Page 148 of 580
455
Features of your vehicle
(Continued)
• When the charging system warninglight comes on due to low voltage
(when the alternator or battery do
not operate normally or malfunc-
tion), the steering wheel may
require increased steering effort.Tilt and telescopic steering
Tilt and telescopic steering allows
you to adjust the steering wheel
before you drive. You can also raise it
to give your legs more room when
you exit and enter the vehicle.
The steering wheel should be posi-
tioned so that it is comfortable for
you to drive, while permitting you to
see the instrument panel warning
lights and gauges.
Electric type
Adjust the steering wheel angle (2)
and position (3) with the switch (1).WARNING- Steering
wheel adjustment
Never adjust the angle and
height of the steering wheel
while driving. You may lose
steering control.
ORJ048099
Page 163 of 580
Features of your vehicle
70
4
Instrument Cluster Control
Adjusting Instrument Cluster
Illumination
The brightness of the instrument
panel illumination is changed by
pressing the illumination control button
(“+” or “-”) when the Engine Start/Stop
button is ON, or the taillights are
turned on. If you hold the illumination control
button (“+” or “-”), the brightness
will be changed continuously.
If the brightness reaches to the maximum or minimum level, an
alarm will sound.
LCD Window Control
The LCD Window modes can be
changed by using the control buttons
on the steering wheel.
(1) : MODE button for changing modes
(2) / : MO VE scroll switch for
selecting the items
(3) OK : SET/RESET button for set- ting the items or resetting
the items
❈ For the LCD modes, refer to “LCD
Windows” in this chapter.ORJ048408
ORJ048409L
ORJ048124L
ORJ048125N
■Type A
■Type B
Page 167 of 580
Features of your vehicle
74
4
Outside Temperature Gauge
This gauge indicates the current out-
side air temperatures by 1°F (1°C).
- Temperature range : -40°F ~ 140°F
(-40°C ~ 60°C) The outside temperature on the dis-
play may not change immediately
like a general thermometer to pre-
vent the driver from being distracted.
The temperature unit can be
changed by using the “Set Up” mode
of the Navigation touch screen in
instrument panel.
Transmission Shift Indicator
Automatic Transmission Shift
Indicator
This indicator displays which auto-
matic transmission shift lever is
selected.
ORJ048127
ORJ048129
■ Type B
■ Type A
ORJ048126N
ORJ048128N
■ Type B
■ Type A
Page 171 of 580

Features of your vehicle
78
4
Automatic reset
To make the average fuel economy
be reset automatically whenever
refueling, select the “Fuel economy
auto reset” mode in Set Up menu of
the Navigation touch screen in
instrument panel.
OFF - You may set to default man-
ually by using the trip switch reset
button.
When driving - The vehicle will automatically set to default once 4
hours pass after the Engine
Start/Stop Button is in the ACC or
OFF position.
When refueling - After refueling more than 2 gallons (6 liters) and
driving over 1 mph (1 km/h), the
vehicle will reset to default auto-
matically.✽ ✽ NOTICE
For a more accurate calculation of
the average fuel economy, the vehi-
cle must be continuously driven
more than 10 seconds and 0.03 miles
(50 meters).
Instant Fuel Economy (2)
This mode displays the instant fuel
economy during the last few sec-
onds when the vehicle speed is
more than 6.2 mph (10 km/h).
- Fuel economy range : 0 ~ 50(MPG), 0 ~ 30 (km/L, L/100 km).
CAUTION - Low Fuel
Level
Level warning light on or withthe fuel level below “E” cancause the engine to misfire anddamage the catalytic converter(if equipped).
Page 197 of 580

Features of your vehicle
104
4
Description
The head up display is a transparent
display which projects a shadow of
some information of the instrument
cluster and navigation on the wind-
shield glass. The head up display image on the
windshield glass may not be visible
when:
- Sitting posture prevents visibility.
- Wearing polarized sunglasses.
- There is an object on the cover ofthe head up display.
- Driving on a wet road.
- Lighting is turned on inside the vehicle.
- Any light comes from the outside.
- Wearing inadequate glasses for your eyesight.
If the head up display image is not shown well, adjust the height, rota-
tion or illumination of the head up
display in the Navigation touch
screen in instrument panel.
When the head up display needs inspection or repair, consult an
authorized K900 Kia dealer.
Do not place any accessories on the dashboard or attach any
objects on the windshield glass.
✽ ✽ NOTICE
Installing window tint or any other
type of metallic coating on the wind-
shield can prevent the driver from
seeing the Head Up Display images.
✽ ✽NOTICE
When replacing the front wind-
shield glass of vehicles equipped
with the head up display, replace it
with a windshield glass designed for
the head up display operation.
Otherwise, duplicated images may
be displayed on the windshield glass.
HEAD UP DISPLAY (HUD) (IF EQUIPPED)
ORJ048413N
WARNING - Head up
display
The Head up display is a supple-
mental system. Do not solely
rely on the system, always drive
safely, and pay attention to the
driving conditions on the road.
Page 209 of 580
Features of your vehicle
116
4
High beam operation
To turn on the high beam headlamp,
push the lever away from you. The
lever will return to its original posi-
tion. The high beam indicator will
light when the headlight high beams
are switched on.
To prevent the battery from being
discharged, do not leave the lights
on for a prolonged time while the
engine is not running.
WARNING - High beams
Do not use high beam when
there are other vehicles in front
of your vehicle. Using high
beam could obstruct the other
driver's vision.
ORJ048435N
CAUTION
Never place anything over the sensor (1) located on theinstrument panel, this willensure better auto-light sys-tem control.
Don’t clean the sensor using a window cleaner, the cleanermay leave a light film whichcould interfere with sensoroperation.
If your vehicle has window tint or other types of metallic coat-ing on the front windshield,the Auto light system may notwork properly.
Page 213 of 580

Features of your vehicle
120
4
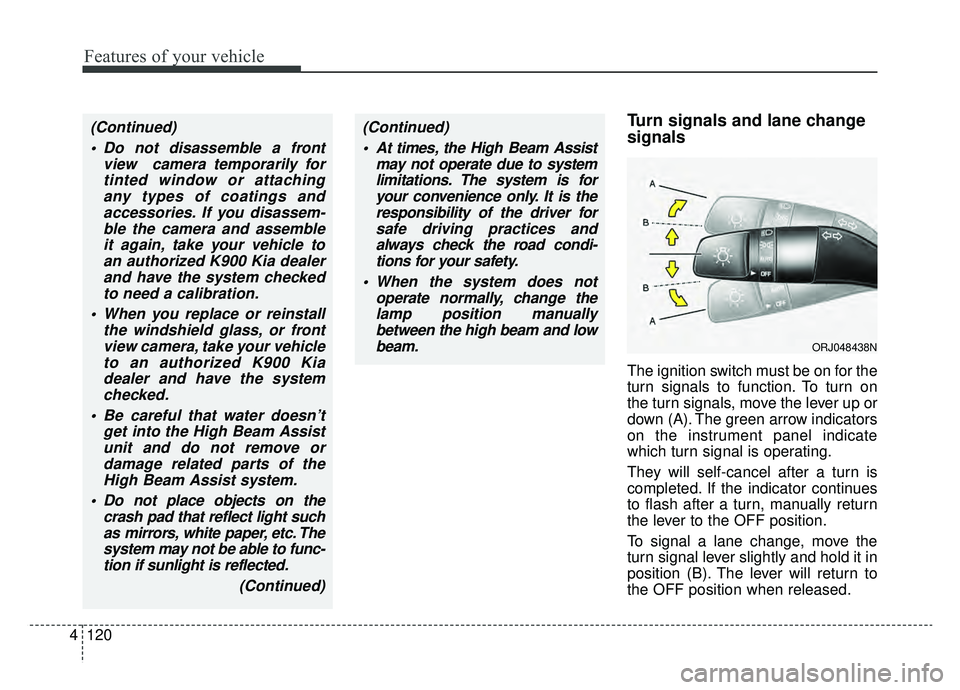
Turn signals and lane change
signals
The ignition switch must be on for the
turn signals to function. To turn on
the turn signals, move the lever up or
down (A). The green arrow indicators
on the instrument panel indicate
which turn signal is operating.
They will self-cancel after a turn is
completed. If the indicator continues
to flash after a turn, manually return
the lever to the OFF position.
To signal a lane change, move the
turn signal lever slightly and hold it in
position (B). The lever will return to
the OFF position when released.
(Continued)
Do not disassemble a front view camera temporarily fortinted window or attachingany types of coatings andaccessories. If you disassem-ble the camera and assembleit again, take your vehicle toan authorized K900 Kia dealerand have the system checkedto need a calibration.
When you replace or reinstall the windshield glass, or frontview camera, take your vehicleto an authorized K900 Kiadealer and have the systemchecked.
Be careful that water doesn’t get into the High Beam Assistunit and do not remove ordamage related parts of theHigh Beam Assist system.
Do not place objects on the crash pad that reflect light suchas mirrors, white paper, etc. Thesystem may not be able to func-tion if sunlight is reflected.
(Continued)(Continued) At times, the High Beam Assist may not operate due to systemlimitations. The system is foryour convenience only. It is theresponsibility of the driver forsafe driving practices andalways check the road condi-tions for your safety.
When the system does not operate normally, change thelamp position manuallybetween the high beam and lowbeam.
ORJ048438N
Page 224 of 580

4131
Features of your vehicle
If you want to defrost and defog the
front windshield, refer to “Windshield
defrosting and defogging” in this sec-
tion.
Rear window defroster
The defroster heats the window to
remove frost, fog and thin ice from
the rear window, while the engine is
running.
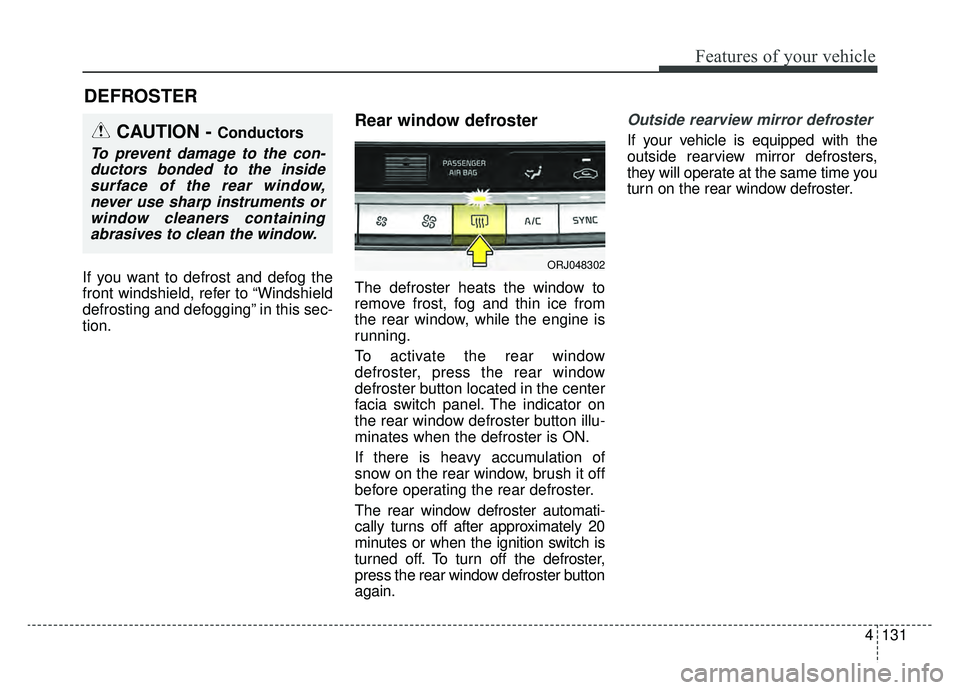
To activate the rear window
defroster, press the rear window
defroster button located in the center
facia switch panel. The indicator on
the rear window defroster button illu-
minates when the defroster is ON.
If there is heavy accumulation of
snow on the rear window, brush it off
before operating the rear defroster.
The rear window defroster automati-
cally turns off after approximately 20
minutes or when the ignition switch is
turned off. To turn off the defroster,
press the rear window defroster button
again.
Outside rearview mirror defroster
If your vehicle is equipped with the
outside rearview mirror defrosters,
they will operate at the same time you
turn on the rear window defroster.
DEFROSTER
CAUTION - Conductors
To prevent damage to the con-ductors bonded to the insidesurface of the rear window,never use sharp instruments orwindow cleaners containingabrasives to clean the window.
ORJ048302