Page 265 of 348

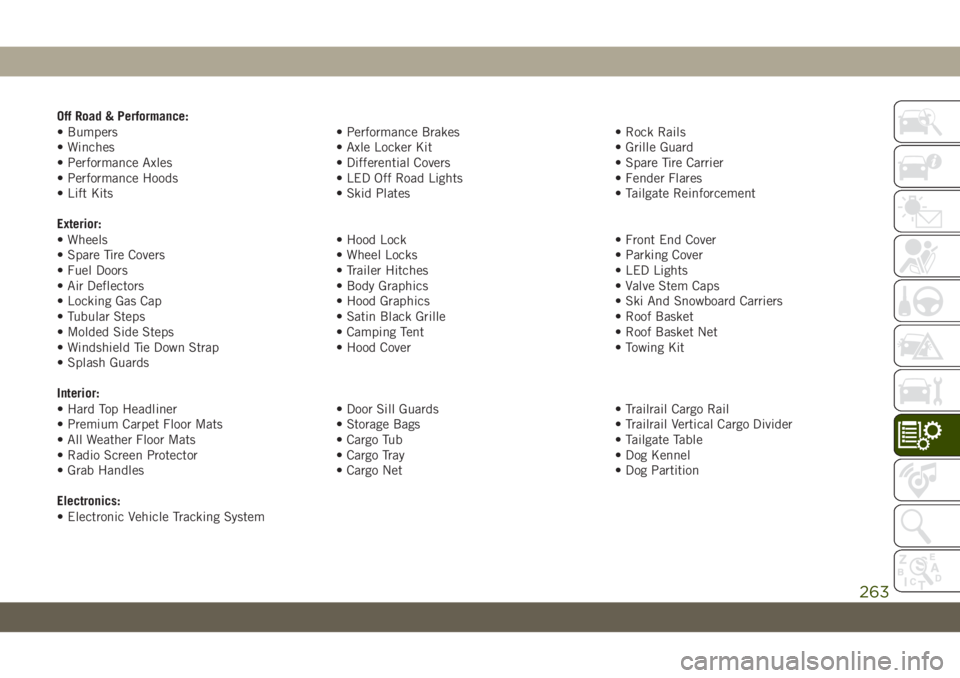
Off Road & Performance:
• Bumpers • Performance Brakes • Rock Rails
• Winches • Axle Locker Kit • Grille Guard
• Performance Axles • Differential Covers • Spare Tire Carrier
• Performance Hoods • LED Off Road Lights • Fender Flares
• Lift Kits • Skid Plates • Tailgate Reinforcement
Exterior:
• Wheels • Hood Lock • Front End Cover
• Spare Tire Covers • Wheel Locks • Parking Cover
• Fuel Doors • Trailer Hitches • LED Lights
• Air Deflectors • Body Graphics • Valve Stem Caps
• Locking Gas Cap • Hood Graphics • Ski And Snowboard Carriers
• Tubular Steps • Satin Black Grille • Roof Basket
• Molded Side Steps • Camping Tent • Roof Basket Net
• Windshield Tie Down Strap • Hood Cover • Towing Kit
• Splash Guards
Interior:
• Hard Top Headliner • Door Sill Guards • Trailrail Cargo Rail
• Premium Carpet Floor Mats • Storage Bags • Trailrail Vertical Cargo Divider
• All Weather Floor Mats • Cargo Tub • Tailgate Table
• Radio Screen Protector • Cargo Tray • Dog Kennel
• Grab Handles • Cargo Net • Dog Partition
Electronics:
• Electronic Vehicle Tracking System
263
Page 266 of 348
Page 267 of 348

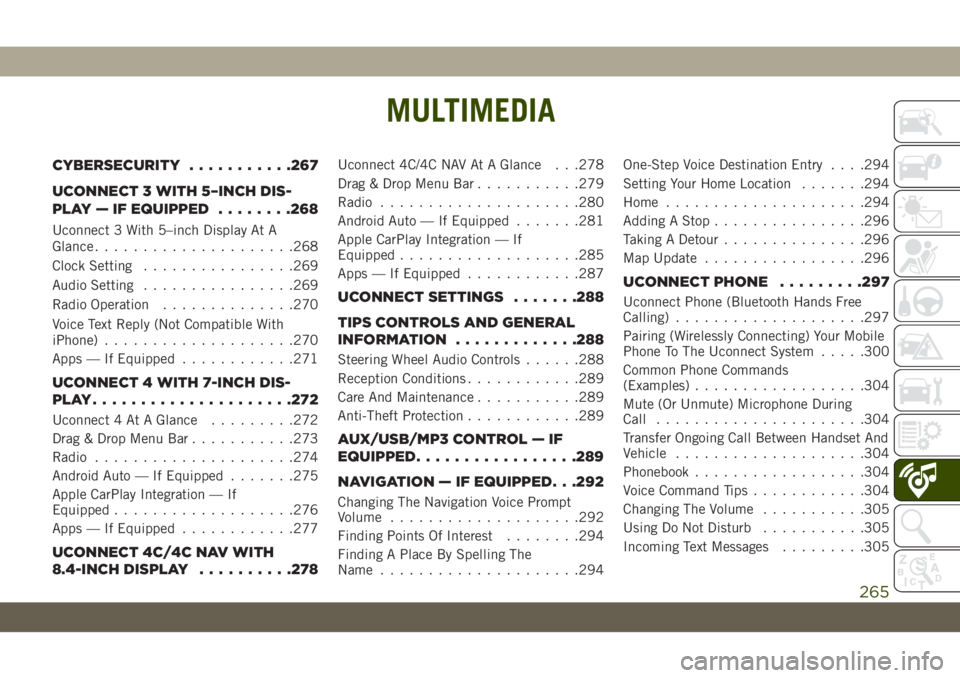
MULTIMEDIA
CYBERSECURITY...........267
UCONNECT 3 WITH 5–INCH DIS-
PLAY — IF EQUIPPED........268
Uconnect 3 With 5–inch Display At A
Glance.....................268
Clock Setting................269
Audio Setting................269
Radio Operation..............270
Voice Text Reply (Not Compatible With
iPhone)....................270
Apps — If Equipped............271
UCONNECT 4 WITH 7-INCH DIS-
PLAY.....................272
Uconnect 4 At A Glance.........272
Drag & Drop Menu Bar...........273
Radio.....................274
Android Auto — If Equipped.......275
Apple CarPlay Integration — If
Equipped...................276
Apps — If Equipped............277
UCONNECT 4C/4C NAV WITH
8.4-INCH DISPLAY..........278
Uconnect 4C/4C NAV At A Glance . . .278
Drag & Drop Menu Bar...........279
Radio.....................280
Android Auto — If Equipped.......281
Apple CarPlay Integration — If
Equipped...................285
Apps — If Equipped............287
UCONNECT SETTINGS.......288
TIPS CONTROLS AND GENERAL
INFORMATION.............288
Steering Wheel Audio Controls......288
Reception Conditions............289
Care And Maintenance...........289
Anti-Theft Protection............289
AUX/USB/MP3 CONTROL — IF
EQUIPPED.................289
NAVIGATION — IF EQUIPPED. . .292
Changing The Navigation Voice Prompt
Volume....................292
Finding Points Of Interest........294
Finding A Place By Spelling The
Name.....................294One-Step Voice Destination Entry. . . .294
Setting Your Home Location.......294
Home.....................294
Adding A Stop................296
Taking A Detour...............296
Map Update.................296
UCONNECT PHONE.........297
Uconnect Phone (Bluetooth Hands Free
Calling)....................297
Pairing (Wirelessly Connecting) Your Mobile
Phone To The Uconnect System.....300
Common Phone Commands
(Examples)..................304
Mute (Or Unmute) Microphone During
Call......................304
Transfer Ongoing Call Between Handset And
Vehicle....................304
Phonebook..................304
Voice Command Tips............304
Changing The Volume...........305
Using Do Not Disturb...........305
Incoming Text Messages.........305
MULTIMEDIA
265
Page 268 of 348
Helpful Tips And Common Questions To
Improve Bluetooth Performance With Your
Uconnect System..............306
UCONNECT VOICE RECOGNITION
QUICK TIPS...............307
Introducing Uconnect...........307
Get Started..................308Basic Voice Commands...........309
Radio.....................309
Media.....................309
Phone.....................310
Voice Text Reply...............311
Climate....................312Navigation (4C NAV)............312
Siri Eyes Free — If Equipped......313
Using Do Not Disturb............313
Android Auto — If Equipped.......314
Apple CarPlay — If Equipped.......314
Additional Information...........315MULTIMEDIA
266
Page 269 of 348

CYBERSECURITY
Your vehicle may be a connected vehicle and
may be equipped with both wired and wire-
less networks. These networks allow your ve-
hicle to send and receive information. This
information allows systems and features in
your vehicle to function properly.
Your vehicle may be equipped with certain
security features to reduce the risk of unau-
thorized and unlawful access to vehicle sys-
tems and wireless communications. Vehicle
software technology continues to evolve over
time and FCA, working with its suppliers,
evaluates and takes appropriate steps as
needed. Similar to a computer or other de-
vices, your vehicle may require software up-
dates to improve the usability and perfor-
mance of your systems or to reduce the
potential risk of unauthorized and unlawful
access to your vehicle systems.The risk of unauthorized and unlawful access
to your vehicle systems may still exist, even if
the most recent version of vehicle software
(such as Uconnect software) is installed.
WARNING!
• It is not possible to know or to predict all
of the possible outcomes if your vehi-
cle’s systems are breached. It may be
possible that vehicle systems, including
safety related systems, could be im-
paired or a loss of vehicle control could
occur that may result in an accident
involving serious injury or death.
• ONLY insert media (e.g., USB, SD card,
or CD) into your vehicle if it came from a
trusted source. Media of unknown origin
could possibly contain malicious soft-
ware, and if installed in your vehicle, it
may increase the possibility for vehicle
systems to be breached.
• As always, if you experience unusual
vehicle behavior, take your vehicle to
WARNING!
your nearest authorized dealer immedi-
ately.
NOTE:
• FCA or your dealer may contact you directly
regarding software updates.
• To help further improve vehicle security and
minimize the potential risk of a security
breach, vehicle owners should:
– Only connect and use trusted media
devices (e.g. personal mobile phones,
USBs, CDs).
Privacy of any wireless and wired communi-
cations cannot be assured. Third parties may
unlawfully intercept information and private
communications without your consent. For
further information, refer to “Onboard Diag-
nostic System (OBD II) Cybersecurity” in
“Getting To Know Your Instrument Panel” in
your Owner’s Manual.
267
Page 270 of 348
UCONNECT 3 WITH 5–INCH DISPLAY — IF EQUIPPED
Uconnect 3 With 5–inch Display At A Glance
Uconnect 3 With 5–inch Display Radio Buttons
1 — RADIO Button
2 — COMPASS Button
3 — SETTINGS Button
4 — MORE Functions Button
5 — BROWSE/ENTER Button — TUNE/SCROLL Knob6 — SCREEN OFF Button
7 — MUTE Button
8 — System On/Off — VOLUME Control Knob
9 — Uconnect PHONE Button
10 — MEDIA Button
MULTIMEDIA
268
Page 271 of 348

CAUTION!
Do NOT attach any object to the touchscreen,
doing so can result in damage to the touch-
screen.
Clock Setting
To start the clock setting procedure:
1. Press the “Settings” button on the face-
plate, then press the “Clock and Date”
button.
2. Press the “Set Time” button on the
touchscreen.
3. Press the “Up” or “Down” arrows to adjust
the hours or minutes, then select the
“AM” or “PM” button on the touchscreen.
You can also select 12hr or 24hr format by
pressing the desired button on the
touchscreen.
4. Once the time is set, press the “Done”
button on the touchscreen to exit the time
screen.NOTE:
In the Clock Setting Menu you can also select
“Display Clock”. Display Clock turns the
clock display in the status bar on or off.
Audio Setting
1. Press the “Settings” button on the
faceplate.
2. Scroll down and press the “Audio” button
on the touchscreen to open the Audio
menu.
3. The Audio Menu shows the following op-
tions for you to customize your audio
settings.
Equalizer
Press the “Equalizer” button on the touch-
screen to adjust the Bass, Mid and Treble.
Use the “+” or “-” button on the touchscreen
to adjust the equalizer to your desired set-
tings.
Balance/Fade
Press the “Balance/Fade” button on the
touchscreen to adjust the sound from thespeakers. Use the arrow buttons on the
touchscreen to adjust the sound level from
the front and rear or right and left side speak-
ers. Press the center “C” button on the touch-
screen to reset the balance and fade to the
factory setting.
Speed Adjusted Volume — If Equipped
Press the “Speed Adjusted Volume” button
on the touchscreen to select between OFF, 1,
2 or 3. This will decrease the radio volume
relative to a decrease in vehicle speed.
Loudness — If Equipped
Press the “Loudness” button on the touch-
screen to select the Loudness feature. When
this feature is activated it improves sound
quality at lower volumes.
Surround Sound — If Equipped
Press the “Surround Sound” button on the
touchscreen, select On or Off followed by
pressing the back arrow button on the touch-
screen. When this feature is activated, it
provides simulated surround sound mode.
269
Page 272 of 348

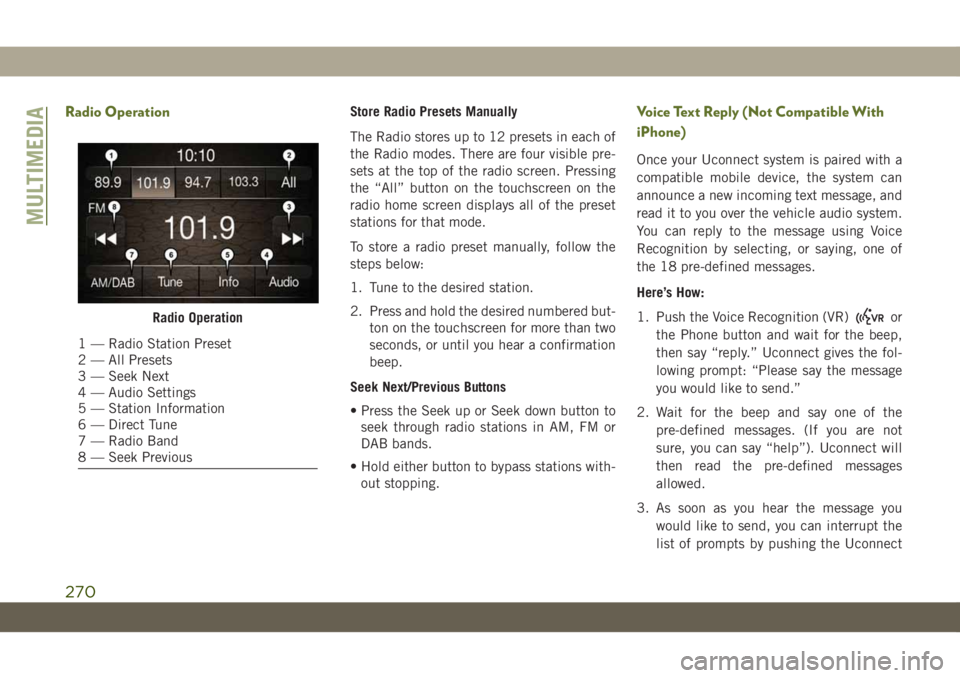
Radio OperationStore Radio Presets Manually
The Radio stores up to 12 presets in each of
the Radio modes. There are four visible pre-
sets at the top of the radio screen. Pressing
the “All” button on the touchscreen on the
radio home screen displays all of the preset
stations for that mode.
To store a radio preset manually, follow the
steps below:
1. Tune to the desired station.
2. Press and hold the desired numbered but-
ton on the touchscreen for more than two
seconds, or until you hear a confirmation
beep.
Seek Next/Previous Buttons
• Press the Seek up or Seek down button to
seek through radio stations in AM, FM or
DAB bands.
• Hold either button to bypass stations with-
out stopping.Voice Text Reply (Not Compatible With
iPhone)
Once your Uconnect system is paired with a
compatible mobile device, the system can
announce a new incoming text message, and
read it to you over the vehicle audio system.
You can reply to the message using Voice
Recognition by selecting, or saying, one of
the 18 pre-defined messages.
Here’s How:
1. Push the Voice Recognition (VR)
or
the Phone button and wait for the beep,
then say “reply.” Uconnect gives the fol-
lowing prompt: “Please say the message
you would like to send.”
2. Wait for the beep and say one of the
pre-defined messages. (If you are not
sure, you can say “help”). Uconnect will
then read the pre-defined messages
allowed.
3. As soon as you hear the message you
would like to send, you can interrupt the
list of prompts by pushing the UconnectRadio Operation
1 — Radio Station Preset
2 — All Presets
3 — Seek Next
4 — Audio Settings
5 — Station Information
6 — Direct Tune
7 — Radio Band
8 — Seek Previous
MULTIMEDIA
270