Page 577 of 626
NOTE:The rear video system must be turned on before
sound can be heard from the headphones. To conserve
battery life, the headphones will automatically turn off
approximately three minutes after the rear video system is
turned off.
Changing the Audio Mode for Headphones
1. Ensure the Remote Control channel/screen selector switch is in the same position as the headphone selector
switch.
NOTE: •When both the headphone and the remote control
channel selector switches are on Channel 1, the Re-
mote is controlling Channel 1 and the headphones are
tuned to the audio on Channel 1.
• When both the headphone and the remote control
channel selector switches are on Channel 2, the Re-
mote is controlling Channel 2 and the headphones are
tuned to the audio on Channel 2.
2. Push the SOURCE button on the remote control.
3. Pushing the SOURCE button will advance to the next mode. 4. When the Mode Selection menu appears on screen, use
the cursor buttons on the remote control to navigate to
the available modes and push the OK button to select
the new mode.
5. To cancel out of the Mode Selection menu, push the BACK button on the remote control.
Replacing The Headphone Batteries
Each set of headphones requires two AAA batteries for
operation. To replace the batteries:
1. Locate the battery compartment on the left ear cup ofthe headphones, and then slide the battery cover down-
ward.
2. Replace the batteries, making sure to orient them ac- cording to the polarity diagram shown.
3. Replace the battery compartment cover.
Accessibility — If Equipped
Accessibility is a feature of the DVD/Blu-ray system that
announces a function prior to performing the action. For
further information refer to “Uconnect Settings” in “Mul-
timedia.”
10
MULTIMEDIA 575
Page 578 of 626
Stereo Headphone Lifetime Limited Warranty
Who Does This Warranty Cover?This warranty covers the
initial user or purchaser (�you� or�your�) of this particular
Aptiv PLC (“Aptiv”) wireless headphone (�Product�). The
warranty is not transferable.
How Long Does the Coverage Last? This warranty lasts as
long as you own the Product.
What Does This Warranty Cover? Except as specified
below, this warranty covers any Product that in normal use
is defective in workmanship or materials.
What Does This Warranty Not Cover? This warranty does
not cover any damage or defect that results from misuse,
abuse or modification of the Product other than by Aptiv.
Foam earpieces, which will wear over time through normal
use, are specifically not covered (replacement foam is
available for a nominal charge). APTIV IS NOT LIABLE
FOR ANY INJURIES OR DAMAGES TO PERSONS OR
PROPERTY RESULTING FROM THE USE OF, OR ANY
FAILURE OR DEFECT IN, THE PRODUCT, NOR IS AP-
TIV LIABLE FOR ANY GENERAL, SPECIAL, DIRECT,
INDIRECT, INCIDENTAL, CONSEQUENTIAL, EXEM-
PLARY, PUNITIVE OR OTHER DAMAGES OF ANY
KIND OR NATURE WHATSOEVER. Some states and
jurisdictions may not allow the exclusion or limitation of
Page 579 of 626
Display Settings
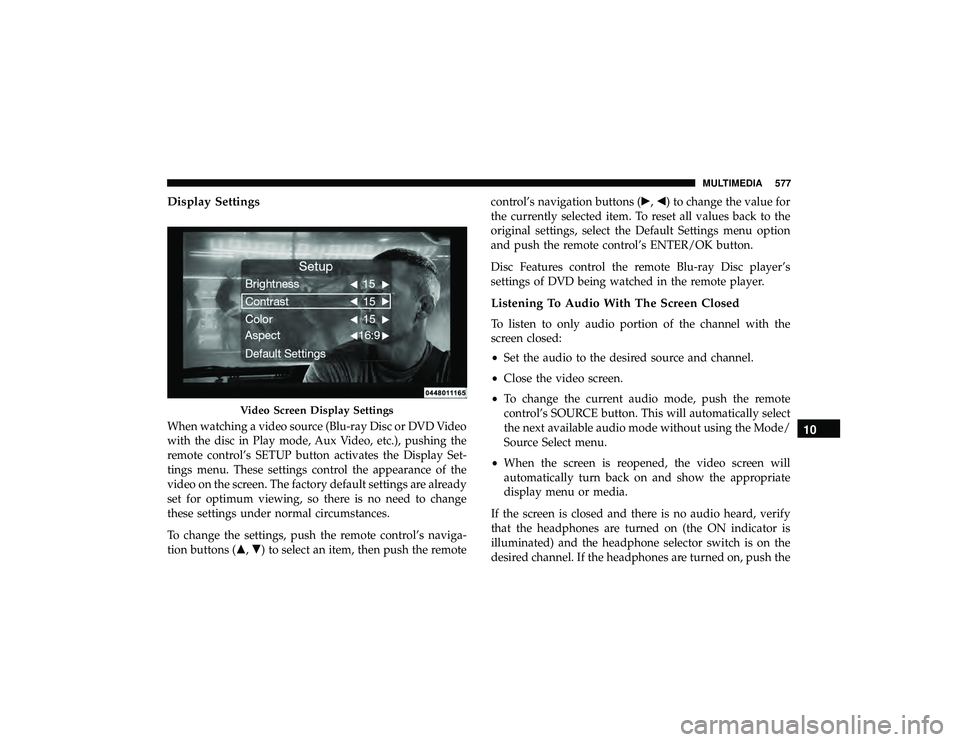
When watching a video source (Blu-ray Disc or DVD Video
with the disc in Play mode, Aux Video, etc.), pushing the
remote control’s SETUP button activates the Display Set-
tings menu. These settings control the appearance of the
video on the screen. The factory default settings are already
set for optimum viewing, so there is no need to change
these settings under normal circumstances.
To change the settings, push the remote control’s naviga-
tion buttons (�,�) to select an item, then push the remote control’s navigation buttons (�,
�) to change the value for
the currently selected item. To reset all values back to the
original settings, select the Default Settings menu option
and push the remote control’s ENTER/OK button.
Disc Features control the remote Blu-ray Disc player’s
settings of DVD being watched in the remote player.
Listening To Audio With The Screen Closed
To listen to only audio portion of the channel with the
screen closed:
• Set the audio to the desired source and channel.
• Close the video screen.
• To change the current audio mode, push the remote
control’s SOURCE button. This will automatically select
the next available audio mode without using the Mode/
Source Select menu.
• When the screen is reopened, the video screen will
automatically turn back on and show the appropriate
display menu or media.
If the screen is closed and there is no audio heard, verify
that the headphones are turned on (the ON indicator is
illuminated) and the headphone selector switch is on the
desired channel. If the headphones are turned on, push the
Page 580 of 626
remote control’s power button to turn audio on. If audio is
still not heard, check that fully charged batteries are
installed in the headphones.
Disc Formats
The Blu-ray Disc player is capable of playing the following
types of 4.7 inches (12 cm) diameter discs:
•BD: BDMV (Profile 1.1), BDAV (Profile 1.1)
• DVD: DVD-Video, DVD-Audio, AVCREC, AVCHD,
DVD-VR
• CD: CD-DA, VCD, CD-TEXT
• DVD/CD: MP3, WMA, AAC, DivX (versions3–6)
profile 3.0
DVD Region Codes
The Blu-ray Disc player and many DVD discs are coded by
geographic region. These region codes must match in order
for the disc to play. If the region code for the DVD disc does
not match the region code for the player, the disc will not
play.
DVD Audio Support
When a DVD-Audio disc is inserted in the Blu-ray Disc
player, the DVD-Audio title on the disc is played by default (most DVD-Audio discs also have a Video title, but the
Video title is ignored). All multi-channel program material
is automatically mixed down to two channels, which may
result in a lowered apparent volume level. If you increase
the volume level to account for this change in level,
remember to lower the volume before changing the disc or
to another mode.
Recorded Discs
The Blu-ray Disc player will play CD-R and CD-RW discs
recorded in CD-Audio or Video-CD format, or as a CD-
ROM containing MP3 or WMA files. The player will also
play DVD-Video content recorded to a DVD-R or DVD-RW
disc. DVD-ROM discs (either pressed or recorded) are not
supported.
If you record a disc using a personal computer, there may
be cases where the Blu-ray Disc player may not be able to
play some or the entire disc, even if it is recorded in a
compatible format and is playable on other players. To help
avoid playback problems, use the following guidelines
when recording discs.
•
Open sessions are ignored. Only sessions that are closed
are playable.
578 MULTIMEDIA
Page 583 of 626
RADIO OPERATION AND MOBILE PHONES
Under certain conditions, the mobile phone being on in
your vehicle can cause erratic or noisy performance from
your radio. This condition may be lessened or eliminated
by relocating the mobile phone antenna. This condition is
not harmful to the radio. If your radio performance does
not satisfactorily “clear” by the repositioning of the an-
tenna, it is recommended that the radio volume be turned
down or off during mobile phone operation when not
using Uconnect (if equipped).
Regulatory And Safety Information
USA/CANADA
Exposure to Radio Frequency Radiation
The radiated output power of the internal wireless radio is
far below the FCC and IC radio frequency exposure limits.
Nevertheless, the wireless radio will be used in such a
manner that the radio is 8 in (20 cm) or further from the
human body.
The internal wireless radio operates within guidelines
found in radio frequency safety standards and recommen-
dations, which reflect the consensus of the scientific com-
munity.The radio manufacturer believes the internal wireless radio
is safe for use by consumers. The level of energy emitted is
far less than the electromagnetic energy emitted by wire-
less devices such as mobile phones. However, the use of
wireless radios may be restricted in some situations or
environments, such as aboard airplanes. If you are unsure
of restrictions, you are encouraged to ask for authorization
before turning on the wireless radio.
The following regulatory statement applies to all Radio
Frequency (RF) devices equipped in this vehicle:
This device complies with Part 15 of the FCC Rules and
with Industry Canada license-exempt RSS standard(s).
Operation is subject to the following two conditions:
1. This device may not cause harmful interference, and
2. This device must accept any interference received, in-
cluding interference that may cause undesired opera-
tion.
NOTE: Changes or modifications not expressly approved
by the party responsible for compliance could void the
user ’s authority to operate the equipment.
10
MULTIMEDIA 581
Page 585 of 626
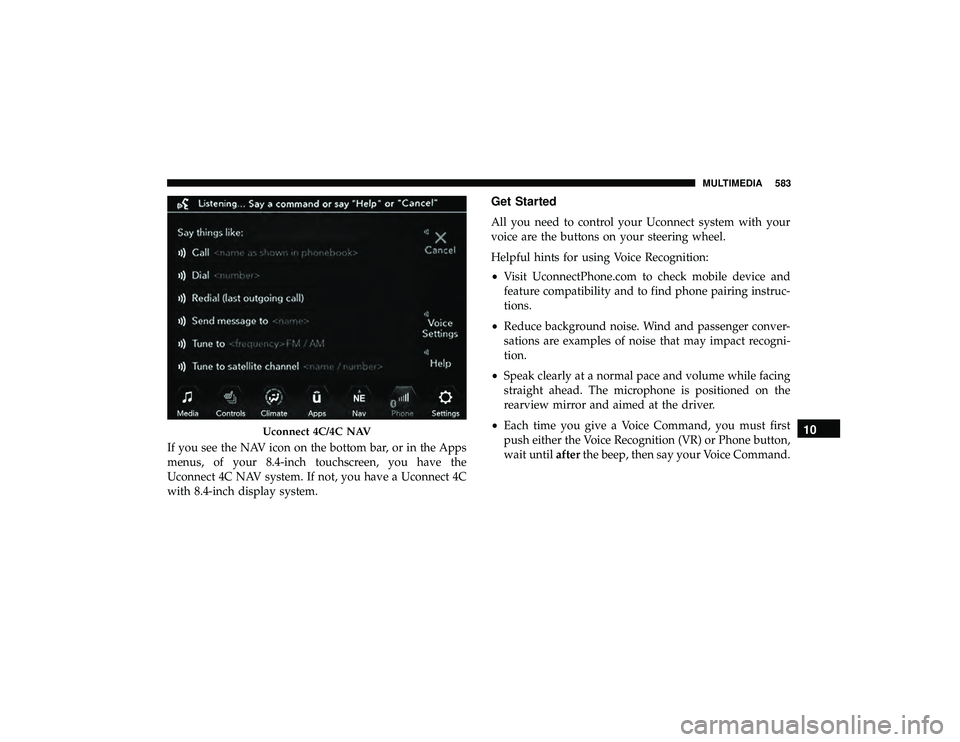
If you see the NAV icon on the bottom bar, or in the Apps
menus, of your 8.4-inch touchscreen, you have the
Uconnect 4C NAV system. If not, you have a Uconnect 4C
with 8.4-inch display system.
Get Started
All you need to control your Uconnect system with your
voice are the buttons on your steering wheel.
Helpful hints for using Voice Recognition:
•Visit UconnectPhone.com to check mobile device and
feature compatibility and to find phone pairing instruc-
tions.
• Reduce background noise. Wind and passenger conver-
sations are examples of noise that may impact recogni-
tion.
• Speak clearly at a normal pace and volume while facing
straight ahead. The microphone is positioned on the
rearview mirror and aimed at the driver.
• Each time you give a Voice Command, you must first
push either the Voice Recognition (VR) or Phone button,
wait until afterthe beep, then say your Voice Command.
Page 586 of 626
•You can interrupt the help message or system prompts
by pushing the VR or Phone button and saying a Voice
Command from the current category.Basic Voice Commands
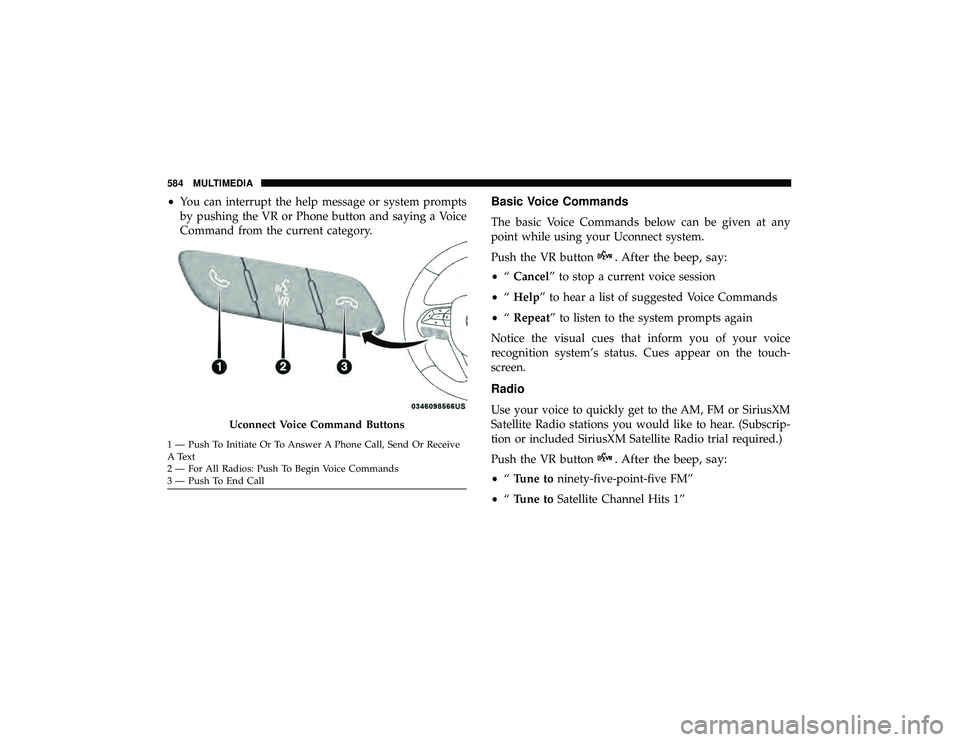
The basic Voice Commands below can be given at any
point while using your Uconnect system.
Push the VR button
. After the beep, say:
•“Cancel” to stop a current voice session
• “Help” to hear a list of suggested Voice Commands
• “Repeat” to listen to the system prompts again
Notice the visual cues that inform you of your voice
recognition system’s status. Cues appear on the touch-
screen.
Radio
Use your voice to quickly get to the AM, FM or SiriusXM
Satellite Radio stations you would like to hear. (Subscrip-
tion or included SiriusXM Satellite Radio trial required.)
Push the VR button
. After the beep, say:
• “Tune to ninety-five-point-five FM”
• “Tune to Satellite Channel Hits 1”
Page 588 of 626
•“Change source to Bluetooth”
• “Change source to AUX”
• “Change source to USB”
• “Play artist Beethoven”; “ Play albumGreatest Hits”; “
Play song Moonlight Sonata”; “ Play genreClassical”
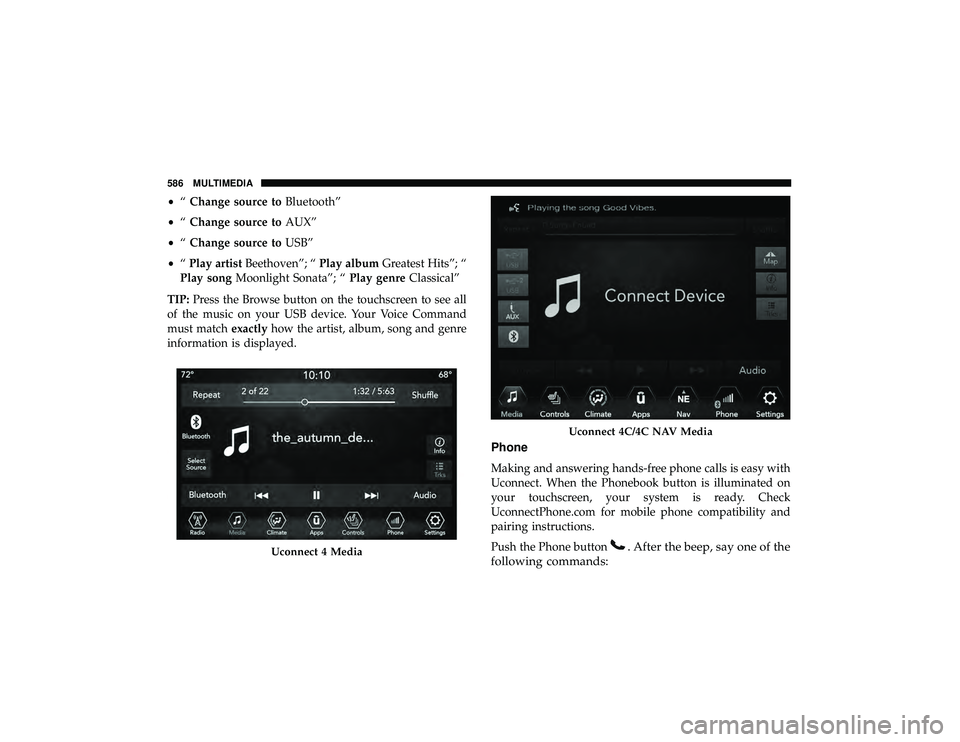
TIP: Press the Browse button on the touchscreen to see all
of the music on your USB device. Your Voice Command
must match exactlyhow the artist, album, song and genre
information is displayed.
Phone
Making and answering hands-free phone calls is easy with
Uconnect. When the Phonebook button is illuminated on
your touchscreen, your system is ready. Check
UconnectPhone.com for mobile phone compatibility and
pairing instructions.
Push the Phone button
. After the beep, say one of the
following commands:
Uconnect 4C/4C NAV Media
586 MULTIMEDIA