Page 51 of 626
WARNING!
•Be certain that the seatback is securely locked into
position. If the seatback is not securely locked into
position the seat will not provide the proper stability
for child seats and/or passengers. An improperly
latched seat could cause serious injury.
• The cargo area in the rear of the vehicle (with the rear
seatbacks in the locked-up or folded down position)
should not be used as a play area by children when
the vehicle is in motion. They could be seriously
injured in a collision. Children should be seated and
using the proper restraint system.
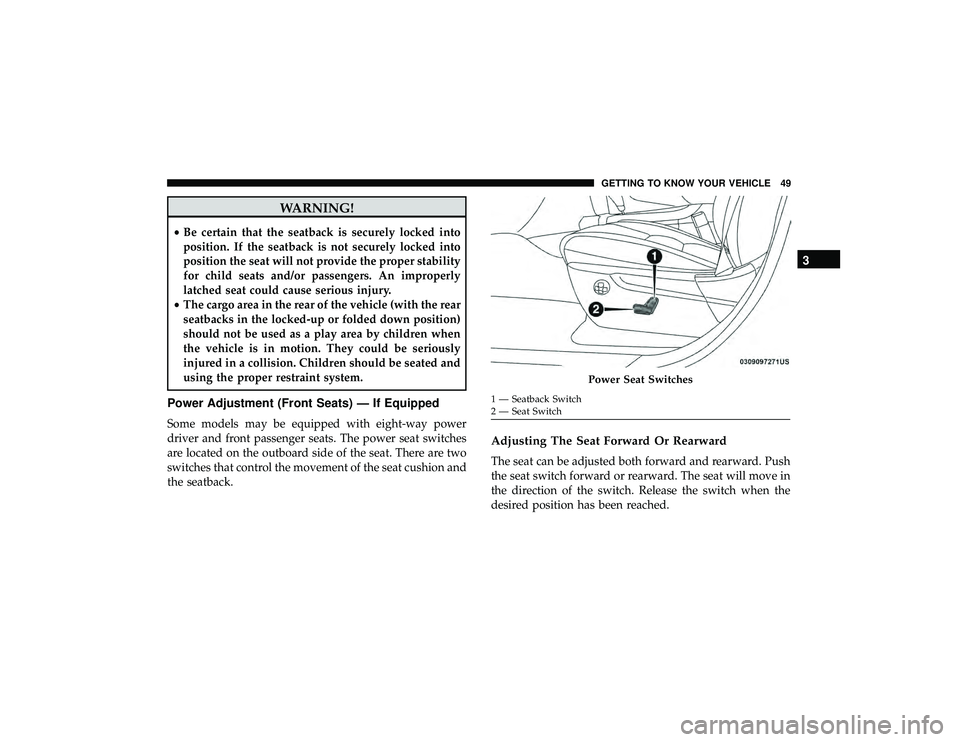
Power Adjustment (Front Seats) — If Equipped
Some models may be equipped with eight-way power
driver and front passenger seats. The power seat switches
are located on the outboard side of the seat. There are two
switches that control the movement of the seat cushion and
the seatback.
Adjusting The Seat Forward Or Rearward
The seat can be adjusted both forward and rearward. Push
the seat switch forward or rearward. The seat will move in
the direction of the switch. Release the switch when the
desired position has been reached.
Page 57 of 626
WARNING!(Continued)
•Do not place anything on the seat or seatback that
insulates against heat, such as a blanket or cushion.
This may cause the seat heater to overheat. Sitting in
a seat that has been overheated could cause serious
burns due to the increased surface temperature of the
seat.
Front Heated Seats
The front heated seat control buttons are located within the
climate or controls screen of the touchscreen.
You can choose from HI, LO, or OFF heat settings. The
indicator arrows in touchscreen buttons indicate the level
of heat in use. Two indicator arrows will illuminate for HI,
and one for LO. Turning the heating elements off will
return the user to the radio screen.
• Press the heated seat button
once to turn the HI
setting on.
• Press the heated seat buttona second time to turn
the LO setting on.
• Press the heated seat buttona third time to turn the
heating elements off.
NOTE:
• Once a heat setting is selected, heat will be felt within
two to five minutes.
• The engine must be running for the heated seats to
operate.
• The level of heat selected will stay on until the operator
changes it.
Vehicles Equipped With Remote Start
On models that are equipped with remote start, the heated
seats can be programmed to come on during a remote start.
This feature can be programmed through the Uconnect
system. Refer to “Uconnect Settings” in “Multimedia” for
further information.
Page 58 of 626
WARNING!(Continued)
•Do not place anything on the seat or seatback that
insulates against heat, such as a blanket or cushion.
This may cause the seat heater to overheat. Sitting in
a seat that has been overheated could cause serious
burns due to the increased surface temperature of the
seat.
Rear Heated Seats — If Equipped
On some models, the two rear outboard seats may be
equipped with heated seats. There are two heated seat
switches that allow the rear passengers to operate the seats
independently. The heated seat switches for each heater are
located on the rear of the center console. You can choose from HI, LO, or OFF heat settings. Amber
indicator lights in each switch indicate the level of heat in
use. Two indicator lights will illuminate for HI, one for LO
and none for OFF.
•
Push the switch
once to turn the HI setting on.
•Push the switcha second time to turn the LO
setting on.
• Push the switcha third time to turn the heating
elements off.
Page 109 of 626
WARNING!
Be sure the hood is fully latched before driving your
vehicle. If the hood is not fully latched, it could open
when the vehicle is in motion and block your vision.
Failure to follow this warning could result in serious
injury or death.
CAUTION!
To prevent possible damage, do not slam the hood to
close it. Lower hood to approximately 12 inches (30 cm)
and drop the hood to close. Make sure hood is fully
closed for both latches. Never drive vehicle unless
hood is fully closed, with both latches engaged.
LIFTGATE
Opening
The liftgate can be opened from inside the vehicle using the
power liftgate button on the overhead console, using the
key fob outside of the vehicle or the electronic liftgate
release.
To Unlock/Enter The Liftgate
The liftgate may be released in several ways:
•Key fob
• Outside handle
• Button on overhead console
The liftgate passive entry unlock feature is built into the
electronic liftgate release. With a valid Passive Entry key
fob within 5 ft (1.5 m) of the liftgate, push the electronic
liftgate release to open with one fluid motion. Push the
button on the key fob twice within five seconds to release
the liftgate.
3
GETTING TO KNOW YOUR VEHICLE 107
Page 116 of 626
WARNING!(Continued)
•Place as much cargo as possible in front of the rear
axle. Too much weight or improperly placed weight
over or behind the rear axle can cause the rear of the
vehicle to sway.
• Do not pile luggage or cargo higher than the top of
the seatback. This could impair visibility or become
a dangerous projectile in a sudden stop or accident.
GARAGE DOOR OPENER — IF EQUIPPED
HomeLink replaces up to three hand-held transmitters that
operate devices such as garage door openers, motorized
gates, lighting or home security systems. The HomeLink
unit is powered by your vehicle’s 12 Volt battery.
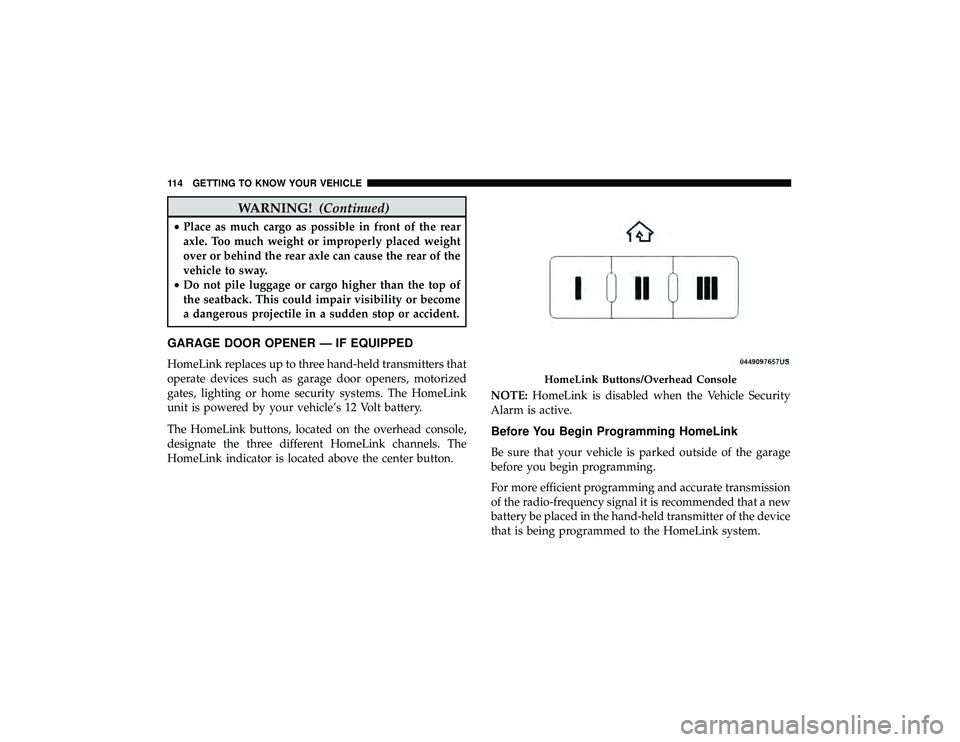
The HomeLink buttons, located on the overhead console,
designate the three different HomeLink channels. The
HomeLink indicator is located above the center button. NOTE:
HomeLink is disabled when the Vehicle Security
Alarm is active.
Before You Begin Programming HomeLink
Be sure that your vehicle is parked outside of the garage
before you begin programming.
For more efficient programming and accurate transmission
of the radio-frequency signal it is recommended that a new
battery be placed in the hand-held transmitter of the device
that is being programmed to the HomeLink system.
Page 131 of 626
WARNING!(Continued)
•Close the lid when not in use and while driving the
vehicle.
• If this outlet is mishandled, it may cause an electric
shock and failure.
CAUTION!
•Many accessories that can be plugged in draw power
from the vehicle’s battery, even when not in use (i.e.,
cellular phones, etc.). Eventually, if plugged in long
enough, the vehicle’s battery will discharge suffi-
ciently to degrade battery life and/or prevent the
engine from starting.
• Accessories that draw higher power (i.e., coolers,
vacuum cleaners, lights, etc.) will degrade the battery
even more quickly. Only use these intermittently and
with greater caution.
• After the use of high power draw accessories, or long
periods of the vehicle not being started (with acces-
sories still plugged in), the vehicle must be driven a
sufficient length of time to allow the generator to
recharge the vehicle’s battery.
Power Inverter — If Equipped
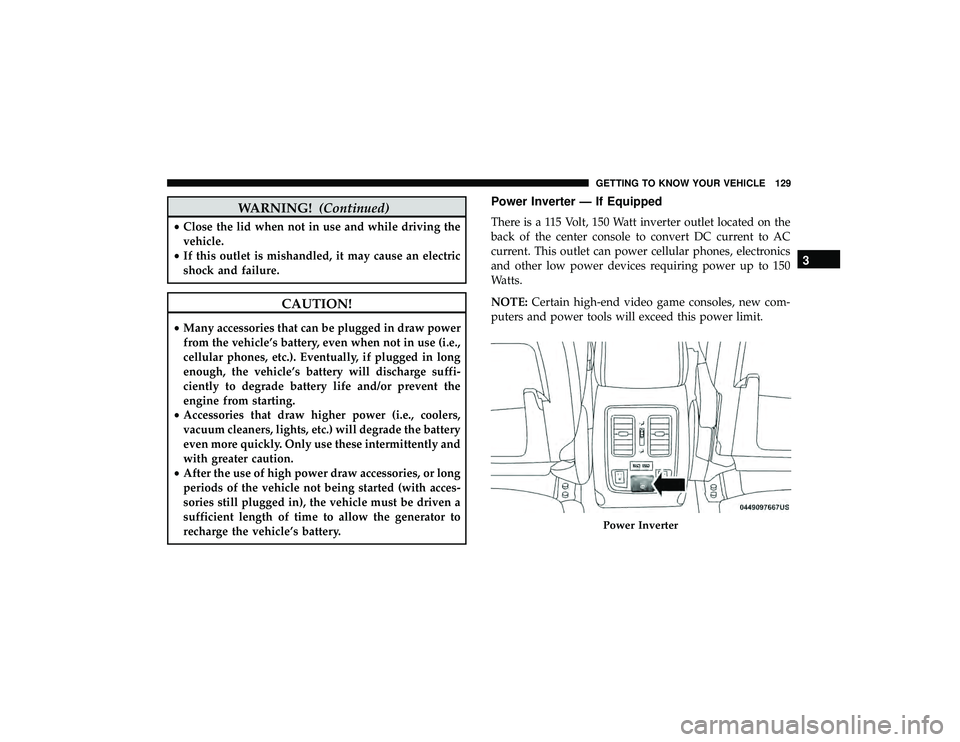
There is a 115 Volt, 150 Watt inverter outlet located on the
back of the center console to convert DC current to AC
current. This outlet can power cellular phones, electronics
and other low power devices requiring power up to 150
Watts.
NOTE: Certain high-end video game consoles, new com-
puters and power tools will exceed this power limit.
Page 138 of 626
INSTRUMENT CLUSTER DISPLAY
Your vehicle will be equipped with an instrument cluster
display, which offers useful information to the driver. With
the ignition in the STOP/OFF mode, opening/closing of a
door will activate the display for viewing, and display the
total miles, or kilometers, in the odometer. Your instrument
cluster display is designed to display important informa-
tion about your vehicle’s systems and features. Using a
driver interactive display located on the instrument panel,
your instrument cluster display can show you how sys-
tems are working and give you warnings when they are
not. The steering wheel mounted controls allow you to
scroll through the main menus and submenus. You can
access the specific information you want and make selec-
tions and adjustments.
Instrument Cluster Display Location And Controls
The instrument cluster display is located in the center of
the instrument cluster.
Page 141 of 626

Secondary Method For Oil Change Reset Procedure
1. Without pushing the brake pedal, place the ignition inthe ON/RUN position (do not start the engine).
2. Fully press the accelerator pedal, slowly, three times within ten seconds.
3. Without pushing the brake pedal, place the ignition in the OFF/LOCK position.
NOTE: If the indicator message illuminates when you
start the vehicle, the oil change indicator system did not
reset. If necessary, repeat this procedure.
Instrument Cluster Display Messages
Includes the following, but not limited to:
• Front Seatbelts Unbuckled
• Driver Seat Belt Unbuckled
• Passenger Seat Belt Unbuckled
• Traction Control Off
• Washer Fluid Low
• Oil Pressure Low
• Oil Change Due •
Fuel Low
• Service Anti-lock Brake System
• Service Electronic Throttle Control
• Service Power Steering
• Cruise Control Off
• Cruise Control Ready
• ACC Driver Override
• Cruise Control Set To XXX MPH
• Tire Pressure Screen With Low Tire(s) “Inflate Tire to
XX”
• Service Tire Pressure System
• Speed Warning Set To XXX MPH
• Speed Warning Exceeded
• Parking Brake Engaged
• Brake Fluid Low
• Service Electronic Braking System
• Engine Temperature Hot
• Lights On
4
GETTING TO KNOW YOUR INSTRUMENT PANEL 139