Page 184 of 458
CAUTION
The turn signal light may look like the
side-of-vehicle line. This is not a mal-
function.
JVH1142X
Front-wide view
JVH1143X
Rear-wide viewFront-wide/rear-wide view:
The front-wide/rear-wide view shows a
wider area on the entire screen and allows
the checking of the blind corners on the right
and left sides. The front-wide/rear-wide
view displays an approximately 180-degree
area while the front view and the rear view
display an approximately 150-degree area.
The predictive course lines are not displayed
when using the front-wide/rear-wide view.
Distance guide lines
Indicates distances from the vehicle body.
.
Red line
: approx. 1.5 ft (0.5 m)
. Yellow line
: approx. 3 ft (1 m)
. Green line
: approx. 7 ft (2 m)
. Green line
: approx. 10 ft (3 m)
Vehicle width guide lines
Indicates the approximate vehicle width.
Monitor, climate, audio, phone and voice recognition systems4-15
Page 185 of 458

4-16Monitor, climate, audio, phone and voice recognition systems
Difference between predicted and
actual distances
The displayed guide lines and their locations
on the ground are for approximate reference
only. Objects on uphill or downhill surfaces
or projecting objects will be actually located
at distances different from those displayed
in the monitor relative to the guide lines
(refer to illustrations). When in doubt, turn
around and view the objects as you are
backing up, or park and exit the vehicle to
view the positioning of objects behind the
vehicle.
JVH1268X
Backing up on a steep uphill:
When backing up the vehicle up a hill, the
distance guide lines and the vehicle width
guide lines are shown closer than the actual
distance. Note that any object on the hill is
further than it appears on the monitor.
JVH1269X
Backing up on a steep downhill:
When backing up the vehicle down a hill, the
distance guide lines and the vehicle width
guide lines are shown further than the actual
distance. Note that any object on the hill is
closer than it appears on the monitor.
Page 186 of 458
SAA1923
Backing up near a projecting object:
The predictive course lines
do not touch
the object in the display. However, the
vehicle may hit the object if it projects over
the actual backing up course.
SAA2244
Backing up behind a projecting object:
The position
is shown further than the
positionin the display. However, the
positionis actually at the same distance
as the position. The vehicle may hit the
object when backing up to the positionif
the object projects over the actual backing up course.
How to park with predictive course
lines
WARNING
.
If the tires are replaced with different
sized tires, the predictive course lines
may be displayed incorrectly.
. On a snow-covered or slippery road,
there may be a difference between
the predictive course line and the
actual course line.
Monitor, climate, audio, phone and voice recognition systems4-17
Page 187 of 458
4-18Monitor, climate, audio, phone and voice recognition systems
SAA1897
1. Visually check that the parking space issafe before parking your vehicle.
2. The rear view of the vehicle is displayed on the screen
when the shift lever is
moved to the R (Reverse) position.
SAA1898
3. Slowly back up the vehicle adjusting the steering wheel so that the predictive
course lines
enter the parking space.
4. Maneuver the steering wheel to make the vehicle width guide lines
parallel to
the parking spacewhile referring to
the predictive course lines. 5. When the vehicle is parked in the space
completely, move the shift lever to the P
(Park) position and apply the parking
brake.
Page 188 of 458

JVH1707X
How to switch the display
The Around View®Monitor can display two
split views as well as a single view of the
front-wide view or rear-wide view. Push the
CAMERA button, change the shift lever
position, or select the “Change View” key
to switch between the available views.
For models with the Back-up Collision
Intervention (BCI) system, “
” key may
be displayed on the Around View®Monitor
screen when the shift lever is in the R
position. For details of the BCI system, see
“Back-up Collision Intervention (BCI)” (P.5-
54).
JVH1690X
HOW TO ADJUST THE SCREEN
VIEW
The display settings such as Brightness,
Contrast, Black Level, Tint and Color of the
Around View
®Monitor can be adjusted.
1. Push the SETTING button with the Around View
®Monitor turned on.
2. The Display settings menu is displayed. Select an item you wish to adjust.
3. Adjust the selected item using the “+” or “-” key.
Select the “Reset Settings” key to return all
settings to default. NOTE:
Do not adjust any of the display settings of
the Around View
®Monitor while the vehicle
is moving. Make sure the parking brake is
firmly applied.
Display settings menu can also be accessed
while the Around View
®Monitor screen is
not displayed. See “Around View®Monitor
settings” (P.4-19).
AROUND VIEW®MONITOR SET-
TINGS
To set up the Around View®Monitor to your
preferred settings, push the SETTING but-
ton while the Around View
®Monitor screen
is not displayed, select the “Camera/Sonar”
key.
Items displayed on the screen may vary
depending on the specification and model.
Monitor, climate, audio, phone and voice recognition systems4-19
Page 189 of 458

4-20Monitor, climate, audio, phone and voice recognition systems
Available setting items:
Setting itemAction
Camera Back-up Collision Intervention Turns the Back-up Collision Intervention (BCI) system on/off. See “Back-up
Collision Intervention (BCI)” (P.5-54).
Moving Object Detection Turns the MOD system on/off. See “Moving Object Detection (MOD)” (P.4-27).
Non-viewable Area Reminder When this item is turned on, the non-viewable area is highlighted in yellow for
several seconds after the bird’s-eye view is displayed. It will be shown only the first
time after the ignition switch is placed in the ON position.
Predictive Course Lines When this item is turned on, the predictive course lines are displayed in the front
and the rear view and bird’s-eye view.
Automatic Display with Sonar The automatic sonar display can be turned on/off.
Sonar For the information about the sonar, see “Sonar function settings” (P.4-26).
Display Brightness Adjust display settings by using the “+”/“-” key.
Contrast
Black Level
Tint
Color
Reset Settings Return all the settings to default.
Page 190 of 458

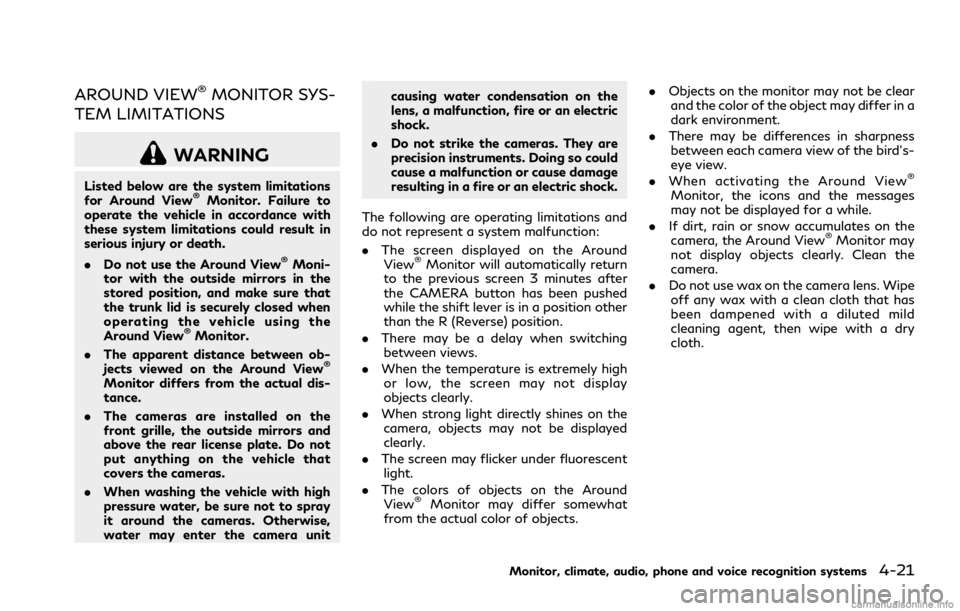
AROUND VIEW®MONITOR SYS-
TEM LIMITATIONS
WARNING
Listed below are the system limitations
for Around View®Monitor. Failure to
operate the vehicle in accordance with
these system limitations could result in
serious injury or death.
. Do not use the Around View
®Moni-
tor with the outside mirrors in the
stored position, and make sure that
the trunk lid is securely closed when
operating the vehicle using the
Around View
®Monitor.
. The apparent distance between ob-
jects viewed on the Around View
®
Monitor differs from the actual dis-
tance.
. The cameras are installed on the
front grille, the outside mirrors and
above the rear license plate. Do not
put anything on the vehicle that
covers the cameras.
. When washing the vehicle with high
pressure water, be sure not to spray
it around the cameras. Otherwise,
water may enter the camera unit causing water condensation on the
lens, a malfunction, fire or an electric
shock.
. Do not strike the cameras. They are
precision instruments. Doing so could
cause a malfunction or cause damage
resulting in a fire or an electric shock.
The following are operating limitations and
do not represent a system malfunction:
. The screen displayed on the Around
View
®Monitor will automatically return
to the previous screen 3 minutes after
the CAMERA button has been pushed
while the shift lever is in a position other
than the R (Reverse) position.
. There may be a delay when switching
between views.
. When the temperature is extremely high
or low, the screen may not display
objects clearly.
. When strong light directly shines on the
camera, objects may not be displayed
clearly.
. The screen may flicker under fluorescent
light.
. The colors of objects on the Around
View
®Monitor may differ somewhat
from the actual color of objects. .
Objects on the monitor may not be clear
and the color of the object may differ in a
dark environment.
. There may be differences in sharpness
between each camera view of the bird’s-
eye view.
. When activating the Around View
®
Monitor, the icons and the messages
may not be displayed for a while.
. If dirt, rain or snow accumulates on the
camera, the Around View
®Monitor may
not display objects clearly. Clean the
camera.
. Do not use wax on the camera lens. Wipe
off any wax with a clean cloth that has
been dampened with a diluted mild
cleaning agent, then wipe with a dry
cloth.
Monitor, climate, audio, phone and voice recognition systems4-21
Page 191 of 458

4-22Monitor, climate, audio, phone and voice recognition systems
JVH0960X
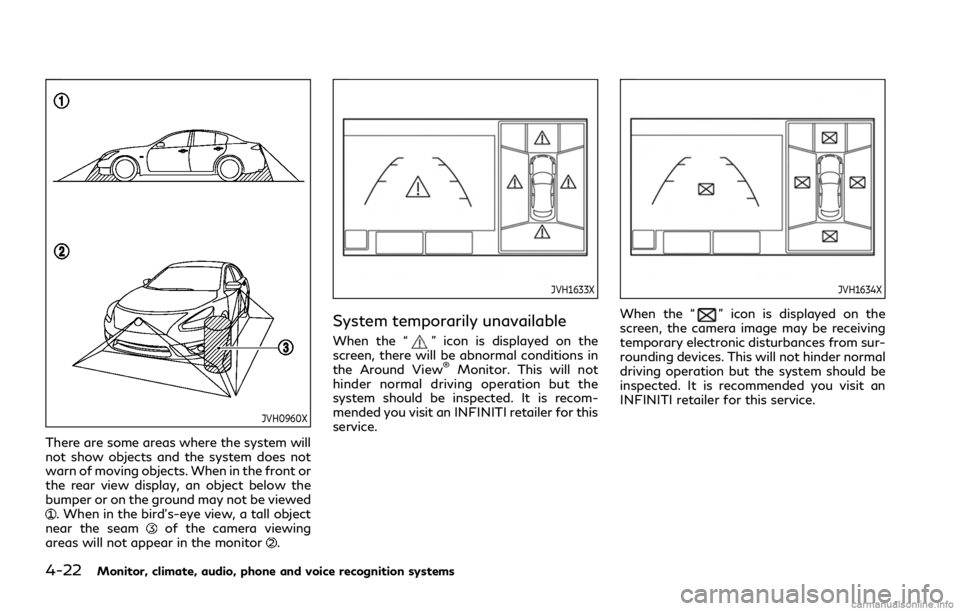
There are some areas where the system will
not show objects and the system does not
warn of moving objects. When in the front or
the rear view display, an object below the
bumper or on the ground may not be viewed
. When in the bird’s-eye view, a tall object
near the seamof the camera viewing
areas will not appear in the monitor.
JVH1633X
System temporarily unavailable
When the “” icon is displayed on the
screen, there will be abnormal conditions in
the Around View
®Monitor. This will not
hinder normal driving operation but the
system should be inspected. It is recom-
mended you visit an INFINITI retailer for this
service.
JVH1634X
When the “” icon is displayed on the
screen, the camera image may be receiving
temporary electronic disturbances from sur-
rounding devices. This will not hinder normal
driving operation but the system should be
inspected. It is recommended you visit an
INFINITI retailer for this service.