Page 133 of 491
3-53
Convenient features of your vehicle
3
Turn Signal IndicatorLight
This indicator light blinks:
When you operate the turn signal
indicator stalk.
If any of the following occur, there may
be a malfunction with the turn signal
system.
- The turn signal indicator light illumi- nates but does not blink
- The turn signal indicator light blinks rapidly
- The turn signal indicator light does not illuminate at all
If any of these conditions occur, have
your vehicle inspected by an author-
ized HYUNDAI dealer.
High Beam Indicator Light
This indicator light illuminates:
When the headlights are on and in
the high beam position
When the turn signal lever is pulled into the Flash-to-Pass position.
Light ON IndicatorLight
This indicator light illuminates:
When the tail lights or headlights
are on.
Page 134 of 491

3-54
Convenient features of your vehicle
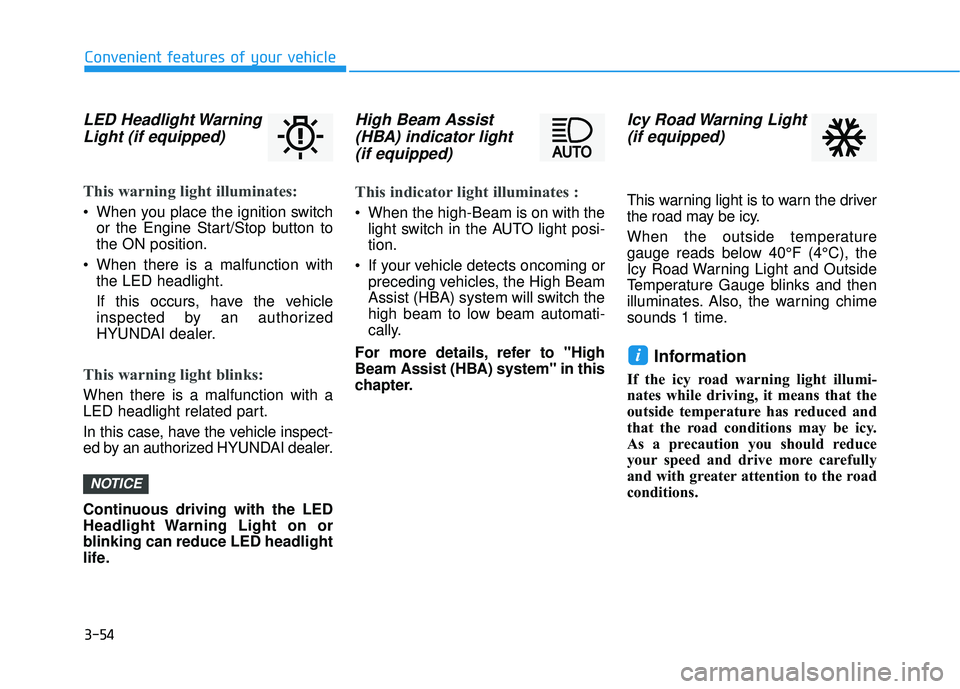
LED Headlight WarningLight (if equipped)
This warning light illuminates:
When you place the ignition switch
or the Engine Start/Stop button to
the ON position.
When there is a malfunction with the LED headlight.
If this occurs, have the vehicle
inspected by an authorized
HYUNDAI dealer.
This warning light blinks:
When there is a malfunction with a
LED headlight related part.
In this case, have the vehicle inspect-
ed by an authorized HYUNDAI dealer.
Continuous driving with the LED
Headlight Warning Light on or
blinking can reduce LED headlight
life.
High Beam Assist(HBA) indicator light(if equipped)
This indicator light illuminates :
When the high-Beam is on with the
light switch in the AUTO light posi-
tion.
If your vehicle detects oncoming or preceding vehicles, the High Beam
Assist (HBA) system will switch the
high beam to low beam automati-
cally.
For more details, refer to "High
Beam Assist (HBA) system" in this
chapter.
Icy Road Warning Light (if equipped)
This warning light is to warn the driver
the road may be icy.
When the outside temperature
gauge reads below 40°F (4°C), the
Icy Road Warning Light and Outside
Temperature Gauge blinks and then
illuminates. Also, the warning chime
sounds 1 time.
Information
If the icy road warning light illumi-
nates while driving, it means that the
outside temperature has reduced and
that the road conditions may be icy.
As a precaution you should reduce
your speed and drive more carefully
and with greater attention to the road
conditions.
i
NOTICE
Page 145 of 491
3-65
Convenient features of your vehicle
3
Assist mode
SCC/LKA/DAW
This mode displays the state of the
Smart Cruise Control (SCC), Lane
Keeping Assist (LKA) and Driver
Attention Warning (DAW).
For more details, refer to each
system in chapter 5.
Tire Pressure
This mode displays information relat-
ed to Tire Pressure.
For more details, refer to "Tire
Pressure Monitoring System
(TPMS)" in chapter 6.
Warning mode
If one of followings occurs, warning
messages will be displayed on the
LCD display for several seconds.
- Low washer fluid
- Exterior lamp malfunction(if equipped)
- Blind-Spot Collision Warning (BCW) system malfunction (if equipped)
- Tire Pressure Monitoring System (TPMS)
- High Beam Assist (HBA) malfunc- tion (if equipped)
- Forward Collision-Avoidance Assist (FCA) malfunction (if equipped)
OJS048118N
OJS048115L
Page 161 of 491
3-81
Convenient features of your vehicle
3
Parking lamp position ( )
The parking lamp, license plate lamp
and instrument panel lamp are turned
ON.
Headlamp position ( )
The headlamp, parking lamp, license
plate lamp and instrument panel lamp
are turned ON.
Information
The ignition switch must be in the ON
position to turn on the headlamp.
High beam operation
To turn on the high beam headlamp,
push the lever away from you. The
lever will return to its original position.
The high beam indicator will light
when the headlamp high beams are
switched on.
To turn off the high beam headlamp,
pull the lever towards you. The low
beams will turn on.
i
OOS047405NOOS047406N
Do not use high beam when there
are other vehicles approaching
you. Using high beam could
obstruct the other driver's vision.
WARNING
OOS047407N
Page 162 of 491

3-82
Convenient features of your vehicle
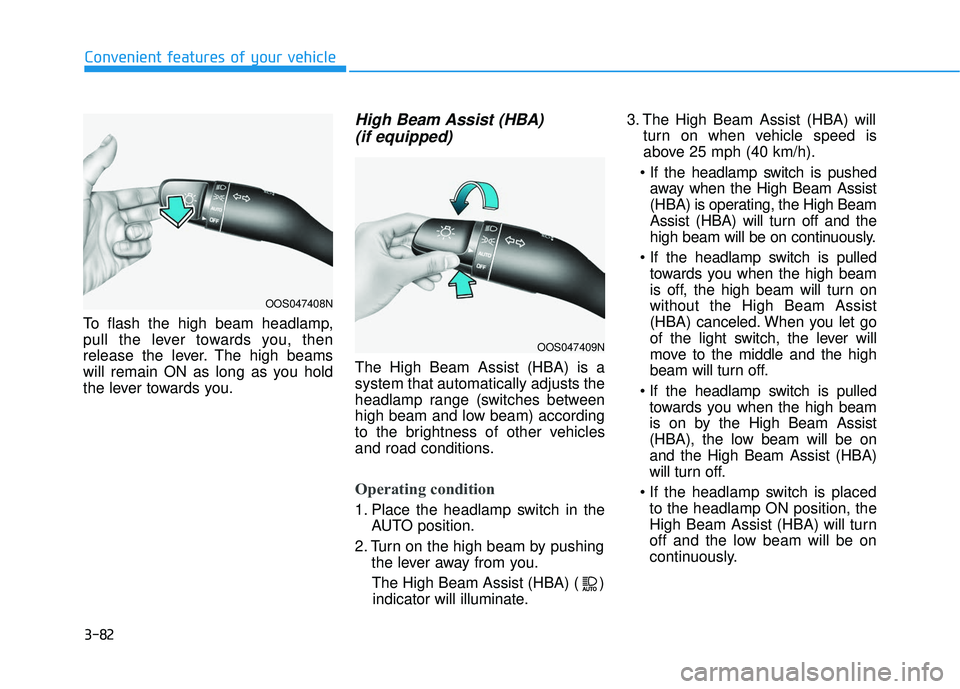
To flash the high beam headlamp,
pull the lever towards you, then
release the lever. The high beams
will remain ON as long as you hold
the lever towards you.
High Beam Assist (HBA) (if equipped)
The High Beam Assist (HBA) is a
system that automatically adjusts the
headlamp range (switches between
high beam and low beam) according
to the brightness of other vehicles
and road conditions.
Operating condition
1. Place the headlamp switch in the
AUTO position.
2. Turn on the high beam by pushing the lever away from you.
The High Beam Assist (HBA) ( ) indicator will illuminate. 3. The High Beam Assist (HBA) will
turn on when vehicle speed is
above 25 mph (40 km/h).
• If the headlamp switch is pushed away when the High Beam Assist
(HBA) is operating, the High Beam
Assist (HBA) will turn off and the
high beam will be on continuously.
the headlamp switch is pulled
towards you when the high beam
is off, the high beam will turn on
without the High Beam Assist
(HBA) canceled. When you let go
of the light switch, the lever will
move to the middle and the high
beam will turn off.
the headlamp switch is pulled
towards you when the high beam
is on by the High Beam Assist
(HBA), the low beam will be on
and the High Beam Assist (HBA)
will turn off.
to the headlamp ON position, the
High Beam Assist (HBA) will turn
off and the low beam will be on
continuously.
OOS047408N
OOS047409N
Page 163 of 491

3-83
Convenient features of your vehicle
3
When the High Beam Assist (HBA) is
operating, the high beam switches to
low beam if any of the following con-
ditions occur :
- When the headlamp of an on-com-ing vehicle is detected.
- When the tail lamp of a vehicle in front is detected.
- When the headlamp or tail lamp of a motorcycle or a bicycle is detect-
ed.
- When the surrounding ambient light is bright enough that high beams
are not required.
- When streetlights or other lights are detected.
- When the headlamp s witch is not in
the AUTO position.
- When the High Beam Assist (HBA) is off.
- When vehicle speed is below 15 mph (24 km/h)
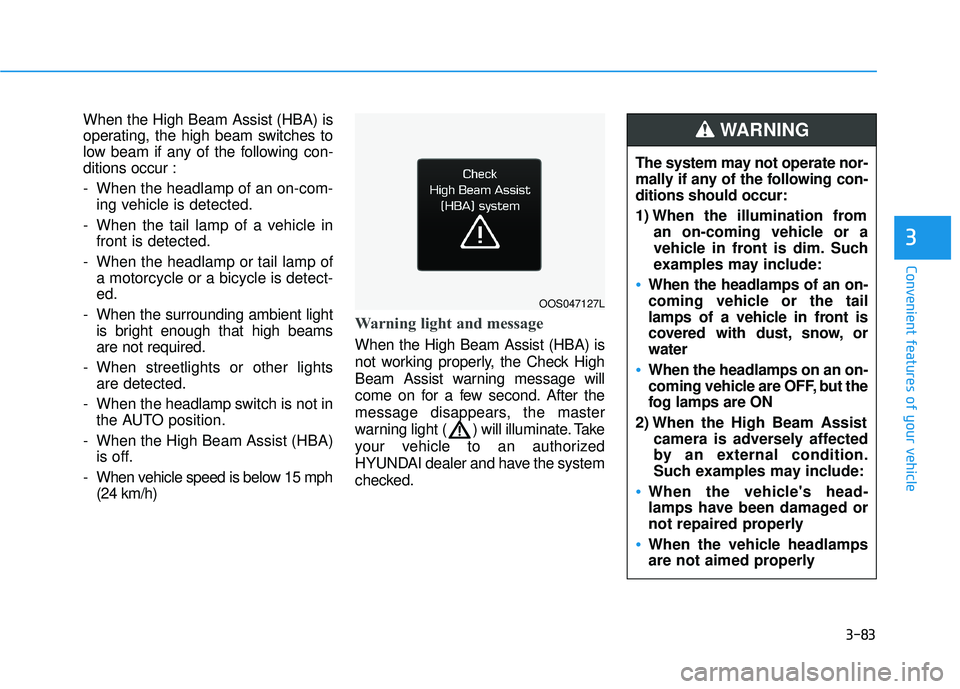
Warning light and message
When the High Beam Assist (HBA) is
not working properly, the Check High
Beam Assist warning message will
come on for a few second. After the
message disappears, the master
warning light ( ) will illuminate. Take
your vehicle to an authorized
HYUNDAI dealer and have the system
checked.
OOS047127L
The system may not operate nor-
mally if any of the following con-
ditions should occur:
1) When the illumination from an on-coming vehicle or a
vehicle in front is dim. Such
examples may include:
When the headlamps of an on-
coming vehicle or the tail
lamps of a vehicle in front is
covered with dust, snow, or
water
When the headlamps on an on-
coming vehicle are OFF, but the
fog lamps are ON
2) When the High Beam Assist camera is adversely affected
by an external condition.
Such examples may include:
When the vehicle's head-
lamps have been damaged or
not repaired properly
When the vehicle headlamps
are not aimed properly
WARNING
Page 165 of 491

3-85
Convenient features of your vehicle
3
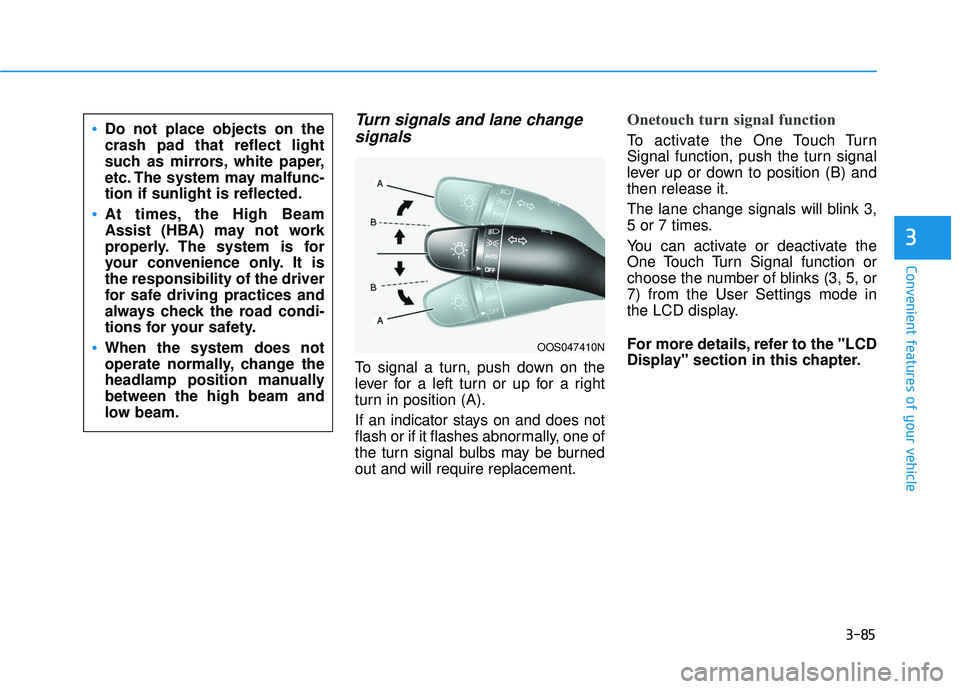
Turn signals and lane changesignals
To signal a turn, push down on the
lever for a left turn or up for a right
turn in position (A).
If an indicator stays on and does not
flash or if it flashes abnormally, one of
the turn signal bulbs may be burned
out and will require replacement.
Onetouch turn signal function
To activate the One Touch Turn
Signal function, push the turn signal
lever up or down to position (B) and
then release it.
The lane change signals will blink 3,
5 or 7 times.
You can activate or deactivate the
One Touch Turn Signal function or
choose the number of blinks (3, 5, or
7) from the User Settings mode in
the LCD display.
For more details, refer to the "LCD
Display" section in this chapter.
OOS047410N
Do not place objects on the
crash pad that reflect light
such as mirrors, white paper,
etc. The system may malfunc-
tion if sunlight is reflected.
At times, the High Beam
Assist (HBA) may not work
properly. The system is for
your convenience only. It is
the responsibility of the driver
for safe driving practices and
always check the road condi-
tions for your safety.
When the system does not
operate normally, change the
headlamp position manually
between the high beam and
low beam.
Page 443 of 491
![HYUNDAI VELOSTER 2019 Owners Manual 7-69
7
Maintenance
[1] : High beam, [2] : Low beam
Headlamp
1. Open the hood.
2. Disconnect the negative batterycable.
3. Remove the headlamp bulb cover by turning it counterclockwise.
4. Disconnect t HYUNDAI VELOSTER 2019 Owners Manual 7-69
7
Maintenance
[1] : High beam, [2] : Low beam
Headlamp
1. Open the hood.
2. Disconnect the negative batterycable.
3. Remove the headlamp bulb cover by turning it counterclockwise.
4. Disconnect t](/manual-img/35/41152/w960_41152-442.png)
7-69
7
Maintenance
[1] : High beam, [2] : Low beam
Headlamp
1. Open the hood.
2. Disconnect the negative batterycable.
3. Remove the headlamp bulb cover by turning it counterclockwise.
4. Disconnect the headlamp bulb socket-connector. 5. Remove the bulb from the head-
lamp assembly.
6. Install a new headlamp bulb and snap the headlamp bulb retaining
wire into position by aligning the
wire with the groove on the bulb.
7. Connect the headlamp bulb sock- et-connector.
8. Install the headlamp bulb cover by turning it clockwise.
Information
The headlamp aiming should be
adjusted after an accident or after the
headlamp assembly is reinstalled at an
authorized HYUNDAI dealer.
Turn signal
1. Open the hood.
2. Disconnect the negative batterycable.
3. Remove the socket (1) from the assembly by turning the socket
counterclockwise until the tabs on
the socket align with the slots on
the assembly.
4. Remove the bulb from the socket by pressing it in and rotating it
counterclockwise until the tabs on
the bulb align with the slots in the
socket. Pull the bulb out of the
socket.
iOJS078028OJS078027
■
High/Low beam