2019 HYUNDAI VELOSTER battery
[x] Cancel search: batteryPage 348 of 491
6-4
What to do in an emergency
Jump starting can be dangerous if
done incorrectly. Follow the jump
starting procedure in this section to
avoid serious injury or damage to
your vehicle. If in doubt about how to
properly jump start your vehicle, we
strongly recommend that you have a
service technician or towing service
do it for you.
J J U
U M
M P
P
S
S T
T A
A R
RT
TI
IN
N G
G
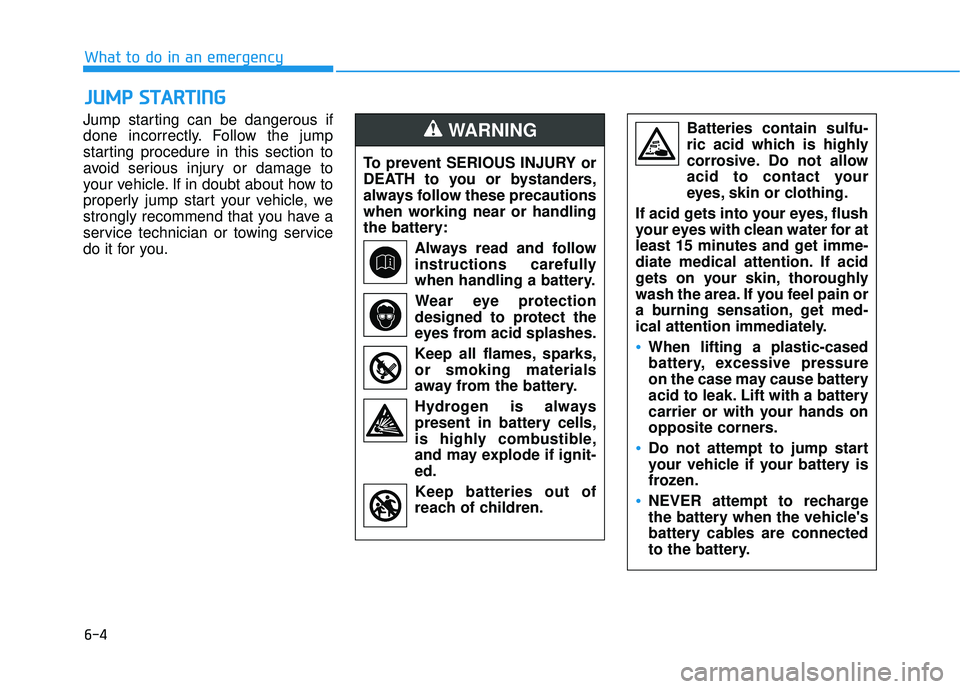
To prevent SERIOUS INJURY or
DEATH to you or bystanders,
always follow these precautions
when working near or handling
the battery:
Always read and follow
instructions carefully
when handling a battery.Wear eye protection
designed to protect the
eyes from acid splashes.
Keep all flames, sparks,
or smoking materials
away from the battery.
Hydrogen is always present in battery cells,
is highly combustible,
and may explode if ignit-
ed.
Keep batteries out of
reach of children.
WARNING Batteries contain sulfu-
ric acid which is highly
corrosive. Do not allow
acid to contact your
eyes, skin or clothing.
If acid gets into your eyes, flush
your eyes with clean water for at
least 15 minutes and get imme-
diate medical attention. If acid
gets on your skin, thoroughly
wash the area. If you feel pain or
a burning sensation, get med-
ical attention immediately.
•When lifting a plastic-cased
battery, excessive pressure
on the case may cause battery
acid to leak. Lift with a battery
carrier or with your hands on
opposite corners.
Do not attempt to jump start
your vehicle if your battery is
frozen.
NEVER attempt to recharge
the battery when the vehicle's
battery cables are connected
to the battery.
Page 349 of 491
6-5
What to do in an emergency
6
Information
An inappropriately disposedbattery can be harmful to the
environment and human
health. Dispose of the battery
according to your local law(s)
or regulations.
To prevent damage to your vehicle:
Only use a 12-volt power supply (battery or jumper system) to
jump start your vehicle.
Do not attempt to jump start your vehicle by push-starting.
Jump starting procedure
1. Position the vehicles close enough that the jumper cables will reach,
but do not allow the vehicles to
touch.
2. Avoid fans or any moving parts in the engine compartment at all
times, even when the vehicles are
turned off.
3. Turn off all electrical devices such as radios, lights, air conditioning,
etc. Put the vehicles in P (Park)
and set the parking brakes. Turn
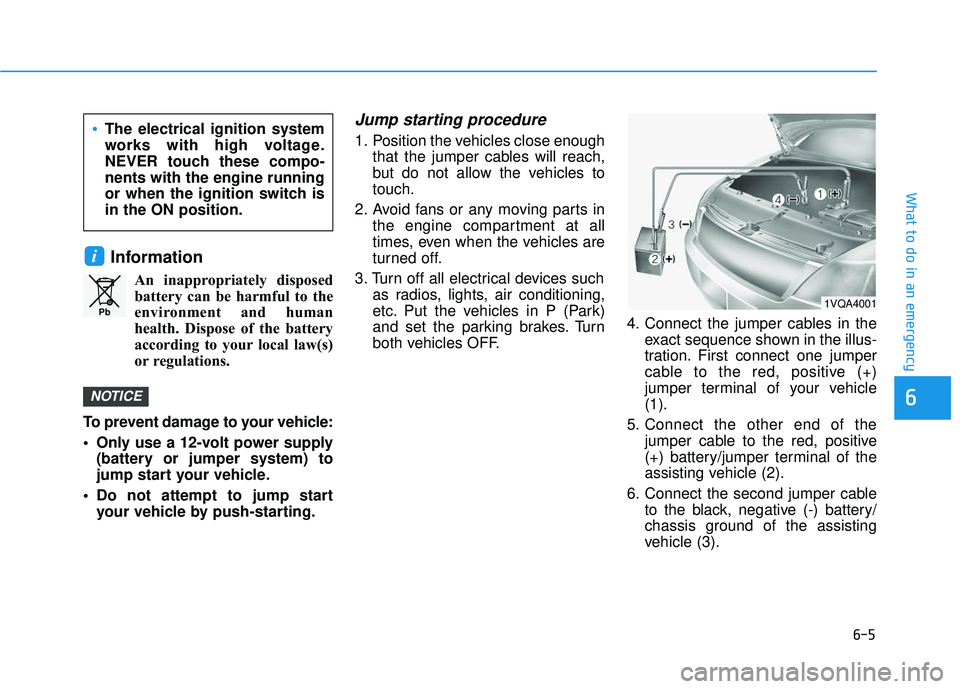
both vehicles OFF. 4. Connect the jumper cables in the
exact sequence shown in the illus-
tration. First connect one jumper
cable to the red, positive (+)
jumper terminal of your vehicle
(1).
5. Connect the other end of the jumper cable to the red, positive
(+) battery/jumper terminal of the
assisting vehicle (2).
6. Connect the second jumper cable to the black, negative (-) battery/
chassis ground of the assisting
vehicle (3).
NOTICE
i
Pb
The electrical ignition system
works with high voltage.
NEVER touch these compo-
nents with the engine running
or when the ignition switch is
in the ON position.
1VQA4001
Page 350 of 491
6-6
What to do in an emergency
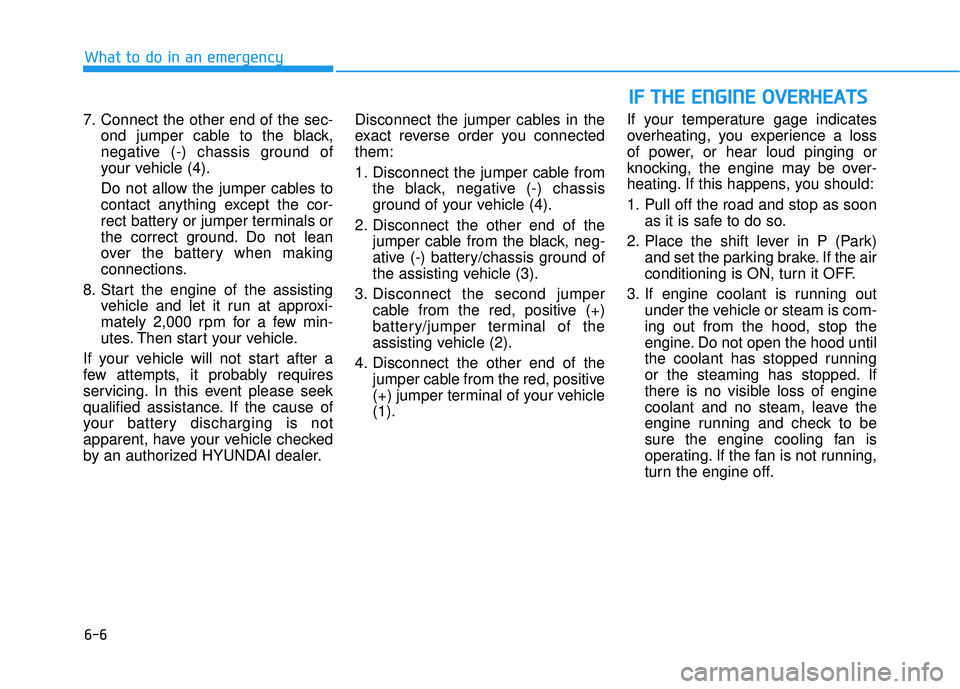
7. Connect the other end of the sec- ond jumper cable to the black,
negative (-) chassis ground of
your vehicle (4).
Do not allow the jumper cables to
contact anything except the cor-
rect battery or jumper terminals or
the correct ground. Do not lean
over the battery when making
connections.
8. Start the engine of the assisting vehicle and let it run at approxi-
mately 2,000 rpm for a few min-
utes. Then start your vehicle.
If your vehicle will not start after a
few attempts, it probably requires
servicing. In this event please seek
qualified assistance. If the cause of
your battery discharging is not
apparent, have your vehicle checked
by an authorized HYUNDAI dealer. Disconnect the jumper cables in the
exact reverse order you connected
them:
1. Disconnect the jumper cable from
the black, negative (-) chassis
ground of your vehicle (4).
2. Disconnect the other end of the jumper cable from the black, neg-
ative (-) battery/chassis ground of
the assisting vehicle (3).
3. Disconnect the second jumper cable from the red, positive (+)
battery/jumper terminal of the
assisting vehicle (2).
4. Disconnect the other end of the jumper cable from the red, positive
(+) jumper terminal of your vehicle
(1). If your temperature gage indicates
overheating, you experience a loss
of power, or hear loud pinging or
knocking, the engine may be over-
heating. If this happens, you should:
1. Pull off the road and stop as soon
as it is safe to do so.
2. Place the shift lever in P (Park) and set the parking brake. If the air
conditioning is ON, turn it OFF.
3. If engine coolant is running out under the vehicle or steam is com-
ing out from the hood, stop the
engine. Do not open the hood until
the coolant has stopped running
or the steaming has stopped. If
there is no visible loss of engine
coolant and no steam, leave the
engine running and check to be
sure the engine cooling fan is
operating. If the fan is not running,
turn the engine off.
I IF
F
T
T H
H E
E
E
E N
N G
GI
IN
N E
E
O
O V
VE
ER
R H
H E
EA
A T
TS
S
Page 365 of 491
6-21
What to do in an emergency
The Tire Mobility Kit is not designed
or intended as a permanent tire
repair method and is to be used for
one tire only.
This instruction shows you step by
step how to temporarily seal the
puncture simply and reliably.
Read the section "Notes on the safe
use of the Tire Mobility Kit".
Notes on the safe use of theTire Mobility Kit
Park your car at the side of the
road so that you can work with the
Tire Mobility Kit away from moving
traffic.
To be sure your vehicle will not move, even when you're on fairly
level ground, always set your park-
ing brake.
Only use the Tire Mobility Kit for sealing/inflation passenger car
tires. Only punctured areas located
within the tread region of the tire
can be sealed using the tire mobil-
ity kit.
Do not use on motorcycles, bicy- cles or any other type of tires. When the tire and wheel are dam-
aged, do not use Tire Mobility Kit
for your safety.
Use of the Tire Mobility Kit may not be effective for tire damage larger
than approximately 0.24 inch (6
mm).
Please contact the nearest
HYUNDAI dealership if the tire
cannot be made roadworthy with
the Tire Mobility Kit.
Do not use the Tire Mobility Kit if a tire is severely damaged by driving
run flat or with insufficient air pres-
sure.
Do not remove any foreign objects such as nails or screws that have
penetrated the tire.
Provided the car is outdoors, leave the engine running. Otherwise
operating the compressor may
eventually drain the car battery.
Never leave the Tire Mobility Kit unattended while it is being used.
Do not leave the compressor run- ning for more than 10 minutes at a
time or it may overheat. Do not use the Tire Mobility Kit if
the ambient temperature is below
-22°F (-30°C).
In case of skin contact with the- sealant, wash the area thoroughly-
with plenty of water. If the irritation-
persists, seek medical attention.
In case of eye contact with the sealant, flush your eyes for at least
15 minutes. If the irritation persists,
seek medical attention.
In case of swallowing the sealant, rinse the mouth and drink plenty
ofwater. However, never give any-
thing to an unconscious person
and seek medical attention imme-
diately.
Long time exposure to the sealant- may cause damage to bodily tissue
such as kidney, etc.
6
Page 375 of 491
7
Maintenance
7
Maintenance
Engine compartment .............................................7-3
Maintenance services ...........................................7-4
Owner's Responsibility .....................................................7-4
Owner Maintenance Precautions..................................7-4
Owner maintenance ...............................................7-5
Owner Maintenance Schedule .......................................7-6
Scheduled maintenance services.........................7-7
Normal Maintenance Schedule (Nu 2.0 MPI) .............7-8
Maintenance Under Severe Usage Conditions
(Nu 2.0 MPI)......................................................................7-\
11
Normal Maintenance Schedule (Gamma 1.6 T-GDI) ... 7-13
Maintenance Under Severe Usage Conditions
(Gamma 1.6 T-GDI) .........................................................7-16
Explanation of scheduled maintenance items .. 7-18
Engine oil ..............................................................7-21
Checking the Engine Oil Level .....................................7-21
Checking the Engine Oil and Filter .............................7-22
Engine coolant......................................................7-23
Checking the Engine Coolant Level ............................7-23
Changing Engine Coolant ..............................................7-26
Brake/clutch fluid ................................................7-27
Checking the brake/clutch Fluid Level ......................7-27
Washer fluid .........................................................7-28
Checking the Washer Fluid Level................................7-28
Parking brake .......................................................7-28
Checking the Parking Brake .........................................7-28
Air cleaner ............................................................7-29
Filter Replacement ..........................................................7-29
Climate control air filter .....................................7-30
Filter Inspection ...............................................................7-30
Wiper blades .........................................................7-31
Blade Inspection ..............................................................7-31
Blade Replacement .........................................................7-31
Battery...................................................................7-34
For Best Battery Service ..............................................7-35
Battery Recharging ........................................................7-35
Reset Features.................................................................7-36
7
Page 377 of 491
7-3
7
Maintenance
E
EN
N G
GI
IN
N E
E
C
C O
O M
M P
PA
A R
RT
TM
M E
EN
N T
T
OJS078002/OJS078048L
■
■Gamma 1.6 T-GDI
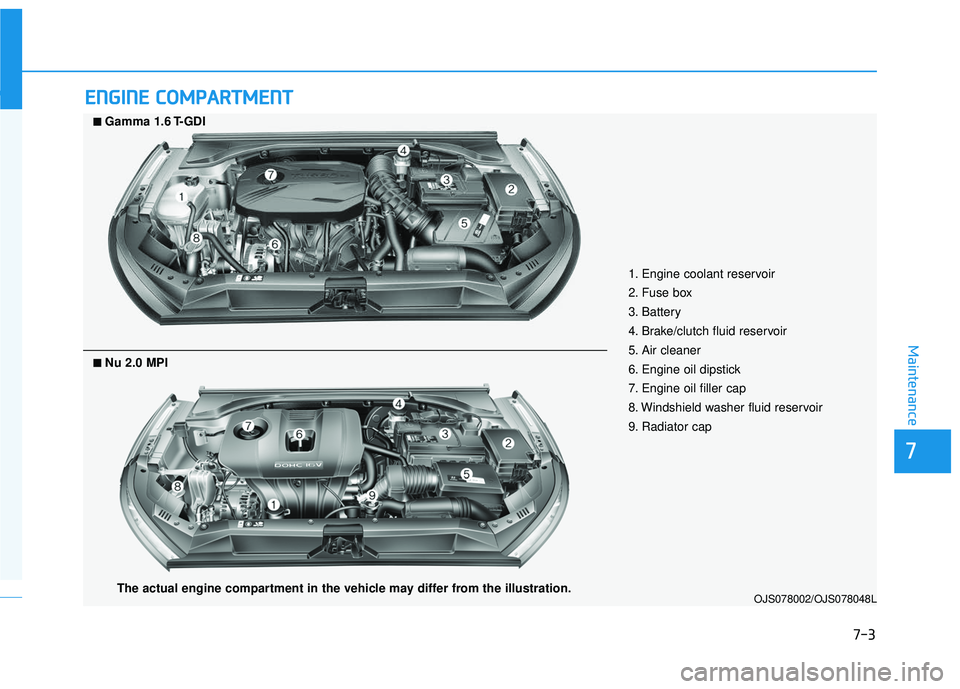
1. Engine coolant reservoir
2. Fuse box
3. Battery
4. Brake/clutch fluid reservoir
5. Air cleaner
6. Engine oil dipstick
7. Engine oil filler cap
8. Windshield washer fluid reservoir
9. Radiator cap
The actual engine compartment in the vehicle may differ from the illustration.
■
■Nu 2.0 MPI
Page 379 of 491
7-5
7
Maintenance
O
OW
W N
NE
ER
R
M
M A
AI
IN
N T
TE
EN
N A
AN
N C
CE
E
The following lists are vehicle checks
and inspections that should be per-
formed by the owner or an author-
ized HYUNDAI dealer at the frequen-
cies indicated to help ensure safe,
dependable operation of your vehi-
cle.
Any adverse conditions should be
brought to the attention of your deal-
er as soon as possible.
These Owner Maintenance vehicle
checks are generally not covered by
warranties and you may be charged
for labor, parts and lubricants used.
Performing maintenance work
on a vehicle can be dangerous.
If you lack sufficient knowledge
and experience or the proper
tools and equipment to do the
work, have it done by an author-
ized HYUNDAI dealer.
ALWAYS follow these precau-
tions for performing mainte-
nance work:
•Park your vehicle on level
ground, move the shift lever
into the P (Park, for automatic
transmission/dual clutch
transmission) position or neu-
tral (for manual transmission
vehicle), apply the parking
brake, place the ignition
switch in the LOCK/OFF posi-
tion.
WARNING Block the tires (front and
back) to prevent the vehicle
from moving.
Remove loose clothing or jew-
elry that can become entan-
gled in moving parts.
If you must run the engine
during maintenance, do so
out doors or in an area with
plenty of ventilation.
Keep flames, sparks, or smok-
ing materials away from the
battery and fuel-related parts.
Page 381 of 491
7-7
7
Maintenance
At least twice a year:(i.e., every Spring and Autumn)
Check radiator, heater and air con-
ditioning hoses for leaks or dam-
age.
Check windshield washer spray and wiper operation. Clean wiper
blades with a clean cloth damp-
ened with washer a fluid.
Check headlamp alignment.
Check muffler, exhaust pipes, shields and clamps.
Check the seat belts for wear and function.
At least once a year:
Clean body and door drain holes.
Lubricate door hinges and hoodhinges.
Lubricate door and hood locks and latches.
Lubricate door rubber weather strips.
Lubricate door checker.
Check the air conditioning system.
Inspect and lubricate automatic transmission linkage and controls.
Clean the battery and terminals.
Check the brake fluid level. Follow Normal Maintenance Schedule
if the vehicle is usually operated where
none of the following conditions apply.
If any of the following conditions apply,
you must follow the Maintenance
Under Severe Usage Conditions.
Repeated short distance driving.
Driving in dusty conditions or
sandy areas.
Extensive use of brakes.
Driving in areas where salt or other corrosive materials are used.
Driving on rough or muddy roads.
Driving in mountainous areas.
Extended periods of idling or low speed operation.
Driving for a prolonged period in cold temperatures and/or extreme-
ly humid climates.
More than 50% driving in heavy city traffic during hot weather
above 90°F (32°C).
For additional information or assis-
tance see your authorized HYUNDAI
dealer.
S S C
C H
H E
ED
D U
U L
LE
E D
D
M
M A
AI
IN
N T
TE
EN
N A
AN
N C
CE
E
S
S E
E R
R V
V I
IC
C E
E S
S