2019 Hyundai Santa Fe navigation system
[x] Cancel search: navigation systemPage 18 of 682
1-5
Your vehicle at a glance
1
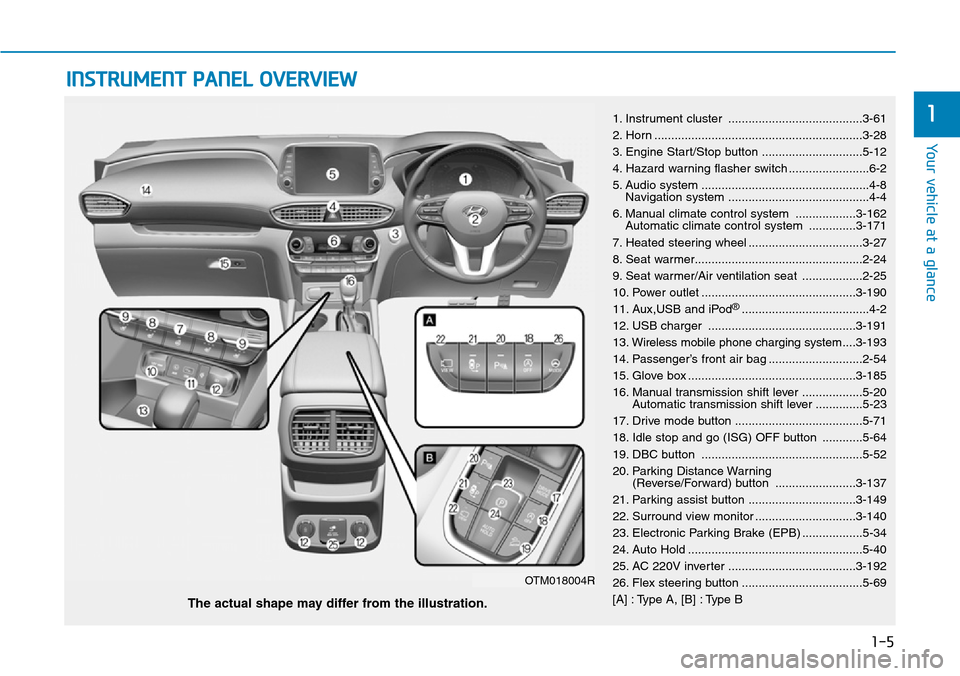
INSTRUMENT PANEL OVERVIEW
1. Instrument cluster ........................................3-61
2. Horn ..............................................................3-28
3. Engine Start/Stop button ..............................5-12
4. Hazard warning flasher switch ........................6-2
5. Audio system ..................................................4-8
Navigation system ..........................................4-4
6. Manual climate control system ..................3-162
Automatic climate control system ..............3-171
7. Heated steering wheel ..................................3-27
8. Seat warmer..................................................2-24
9. Seat warmer/Air ventilation seat ..................2-25
10. Power outlet ..............................................3-190
11. Aux,USB and iPod
®......................................4-2
12. USB charger ............................................3-191
13. Wireless mobile phone charging system....3-193
14. Passenger’s front air bag ............................2-54
15. Glove box ..................................................3-185
16. Manual transmission shift lever ..................5-20
Automatic transmission shift lever ..............5-23
17. Drive mode button ......................................5-71
18. Idle stop and go (ISG) OFF button ............5-64
19. DBC button ................................................5-52
20. Parking Distance Warning
(Reverse/Forward) button ........................3-137
21. Parking assist button ................................3-149
22. Surround view monitor ..............................3-140
23. Electronic Parking Brake (EPB) ..................5-34
24. Auto Hold ....................................................5-40
25. AC 220V inverter ......................................3-192
26. Flex steering button ....................................5-69
[A] : Type A, [B] : Type B
The actual shape may differ from the illustration.
OTM018004R
Page 183 of 682
3-92
Convenient features of your vehicle
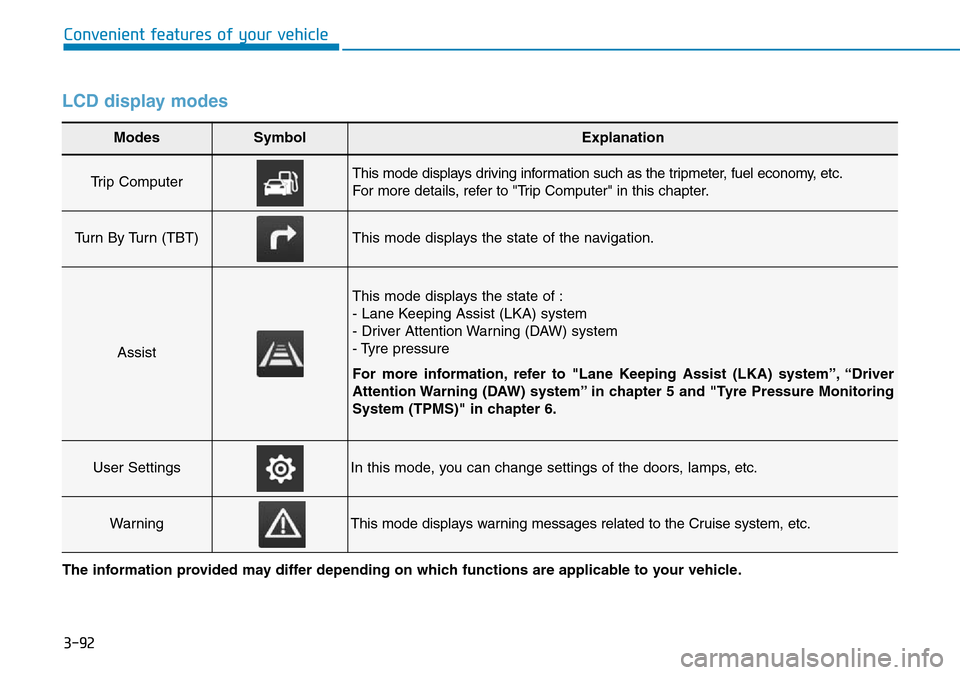
LCD display modes
Modes SymbolExplanation
Trip Computer This mode displays driving information such as the tripmeter, fuel economy, etc.
For more details, refer to "Trip Computer" in this chapter.
Turn By Turn (TBT)This mode displays the state of the navigation.
Assist
This mode displays the state of :
- Lane Keeping Assist (LKA) system
- Driver Attention Warning (DAW) system
- Tyre pressure
For more information, refer to "Lane Keeping Assist (LKA) system”, “Driver
Attention Warning (DAW) system” in chapter 5 and "Tyre Pressure Monitoring
System (TPMS)" in chapter 6.
User SettingsIn this mode, you can change settings of the doors, lamps, etc.
WarningThis mode displays warning messages related to the Cruise system, etc.
The information provided may differ depending on which functions are applicable to your vehicle.
Page 184 of 682
3-93
Convenient features of your vehicle
3
Shift to P to edit settings /
Engage parking brake to edit
settings
This warning message illuminates if
you try to select an item from the
User Settings mode whilst driving.
- Manual transmission
For your safety, change the User
Settings after engaging the parking
brake.
- Automatic transmission
For your safety, change the User
Settings after parking the vehicle,
applying the parking brake and
moving the shift lever to P (Park).
Quick guide (Help, if equipped)
This mode provides quick guides for
the systems in the User Settings
mode.
Select an item, press and hold the
OK button.
For more details about each sys-
tem, refer to this Owner’s Manual.
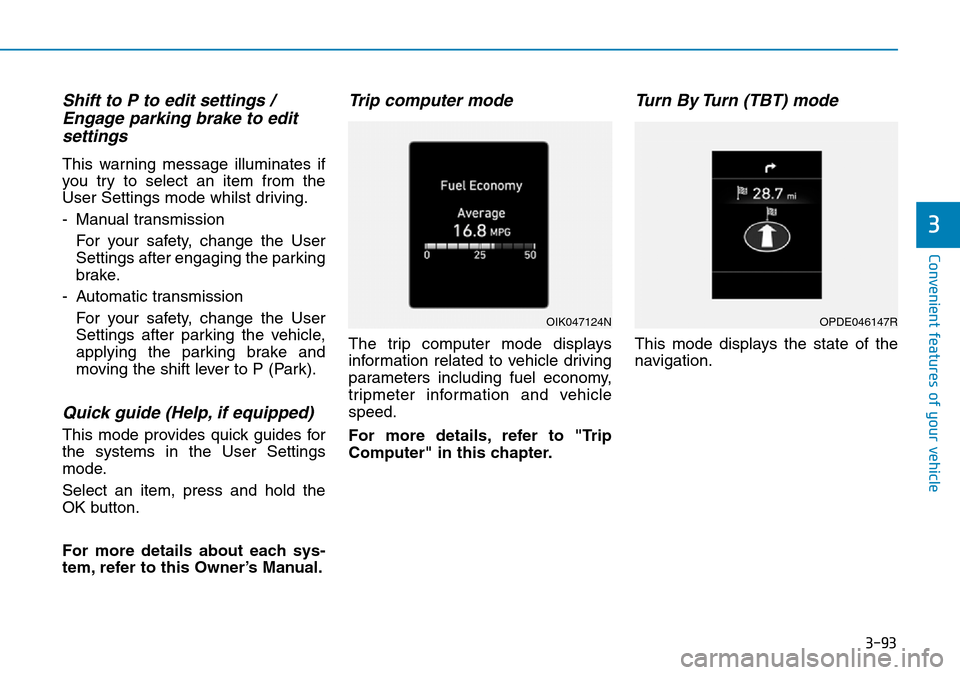
Trip computer mode
The trip computer mode displays
information related to vehicle driving
parameters including fuel economy,
tripmeter information and vehicle
speed.
For more details, refer to "Trip
Computer" in this chapter.
Turn By Turn (TBT) mode
This mode displays the state of the
navigation.
OIK047124NOPDE046147R
Page 199 of 682
3-108
Convenient features of your vehicle
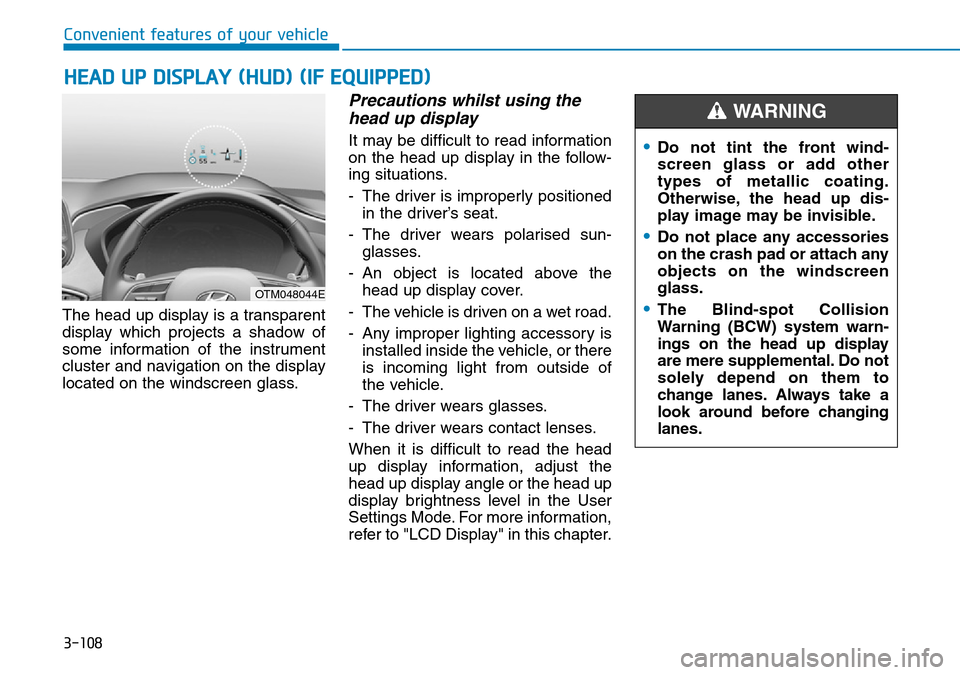
HEAD UP DISPLAY (HUD) (IF EQUIPPED)
The head up display is a transparent
display which projects a shadow of
some information of the instrument
cluster and navigation on the display
located on the windscreen glass.
Precautions whilst using the
head up display
It may be difficult to read information
on the head up display in the follow-
ing situations.
- The driver is improperly positioned
in the driver’s seat.
- The driver wears polarised sun-
glasses.
- An object is located above the
head up display cover.
- The vehicle is driven on a wet road.
- Any improper lighting accessory is
installed inside the vehicle, or there
is incoming light from outside of
the vehicle.
- The driver wears glasses.
- The driver wears contact lenses.
When it is difficult to read the head
up display information, adjust the
head up display angle or the head up
display brightness level in the User
Settings Mode. For more information,
refer to "LCD Display" in this chapter.
OTM048044E
•Do not tint the front wind-
screen glass or add other
types of metallic coating.
Otherwise, the head up dis-
play image may be invisible.
•Do not place any accessories
on the crash pad or attach any
objects on the windscreen
glass.
•The Blind-spot Collision
Warning (BCW) system warn-
ings on the head up display
are mere supplemental. Do not
solely depend on them to
change lanes. Always take a
look around before changing
lanes.
WARNING
Page 200 of 682
3-109
Convenient features of your vehicle
3
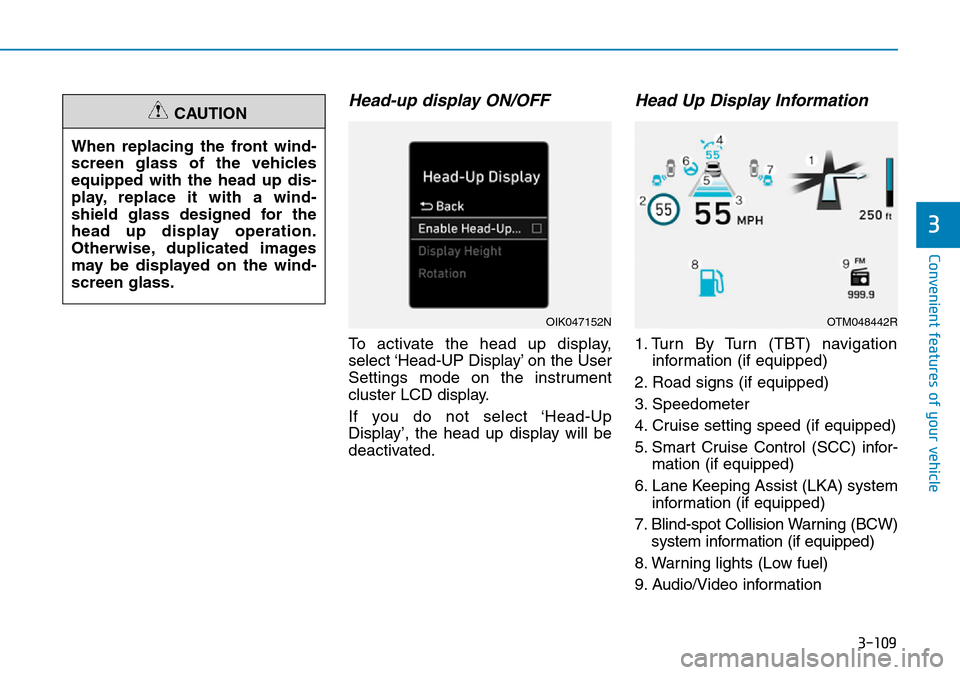
Head-up display ON/OFF
To activate the head up display,
select ‘Head-UP Display’ on the User
Settings mode on the instrument
cluster LCD display.
If you do not select ‘Head-Up
Display’, the head up display will be
deactivated.
Head Up Display Information
1. Turn By Turn (TBT) navigation
information (if equipped)
2. Road signs (if equipped)
3. Speedometer
4. Cruise setting speed (if equipped)
5. Smart Cruise Control (SCC) infor-
mation (if equipped)
6. Lane Keeping Assist (LKA) system
information (if equipped)
7. Blind-spot Collision Warning (BCW)
system information (if equipped)
8. Warning lights (Low fuel)
9. Audio/Video information When replacing the front wind-
screen glass of the vehicles
equipped with the head up dis-
play, replace it with a wind-
shield glass designed for the
head up display operation.
Otherwise, duplicated images
may be displayed on the wind-
screen glass.
CAUTION
OIK047152NOTM048442R
Page 221 of 682
3-130
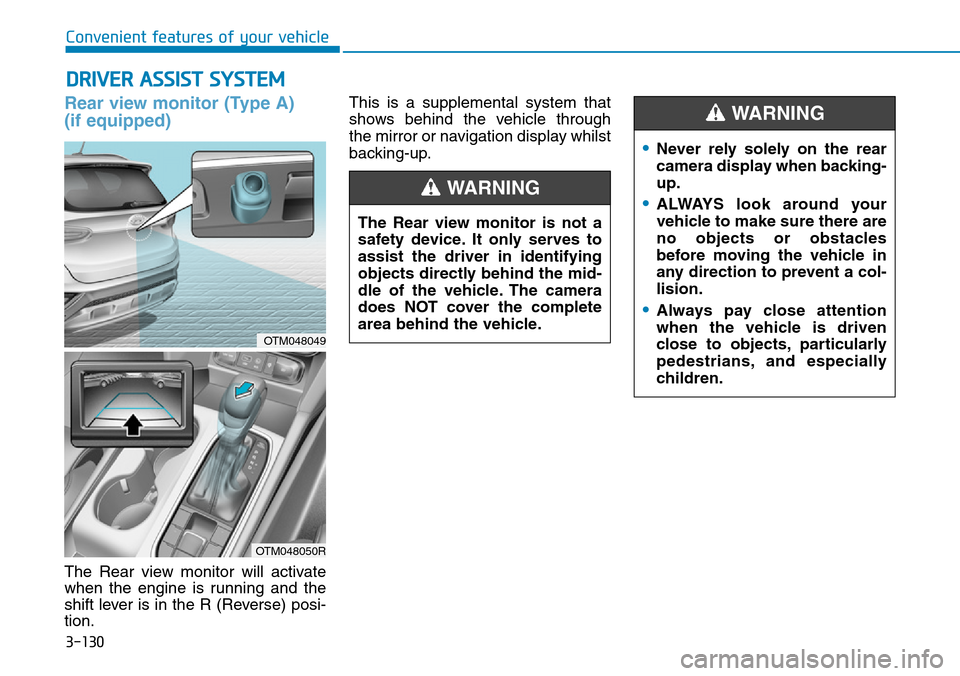
Rear view monitor (Type A)
(if equipped)
The Rear view monitor will activate
when the engine is running and the
shift lever is in the R (Reverse) posi-
tion.This is a supplemental system that
shows behind the vehicle through
the mirror or navigation display whilst
backing-up.
DRIVER ASSIST SYSTEM
Convenient features of your vehicle
The Rear view monitor is not a
safety device. It only serves to
assist the driver in identifying
objects directly behind the mid-
dle of the vehicle. The camera
does NOT cover the complete
area behind the vehicle.
WARNING
•Never rely solely on the rear
camera display when backing-
up.
•ALWAYS look around your
vehicle to make sure there are
no objects or obstacles
before moving the vehicle in
any direction to prevent a col-
lision.
•Always pay close attention
when the vehicle is driven
close to objects, particularly
pedestrians, and especially
children.
WARNING
OTM048049
OTM048050R
Page 286 of 682
3-195
Convenient features of your vehicle
3
• The wireless charging process may
temporarily stop, when temperature
abnormally increases inside the
wireless mobile phone charging sys-
tem. The wireless charging process
restarts, when temperature falls to
a certain level.
• The wireless charging process
may temporarily stop when there
is any metallic item, such as a
coin, between the wireless mobile
phone charging system and a
mobile phone.
• For certain mobile phones with
their own protection, the wireless
charging speed may decrease and
the wireless charging may stop.
• If the mobile phone has a thick
cover, the wireless charging may
not be possible.
• If the mobile phone is not fully in
contact with the wireless charging
pad, the wireless charging may
not be possible.
• Some magnetic items (credit
cards, phone cards, passbook and
tickets) may be damaged whilst
using the wireless charging
process.
Clock
Vehicles with Audio system
Select the [SETUP/CLOCK ]button on
the audio system ➟Select [Date/Time].
• Set time: Set the time displayed on
the audio screen.
• Time format: Choose between 12-
hour and 24-hour time formats.
Vehicles with Navigation system
Select the Settings menu on the
Navigation system➟Select
[Date/Time].
• GPS time: Displays time according
to the received GNSS time.
• 24-hour: Switches to 12 hour or 24
hour.
For more details, please refer to
the separate manual that was sup-
plied with your vehicle.
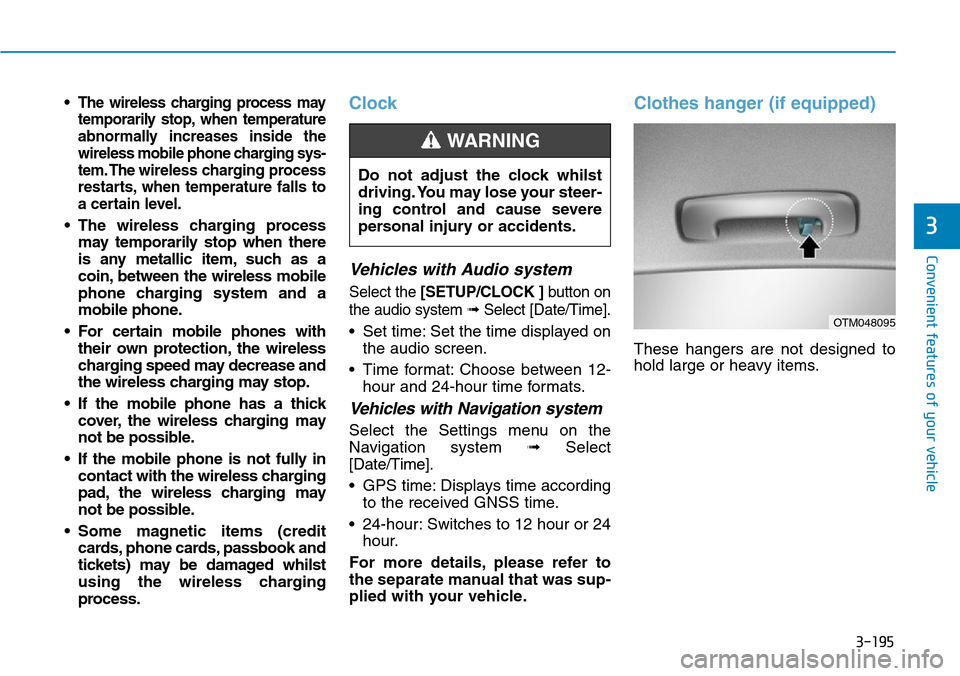
Clothes hanger (if equipped)
These hangers are not designed to
hold large or heavy items. Do not adjust the clock whilst
driving. You may lose your steer-
ing control and cause severe
personal injury or accidents.
WARNING
OTM048095
Page 292 of 682
Multimedia System
Multimedia system .................................................4-2
AUX, USB and iPod®port ..............................................4-2
Antenna ...............................................................................4-2
Steering wheel audio controls .......................................4-3
Bluetooth
®Wireless Technology hands-free ..........4-4
Audio / Video / Navigation system (AVN) ..................4-4
How vehicle radio works .................................................4-5
Audio (Without Touch Screen) ............................4-8
Radio...................................................................................4-15
Media player ....................................................................4-17
Bluetooth ...........................................................................4-24
Setup ..................................................................................4-33
System status icons........................................................4-35
Audio system specifications...............................4-36
Trademarks ...........................................................4-37
Declaration of Conformity ..................................4-38
CE RED for EU .................................................................4-38
4