2019 Hyundai Nexo trailer
[x] Cancel search: trailerPage 346 of 560
5-80
Driving your vehicle
LKA System Operation
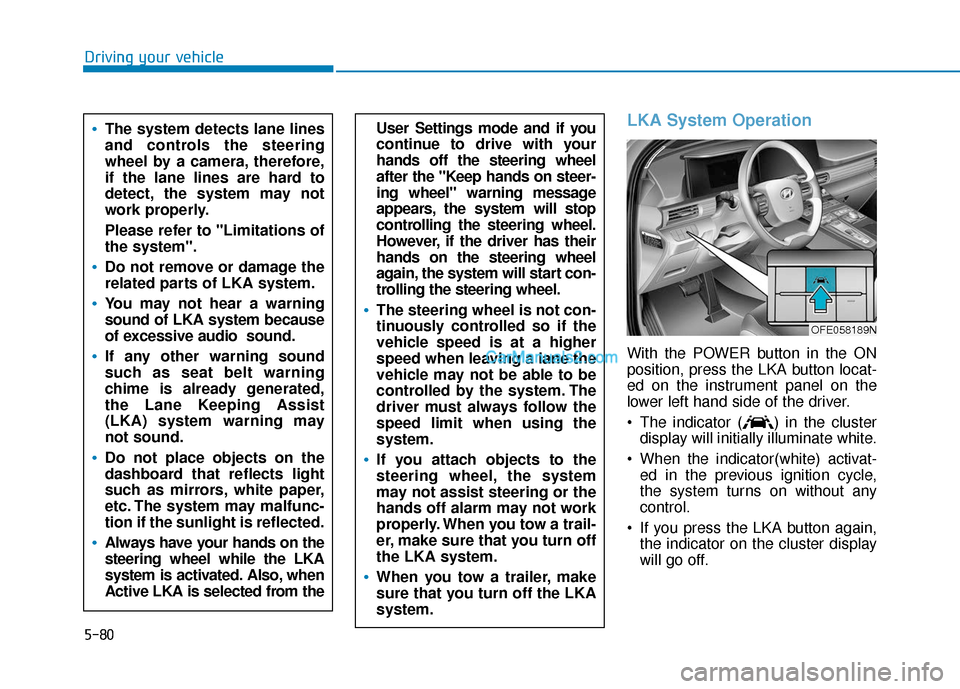
With the POWER button in the ON
position, press the LKA button locat-
ed on the instrument panel on the
lower left hand side of the driver.
The indicator ( ) in the clusterdisplay will initially illuminate white.
When the indicator(white) activat- ed in the previous ignition cycle,
the system turns on without any
control.
If you press the LKA button again, the indicator on the cluster display
will go off.
User Settings mode and if you
continue to drive with your
hands off the steering wheel
after the "Keep hands on steer-
ing wheel" warning message
appears, the system will stop
controlling the steering wheel.
However, if the driver has their
hands on the steering wheel
again, the system will start con-
trolling the steering wheel.
The steering wheel is not con-
tinuously controlled so if the
vehicle speed is at a higher
speed when leaving a lane the
vehicle may not be able to be
controlled by the system. The
driver must always follow the
speed limit when using the
system.
If you attach objects to the
steering wheel, the system
may not assist steering or the
hands off alarm may not work
properly. When you tow a trail-
er, make sure that you turn off
the LKA system.
When you tow a trailer, make
sure that you turn off the LKA
system.
The system detects lane lines
and controls the steering
wheel by a camera, therefore,
if the lane lines are hard to
detect, the system may not
work properly.
Please refer to "Limitations of
the system".
Do not remove or damage the
related parts of LKA system.
You may not hear a warning
sound of LKA system because
of excessive audio sound.
If any other warning sound
such as seat belt warning
chime is already generated,
the Lane Keeping Assist
(LKA) system warning may
not sound.
Do not place objects on the
dashboard that reflects light
such as mirrors, white paper,
etc. The system may malfunc-
tion if the sunlight is reflected.
Always have your hands on the
steering wheel while the LKA
system is activated. Also, when
Active LKA is selected from the
OFE058189N
Page 354 of 560
5-88
LFA operation
The driver can turn on the LFA sys-
tem with the vehicle on and by
selecting "Vehicle settings →Driver
assistance →Driving assist → LFA
(Lane Following Assist)" in the AVN
screen.
The set-up of the LFA system will be
maintained, as selected, when the
vehicle is restarted.
Driving your vehicle
The system detects lane
markers and controls the
steering wheel by a camera,
therefore, if the lane markers
are hard to detect, the system
may not work properly.
Please refer to "Limitations of
the system".
Do not remove or damage the
related parts of LFA system.
You may not hear a warning
sound of LFA system because
of excessive audio sound.
Do not place objects on the
dashboard that reflects light
such as mirrors, white paper,
etc. The system may malfunc-
tion if the sunlight is reflected.
Always have your hands on
the steering wheel while the
LFA system is activated. If you
continue to drive with your
hands off the steering wheel
after the "Keep hands on
steering wheel" warning mes-
sage appears, the system will
be turned off automatically.
However, if the driver has their
hands on the steering wheel
again, the system will start
controlling the steering wheel.
The steering wheel may not
be continuously controlled by
the system if the vehicle
speed is too high. The driver
must always follow the speed
limit when using the system.
If you attach objects to the
steering wheel, the system
may not assist steering nor-
mally or the hands off alarm
may not work properly.
When you tow a trailer, make
sure that you turn off the LFA
system.
Page 378 of 560
5-112
Driving your vehicle
Lane changing
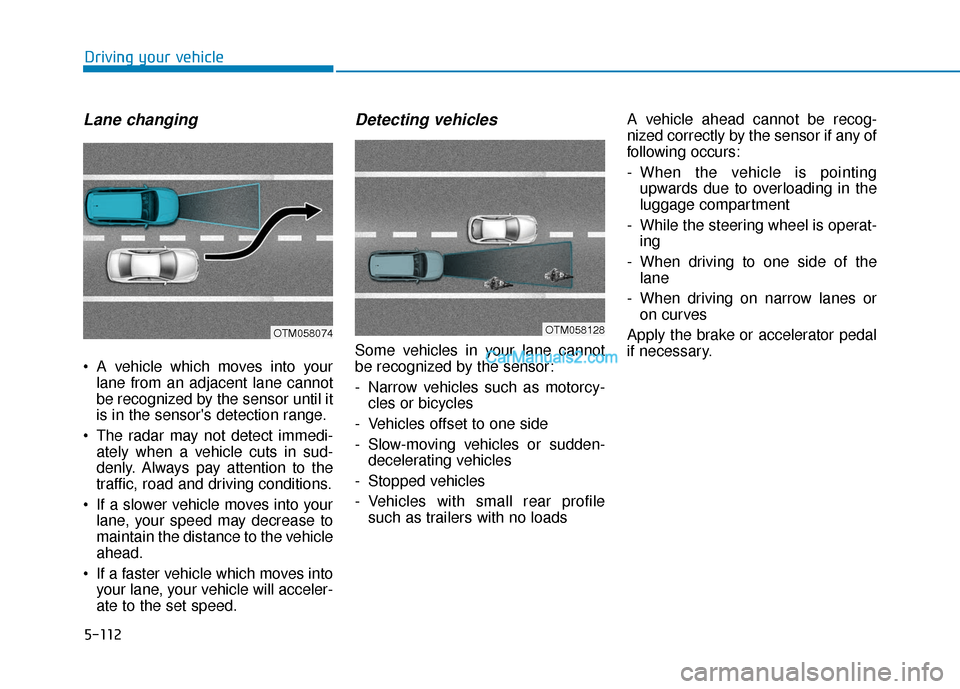
A vehicle which moves into yourlane from an adjacent lane cannot
be recognized by the sensor until it
is in the sensor's detection range.
The radar may not detect immedi- ately when a vehicle cuts in sud-
denly. Always pay attention to the
traffic, road and driving conditions.
If a slower vehicle moves into your lane, your speed may decrease to
maintain the distance to the vehicle
ahead.
If a faster vehicle which moves into your lane, your vehicle will acceler-
ate to the set speed.
Detecting vehicles
Some vehicles in your lane cannot
be recognized by the sensor:
- Narrow vehicles such as motorcy-cles or bicycles
- Vehicles offset to one side
- Slow-moving vehicles or sudden- decelerating vehicles
- Stopped vehicles
- Vehicles with small rear profile such as trailers with no loads A vehicle ahead cannot be recog-
nized correctly by the sensor if any of
following occurs:
- When the vehicle is pointing
upwards due to overloading in the
luggage compartment
- While the steering wheel is operat- ing
- When driving to one side of the lane
- When driving on narrow lanes or on curves
Apply the brake or accelerator pedal
if necessary.
OTM058074OTM058128
Page 393 of 560
5-127
Driving your vehicle
5
The label located on the driver's door
sill gives the original tire size, cold
tire pressures recommended for your
vehicle, the number of people that
can be in your vehicle and vehicle
capacity weight.
Vehicle capacity weight
903 lbs. (410 kg)
Vehicle capacity weight is the maxi-
mum combined weight of occupants
and cargo. If your vehicle is equipped
with a trailer, the combined weight
includes the tongue load.
Seating capacity
Total : 5 persons (Front seat : 2 persons,
Rear seat : 3 persons)
Seating capacity is the maximum
number of occupants including a
driver, your vehicle may carry.
However, the seating capacity may
be reduced based upon the weight of
all of the occupants, and the weight
of the cargo being carried or towed.
Do not overload the vehicle as there
is a limit to the total weight, or load
limit including occupants and cargo,
the vehicle can carry.
Towing capacity
We do not recommend using this
vehicle for trailer towing.
Cargo capacity
The cargo capacity of your vehicle
will increase or decrease depending
on the weight and the number of
occupants and the tongue load, if
your vehicle is equipped with a trailer.
Steps for determining correct load limit
1. Locate the statement "The com-
bined weight of occupants and
cargo should never exceed XXX
kg or XXX lbs." on your vehicle's
placard.
2. Determine the combined weight of the driver and passengers that will
be riding in your vehicle.
3. Subtract the combined weight of the driver and passengers from
XXX kg or XXX lbs.
4. The resulting figure equals the available amount of cargo and lug-
gage load capacity. For example, if
the "XXX" amount equals 1400
lbs. and there will be five 150 lb
passengers in your vehicle, the
amount of available cargo and lug-
gage load capacity is 650 lbs.
(1400 - 750 (5 x 150) = 650 lbs.)
5. Determine the combined weight of luggage and cargo being loaded
on the vehicle. That weight may
not safely exceed the available
cargo and luggage load capacity
calculated in Step 4.
Page 394 of 560
5-128
Driving your vehicle
6. If your vehicle will be towing a trail- er, load from your trailer will be
transferred to your vehicle. Consult
this manual to determine how this
reduces the available cargo and
luggage load capacity of your vehi-
cle.
Do not overload the vehicle as
there is a limit to the total
weight, or load limit, including
occupants and cargo, the vehi-
cle can carry. Overloading can
shorten the life of the vehicle. If
the GVWR or the GAWR is
exceeded, parts on the vehicle
can break, and it can change the
handling of your vehicle. These
could cause you to lose control
and result in an accident.
WARNING
Page 396 of 560
5-130
Driving your vehicle
Certification label
The certification label is located on
the driver’s door sill at the center pil-
lar and shows the maximum allow-
able weight of the fully loaded vehi-
cle. This is called the GVWR (Gross
Vehicle Weight Rating). The GVWR
includes the weight of the vehicle, all
occupants, fuel and cargo.
This label also tells you the maxi-
mum weight that can be supported
by the front and rear axles, called
Gross Axle Weight Rating (GAWR).The total weight of the vehicle,
including all occupants, accessories,
cargo, and trailer tongue load must
not exceed the Gross Vehicle Weight
Rating (GVWR) or the Gross Axle
Weight Rating (GAWR). To find out
the actual loads on your front and
rear axles, you need to go to a weigh
station and weigh your vehicle. Be
sure to spread out your load equally
on both sides of the centerline.
OBH059070
Overloading
Never exceed the GVWR for
your vehicle, the GAWR for
either the front or rear axle
and vehicle capacity weight.
Exceeding these ratings can
affect your vehicle’s handling
and braking ability, and cause
an accident.
Do not overload your vehicle.
Overloading your vehicle can
cause heat buildup in your
vehicle’s tires and possible
tire failure, increased stop-
ping distances and poor vehi-
cle handling-all of which may
result in a crash.
WARNING
Page 397 of 560
5-131
Driving your vehicle
5
Overloading your vehicle may
cause damage. Repairs would not
be covered by your warranty. Do
not overload your vehicle.We do not recommend using this
vehicle for trailer towing.
NOTICE
T T
R
R A
A I
IL
L E
E R
R
T
T O
O W
W I
IN
N G
G
If you carry items inside your
vehicle (e.g., suitcases, tools,
packages, or anything else),
they are moving as fast as the
vehicle. If you have to stop or
turn quickly, or if there is a
crash, the items will keep going
and can cause an injury if they
strike the driver or a passenger.
Put items in the cargo area of
your vehicle. Try to spread the
weight evenly.
Do not stack items, like suit-
cases, inside the vehicle
above the tops of the seats.
Do not leave an unsecured
child restraint in your vehicle.
When you carry something
inside the vehicle, secure it.
WARNING
Page 415 of 560
6-18
What to do in an emergency
Introduction
With the Tire Mobility Kit you stay
mobile even after experiencing a tire
puncture.
The compressor and sealing com-
pound system effectively and com-
fortably seals most punctures in a
passenger car tire caused by nails
or similar objects and reinflates the
tire.
After you ensure that the tire is prop-
erly sealed you can drive cautiously
on the tire (distance up to 120 miles
(200 km)) at a max. speed of (50
mph (80 km/h)) in order to reach a
service station or tire dealer for the
tire replacement.
It is possible that some tires, espe-
cially with larger punctures or dam-
age to the sidewall, cannot be sealed
completely.
Air pressure loss in the tire may
adversely affect tire performance.
For this reason, you should avoid
abrupt steering or other driving
maneuvers, especially if the vehicle
is heavily loaded or if a trailer is in
use.The Tire Mobility Kit is not designed
or intended as a permanent tire
repair method and is to be used for
one tire only.
This instruction shows you step by
step how to temporarily seal the
puncture simply and reliably.
Read the section "Notes on the safe
use of the Tire Mobility Kit".
Notes on the safe use of the
Tire Mobility Kit
Park your car at the side of the
road so that you can work with the
Tire Mobility Kit away from moving
traffic.
To be sure your vehicle will not move, even when you're on fairly
level ground, always set your park-
ing brake.
Only use the Tire Mobility Kit for sealing/inflation passenger car
tires. Only punctured areas located
within the tread region of the tire
can be sealed using the tire mobil-
ity kit.
Do not use on motorcycles, bicy- cles or any other type of tires. When the tire and wheel are dam-
aged, do not use Tire Mobility Kit
for your safety.
Use of the Tire Mobility Kit may not be effective for tire damage larger
than approximately 0.16 in. (4
mm).
Please contact the nearest
HYUNDAI dealership if the tire
cannot be made roadworthy with
the Tire Mobility Kit.
Do not use the Tire Mobility Kit if a tire is severely damaged by driving
run flat or with insufficient air pres-
sure.
Do not remove any foreign objects such as nails or screws that have
penetrated the tire.
Provided the car is outdoors, leave the vehicle ON ( indicator ON).
Otherwise operating the compres-
sor may eventually drain the car
battery.
Never leave the Tire Mobility Kit unattended while it is being used.
Do not leave the compressor run- ning for more than 10 minutes at a
time or it may overheat.