2019 Hyundai Nexo cluster
[x] Cancel search: clusterPage 14 of 560
I
IN
N S
ST
T R
R U
U M
M E
EN
N T
T
P
P A
A N
N E
EL
L
O
O V
VE
ER
R V
V I
IE
E W
W
The actual shape may differ from the illustration.
1-5
Your vehicle at a glance
1
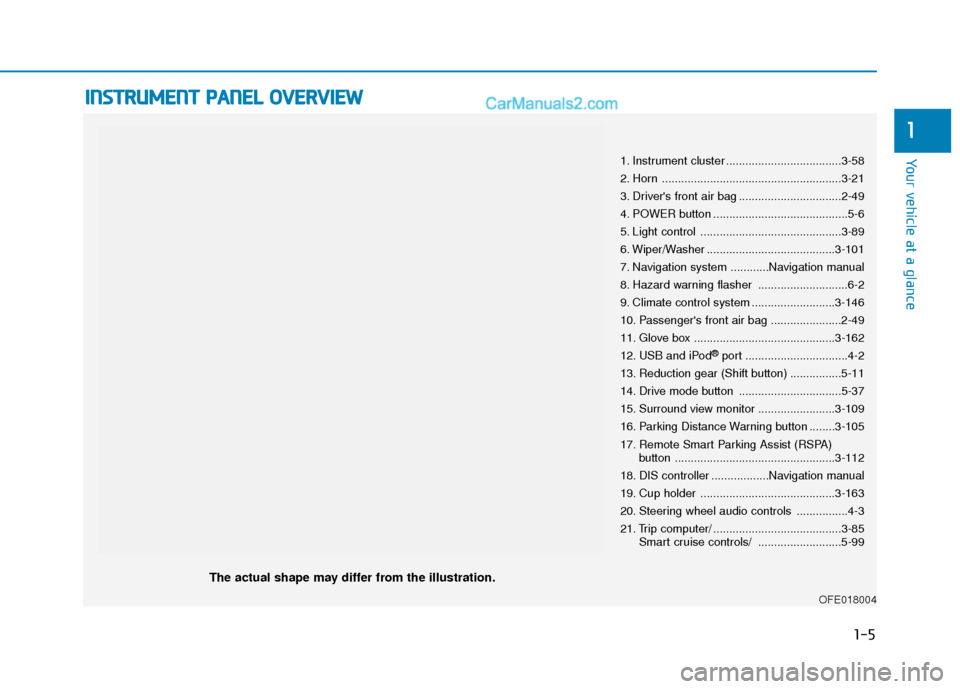
1. Instrument cluster ....................................3-58
2. Horn ........................................................3-21
3. Driver's front air bag ................................2-49
4. POWER button ..........................................5-6
5. Light control ............................................3-89
6. Wiper/Washer ........................................3-101
7. Navigation system ............Navigation manual
8. Hazard warning flasher ............................6-2
9. Climate control system ..........................3-146
10. Passenger's front air bag ......................2-49
11. Glove box ............................................3-162
12. USB and iPod
®port ................................4-2
13. Reduction gear (Shift button) ................5-11
14. Drive mode button ................................5-37
15. Surround view monitor ........................3-109
16. Parking Distance Warning button ........3-105
17. Remote Smart Parking Assist (RSPA) button ..................................................3-112
18. DIS controller ..................Navigation manual
19. Cup holder ..........................................3-163
20. Steering wheel audio controls ................4-3
21. Trip computer/ ........................................3-85 Smart cruise controls/ ..........................5-99
OFE018004
Page 71 of 560
2-56
Safety system of your vehicle
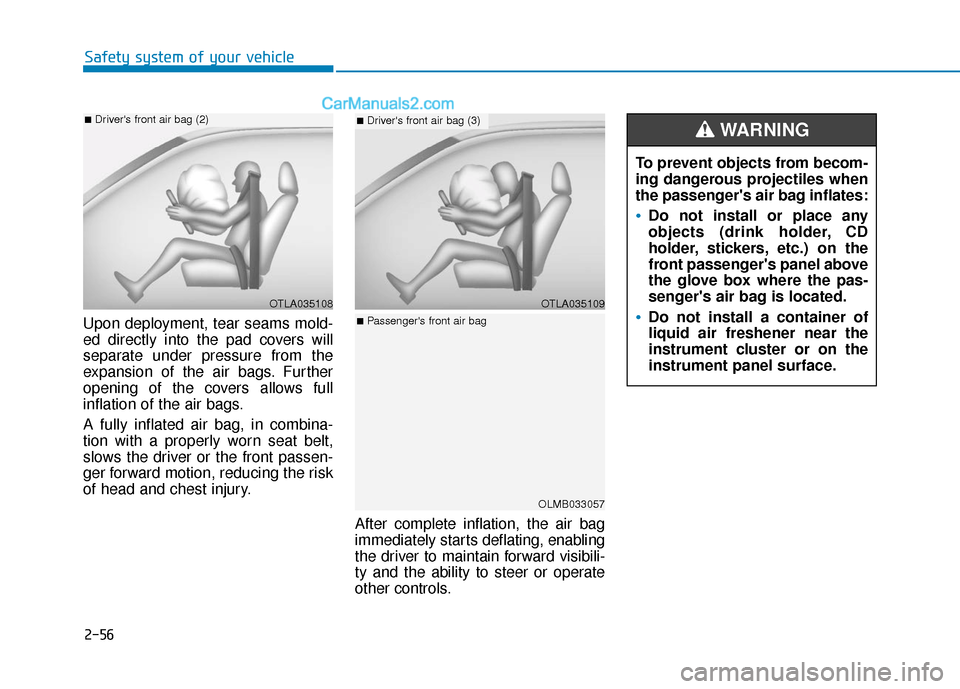
Upon deployment, tear seams mold-
ed directly into the pad covers will
separate under pressure from the
expansion of the air bags. Further
opening of the covers allows full
inflation of the air bags.
A fully inflated air bag, in combina-
tion with a properly worn seat belt,
slows the driver or the front passen-
ger forward motion, reducing the risk
of head and chest injury. After complete inflation, the air bag
immediately starts deflating, enabling
the driver to maintain forward visibili-
ty and the ability to steer or operate
other controls.
OTLA035108
■Driver's front air bag (2)
To prevent objects from becom-
ing dangerous projectiles when
the passenger's air bag inflates:
Do not install or place any
objects (drink holder, CD
holder, stickers, etc.) on the
front passenger's panel above
the glove box where the pas-
senger's air bag is located.
Do not install a container of
liquid air freshener near the
instrument cluster or on the
instrument panel surface.
WARNING
OTLA035109
■Driver's front air bag (3)
OLMB033057
■Passenger's front air bag
Page 87 of 560
2-72
Safety system of your vehicle
System malfunction
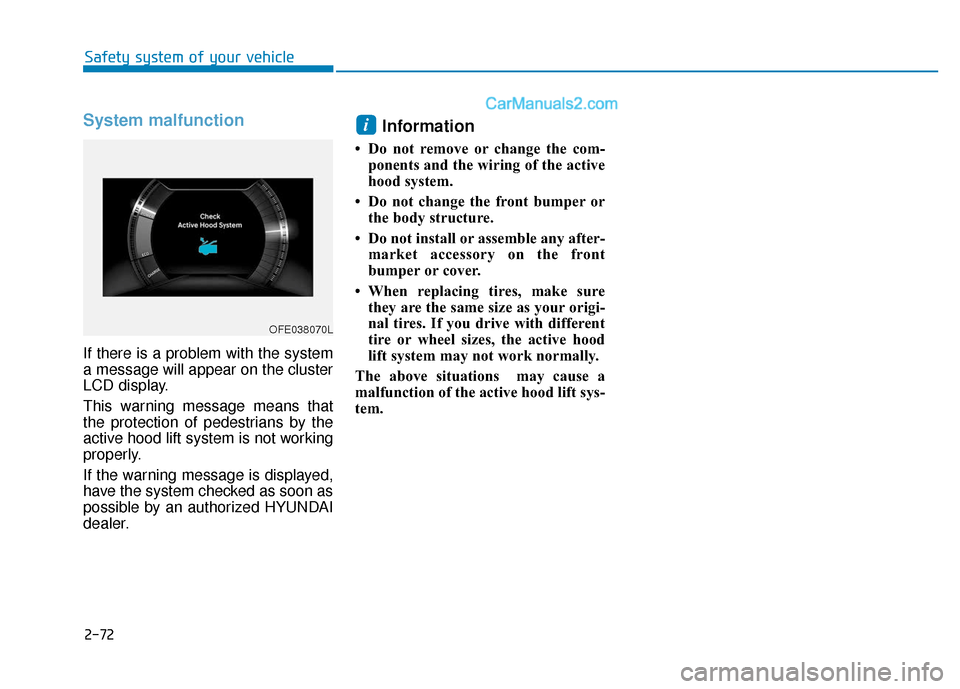
If there is a problem with the system
a message will appear on the cluster
LCD display.
This warning message means that
the protection of pedestrians by the
active hood lift system is not working
properly.
If the warning message is displayed,
have the system checked as soon as
possible by an authorized HYUNDAI
dealer.
Information
• Do not remove or change the com-ponents and the wiring of the active
hood system.
• Do not change the front bumper or the body structure.
• Do not install or assemble any after- market accessory on the front
bumper or cover.
• When replacing tires, make sure they are the same size as your origi-
nal tires. If you drive with different
tire or wheel sizes, the active hood
lift system may not work normally.
The above situations may cause a
malfunction of the active hood lift sys-
tem.
i
OFE038070L
Page 88 of 560
Convenient features of your vehicle
Accessing Your Vehicle .........................................3-3
Smart Key ........................................................................\
....3-3
Immobilizer System ...........................................................3-9
Door Locks ............................................................3-11
Door unlocking from outside the vehicle .................3-11
Door locking from outside the vehicle ......................3-14
Operating Door Locks from Inside the Vehicle .......3-14
Automatic Door Lock and Unlock Features .............3-17
Child-Protector Rear Door Locks ...............................3-18
Theft-Alarm System ............................................3-19
Steering Wheel .....................................................3-20
Electric Power Steering (EPS) .....................................3-20
Tilt Steering/Telescope Steering.................................3-21
Horn ........................................................................\
............3-21
Heated Steering Wheel ..................................................3-22
Mirrors ...................................................................3-23
Inside Rearview Mirror ..................................................3-23
Side View Mirrors ...........................................................3-31
Windows ................................................................3-33
Power Windows ...............................................................3-34
Sunroof..................................................................3-37
Sunroof Opening and Closing ......................................3-38
Sliding the Sunroof .........................................................3-38
Tilting the Sunroof .........................................................3-39
Sunshade ........................................................................\
...3-39Resetting the Sunroof ...................................................3-40
Sunroof Open Warning ..................................................3-41
Exterior Features .................................................3-42
Hood ........................................................................\
...........3-42
Non-Powered Liftgate ...................................................3-43
Power Liftgate .................................................................3-45
Smart Liftgate ..................................................................3-51
Fuel Filler Door ................................................................3-55
Emergency Fuel Filler Door Release..........................3-57
Instrument Cluster ...............................................3-58
Instrument Cluster Control............................................3-59
Gauges and Meters ........................................................3-59
Warning and Indicator Lights .......................................3-65
LCD Display Messages ...................................................3-76
LCD Display ...........................................................3-81
LCD Display Control ........................................................3-81
LCD Display Modes .........................................................3-82
Trip Computer .......................................................3-85
Lighting..................................................................3-89
Exterior Lights .................................................................3-89
Welcome System .............................................................3-99
Wipers and Washers..........................................3-101
Front Windshield Wipers .............................................3-101
Front Windshield Washers ..........................................3-102
Rear Window Wiper and Washer..............................3-103
3
Page 107 of 560
3-20
Electric Power Steering (EPS)
The system assists you with steering
the vehicle. If the vehicle is turned off
or if the power steering system
becomes inoperative, you may still
steer the vehicle, but it will require
increased steering effort.
Should you notice any change in the
effort required to steer during normal
vehicle operation, have the system
checked by an authorized HYUNDAI
dealer.
Information
The following symptoms may occur
during normal vehicle operation:
• The steering effort may be highimmediately after placing the
POWER button in the ON position.
This happens as the system performs
the EPS system diagnostics. When
the diagnostics is completed, the
steering wheel will return to its nor-
mal condition.
• A click noise may be heard from the EPS relay after the POWER button
is in the ON or OFF position.
• Motor noise may be heard when the vehicle is at a stop or at a low driving
speed.
• When you operate the steering wheel in low temperature, abnormal noise
may occur. If temperature rises, the
noise will disappear. This is a normal
condition. • When an error is detected from the
EPS, the assistant function of steer-
ing effort will not be activated in
order to prevent fatal accidents.
Instrument cluster warning lights
may be on or the steering effort may
be high. When the following symp-
toms occur, immediately drive the
vehicle to a safe area and check it.
i
S ST
T E
EE
ER
R I
IN
N G
G
W
W H
HE
EE
EL
L
Convenient features of your vehicle
If the Electric Power Steering
System does not operate nor-
mally, the warning light ( ) will
illuminate on the instrument
cluster. You may steer the vehi-
cle, but it will require increased
steering efforts. Take your vehi-
cle to an authorized HYUNDAI
dealer and have the system
checked as soon as possible.
CAUTION
Page 108 of 560
3-21
Convenient features of your vehicle
3
Tilt Steering / Telescope Steering
Adjust the steering wheel so it points
toward your chest, not toward your
face. Make sure you can see the
instrument cluster warning lights and
gauges. After adjusting, push the
steering wheel both up and down to
be certain it is locked in position.
Always adjust the position of the
steering wheel before driving.To change the steering wheel angle
and height:
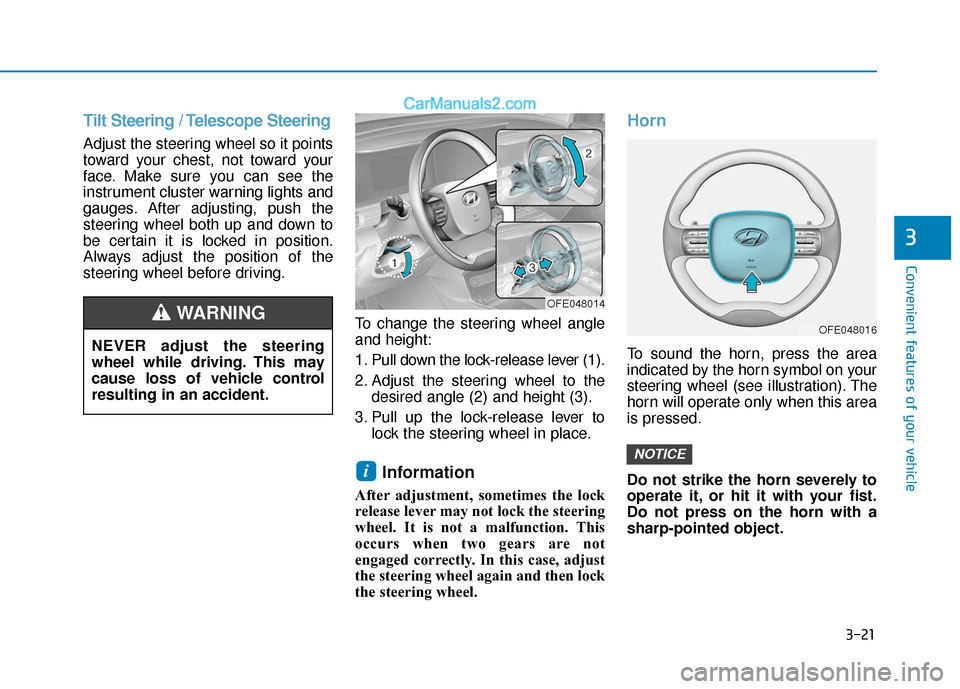
1. Pull down the lock-release lever (1).
2. Adjust the steering wheel to thedesired angle (2) and height (3).
3. Pull up the lock-release lever to lock the steering wheel in place.
Information
After adjustment, sometimes the lock
release lever may not lock the steering
wheel. It is not a malfunction. This
occurs when two gears are not
engaged correctly. In this case, adjust
the steering wheel again and then lock
the steering wheel.
Horn
To sound the horn, press the area
indicated by the horn symbol on your
steering wheel (see illustration). The
horn will operate only when this area
is pressed.
Do not strike the horn severely to
operate it, or hit it with your fist.
Do not press on the horn with a
sharp-pointed object.
NOTICE
i
NEVER adjust the steering
wheel while driving. This may
cause loss of vehicle control
resulting in an accident.
WARNING OFE048014
OFE048016
Page 142 of 560
3-55
Convenient features of your vehicle
3
Fuel Filler Door
Opening the fuel filler door
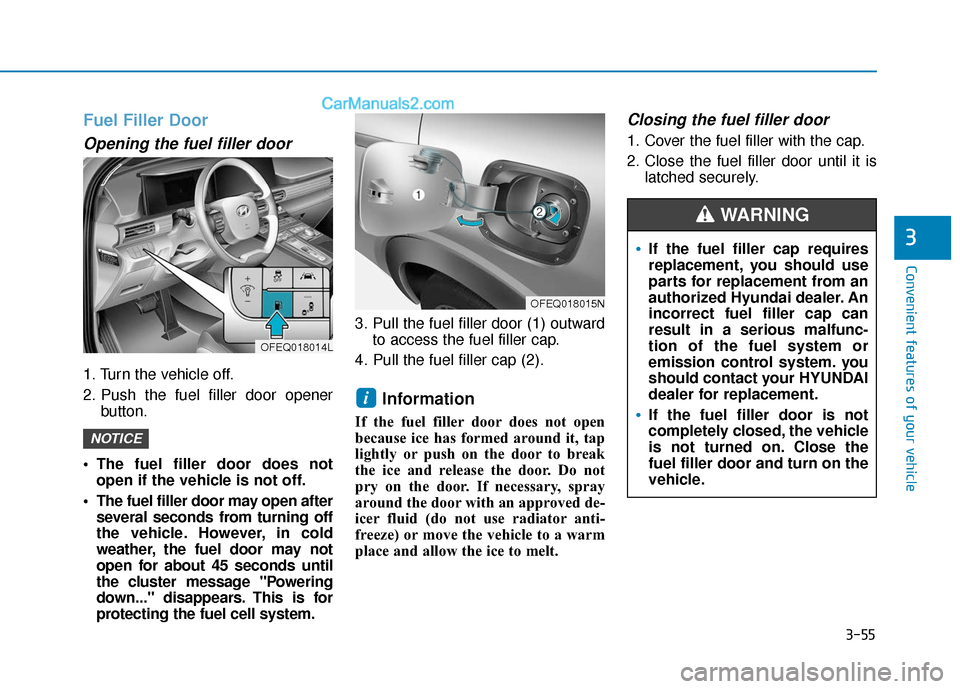
1. Turn the vehicle off.
2. Push the fuel filler door openerbutton.
The fuel filler door does not open if the vehicle is not off.
The fuel filler door may open after several seconds from turning off
the vehicle. However, in cold
weather, the fuel door may not
open for about 45 seconds until
the cluster message "Powering
down..." disappears. This is for
protecting the fuel cell system. 3. Pull the fuel filler door (1) outward
to access the fuel filler cap.
4. Pull the fuel filler cap (2).
Information
If the fuel filler door does not open
because ice has formed around it, tap
lightly or push on the door to break
the ice and release the door. Do not
pry on the door. If necessary, spray
around the door with an approved de-
icer fluid (do not use radiator anti-
freeze) or move the vehicle to a warm
place and allow the ice to melt.
Closing the fuel filler door
1. Cover the fuel filler with the cap.
2. Close the fuel filler door until it is latched securely.
i
NOTICE
OFEQ018014L
OFEQ018015N
If the fuel filler cap requires
replacement, you should use
parts for replacement from an
authorized Hyundai dealer. An
incorrect fuel filler cap can
result in a serious malfunc-
tion of the fuel system or
emission control system. you
should contact your HYUNDAI
dealer for replacement.
If the fuel filler door is not
completely closed, the vehicle
is not turned on. Close the
fuel filler door and turn on the
vehicle.
WARNING
Page 145 of 560
3-58
Convenient features of your vehicle
I
IN
N S
ST
T R
R U
U M
M E
EN
N T
T
C
C L
LU
U S
ST
T E
ER
R
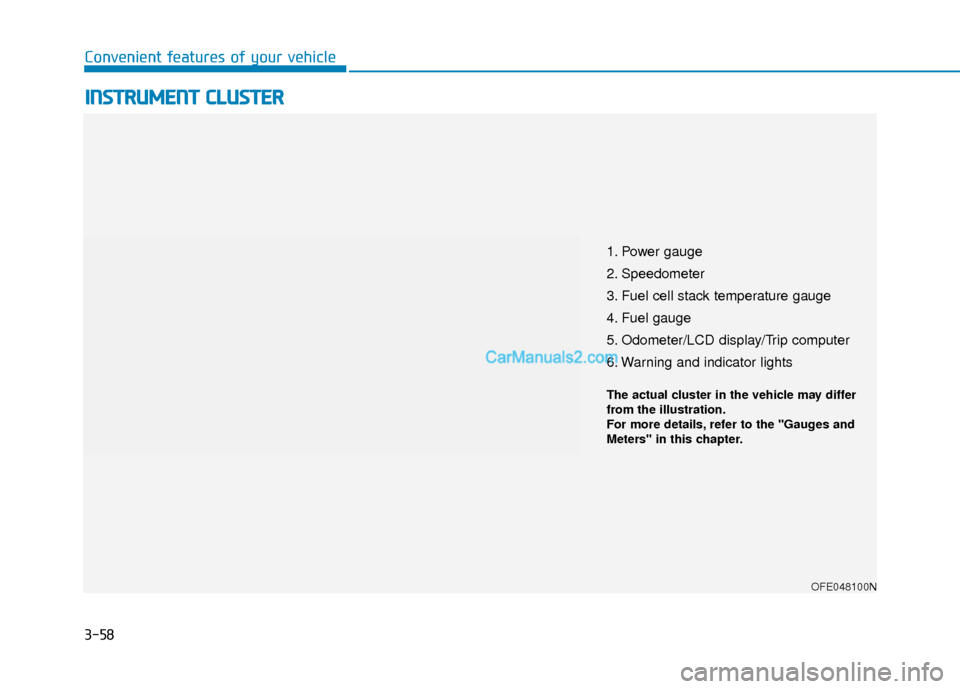
1. Power gauge
2. Speedometer
3. Fuel cell stack temperature gauge
4. Fuel gauge
5. Odometer/LCD display/Trip computer
6. Warning and indicator lights
OFE048100N
The actual cluster in the vehicle may differ
from the illustration.
For more details, refer to the "Gauges and
Meters" in this chapter.