Page 169 of 485
3-85
Convenient features of your vehicle
3
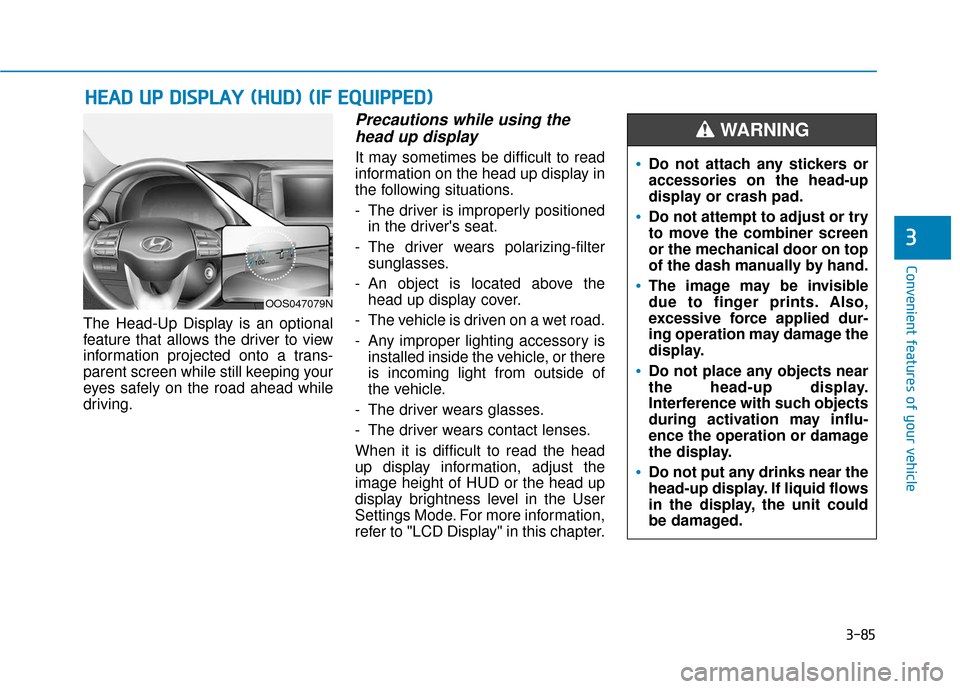
The Head-Up Display is an optional
feature that allows the driver to view
information projected onto a trans-
parent screen while still keeping your
eyes safely on the road ahead while
driving.
Precautions while using thehead up display
It may sometimes be difficult to read
information on the head up display in
the following situations.
- The driver is improperly positioned
in the driver's seat.
- The driver wears polarizing-filter sunglasses.
- An object is located above the head up display cover.
- The vehicle is driven on a wet road.
- Any improper lighting accessory is installed inside the vehicle, or there
is incoming light from outside of
the vehicle.
- The driver wears glasses.
- The driver wears contact lenses.
When it is difficult to read the head
up display information, adjust the
image height of HUD or the head up
display brightness level in the User
Settings Mode. For more information,
refer to "LCD Display" in this chapter.
H H E
EA
A D
D
U
U P
P
D
D I
IS
S P
P L
LA
A Y
Y
(
( H
H U
U D
D)
)
(
( I
IF
F
E
E Q
Q U
UI
IP
P P
PE
ED
D )
)
Do not attach any stickers or
accessories on the head-up
display or crash pad.
Do not attempt to adjust or try
to move the combiner screen
or the mechanical door on top
of the dash manually by hand.
The image may be invisible
due to finger prints. Also,
excessive force applied dur-
ing operation may damage the
display.
Do not place any objects near
the head-up display.
Interference with such objects
during activation may influ-
ence the operation or damage
the display.
Do not put any drinks near the
head-up display. If liquid flows
in the display, the unit could
be damaged.
WARNING
OOS047079N
Page 170 of 485
3-86
Convenient features of your vehicle
Head Up Display ON/OFF
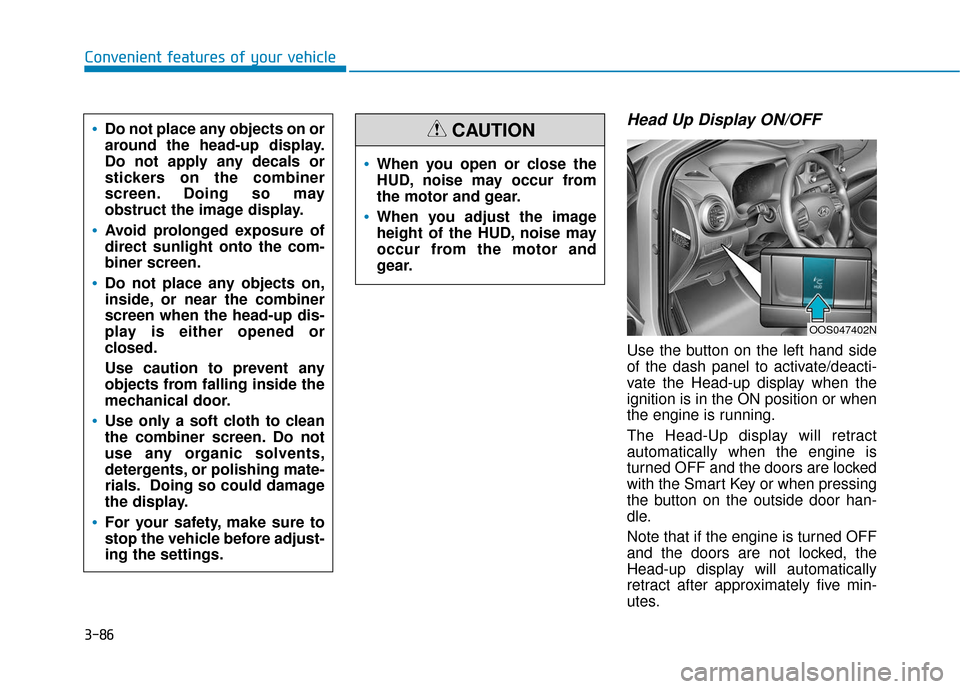
Use the button on the left hand side
of the dash panel to activate/deacti-
vate the Head-up display when the
ignition is in the ON position or when
the engine is running.
The Head-Up display will retract
automatically when the engine is
turned OFF and the doors are locked
with the Smart Key or when pressing
the button on the outside door han-
dle.
Note that if the engine is turned OFF
and the doors are not locked, the
Head-up display will automatically
retract after approximately five min-
utes.
When you open or close the
HUD, noise may occur from
the motor and gear.
When you adjust the image
height of the HUD, noise may
occur from the motor and
gear.
CAUTIONDo not place any objects on or
around the head-up display.
Do not apply any decals or
stickers on the combiner
screen. Doing so may
obstruct the image display.
Avoid prolonged exposure of
direct sunlight onto the com-
biner screen.
Do not place any objects on,
inside, or near the combiner
screen when the head-up dis-
play is either opened or
closed.
Use caution to prevent any
objects from falling inside the
mechanical door.
Use only a soft cloth to clean
the combiner screen. Do not
use any organic solvents,
detergents, or polishing mate-
rials. Doing so could damage
the display.
For your safety, make sure to
stop the vehicle before adjust-
ing the settings.
OOS047402N
Page 171 of 485
3-87
Convenient features of your vehicle
3
Head Up Display Information
1. Turn By Turn (TBT) navigationinformation
2. Speed Limit Sign
3. Speedometer
4. Cruise Control SET Indicator
5. Lane Keeping Assist (LKA) sys- tem information
6. Blind-spot Collision Warning (BCW) system information
7. Warning Message (Low Fuel, etc.)
8. Audio Station Info
Information
If you select the Turn By Turn (TBT)
navigation information as HUD con-
tents, the Turn By Turn (TBT) naviga-
tion information will not be displayed
on the LCD Display.
Head Up Display Setting
On the LCD display, you can change
the head up display settings as fol-
lows.
Display Height
Rotation
Brightness
Content Select
Speedometer Size
Speedometer Color
For more information, refer to
"LCD Display" in this chapter.i
OOS047082N
Page 178 of 485
3-94
Convenient features of your vehicle
Onetouch turn signal function
To activate the One Touch Turn
Signal function, push the turn signal
lever up or down to position (B) and
then release it.
The lane change signals will blink 3,
5 or 7 times.
You can activate or deactivate the
One Touch Turn Signal function or
choose the number of blinks (3, 5, or
7) from the User Settings mode in
the LCD display.
For more information, refer to the
"LCD Display" section in this
chapter.
Front fog lamp (if equipped)
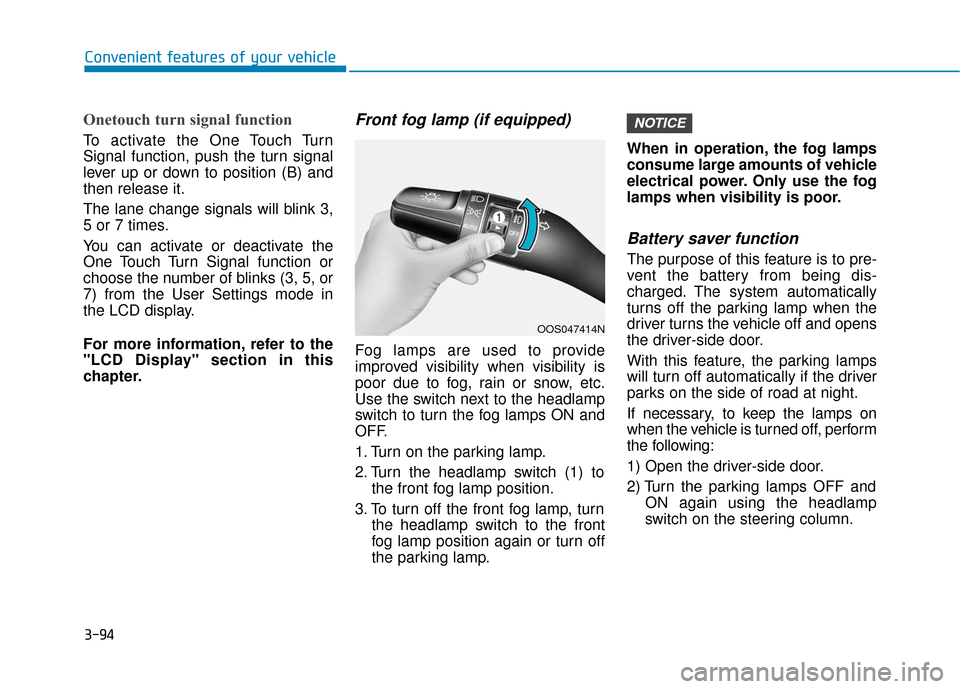
Fog lamps are used to provide
improved visibility when visibility is
poor due to fog, rain or snow, etc.
Use the switch next to the headlamp
switch to turn the fog lamps ON and
OFF.
1. Turn on the parking lamp.
2. Turn the headlamp switch (1) tothe front fog lamp position.
3. To turn off the front fog lamp, turn the headlamp switch to the front
fog lamp position again or turn off
the parking lamp. When in operation, the fog lamps
consume large amounts of vehicle
electrical power. Only use the fog
lamps when visibility is poor.
Battery saver function
The purpose of this feature is to pre-
vent the battery from being dis-
charged. The system automatically
turns off the parking lamp when the
driver turns the vehicle off and opens
the driver-side door.
With this feature, the parking lamps
will turn off automatically if the driver
parks on the side of road at night.
If necessary, to keep the lamps on
when the vehicle is turned off, perform
the following:
1) Open the driver-side door.
2) Turn the parking lamps OFF and
ON again using the headlamp
switch on the steering column.
NOTICE
OOS047414N
Page 179 of 485
3-95
Convenient features of your vehicle
3
Headlamp delay function
If the key is removed from the ignition
switch or placed in the ACC position
or the LOCK/OFF position with the
headlamps ON, the headlamps
(and/or parking lamps) remain on for
about 5 minutes. However, if the dri-
ver’s door is opened and closed, the
headlights are turned off after 15
seconds. Also, with the engine off if
the driver's door is opened and
closed, the headlamps (and/or park-
ing lamps) are turned off after 15
seconds.
The headlamps (and/or parking
lamps) can be turned off by pressing
the lock button on the remote key or
smart key twice or turning the head-
lamp switch to the OFF or AUTO
position.
You can activate or deactivate the
Headlamp Delay function from the
User Settings Mode in the LCD dis-
play.
For more information, refer to the
"LCD Display" section in this
chapter.If the driver exits the vehicle
through another door besides the
driver door, the battery saver func-
tion does not operate and the
headlamp delay function does not
turn OFF automatically.
This may cause the battery to dis-
charge. To avoid battery dis-
charge, turn OFF the headlamps
manually from the headlamp
switch before exiting the vehicle.
Smart cornering lamp
(if equipped)
As an optional safety feature, your
vehicle may be equipped with a
smart cornering lamp. The cornering
lamp turns ON automatically while
driving when the vehicle enters into a
cornering maneuver.
The system will operate under the
following conditions:
When the headlamps are turned
ON
When the steering angle is above 25 to 35 degrees (depending on
vehicle speed)
When the vehicle speed is under 25 mph (40 kph)
When the smart cornering lamp
turns on, the front fog lamp turns off.
(if equipped)
NOTICE
Page 186 of 485
3-102
To prevent possible damage tothe washer pump, do not oper-
ate the washer when the fluid
reservoir is empty.
To prevent possible damage to the wipers or windshield, do not
operate the wipers when the
windshield is dry.
To prevent damage to the wiper arms and other components, do
not attempt to move the wipers
manually.
To prevent possible damage to the wipers and washer system,
use anti-freezing washer fluids
in the winter season or cold
weather.
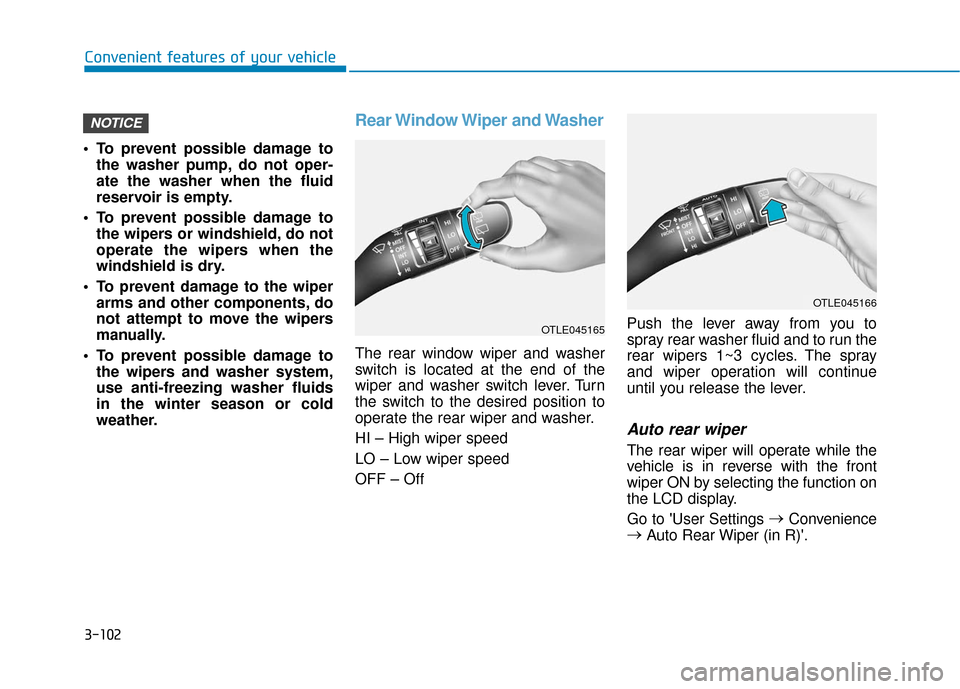
Rear Window Wiper and Washer
The rear window wiper and washer
switch is located at the end of the
wiper and washer switch lever. Turn
the switch to the desired position to
operate the rear wiper and washer.
HI – High wiper speed
LO – Low wiper speed
OFF – Off Push the lever away from you to
spray rear washer fluid and to run the
rear wipers 1~3 cycles. The spray
and wiper operation will continue
until you release the lever.
Auto rear wiper
The rear wiper will operate while the
vehicle is in reverse with the front
wiper ON by selecting the function on
the LCD display.
Go to 'User Settings
→
Convenience
→ Auto Rear Wiper (in R)'.
NOTICE
Convenient features of your vehicle
OTLE045166
OTLE045165
Page 187 of 485
3-103
Convenient features of your vehicle
3
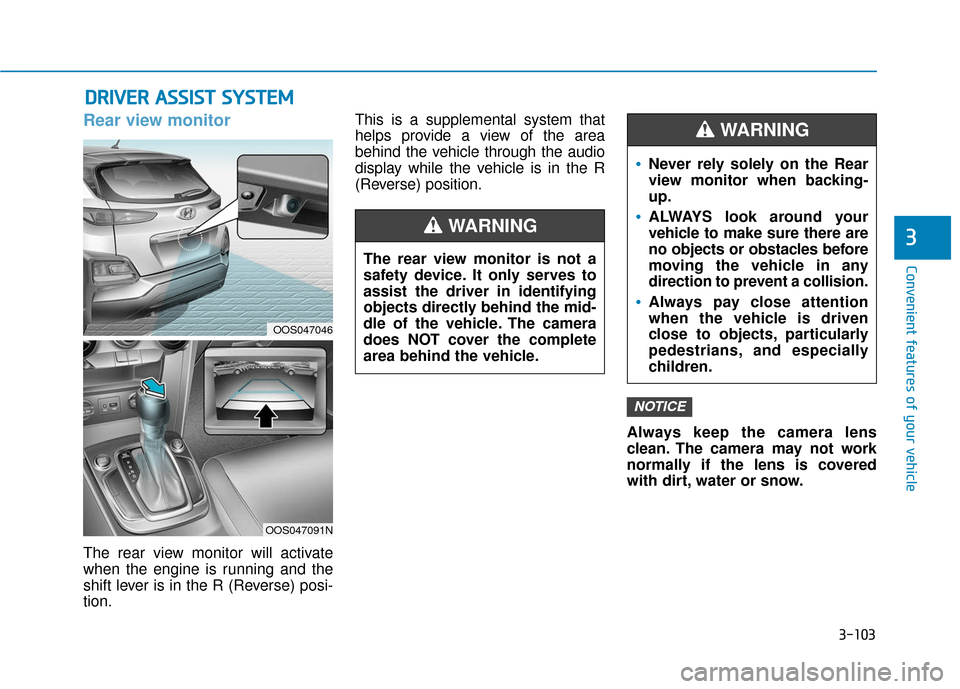
Rear view monitor
The rear view monitor will activate
when the engine is running and the
shift lever is in the R (Reverse) posi-
tion.This is a supplemental system that
helps provide a view of the area
behind the vehicle through the audio
display while the vehicle is in the R
(Reverse) position.
Always keep the camera lens
clean. The camera may not work
normally if the lens is covered
with dirt, water or snow.
NOTICE
D DR
RI
IV
V E
ER
R
A
A S
SS
SI
IS
S T
T
S
S Y
Y S
ST
T E
EM
M
The rear view monitor is not a
safety device. It only serves to
assist the driver in identifying
objects directly behind the mid-
dle of the vehicle. The camera
does NOT cover the complete
area behind the vehicle.
WARNING
Never rely solely on the Rear
view monitor when backing-
up.
ALWAYS look around your
vehicle to make sure there are
no objects or obstacles before
moving the vehicle in any
direction to prevent a collision.
Always pay close attention
when the vehicle is driven
close to objects, particularly
pedestrians, and especially
children.
WARNING
OOS047046
OOS047091N
Page 201 of 485
3-117
Convenient features of your vehicle
3
Automatic Temperature
Control Mode
The Automatic Climate Control
System is controlled by setting the
desired temperature.
1. Press the AUTO button (3).
The modes, fan speeds, air intake
and air-conditioning will be controlled
automatically by the temperature set-
ting you select.
2. Turn the temperature control knob(1) to the desired temperature. If
the temperature is set to the low-
est setting (Lo), the air condition-
ing system will operate continu-
ously. After the interior has cooled
sufficiently, adjust the knob to a
higher temperature set point
whenever possible.
To turn the automatic operation off,
select any button of the following: - Mode selection button
- Front windshield defroster button(Press the button one more time
to deselect the front windshield
defroster function. The 'AUTO'
sign will illuminate on the infor-
mation display once again.)
- Fan speed control button The selected function will be con-
trolled manually while other functions
operate automatically.
For your convenience and to improve
the efficiency of the climate control,
use the AUTO button and set the
temperature to 73°F (23°C).
To change the temperature unit from
°F to °C or °C to °F:
Press and hold the AUTO and OFF
buttons on the climate control unit for
3 seconds.
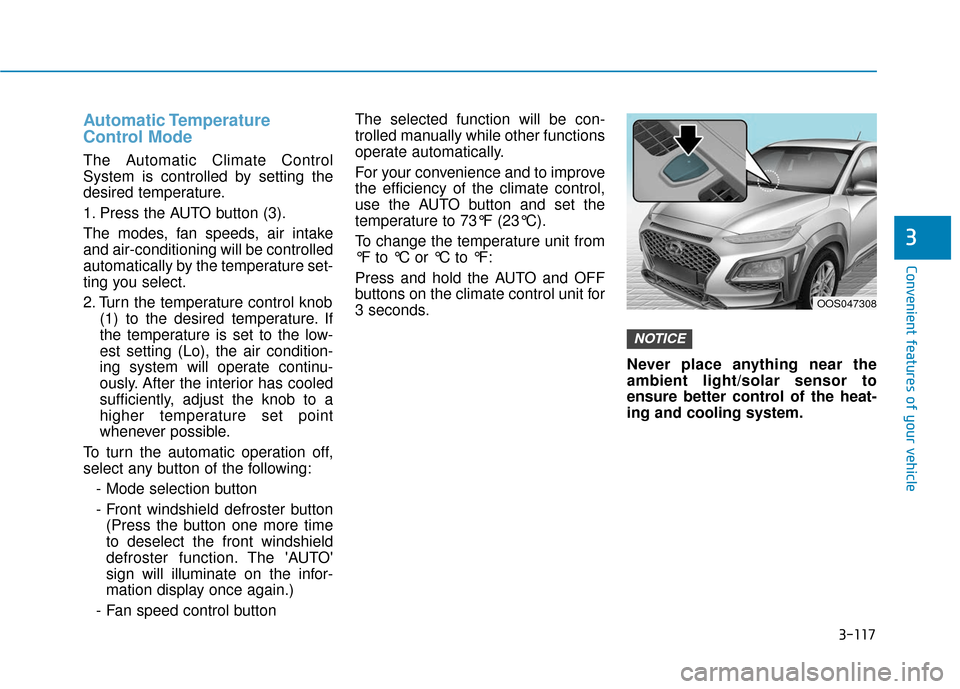
Never place anything near the
ambient light/solar sensor to
ensure better control of the heat-
ing and cooling system.
NOTICE
OOS047308