Page 25 of 526

2-7
Safety system of your vehicle
Manual adjustment
Forward and rearward adjustment
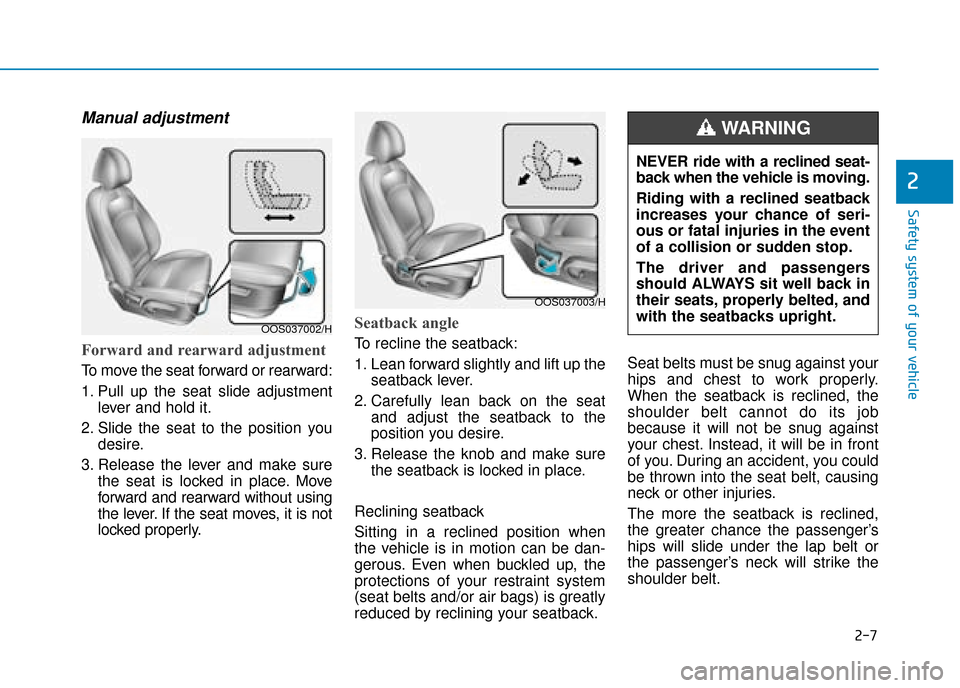
To move the seat forward or rearward:
1. Pull up the seat slide adjustmentlever and hold it.
2. Slide the seat to the position you desire.
3. Release the lever and make sure the seat is locked in place. Move
forward and rearward without using
the lever. If the seat moves, it is not
locked properly.
Seatback angle
To recline the seatback:
1. Lean forward slightly and lift up theseatback lever.
2. Carefully lean back on the seat and adjust the seatback to the
position you desire.
3. Release the knob and make sure the seatback is locked in place.
Reclining seatback
Sitting in a reclined position when
the vehicle is in motion can be dan-
gerous. Even when buckled up, the
protections of your restraint system
(seat belts and/or air bags) is greatly
reduced by reclining your seatback. Seat belts must be snug against your
hips and chest to work properly.
When the seatback is reclined, the
shoulder belt cannot do its job
because it will not be snug against
your chest. Instead, it will be in front
of you. During an accident, you could
be thrown into the seat belt, causing
neck or other injuries.
The more the seatback is reclined,
the greater chance the passenger’s
hips will slide under the lap belt or
the passenger’s neck will strike the
shoulder belt.
2
OOS037002/H
OOS037003/H
NEVER ride with a reclined seat-
back when the vehicle is moving.
Riding with a reclined seatback
increases your chance of seri-
ous or fatal injuries in the event
of a collision or sudden stop.
The driver and passengers
should ALWAYS sit well back in
their seats, properly belted, and
with the seatbacks upright.
WARNING
Page 26 of 526
2-8
Safety system of your vehicle
Seat cushion height (if equipped)
To change the height of the seat
cushion:
Push down the lever several times,to lower the seat cushion.
Pull up the lever several times, to raise the seat cushion.
Power adjustment
To prevent damage to the seats:
Always stop adjusting the seatswhen the seat has been adjust-
ed as far forward or rearward as
possible.
Do not adjust the seats longer than necessary when the engine
is turned off. This may result in
unnecessary battery drain.
Do not operate two or more seats at the same time. This may result
in an electrical malfunction.Forward and rearward adjustment
To move the seat forward or rearward:
1. Push the control switch forward or rearward.
2. Release the switch once the seat reaches the desired position.
NOTICE
OOS037004/H
NEVER allow children in the
vehicle unattended. The power
seats are operable when the
engine is turned off.
WARNING
OOS037005/H
Page 33 of 526
2-15
Safety system of your vehicle
2
Front seat head restraints
The driver’s and front passenger’s
seats are equipped with adjustable
head restraints for the passengers
safety and comfort.
Adjusting the height up and down
To raise the head restraint:
1. Pull it up to the desired position(1).
To lower the head restraint:
1. Push and hold the release button (2) on the head restraint support.
2. Lower the head restraint to the desired position (3).
Forward and rearward adjustment
(if equipped)
The head restraint may be adjusted
forward to 3 different positions by
pulling the head restraint forward to
the desired detent. To adjust the
head restraint to it’s furthest rear-
wards position, pull it fully forward to
the farthest position and release it.
OPDE036068
OOS037061OOS037010
Page 44 of 526

2-26
Height adjustment
You can adjust the height of the
shoulder belt anchor to one of the
four different positions for maximum
comfort and safety.
The shoulder portion should be
adjusted so it lies across your chest
and midway over your shoulder near-
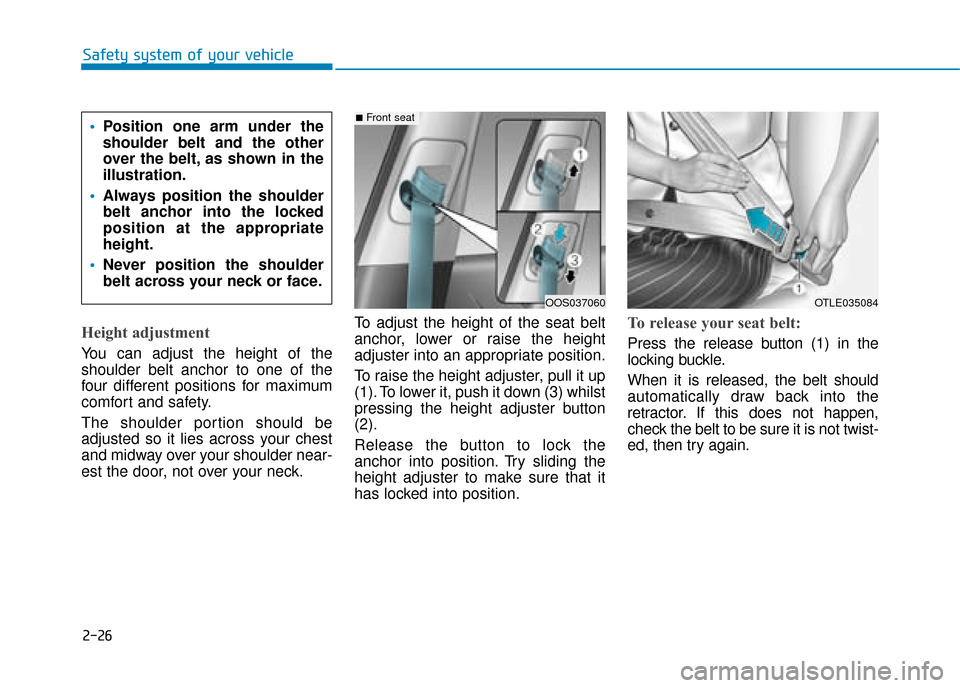
est the door, not over your neck.To adjust the height of the seat belt
anchor, lower or raise the height
adjuster into an appropriate position.
To raise the height adjuster, pull it up
(1). To lower it, push it down (3) whilst
pressing the height adjuster button
(2).
Release the button to lock the
anchor into position. Try sliding the
height adjuster to make sure that it
has locked into position.
To release your seat belt:
Press the release button (1) in the
locking buckle.
When it is released, the belt should
automatically draw back into the
retractor. If this does not happen,
check the belt to be sure it is not twist-
ed, then try again.
Safety system of your vehicle
Position one arm under the
shoulder belt and the other
over the belt, as shown in the
illustration.
Always position the shoulder
belt anchor into the locked
position at the appropriate
height.
Never position the shoulder
belt across your neck or face.
OOS037060
■Front seat
OTLE035084
Page 101 of 526

3-19
Convenient features of your vehicle
3
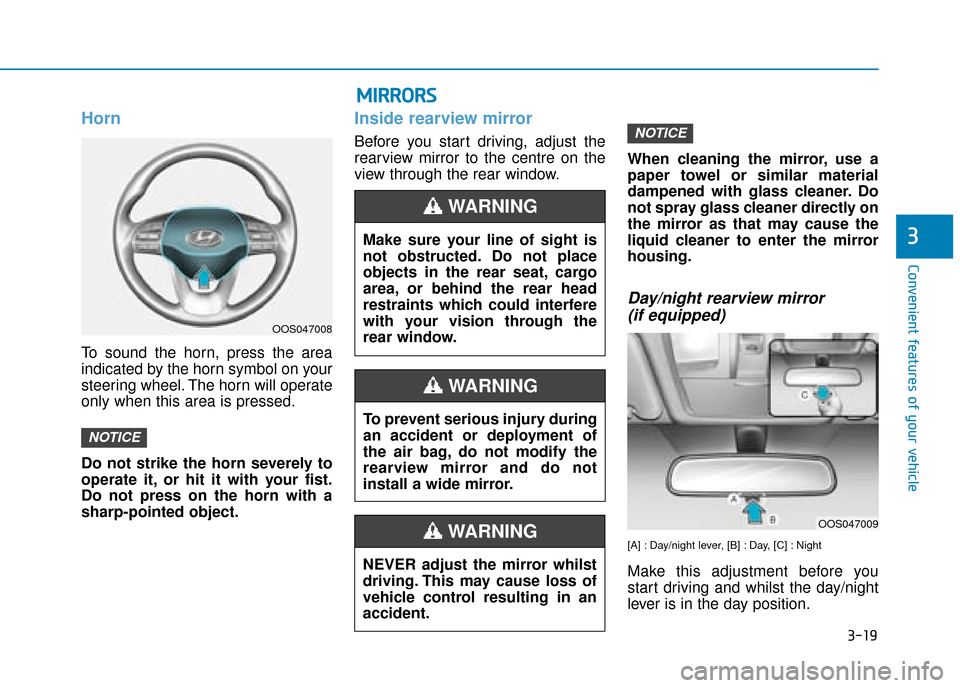
Horn
To sound the horn, press the area
indicated by the horn symbol on your
steering wheel. The horn will operate
only when this area is pressed.
Do not strike the horn severely to
operate it, or hit it with your fist.
Do not press on the horn with a
sharp-pointed object.
Inside rearview mirror
Before you start driving, adjust the
rearview mirror to the centre on the
view through the rear window.When cleaning the mirror, use a
paper towel or similar material
dampened with glass cleaner. Do
not spray glass cleaner directly on
the mirror as that may cause the
liquid cleaner to enter the mirror
housing.
Day/night rearview mirror
(if equipped)
[A] : Day/night lever, [B] : Day, [C] : Night
Make this adjustment before you
start driving and whilst the day/night
lever is in the day position.
NOTICE
NOTICE
OOS047008
NEVER adjust the mirror whilst
driving. This may cause loss of
vehicle control resulting in an
accident.
WARNING
M M I
IR
R R
RO
O R
RS
S
Make sure your line of sight is
not obstructed. Do not place
objects in the rear seat, cargo
area, or behind the rear head
restraints which could interfere
with your vision through the
rear window.
WARNING
To prevent serious injury during
an accident or deployment of
the air bag, do not modify the
rearview mirror and do not
install a wide mirror.
WARNING
OOS047009