2019 Hyundai Kona radio
[x] Cancel search: radioPage 230 of 526
4-8
Multimedia System
Feature of Your Audio
Head unit
❈The actual features in the vehicle
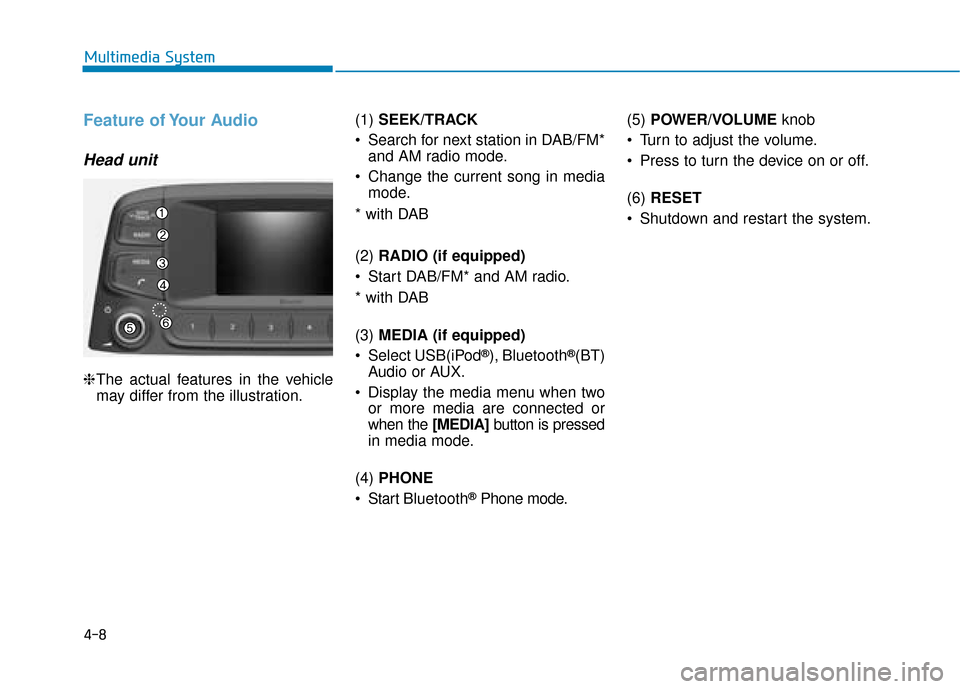
may differ from the illustration. (1)
SEEK/TRACK
Search for next station in DAB/FM* and AM radio mode.
Change the current song in media mode.
* with DAB
(2) RADIO (if equipped)
Start DAB/FM* and AM radio.
* with DAB
(3) MEDIA (if equipped)
Select USB(iPod
®), Bluetooth®(BT)
Audio or AUX.
Display the media menu when two or more media are connected or
when the [MEDIA] button is pressed
in media mode.
(4) PHONE
Start Bluetooth
®Phone mode. (5)
POWER/VOLUME knob
Turn to adjust the volume.
Press to turn the device on or off.
(6) RESET
Shutdown and restart the system.
Page 231 of 526
4-9
Multimedia System
4
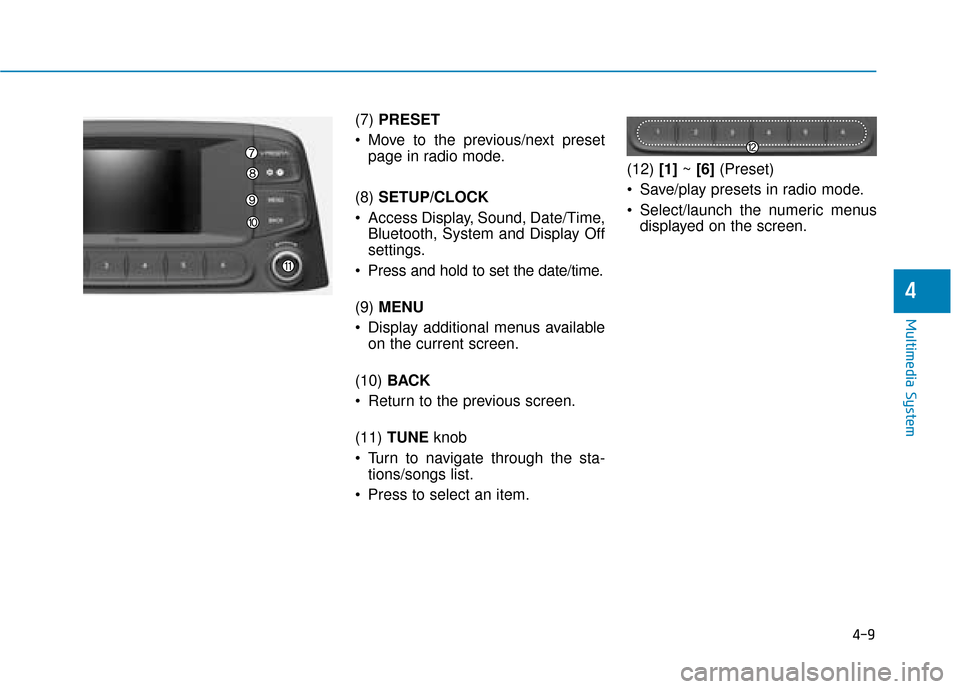
(7) PRESET
Move to the previous/next preset page in radio mode.
(8) SETUP/CLOCK
Access Display, Sound, Date/Time, Bluetooth, System and Display Off
settings.
Press and hold to set the date/time.
(9) MENU
Display additional menus available on the current screen.
(10) BACK
Return to the previous screen.
(11) TUNE knob
Turn to navigate through the sta- tions/songs list.
Press to select an item. (12)
[1]~ [6] (Preset)
Save/play presets in radio mode.
Select/launch the numeric menus displayed on the screen.
Page 232 of 526
4-10
Multimedia System
Steering wheel remote control
❈The actual features in the vehicle
may differ from the illustration.
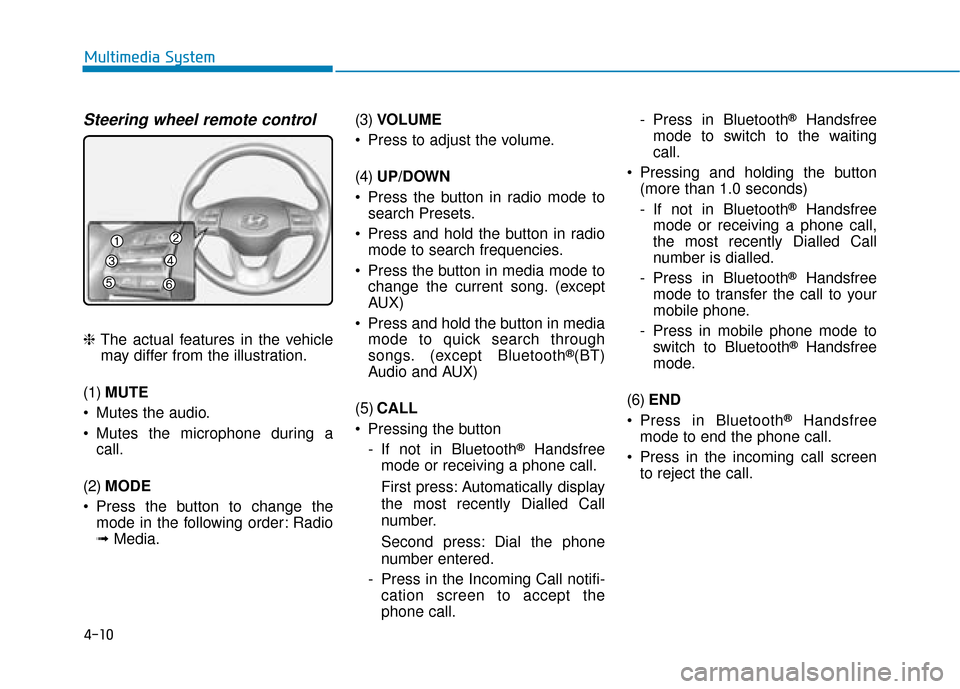
(1) MUTE
Mutes the audio.
Mutes the microphone during a call.
(2) MODE
Press the button to change the mode in the following order: Radio
➟ Media. (3)
VOLUME
Press to adjust the volume.
(4) UP/DOWN
Press the button in radio mode to search Presets.
Press and hold the button in radio mode to search frequencies.
Press the button in media mode to change the current song. (except
AUX)
Press and hold the button in media mode to quick search through
songs. (except Bluetooth®(BT)
Audio and AUX)
(5) CALL
Pressing the button - If not in Bluetooth
®Handsfree
mode or receiving a phone call.
First press: Automatically display
the most recently Dialled Call
number.
Second press: Dial the phone
number entered.
- Press in the Incoming Call notifi- cation screen to accept the
phone call. - Press in Bluetooth
®Handsfree
mode to switch to the waiting
call.
Pressing and holding the button (more than 1.0 seconds)
- If not in Bluetooth
®Handsfree
mode or receiving a phone call,
the most recently Dialled Call
number is dialled.
- Press in Bluetooth
®Handsfree
mode to transfer the call to your
mobile phone.
- Press in mobile phone mode to switch to Bluetooth
®Handsfree
mode.
(6) END
Press in Bluetooth
®Handsfree
mode to end the phone call.
Press in the incoming call screen to reject the call.
Page 235 of 526
![Hyundai Kona 2019 Owners Manual - RHD (UK, Australia) 4-13
Multimedia System
4
Radio
FM/AM (with RDS, if equipped)
Switching between FM and AM
Press the [RADIO]button on the
audio system to switch between
FM and AM.
Searching stations
Press the [SEEK/TR](/manual-img/35/16225/w960_16225-234.png "Hyundai Kona 2019 Owners Manual - RHD (UK, Australia) 4-13
Multimedia System
4
Radio
FM/AM (with RDS, if equipped)
Switching between FM and AM
Press the [RADIO]button on the
audio system to switch between
FM and AM.
Searching stations
Press the [SEEK/TR")
4-13
Multimedia System
4
Radio
FM/AM (with RDS, if equipped)
Switching between FM and AM
Press the [RADIO]button on the
audio system to switch between
FM and AM.
Searching stations
Press the [SEEK/TRACK] button to
search stations.
Presets
Save up to 36 frequently used sta-
tions.
1. Press and hold the desired slot from 1 through 36. This saves the
current station in the selected slot.
If the slot is empty, simply press-
ing saves the station to the slot.
2. To save in slots numbered 7 or higher, press the [PRESET]but-
ton to move to the previous/next
page and save.
To listen to a preset station, press
the desired station in the list.
Menu
Press the [MENU] button, and select
the desired function.
List: A list of all available stations in the current location of the vehicle is
displayed. Press the desired sta-
tion.
Traffic Announcement (TA): Enable or disable Traffic Announcements.
Scan: All available stations are played for five seconds each.
Sound Settings: Audio sound set- tings can be changed.
DAB/FM (with DAB)
Switching between DAB/FM and AM
Press the [RADIO] button on the
audio system to switch between
DAB/FM and AM.
Searching stations
Press the [SEEK/TRACK] button to
search stations.
Page 378 of 526
6-6
What to do in an emergencyTo prevent damage to your vehi-
cle:
Only use a 12-volt power supply(battery or jumper system) to
jump start your vehicle.
Do not attempt to jump start your vehicle by push-starting.
Information
An inappropriately disposedbattery can be harmful to the
environment and human
health. Dispose of the battery
according to your local law(s)
or regulations.
Jump starting procedure
1. Position the vehicles close enough that the jumper cables will reach,
but do not allow the vehicles to
touch.
2. Avoid fans or any moving parts in the engine compartment at all
times, even when the vehicles are
turned off.
3. Turn off all electrical devices such as radios, lights, air conditioning,
etc. Put the vehicles in P (Park, for
dual clutch transmission vehicle)
or neutral (for manual transmis-
sion vehicle), and set the parking
brakes. Turn both vehicles OFF.
i
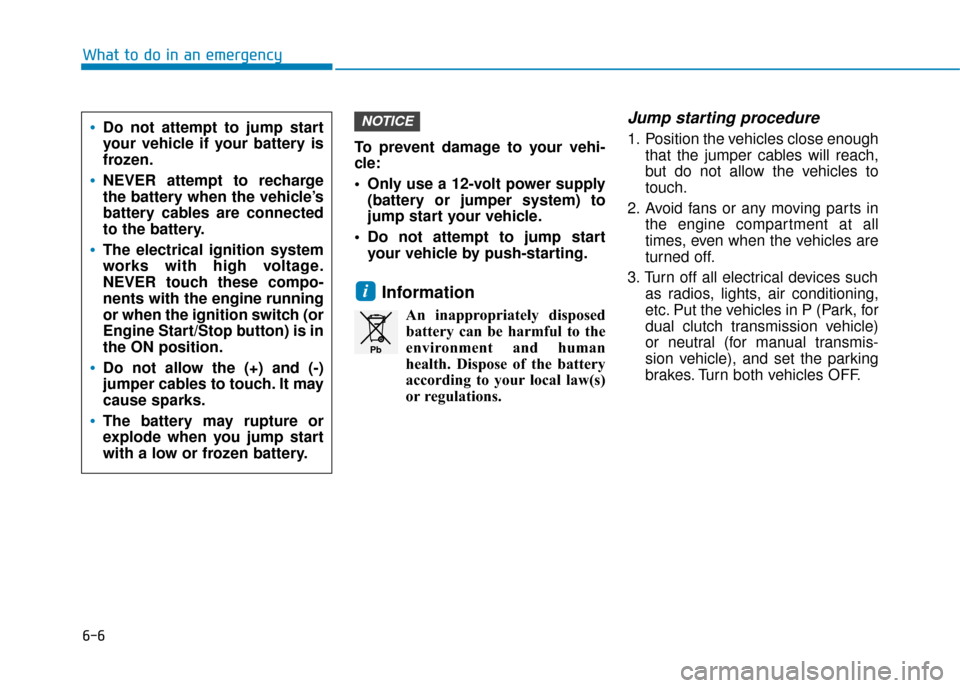
NOTICEDo not attempt to jump start
your vehicle if your battery is
frozen.
NEVER attempt to recharge
the battery when the vehicle’s
battery cables are connected
to the battery.
The electrical ignition system
works with high voltage.
NEVER touch these compo-
nents with the engine running
or when the ignition switch (or
Engine Start/Stop button) is in
the ON position.
Do not allow the (+) and (-)
jumper cables to touch. It may
cause sparks.
The battery may rupture or
explode when you jump start
with a low or frozen battery.
Pb
Page 383 of 526
6-11
What to do in an emergency
6
TPMS (Tyre Pressure
Monitoring System)
malfunction indicator
The TPMS malfunction indicator will
illuminate after it blinks for approxi-
mately one minute when there is a
problem with the Tyre Pressure
Monitoring System. If the system is
able to correctly detect an under
inflation warning at the same time as
system failure then it will illuminate
the TPMS malfunction indicator.
We recommend that the system be
checked by a HYUNDAI authorised
repairer.
In winter or cold weather, the
low tyre pressure telltale may
be illuminated if the tyre pres-
sure was adjusted to the recom-
mended tyre inflation pressure
in warm weather. It does not
mean your TPMS is malfunc-
tioning because the decreased
temperature leads to a propor-
tional lowering of tyre pressure.
When you drive your vehicle
from a warm area to a cold area
or from a cold area to a warm
area, or the outside temperature
is greatly higher or lower, you
should check the tyre inflation
pressure and adjust the tyres to
the recommended tyre inflation
pressure.
CAUTION
Low pressure damage
Significantly low tyre pressure
makes the vehicle unstable and
can contribute to loss of vehicle
control and increased braking
distances.
Continued driving on low pres-
sure tyres can cause the tyres
to overheat and fail.
WARNING
The TPMS malfunction indica-
tor may be illuminated if the
vehicle is moving around
electric power supply cables
or radios transmitter such as
at police stations, government
and public offices, broadcast-
ing stations, military installa-
tions, airports, or transmitting
towers, etc. This can interfere
with normal operation of the
Tyre Pressure Monitoring
System (TPMS).
The TPMS malfunction indica-
tor may illuminate if snow
chains or some separately
purchased devices such as
notebook computers, mobile
charger, remote starter, navi-
gation etc. are used in the
vehicle. This can interfere with
normal operation of the Tyre
Pressure Monitoring System
(TPMS).
CAUTION
Page 390 of 526
6-18
What to do in an emergency
Changing a tyre with TPMS
If you have a flat tyre, the low Tyre
Pressure and Position telltales will
come on. We recommend that the
system be checked by a HYUNDAI
authorised repairer.
Each wheel is equipped with a tyre
pressure sensor mounted inside the
tyre behind the valve stem. You must
use TPMS specific wheels. It is rec-
ommended that you have your tyres
serviced by a HYUNDAI authorised
repairer.If you drive the vehicle for about 10
minutes at speeds above 15.5 mph
(25 km/h) after replacing the low
pressure tyre with the spare tyre, the
following will happen:
The TPMS malfunction indicator
may blink for approximately 1 minute
and then remain continuously illumi-
nated because the TPMS sensor is
not mounted on the spare wheel.
You may not be able identify a tyre
with low pressure by simply looking
at it. Always use a good quality tyre
pressure gauge to measure the
tyre's inflation pressure. Please note
that a tyre that is hot (from being
driven) will have a higher pressure
measurement than a tyre that is cold.
Allow the tyre to cool before measur-
ing the inflation pressure. Always be
sure the tyre is cold before inflating
to the recommended pressure.
A cold tyre means the vehicle has
been sitting for 3 hours and driven for
less than 1 mile (1.6 km) in that 3
hour period.
The TPMS malfunction indicator
may blink for approximately 1
minute and then remain contin-
uously illuminated if the vehicle
is moving around electric power
supply cables or radios trans-
mitter such as at police stations,
government and public offices,
broadcasting stations, military
installations, airports, or trans-
mitting towers, etc. This can
interfere with normal operation
of the Tyre Pressure Monitoring
System (TPMS).
The TPMS malfunction indica-
tor may blink for approximately
1 minute and then remain con-
tinuously illuminated if snow
chains are used or some sepa-
rate electronic devices such as
notebook computer, mobile
charger, remote starter or nav-
igation etc., are used in the
vehicle.
This can interfere with normal
operation of the Tyre Pressure
Monitoring System (TPMS).
CAUTION
It is recommended that you do
not use a puncture-repairing
agent not approved by
HYUNDAI dealer to repair
and/or inflate a low pressure
tire. Tire sealant not approved
by HYUNDAI dealer may dam-
age the tyre pressure sensor.
CAUTION
Page 525 of 526
8-13
8
Specifications & Consumer information
A compressor label informs you the
type of compressor your vehicle is
equipped with such as model, suppli-
er part number, production number,
refrigerant (1) and refrigerant oil (2).The refrigerant label provides infor-
mation such as refrigerant type and
amount.
The label is located on the underside
of the bonnet.
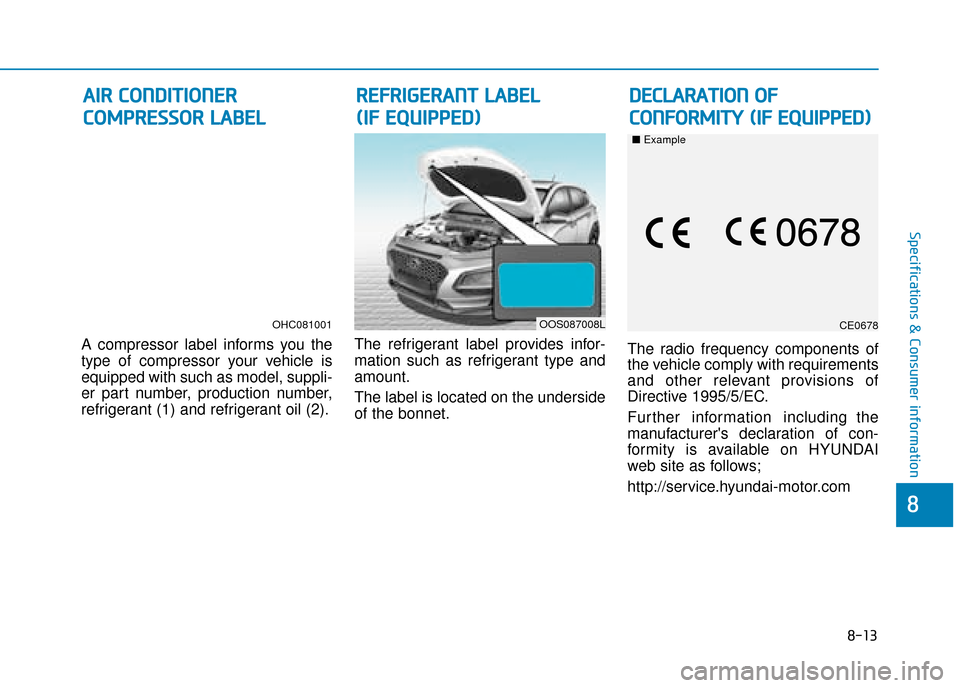
The radio frequency components of
the vehicle comply with requirements
and other relevant provisions of
Directive 1995/5/EC.
Further information including the
manufacturer's declaration of con-
formity is available on HYUNDAI
web site as follows;
http://service.hyundai-motor.com
R R
E
EF
FR
R I
IG
G E
ER
R A
A N
N T
T
L
L A
A B
BE
EL
L
(
( I
IF
F
E
E Q
Q U
UI
IP
P P
PE
ED
D )
)
OOS087008LCE0678
■
Example
D
DE
EC
CL
LA
A R
RA
A T
TI
IO
O N
N
O
O F
F
C
C O
O N
NF
FO
O R
RM
M I
IT
T Y
Y
(
( I
IF
F
E
E Q
Q U
UI
IP
P P
PE
ED
D )
)
A
A
I
IR
R
C
C O
O N
ND
DI
IT
T I
IO
O N
NE
ER
R
C
C O
O M
M P
PR
R E
ES
SS
SO
O R
R
L
L A
A B
BE
EL
L
OHC081001