2019 Hyundai Kona EV ignition
[x] Cancel search: ignitionPage 72 of 540

2-57
Safety system of your vehicle
2
Noise and smoke from inflatingair bag
When the air bags inflate, they make
a loud noise and may produce
smoke and powder in the air inside of
the vehicle. This is normal and is a
result of the ignition of the air bag
inflator. After the air bag inflates, you
may feel substantial discomfort in
breathing because of the contact of
your chest with both the seat belt and
the air bag, as well as from breathing
the smoke and powder. The powder
may aggravate asthma for some
people. If you experience breathing
problems after an air bag deploy-
ment, seek medical attention imme-
diately.
Though the smoke and powder are
nontoxic, they may cause irritation to
the skin, eyes, nose, throat, etc. If
this is the case, wash and rinse with
cold water immediately and seek
medical attention if the symptoms
persist.
Occupant Classification
System (OCS)
Your vehicle is equipped with an
Occupant Classification System
(OCS) in the front passenger's seat.
After an air bag inflates, take
the following precautions:
Open your windows and doors
as soon as possible after
impact to reduce prolonged
exposure to the smoke and
powder released by the inflat-
ing air bag.
Do not touch the air bag stor-
age area's internal compo-
nents immediately after an air
bag has inflated. The parts
that come into contact with an
inflating air bag may be very
hot.
Always wash exposed skin
areas thoroughly with cold
and mild soap.
Always have an authorized
HYUNDAI dealer replace the
air bag immediately after
deployment. Air bags are
designed to be used only
once.
WARNING
OOSEV038014N
Page 105 of 540

3-21
Convenient features of your vehicle
3
Z-Nav™ Compass Display
The NVS™ Mirror in your vehicle is
also equipped with a Z-Nav™
Compass that shows the vehicle
Compass heading in the Display
Window using the 8 basic cardinal
headings (N, NE, E, SE, etc.).
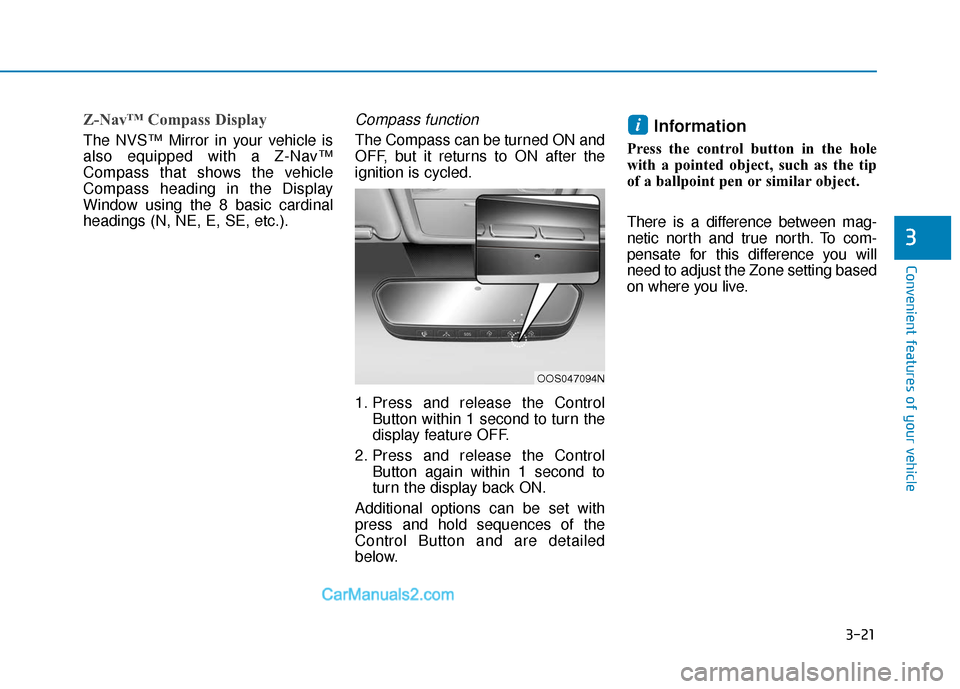
Compass function
The Compass can be turned ON and
OFF, but it returns to ON after the
ignition is cycled.
1. Press and release the ControlButton within 1 second to turn the
display feature OFF.
2. Press and release the Control Button again within 1 second to
turn the display back ON.
Additional options can be set with
press and hold sequences of the
Control Button and are detailed
below.Information
Press the control button in the hole
with a pointed object, such as the tip
of a ballpoint pen or similar object.
There is a difference between mag-
netic north and true north. To com-
pensate for this difference you will
need to adjust the Zone setting based
on where you live.
i
OOS047094N
Page 108 of 540

3-24
Convenient features of your vehicle
Programming HomeLink®
Please note the following:
When programming a garage dooropener, it is advised to park the
vehicle outside of the garage.
It is recommended that a new bat- tery be placed in the hand-held
transmitter of the device being pro-
grammed to HomeLink
®for quicker
training and accurate transmission
of the radio-frequency signal.
Some vehicles may require the ignition switch to be placed in the
ACC (or "Accessories") position for
programming and/or operation of
HomeLink
®.
In the event that there are still pro- gramming difficulties or questions
after following the programming
steps listed below, contact
HomeLink
®at: www.homelink.com,
www.youtube.com/HomeLinkGentex
or by calling 1-800-355-3515.
Programming
To program most devices, follow
these instructions:
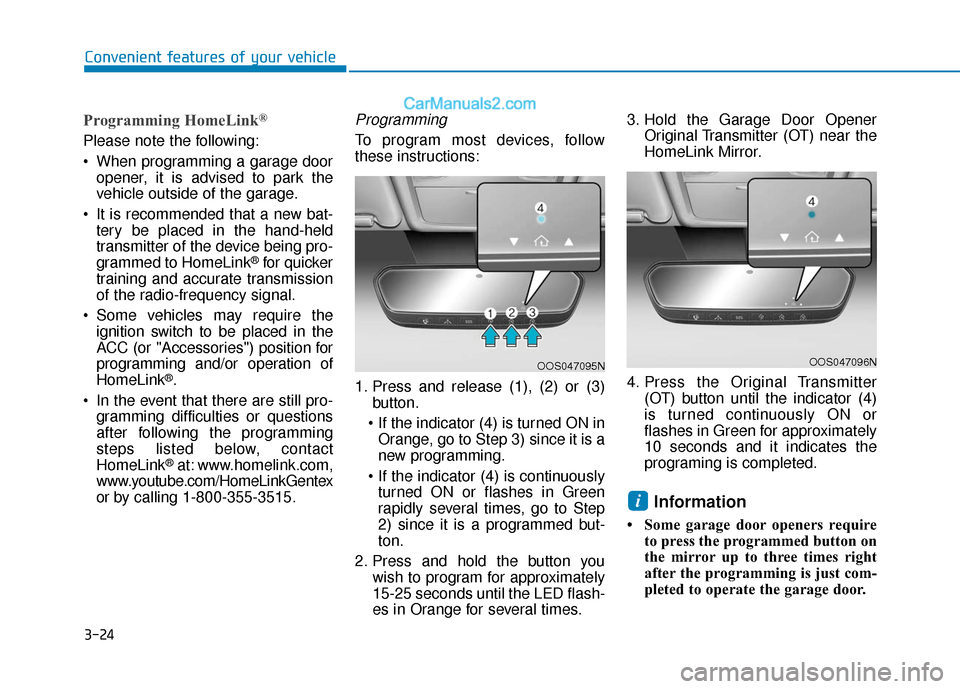
1. Press and release (1), (2) or (3) button.
Orange, go to Step 3) since it is a
new programming.
turned ON or flashes in Green
rapidly several times, go to Step
2) since it is a programmed but-
ton.
2. Press and hold the button you wish to program for approximately
15-25 seconds until the LED flash-
es in Orange for several times. 3. Hold the Garage Door Opener
Original Transmitter (OT) near the
HomeLink Mirror.
4. Press the Original Transmitter (OT) button until the indicator (4)
is turned continuously ON or
flashes in Green for approximately
10 seconds and it indicates the
programing is completed.
Information
• Some garage door openers requireto press the programmed button on
the mirror up to three times right
after the programming is just com-
pleted to operate the garage door.
i
OOS047095NOOS047096N
Page 140 of 540

3-56
Convenient features of your vehicle
Electric PowerSteering (EPS)Warning Light
This warning light illuminates:
When the POWER button is in the
ON position.
- It illuminates for approximately 3seconds and then goes off.
When there is a malfunction with the EPS.
If this occurs, have your vehicle
inspected by an authorized
HYUNDAI dealer.
Charging SystemWarning Light(for 12-volt battery)
This warning light illuminates:
If the 12V auxiliary battery voltage
is low, or if a system malfunction
related to the low voltage DC
charging system (LDC) occurs.
If this warning light comes on while driving, or if this warning light
comes on and off intermittently
with ignition cycle, have the vehicle
inspected by an authorized
HYUNDAI dealer.
If the vehicle is driven continuously
with the Charging System Warning
Light on, the 12V auxiliary battery
may discharge. If this occurs, vehi-
cle operation may be limited.
Low Tire PressureWarning Light
This warning light illuminates:
When the POWER button is in the
ON position.
- It illuminates for approximately 3seconds and then goes off.
When one or more of your tires are significantly underinflated (The
location of each underinflated tire
is displayed on the LCD display).
For more details, refer to "Tire
Pressure Monitoring System
(TPMS)" in chapter 6.
Page 175 of 540

3-91
Convenient features of your vehicle
3
Consumption info display
Average Energy Consumption (1)
The average energy consumptionis calculated by the total driving
distance and the high voltage bat-
tery usage since the last average
energy consumption reset.
The average energy consumption can be reset both manually and
automatically.
Manual reset
To clear the average energy con-
sumption manually, press the OK but-
ton on the steering wheel for more
than 1 second when the average
energy consumption is displayed.
Automatic reset
To change the automatic reset for the
Energy Consumption display, select
one of the options in the User Settings
mode on the LCD display.
- After ignition: The average energyconsumption will reset automati-
cally after the vehicle has been
turned OFF for at least four hours.
- After recharging: The average energy consumption will reset
automatically after the vehicle has
been charged more that 10%.
Information
The vehicle must be driven for a min-
imum of 0.19 miles (300 meters) since
the last ignition key cycle before the
average energy consumption will be
recalculated.
Instant Energy Consumption (2)
The instantaneous energy con-sumption is displayed according to
the bar graph in the LCD display
while driving.
i
OOSEV048135N
Page 176 of 540

3-92
Convenient features of your vehicle
Accumulated Info display
This display shows the accumulated
trip distance (1), the average energy
consumption (2), and the total driv-
ing time (3).
The information is accumulated start-
ing from the last reset.
To reset the details, press and hold
the OK button when viewing the
Accumulated driving info.The accumulated driving information
will continue to be counted while the
vehicle is in the ready ( ) mode
(for example, when the vehicle is in
traffic or stopped at a stop light).
Information
The vehicle must be driven for a min-
imum of 0.19 miles (300 meters) since
the last ignition key cycle before the
average accumulated driving infor-
mation is recalculated.
Drive Info display
This display shows the trip distance
(1), the average energy consumption
(2), and the total driving time (3).
The information is combined for each
ignition cycle. However, when the
vehicle has been OFF for 4 hours or
longer the Drive Info screen will reset.
The driving information will continue to
be counted while the vehicle is in the
ready ( ) mode (for example, when
the vehicle is in traffic or stopped at a
stop light).
i
OOSEV048136NOOSEV048137N
Page 177 of 540

3-93
Convenient features of your vehicle
3
Information
The vehicle must be driven for a mini-
mum of 0.19 miles (300 meters) since the
last ignition key cycle before the driving
information is recalculated.
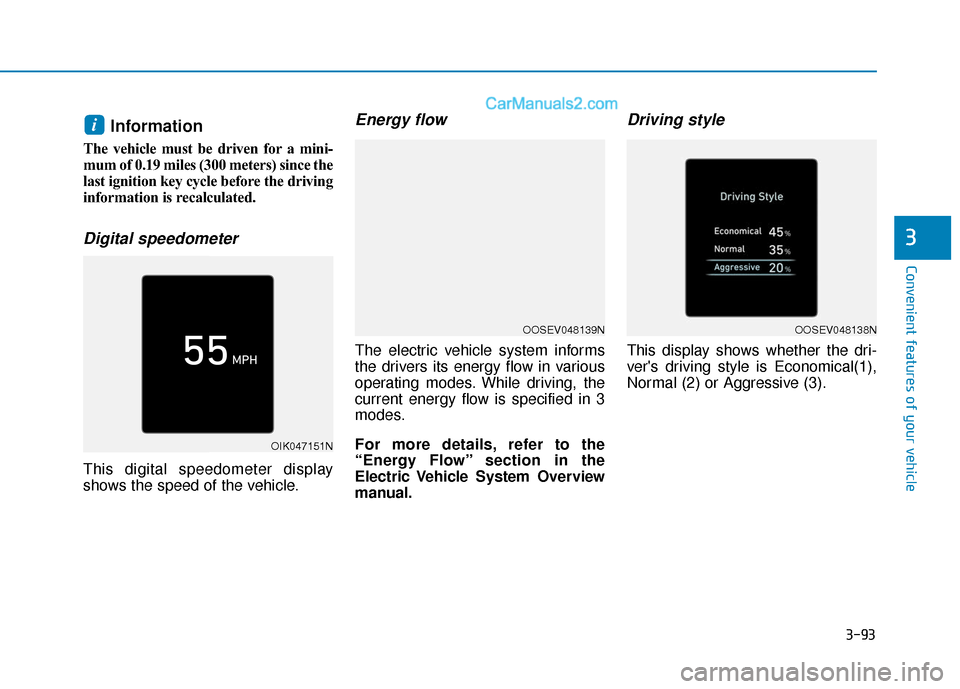
Digital speedometer
This digital speedometer display
shows the speed of the vehicle.
Energy flow
The electric vehicle system informs
the drivers its energy flow in various
operating modes. While driving, the
current energy flow is specified in 3
modes.
For more details, refer to the
“Energy Flow” section in the
Electric Vehicle System Overview
manual.
Driving style
This display shows whether the dri-
ver's driving style is Economical(1),
Normal (2) or Aggressive (3).
i
OIK047151N
OOSEV048139NOOSEV048138N
Page 310 of 540

5-77
Driving your vehicle
5
The color of indicator will
change depending on the
condition of LKA.
- White : Sensor does not detect
lane markers or vehicle
speed is under 40 mph (64
km/h).
- Green : Sensor detects lane mark- ers and the system is able
to control vehicle steering.
Information
If the indicator (white) is activated
from the previous ignition cycle, the
system will turn ON without any addi-
tional control. If you press the LKA
switch again, the indicator on the clus-
ter goes off.
LKA activation
To see the LKA screen on the LCDdisplay in the cluster, select Assist
mode ( ). For more information,
refer to "LCD Display Modes" in
chapter 3. If vehicle speed is over 40 mph (64
km/h) and the system detects lane
markers, the color changes from
gray to white.
Both lane markers must be detect- ed for the system to fully activate.
iOOSEV058055L
The Lane Keeping Assist (LKA)
system is a system to prevent
the driver from leaving the lane.
However, the driver should not
solely rely on the system but
always check the road condi-
tions when driving.
WARNING
■Lane marker
undetected■Lane marker
detected
OOSEV058055L/OOSEV058056N