2019 Hyundai Kona EV charging
[x] Cancel search: chargingPage 170 of 540

3-86
Convenient features of your vehicle
ItemsExplanation
Wireless Charging SystemTo activate or deactivate the wireless charging system in the front seat.
For more details, refer to "Wireless Charging System" in this chapter.
Wiper/Lights DisplayTo activate or deactivate the Wiper/Light mode.
When activated, the LCD display shows the selected Wiper/Light mode whenever you change
the mode.
Auto Rear Wiper (in R)To activate or deactivate the rear wiper while the vehicle is in reverse with the front wiper ON.
Gear Position Pop-upTo activate or deactivate the gear position pop-up.
When activated, the gear position will be displayed in the cluster LCD display.
Smart Regeneration
To activate or deactivate the Smart Regeneration function. When activated, the regeneration
level is adjusted automatically according to the current driving situation.
For more details, refer to “Smart Regeneration System” in chapter 5.
Icy Road WarningTo activate or deactivate the Icy Road Warning function.
6. Convenience
❈The information provided may differ depending on which functions are applicable to your vehicle.
Page 172 of 540

3-88
Convenient features of your vehicle
ItemsExplanation
Aux. Battery Saver+
To activate or deactivate the Aux. Battery Saver+ function.
When activated, the high voltage battery is used to keep the 12V battery charged.
For more details, refer to the “Aux. Battery Saver+” section in the Electric Vehicle System
Overview manual.
Energy Consumption Reset
The average fuel economy will not reset automatically whenever recharging.
The average fuel economy will reset automatically whenever it has passed 4hours after turning OFF the vehicle.
The average fuel economy will reset automatically when recharging.
For more details, refer to "Trip Computer" in this chapter.
Speedometer Subscale
To activate or deactivate the display of a secondary speedometer.
When activated, it is displayed underneath the main speedometer.
For more details, refer to “Gauges and Meters" in this chapter.
Energy Consumption Unit
To select the fuel economy unit.
Temperature Unit
To select the temperature unit.
Tire Pressure Unit
To select the tire pressure unit.
8. Other
Page 175 of 540

3-91
Convenient features of your vehicle
3
Consumption info display
Average Energy Consumption (1)
The average energy consumptionis calculated by the total driving
distance and the high voltage bat-
tery usage since the last average
energy consumption reset.
The average energy consumption can be reset both manually and
automatically.
Manual reset
To clear the average energy con-
sumption manually, press the OK but-
ton on the steering wheel for more
than 1 second when the average
energy consumption is displayed.
Automatic reset
To change the automatic reset for the
Energy Consumption display, select
one of the options in the User Settings
mode on the LCD display.
- After ignition: The average energyconsumption will reset automati-
cally after the vehicle has been
turned OFF for at least four hours.
- After recharging: The average energy consumption will reset
automatically after the vehicle has
been charged more that 10%.
Information
The vehicle must be driven for a min-
imum of 0.19 miles (300 meters) since
the last ignition key cycle before the
average energy consumption will be
recalculated.
Instant Energy Consumption (2)
The instantaneous energy con-sumption is displayed according to
the bar graph in the LCD display
while driving.
i
OOSEV048135N
Page 202 of 540

3-118
Convenient features of your vehicle
Automatic Temperature
Control Mode
The Automatic Climate Control
System is controlled by setting the
desired temperature.
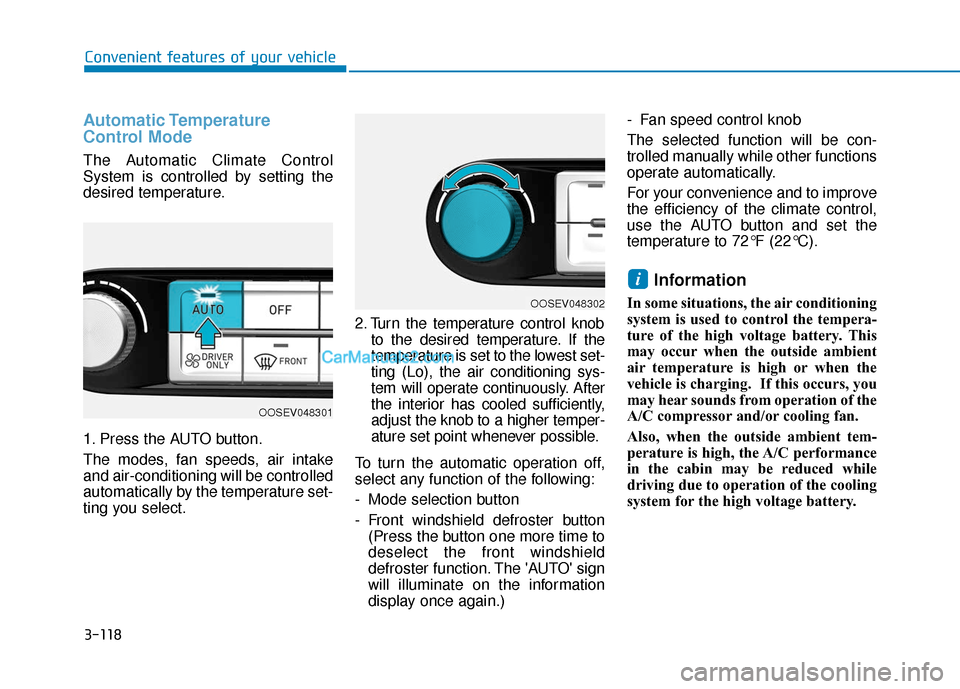
1. Press the AUTO button.
The modes, fan speeds, air intake
and air-conditioning will be controlled
automatically by the temperature set-
ting you select.2. Turn the temperature control knob
to the desired temperature. If the
temperature is set to the lowest set-
ting (Lo), the air conditioning sys-
tem will operate continuously. After
the interior has cooled sufficiently,
adjust the knob to a higher temper-
ature set point whenever possible.
To turn the automatic operation off,
select any function of the following:
- Mode selection button
- Front windshield defroster button (Press the button one more time to
deselect the front windshield
defroster function. The 'AUTO' sign
will illuminate on the information
display once again.) - Fan speed control knob
The selected function will be con-
trolled manually while other functions
operate automatically.
For your convenience and to improve
the efficiency of the climate control,
use the AUTO button and set the
temperature to 72°F (22°C).
Information
In some situations, the air conditioning
system is used to control the tempera-
ture of the high voltage battery. This
may occur when the outside ambient
air temperature is high or when the
vehicle is charging. If this occurs, you
may hear sounds from operation of the
A/C compressor and/or cooling fan.
Also, when the outside ambient tem-
perature is high, the A/C performance
in the cabin may be reduced while
driving due to operation of the cooling
system for the high voltage battery.
i
OOSEV048302
OOSEV048301
Page 224 of 540

3-140
Convenient features of your vehicle
USB Charger
The USB charger is designed to
recharge batteries of small size elec-
trical devices using a USB cable.
The electrical devices can be
recharged when the vehicle is ON.
Insert the USB charger into the USB
port, and re-charge a smart phone or
a tablet PC.
The battery charging state may be
monitored on the electrical device.
Disconnect the USB cable from the
USB port after use. A smart phone or a tablet PC may
get warmer during the re-charging
process. It does not indicate any
malfunction with the charging sys-
tem.
A smart phone or a tablet PC, which adopts a different re-charg-
ing method, may not be properly
re-charged. In this case, use an
exclusive charger of your device.
The charging terminal is only to recharge a device. Do not use the
charging terminal either to turn ON
an audio or to play media.
Wireless Cellular Phone
Charging System (if equipped)
[A]: Indicator light, [B]: Charging pad
On certain models, the vehicle
comes equipped with a wireless cel-
lular phone charger.
To use the wireless cellular phone
charging system, open the front con-
sole cover by pressing the lower part
of the cover (1).
After use, to close the cover, slightly
pull down the cover.
The system is available when all
doors are closed, and when the vehi-
cle is ON.
OOSEV048033
OOSEV048034L
Page 225 of 540

3-141
Convenient features of your vehicle
3
To charge a cellular phone
The wireless cellular phone charging
system charges only the Qi-enabled
cellular phones ( ). Read the label
on the cellular phone accessory
cover or visit your cellular phone
manufacturer's website to check
whether your cellular phone supports
the Qi technology.
The wireless charging process starts
when you put a Qi-enabled cellular
phone on the wireless charging unit.
1. Remove other items, including thesmart key, from the wireless charg-
ing unit. If not, the wireless charg-
ing process may be interrupted.
Place the cellular phone on the
center of the charging pad ( ).
2. The indicator light is orange when the cellular phone is charging. The
indicator light turns green when
phone charging is complete.
3. You can turn ON or OFF the wire- less charging function in the user
settings mode on the instrument
cluster. For further information,
refer to the "LCD Display Modes"
in this chapter. If your cellular phone is not charging:
- Slightly change the position of the
cellular phone on the charging
pad.
- Make sure the indicator light is orange.
The indicator light will blink orange for
10 seconds if there is a malfunction in
the wireless charging system.
In this case, temporarily stop the
charging process, and re-attempt to
charge your cellular phone again.
The system warns you with a mes-
sage on the LCD display if the cellular
phone is still on the wireless charging
unit after the vehicle is turned OFF
and the front door is opened.
Information
For some manufacturers' cellular
phones, the system may not warn you
even though the cellular phone is left
on the wireless charging unit. This is
due to the particular characteristic of
the cellular phone and not a malfunc-
tion of the wireless charging. The wireless cellular phone
charging system may not sup-
port certain cellular phones,
which are not verified for the Qi
specification ( ).
When placing your cellular phone on the charging mat,
position the phone in the middle
of the mat for optimal charging
performance. If your cell phone
is off to the side, the charging
rate may be less and in some
cases the cell phone may experi-
ence higher heat conduction.
In some cases, the wireless charging may stop temporarily
when the Smart Key is used,
either when starting the vehicle or
locking/unlocking the doors, etc.
When charging certain cellular phones, the charging indicator
may not change to green when
the cell phone is fully charged.
NOTICE
i
Page 226 of 540

3-142
Convenient features of your vehicle
The wireless charging processmay temporarily stop, when tem-
perature abnormally increases
inside the wireless cellular phone
charging system. Stop the charg-
ing cellular phone and wait until
temperature falls to a certain level.
The wireless charging process may temporarily stop when there
is any metallic item, such as a
coin, between the wireless cellular
phone charging system and the
cellular phone.
When charging some cellular phones with a self-protection fea-
ture, the wireless charging speed
may decrease and the wireless
charging may stop.
If the cellular phone has a thick cover, the wireless charging may
not be possible.
If the cell phone is not completely contacting the charging pad, wire-
less charging may not operate
properly.
Some magnetic items like credit cards, phone cards or rail tickets
may be damaged if left with the
cellular phone during the charging
process. When any cellular phone without a
wireless charging function or a
metallic object is placed on the
charging pad, a small noise may
sound. This small sound is due to
the vehicle discerning compatibil-
ity of the object placed on the
charging pad. It does not affect
your vehicle or the cellular phone
in any way.
Information
If the POWER button is in the OFF
position, the charging also stops.
Information
This device complies with part 15 of
the FCC Rules.
Operation is subject to the following
two conditions:
1. This device may not cause harmful interference, and
2. This device must accept any inter- ference received, including inter-
ference that may cause undesired
operation.
Clock
Vehicles with Audio system
Select the [SETUP] button on the
audio system ➟ Select [Date/Time].
Set time: Set the time displayed on the audio screen.
Time format: Choose between 12- hour and 24-hour time formats.
Vehicles with Navigation system
Select the Settings menu on the
Navigation system ➟Select
[Date/Time].
GPS time: Displays time according to the received GNSS time.
24-hour: Switches to 12 hour or 24 hour.
i
i
Do not attempt to adjust the
clock while driving. Doing so
may result in distracted driving
which may lead to an accident
involving personal injury or
death.
WARNING
Page 241 of 540

5-8
Driving your vehicleButton Position Action Notice
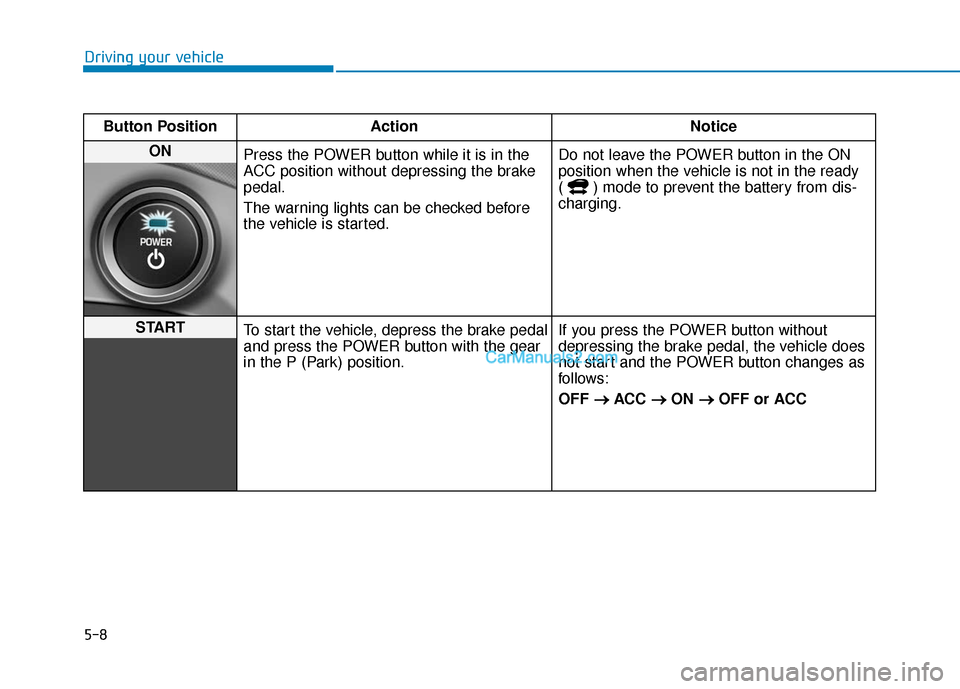
ON Press the POWER button while it is in the
ACC position without depressing the brake
pedal.
The warning lights can be checked before
the vehicle is started. Do not leave the POWER button in the ON
position when the vehicle is not in the ready
( ) mode to prevent the battery from dis-
charging.
START
To start the vehicle, depress the brake pedal
and press the POWER button with the gear
in the P (Park) position. If you press the POWER button without
depressing the brake pedal, the vehicle does
not start and the POWER button changes as
follows:
OFF
→ →
ACC →
→
ON →
→
OFF or ACC