2019 Hyundai Kona EV change light
[x] Cancel search: change lightPage 187 of 540

3-103
Convenient features of your vehicle
3
The lane change signals will blink 3,
5 or 7 times.
You can activate or deactivate the
One Touch Turn Signal function or
choose the number of blinks (3, 5, or
7) from the User Settings mode in
the LCD display.
For more details, refer to the "LCD
Display" section in this chapter.
Battery saver function
The purpose of this feature is to pre-
vent the battery from being dis-
charged. The system automatically
turns off the parking lamp when the
driver turns the vehicle off and opens
the driver-side door.
With this feature, the parking lamps
will turn off automatically if the driver
parks on the side of road at night.
If necessary, to keep the lamps on
when the vehicle is turned off, perform
the following:
1) Open the driver-side door.
2) Turn the parking lamps OFF andON again using the headlamp
switch on the steering column.
Headlamp delay function
If the POWER button is placed in the
ACC position or the OFF position
with the headlamps ON, the head-
lamps (and/or parking lamps) remain
on for about 5 minutes. However, if
the driver’s door is opened and
closed, the headlights are turned off
after 15 seconds. Also, with the vehi-
cle off if the driver's door is opened
and closed, the headlamps (and/or
parking lamps) are turned off after 15
seconds.
The headlamps (and/or parking
lamps) can be turned off by pressing
the lock button on the smart key
twice or turning the light switch to the
OFF or AUTO position.
You can activate or deactivate the
Headlamp Delay function from the
User Settings mode (Light) on the
LCD display.
For more details, refer to the "LCD
Display" section in this chapter. If the driver exits the vehicle
through another door besides the
driver door, the battery saver func-
tion does not operate and the
headlamp delay function does not
turn OFF automatically.
This may cause the battery to dis-
charge. To avoid battery dis-
charge, turn OFF the headlamps
manually from the headlamp
switch before exiting the vehicle.
NOTICE
Page 194 of 540

3-110
Convenient features of your vehicle
When washing the vehicle, set the wiper switch in the OFF posi-
tion to stop the auto wiper oper-
ation. The wiper may operate
and be damaged if the switch is
set in the AUTO mode while
washing the vehicle.
Do not remove the sensor cover located on the upper end of the
passenger side windshield
glass. Damage to system parts
could occur and may not be cov-
ered by your vehicle warranty.
Because of using a photo sen- sor, temporary malfunction
could occur according to sud-
den ambient light change made
by stone and dust while driving.
Front Windshield Washers
In the OFF position, pull the lever
gently toward you to spray washer
fluid on the windshield and to run the
wipers 1-3 cycles. The spray and
wiper operation will continue until
you release the lever. If the washer
does not work, you may need to add
washer fluid to the washer fluid
reservoir.
NOTICE
When the outside temperature
is below freezing, ALWAYS
warm the windshield using the
defroster to help prevent the
washer fluid from freezing on
the windshield and obscuring
your vision which could result
in an accident and serious
injury or death.
WARNING
OTLE045164
Page 211 of 540

3-127
Convenient features of your vehicle
3
Air conditioning
1. Start the engine.
2. Press the air conditioning button.
3. Select the Face Level mode.
4. Set the air intake control toRecirculation mode temporarily to
allow the cabin to cool quickly.
When the desired temperature in
the cabin is reached, change the
air intake control back to Fresh
mode.
5. Adjust the fan speed control and temperature control to maintain
maximum comfort.
When maximum cooling is desired,
set the temperature control to the
MAX A/C position, then set the fan
speed control to the highest setting.
Air conditioning system operation
tips
If the vehicle has been parked in direct sunlight during hot weather,
open the windows for a short time
to let the hot air inside the vehicle
escape.
After sufficient cooling has been achieved, switch back from recircu-
lation mode to fresh mode.
To help decrease the humidity inside the vehicle on rainy or humid
days, operate the air conditioning
system with the windows and sun-
roof closed. It is useful to operate the air condi-
tioning system periodically through-
out the year. Turn on the A/C sys-
tem at least once a month for a few
minutes to maintain system pres-
sure and help optimize A/C per-
formance.
Note that if you operate the air con-
ditioner to cool your vehicle with
the mode set to or when
the outside relative humidity is
high, moisture may collect on the
outer surface of the windshield
glass causing the windshield to fog
up on the outside and limit your
visibility.
If this occurs, use the windshield
wipers to clear the glass. In addi-
tion, change the mode selection
knob or button on the climate con-
trol system to the mode to
redirect cooling air away from the
windshield.
Page 225 of 540

3-141
Convenient features of your vehicle
3
To charge a cellular phone
The wireless cellular phone charging
system charges only the Qi-enabled
cellular phones ( ). Read the label
on the cellular phone accessory
cover or visit your cellular phone
manufacturer's website to check
whether your cellular phone supports
the Qi technology.
The wireless charging process starts
when you put a Qi-enabled cellular
phone on the wireless charging unit.
1. Remove other items, including thesmart key, from the wireless charg-
ing unit. If not, the wireless charg-
ing process may be interrupted.
Place the cellular phone on the
center of the charging pad ( ).
2. The indicator light is orange when the cellular phone is charging. The
indicator light turns green when
phone charging is complete.
3. You can turn ON or OFF the wire- less charging function in the user
settings mode on the instrument
cluster. For further information,
refer to the "LCD Display Modes"
in this chapter. If your cellular phone is not charging:
- Slightly change the position of the
cellular phone on the charging
pad.
- Make sure the indicator light is orange.
The indicator light will blink orange for
10 seconds if there is a malfunction in
the wireless charging system.
In this case, temporarily stop the
charging process, and re-attempt to
charge your cellular phone again.
The system warns you with a mes-
sage on the LCD display if the cellular
phone is still on the wireless charging
unit after the vehicle is turned OFF
and the front door is opened.
Information
For some manufacturers' cellular
phones, the system may not warn you
even though the cellular phone is left
on the wireless charging unit. This is
due to the particular characteristic of
the cellular phone and not a malfunc-
tion of the wireless charging. The wireless cellular phone
charging system may not sup-
port certain cellular phones,
which are not verified for the Qi
specification ( ).
When placing your cellular phone on the charging mat,
position the phone in the middle
of the mat for optimal charging
performance. If your cell phone
is off to the side, the charging
rate may be less and in some
cases the cell phone may experi-
ence higher heat conduction.
In some cases, the wireless charging may stop temporarily
when the Smart Key is used,
either when starting the vehicle or
locking/unlocking the doors, etc.
When charging certain cellular phones, the charging indicator
may not change to green when
the cell phone is fully charged.
NOTICE
i
Page 235 of 540

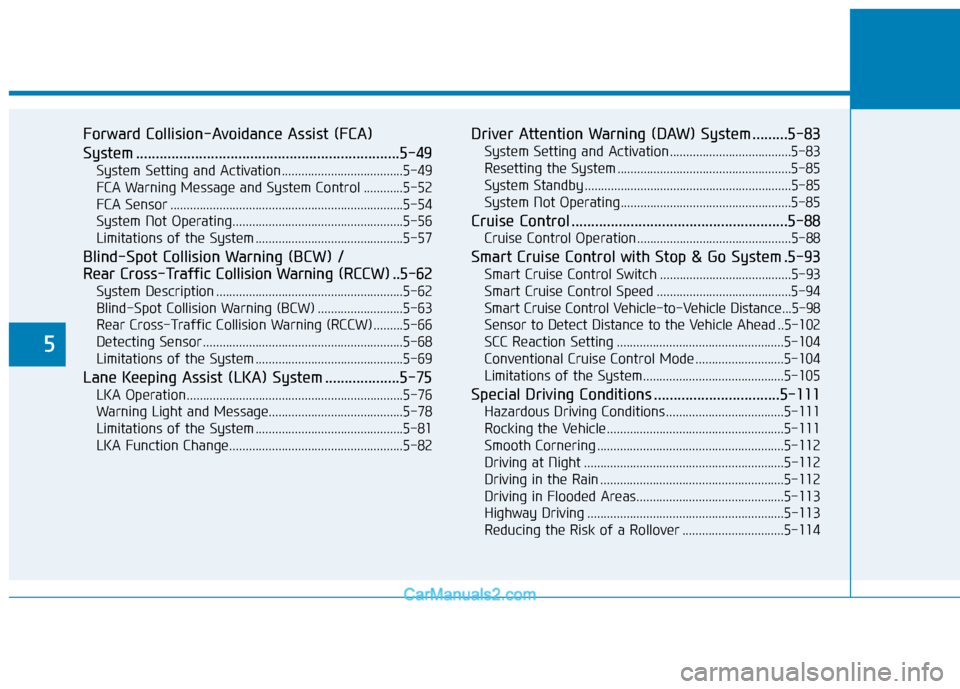
5
Forward Collision-Avoidance Assist (FCA)
System ...................................................................5-49
System Setting and Activation.....................................5-49
FCA Warning Message and System Control ............5-52
FCA Sensor .......................................................................5\
-54
System Not Operating....................................................5-56
Limitations of the System .............................................5-57
Blind-Spot Collision Warning (BCW) /
Rear Cross-Traffic Collision Warning (RCCW) ..5-62
System Description .........................................................5-62
Blind-Spot Collision Warning (BCW) ..........................5-63
Rear Cross-Traffic Collision Warning (RCCW) .........5-66
Detecting Sensor .............................................................5-68
Limitations of the System .............................................5-69
Lane Keeping Assist (LKA) System ...................5-75
LKA Operation..................................................................5-76
Warning Light and Message.........................................5-78
Limitations of the System .............................................5-81
LKA Function Change.....................................................5-82
Driver Attention Warning (DAW) System .........5-83
System Setting and Activation.....................................5-83
Resetting the System .....................................................5-85
System Standby ...............................................................5-85
System Not Operating....................................................5-85
Cruise Control .......................................................5-88
Cruise Control Operation...............................................5-88
Smart Cruise Control with Stop & Go System .5-93
Smart Cruise Control Switch ........................................5-93
Smart Cruise Control Speed .........................................5-94
Smart Cruise Control Vehicle-to-Vehicle Distance...5-98
Sensor to Detect Distance to the Vehicle Ahead ..5-102
SCC Reaction Setting ...................................................5-104
Conventional Cruise Control Mode ...........................5-104
Limitations of the System...........................................5-105
Special Driving Conditions ................................5-111
Hazardous Driving Conditions....................................5-111
Rocking the Vehicle ......................................................5-111
Smooth Cornering .........................................................5-112
Driving at Night .............................................................5-112
Driving in the Rain ........................................................5-112
Driving in Flooded Areas.............................................5-113
Highway Driving ............................................................5-113
Reducing the Risk of a Rollover ...............................5-114
Page 241 of 540

5-8
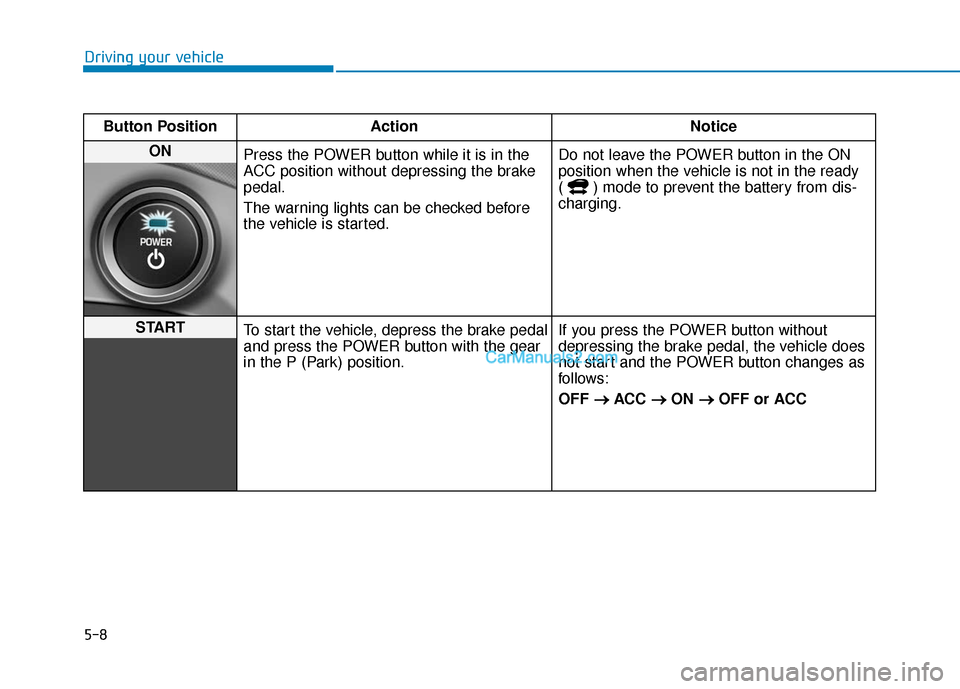
Driving your vehicleButton Position Action Notice
ON Press the POWER button while it is in the
ACC position without depressing the brake
pedal.
The warning lights can be checked before
the vehicle is started. Do not leave the POWER button in the ON
position when the vehicle is not in the ready
( ) mode to prevent the battery from dis-
charging.
START
To start the vehicle, depress the brake pedal
and press the POWER button with the gear
in the P (Park) position. If you press the POWER button without
depressing the brake pedal, the vehicle does
not start and the POWER button changes as
follows:
OFF
→ →
ACC →
→
ON →
→
OFF or ACC
Page 267 of 540

5-34
Driving your vehicle
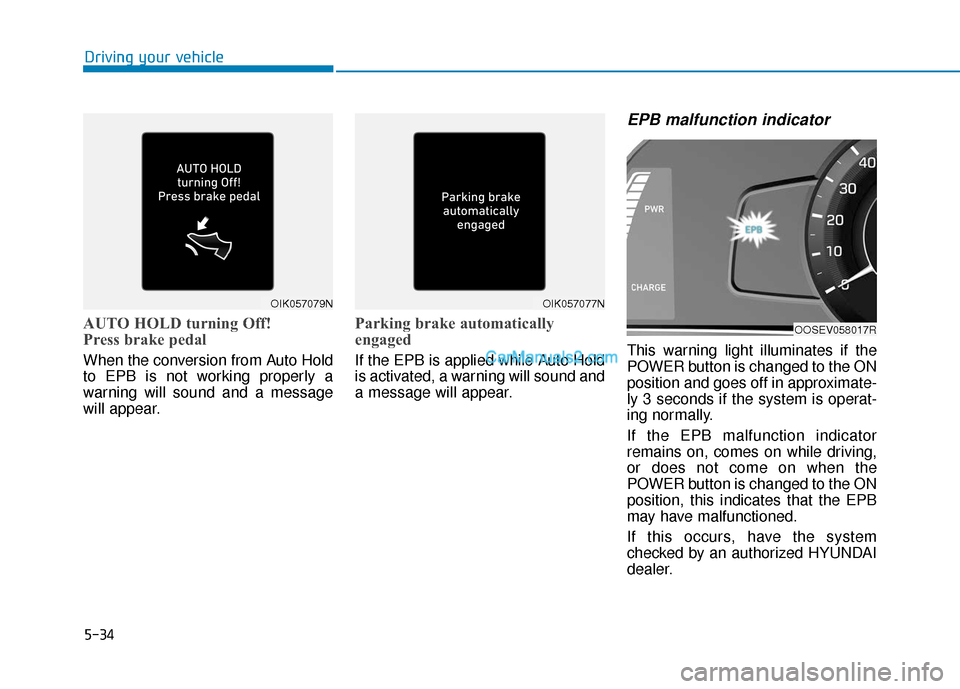
AUTO HOLD turning Off!
Press brake pedal
When the conversion from Auto Hold
to EPB is not working properly a
warning will sound and a message
will appear.
Parking brake automatically
engaged
If the EPB is applied while Auto Hold
is activated, a warning will sound and
a message will appear.
EPB malfunction indicator
This warning light illuminates if the
POWER button is changed to the ON
position and goes off in approximate-
ly 3 seconds if the system is operat-
ing normally.
If the EPB malfunction indicator
remains on, comes on while driving,
or does not come on when the
POWER button is changed to the ON
position, this indicates that the EPB
may have malfunctioned.
If this occurs, have the system
checked by an authorized HYUNDAI
dealer.
OIK057077N
OOSEV058017R
OIK057079N
Page 271 of 540

5-38
Driving your vehicle
Information
• The Auto Hold does not operatewhen:
- The driver's door is opened
- The hood is opened
- The liftgate is opened
- The gear is in P (Park)
- The EPB is applied
• For your safety, the Auto Hold auto- matically switches to EPB when:
- The driver's door is opened
- The hood is opened
- The liftgate is opened
- The vehicle stops for more than 10minutes
- The vehicle stands on a steep slope
- The vehicle moves several times In these cases, the parking brake
warning light comes on, the AUTO
HOLD indicator changes from green
to white, and a warning sounds and
a message will appear to inform you
that EPB has been automatically
engaged. Before driving again,
depress the brake pedal, check the
surrounding area near your vehicle
and release the parking brake man-
ually with the EPB switch.
• While the AUTO HOLD feature is operating, some mechanical noises
may be audible. This is a normal
condition of the AUTO HOLD fea-
ture.
If the AUTO HOLD indicator
changes to yellow, the Auto Hold
is not working properly. Contact
an authorized HYUNDAI dealer. If there is a malfunction with the
driver's door or hood open detec-
tion system, the Auto Hold may
not work properly. Contact an
authorized HYUNDAI dealer.
NOTICE
NOTICE
i
Depress the accelerator pedal
slowly when you start the
vehicle.
For your safety, cancel the
Auto Hold when you drive
downhill, back up the vehicle
or park the vehicle.
WARNING