Page 144 of 599

2-67
Safety system of your vehicle
2
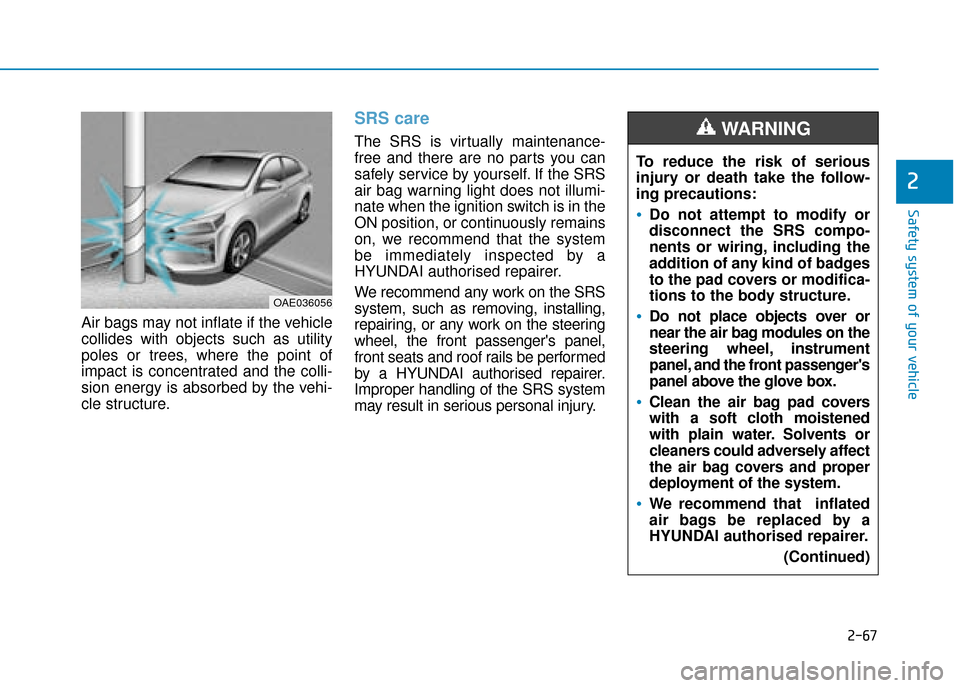
Air bags may not inflate if the vehicle
collides with objects such as utility
poles or trees, where the point of
impact is concentrated and the colli-
sion energy is absorbed by the vehi-
cle structure.
SRS care
The SRS is virtually maintenance-
free and there are no parts you can
safely service by yourself. If the SRS
air bag warning light does not illumi-
nate when the ignition switch is in the
ON position, or continuously remains
on, we recommend that the system
be immediately inspected by a
HYUNDAI authorised repairer.
We recommend any work on the SRS
system, such as removing, installing,
repairing, or any work on the steering
wheel, the front passenger's panel,
front seats and roof rails be performed
by a HYUNDAI authorised repairer.
Improper handling of the SRS system
may result in serious personal injury.
OAE036056
To reduce the risk of serious
injury or death take the follow-
ing precautions:
Do not attempt to modify or
disconnect the SRS compo-
nents or wiring, including the
addition of any kind of badges
to the pad covers or modifica-
tions to the body structure.
Do not place objects over or
near the air bag modules on the
steering wheel, instrument
panel, and the front passenger's
panel above the glove box.
Clean the air bag pad covers
with a soft cloth moistened
with plain water. Solvents or
cleaners could adversely affect
the air bag covers and proper
deployment of the system.
We recommend that inflated
air bags be replaced by a
HYUNDAI authorised repairer.(Continued)
WARNING
Page 164 of 599

3-18
Convenient features of your vehicle
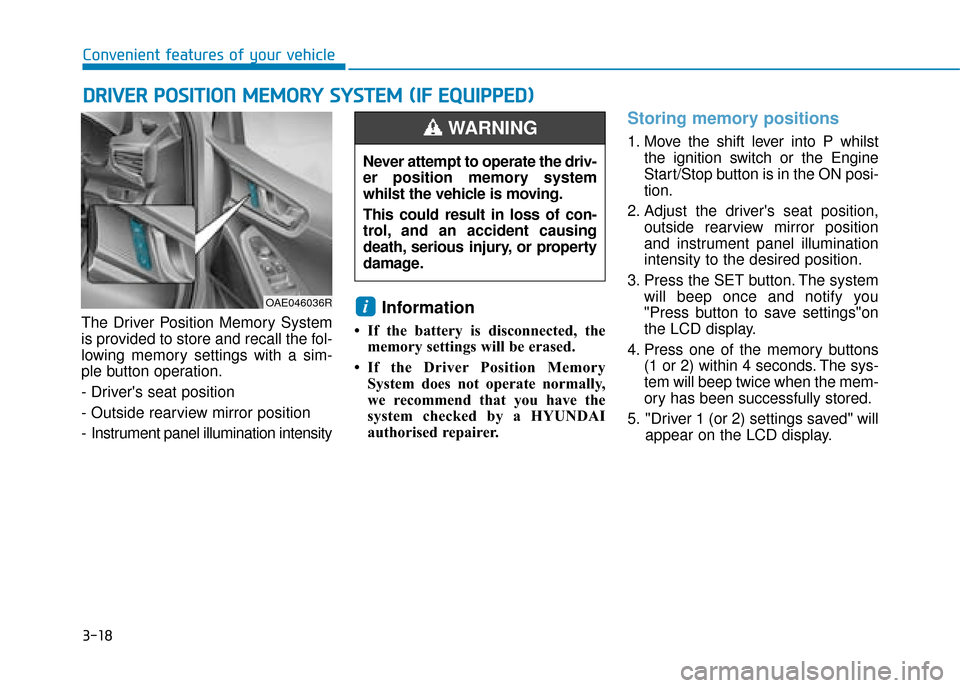
The Driver Position Memory System
is provided to store and recall the fol-
lowing memory settings with a sim-
ple button operation.
- Driver's seat position
- Outside rearview mirror position
- Instrument panel illumination intensity
Information
• If the battery is disconnected, the memory settings will be erased.
• If the Driver Position Memory System does not operate normally,
we recommend that you have the
system checked by a HYUNDAI
authorised repairer.
Storing memory positions
1. Move the shift lever into P whilst the ignition switch or the Engine
Start/Stop button is in the ON posi-
tion.
2. Adjust the driver's seat position, outside rearview mirror position
and instrument panel illumination
intensity to the desired position.
3. Press the SET button. The system will beep once and notify you
"Press button to save settings"on
the LCD display.
4. Press one of the memory buttons (1 or 2) within 4 seconds. The sys-
tem will beep twice when the mem-
ory has been successfully stored.
5. "Driver 1 (or 2) settings saved" will appear on the LCD display.
i
D DR
RI
IV
V E
ER
R
P
P O
O S
SI
IT
T I
IO
O N
N
M
M E
EM
M O
OR
RY
Y
S
S Y
Y S
ST
T E
EM
M
(
( I
IF
F
E
E Q
Q U
UI
IP
P P
PE
ED
D )
)
OAE046036R
Never attempt to operate the driv-
er position memory system
whilst the vehicle is moving.
This could result in loss of con-
trol, and an accident causing
death, serious injury, or property
damage.
WARNING
Page 165 of 599

3-19
Convenient features of your vehicle
3
Recalling memory positions
1. Move the shift lever into P whilst theignition switch or the Engine
Start/Stop button is in the ON posi-
tion.
2. Press the desired memory button (1 or 2). The system will beep
once, then the driver’s seat posi-
tion, outside rearview mirror and
instrument panel illumination will
automatically adjust to the stored
position (if equipped).
3. "Driver 1(or 2) settings is applied" will appear on the LCD display.
Information
• Whilst recalling the "1" memoryposition, pressing the SET or 1 but-
ton temporarily stops the adjust-
ment of the recalled memory posi-
tion. Pressing the 2 button recalls
the "2" memory position.
• Whilst recalling the "2" memory position, pressing the SET or 2 but-
ton temporarily stops the adjust-
ment of the recalled memory posi-
tion. Pressing the 1 button recalls
the "1" memory position.
• Whilst recalling the stored positions, pressing one of the control buttons
for the driver's seat, outside
rearview mirror, or instrument
panel illumination will cause the
movement of that component to stop
and move in the direction that the
control button is pressed.
Easy access function
(if equipped)
The system will move the driver's
seat automatically as follows:
The shift lever is in P
Without smart key system
- It will move the driver’s seat rear-ward when the ignition key is
removed and the driver’s door is
opened.
- It will move the driver’s seat forward when the ignition key is inserted.
With smart key system - It will move the driver’s seat rear-ward when the Engine Start/Stop
button is in the OFF position and
the driver’s door is opened.
- It will move the driver’s seat for- ward when the vehicle is turned
ON or the driver’s door is closed
with the smart key with you.
You can activate or deactivate the
Easy Access Function from the User
Settings Mode on the LCD display.
For more information, refer to
"LCD Display" in this chapter.
i
Page 167 of 599

3-21
Convenient features of your vehicle
3
Tilt steering /
Telescopic steeringInformation
After adjustment, sometimes the lock-
release lever may not lock the steering
wheel.
It is not a malfunction. This occurs
when two gears are not engaged cor-
rectly. In this case, adjust the steering
wheel again and then lock the steering
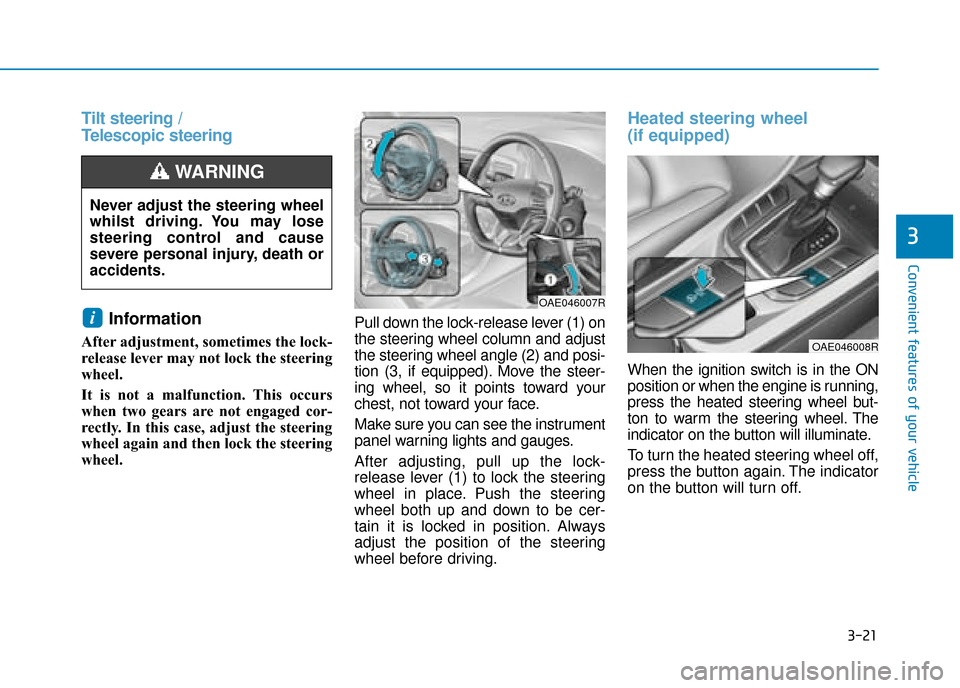
wheel. Pull down the lock-release lever (1) on
the steering wheel column and adjust
the steering wheel angle (2) and posi-
tion (3, if equipped). Move the steer-
ing wheel, so it points toward your
chest, not toward your face.
Make sure you can see the instrument
panel warning lights and gauges.
After adjusting, pull up the lock-
release lever (1) to lock the steering
wheel in place. Push the steering
wheel both up and down to be cer-
tain it is locked in position. Always
adjust the position of the steering
wheel before driving.
Heated steering wheel
(if equipped)
When the ignition switch is in the ON
position or when the engine is running,
press the heated steering wheel but-
ton to warm the steering wheel. The
indicator on the button will illuminate.
To turn the heated steering wheel off,
press the button again. The indicator
on the button will turn off.
i
Never adjust the steering wheel
whilst driving. You may lose
steering control and cause
severe personal injury, death or
accidents.
WARNING
OAE046007R
OAE046008R
Page 192 of 599
3-46
Convenient features of your vehicle
Instrument cluster control
Instrument panel illumination
When the vehicle's position lights or
headlamps are on, press the illumi-
nation control button to adjust the
brightness of the instrument panel
illumination.
When pressing the illumination con-
trol button, the interior switch illumi-
nation intensity is also adjusted. The brightness
of the instrument panel illumination
is displayed.
If the brightness reaches to the maximum or minimum level, a
chime will sound.
Never adjust the instrument
cluster whilst driving. This could
result in loss of control and lead
to an accident that may cause
death, serious injury, or vehicle
damage.
WARNING
OAE046167L/OAE046113L
■
Type B
■
Type A
OAEPH047412R
■Type A
■Type B
Page 254 of 599

3-108
Convenient features of your vehicle
Exterior lights
Lighting control
To operate the lights, turn the knob at
the end of the control lever to one of
the following positions:
(1) O (OFF) position
(2) AUTO light position
(3) Position lamp position
(4) Headlamp position
AUTO light position
When the light switch is in the AUTO
position, the position lamp and head-
lamp will be turned ON or OFF auto-
matically depending on the amount
of light outside the vehicle.Even with the AUTO light feature in
operation, it is recommended to
manually turn ON the lamps when
driving at night or in fog, or when you
enter dark areas, such as tunnels
and parking facilities.
• Do not cover or spill anything on
the sensor (1) located on the
instrument panel.
Do not clean the sensor using a window cleaner, the cleanser
may leave a light film which
could interfere with sensor oper-
ation.
If your vehicle has window tint or other types of metallic coat-
ing on the front windscreen, the
AUTO light system may not work
properly.
NOTICE
L LI
IG
G H
H T
T
OAE046449L
OAE046451L
Page 255 of 599
3-109
Convenient features of your vehicle
3
Position lamp position ( )
The position lamp, license plate lamp
and instrument panel lamp are turned
ON.
Headlamp position ( )
The headlamp, position lamp,
license plate lamp and instrument
panel lamp are turned ON.
Information
The ignition switch must be in the ON
position to turn on the headlamp.
High beam operation
To turn on the high beam headlamp,
push the lever away from you. The
lever will return to its original posi-
tion.
The high beam indicator will light
when the headlamp high beams are
switched on.
i
OAE046469LOAE046467L
OAE046453L
Page 279 of 599
3-133
Convenient features of your vehicle
3
Instrument panel vents
The outlet vents can be opened or
closed ( ) using the vent control
lever.
Also, you can adjust the direction of
air delivery from these vents using
the vent control lever as shown.
Temperature control
Turn the temperature control knob to
set the desired temperature.
Adjusting the driver and passenger
side temperature equally
Press the “SYNC” button to adjustthe driver and passenger side tem-
perature equally.
The passenger side temperature
will be set to the same temperature
as the driver side temperature.
Turn the driver side temperature control knob. The driver and pas-
senger side temperature will be
adjusted equally.
OAE046308R
OAE046309
■ Front
■Rear (if equipped)
OAE046310
■Front passenger’s side■ Driver’s side
OAE046311R