Page 493 of 603
7-48
Maintenance
Low Aspect Ratio Tires
(if equipped)
The aspect ratio is lower than 50 on
low aspect ratio tires.
Because low aspect ratio tires are
optimized for handling and braking,
their sidewall is a little stiffer than a
standard tire. Also low aspect ratio
tires tend to be wider and conse-
quently have a greater contact patch
with the road surface. In some
instances they may generate more
road noise compared with standard
tires.Do not mix bias ply and radial
ply tires under any circum-
stances. This may cause unusu-
al handling characteristics that
may cause loss of vehicle con-
trol resulting in an accident.
WARNING
Because the sidewall of a low
aspect ratio tire is shorter than
a standard tire, the rim of the
wheel and the tire itself is more
easily susceptible to damage.
Use caution when driving and
follow the guidelines below to
help minimize damage to the
wheel and tire:
•When driving on a rough road
or off road, drive cautiously
because tires and wheels may
be damaged. And after driv-
ing, inspect tires and wheels.
When passing over a pothole,
speed bump, manhole, or
curb stone, drive slowly so
that the tires and wheels are
not damaged.
If the tire is subjected to a
severe impact, have the tire
and wheel inspected by an
authorized HYUNDAI dealer.
Inspect the tire condition and
pressure every 1,800 miles
(3,000km).
CAUTION
It is not easy to recognize tire
damage with your own eyes.
But if there is the slightest
hint of tire damage, have the
tire checked or replaced
because the tire damage may
cause air leakage from the
tire.
If the tire is damaged by driv-
ing on a rough road, off road,
pothole, manhole, or curb
stone, it will not be covered by
the warranty.
CAUTION
Page 494 of 603
7-49
7
Maintenance
F
FU
U S
SE
E S
S
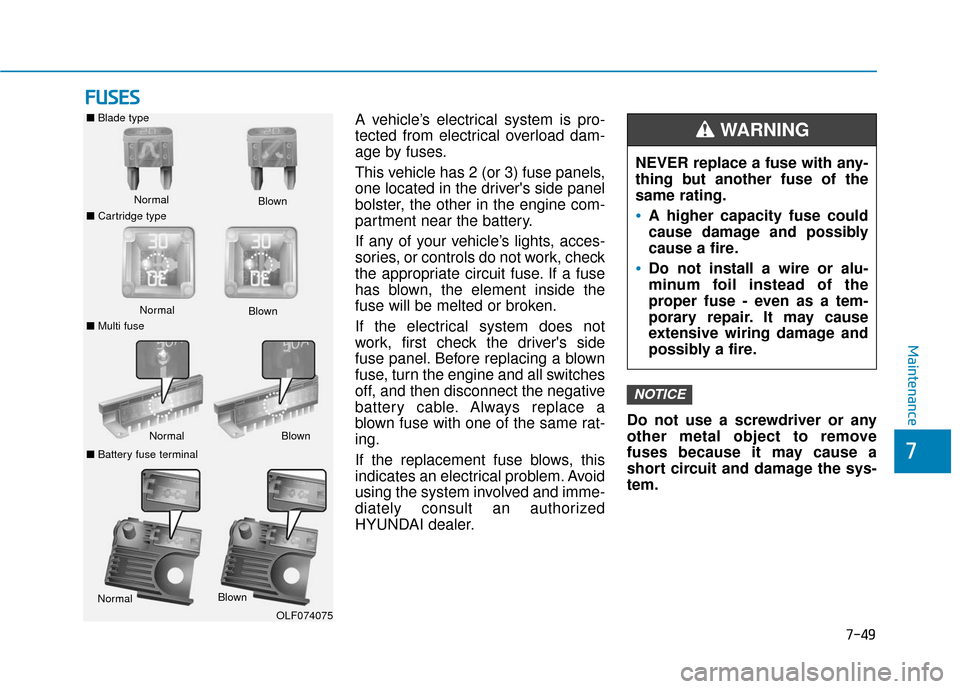
A vehicle’s electrical system is pro-
tected from electrical overload dam-
age by fuses.
This vehicle has 2 (or 3) fuse panels,
one located in the driver's side panel
bolster, the other in the engine com-
partment near the battery.
If any of your vehicle’s lights, acces-
sories, or controls do not work, check
the appropriate circuit fuse. If a fuse
has blown, the element inside the
fuse will be melted or broken.
If the electrical system does not
work, first check the driver's side
fuse panel. Before replacing a blown
fuse, turn the engine and all switches
off, and then disconnect the negative
battery cable. Always replace a
blown fuse with one of the same rat-
ing.
If the replacement fuse blows, this
indicates an electrical problem. Avoid
using the system involved and imme-
diately consult an authorized
HYUNDAI dealer. Do not use a screwdriver or any
other metal object to remove
fuses because it may cause a
short circuit and damage the sys-
tem.
NOTICE
NEVER replace a fuse with any-
thing but another fuse of the
same rating.
A higher capacity fuse could
cause damage and possibly
cause a fire.
Do not install a wire or alu-
minum foil instead of the
proper fuse - even as a tem-
porary repair. It may cause
extensive wiring damage and
possibly a fire.
WARNING ■
Blade type
Normal
■ Cartridge type Blown
Normal
Blown
■ Multi fuse
Normal Blown
■
Battery fuse terminal
Normal Blown
OLF074075
Page 500 of 603
7-55
7
Maintenance
L
LI
IG
G H
H T
T
B
B U
U L
LB
B S
S
Consult an authorized HYUNDAI
dealer to replace most vehicle light
bulbs. It is difficult to replace vehicle
light bulbs because other parts of the
vehicle must be removed before you
can get to the bulb. This is especially
true for removing the headlamp
assembly to get to the bulb(s).
Removing/installing the headlamp
assembly can result in damage to
the vehicle.
Information
After heavy driving rain or washing,
lamps could appear frosty. This condi-
tion is caused by the temperature dif-
ference between the lamp inside and
the outside temperature. This is simi-
lar to the condensation on your win-
dows inside your vehicle when raining
and doesn 't indicate a problem with
your vehicle. If the water leaks into
the lamp bulb circuitry, have your
vehicle checked by an authorized
HYUNDAI dealer.
Headlamp, Parking Lamp, Turn
Signal Lamp and Side Marker
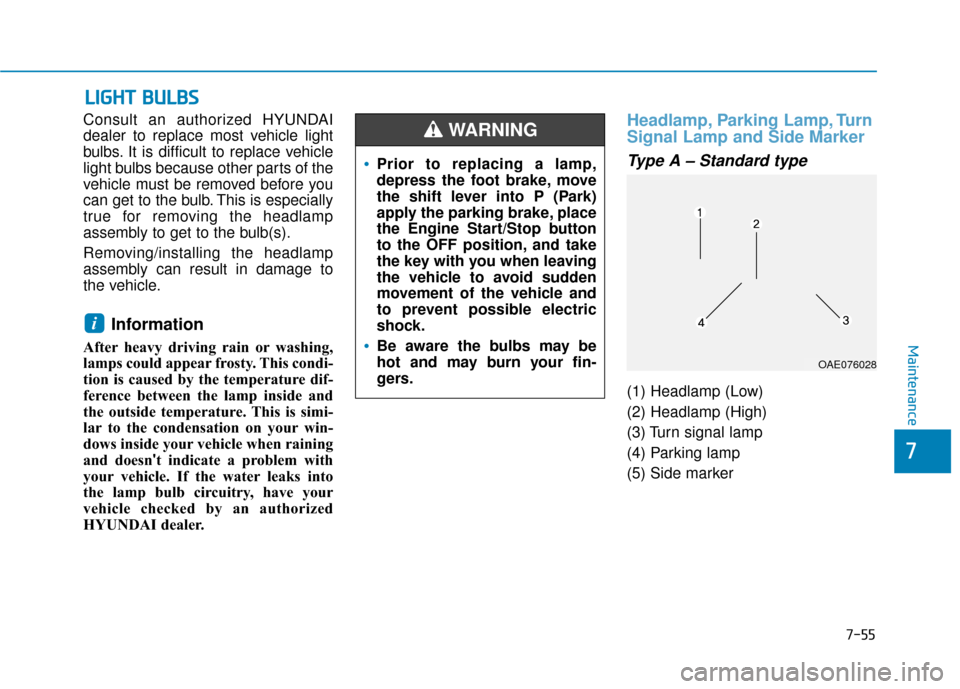
Type A – Standard type
(1) Headlamp (Low)
(2) Headlamp (High)
(3) Turn signal lamp
(4) Parking lamp
(5) Side marker
i
Prior to replacing a lamp,
depress the foot brake, move
the shift lever into P (Park)
apply the parking brake, place
the Engine Start/Stop button
to the OFF position, and take
the key with you when leaving
the vehicle to avoid sudden
movement of the vehicle and
to prevent possible electric
shock.
Be aware the bulbs may be
hot and may burn your fin-
gers.
WARNING
OAE076028
Page 503 of 603
7-58
Maintenance
Side marker
1. Open the hood.
2. Disconnect the negative batterycable.
3. Remove the socket from the assembly by turning the socket
counterclockwise until the tabs on
the socket align with the slots on
the assembly.
4. Remove the bulb from the socket by pulling out the bulb.
5. Insert a new bulb.
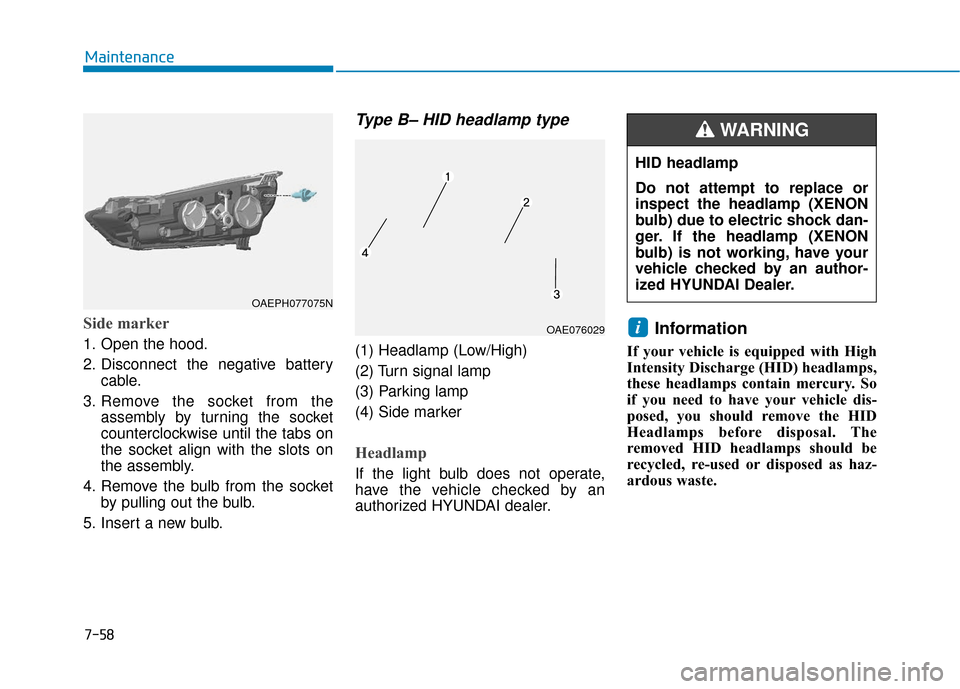
Type B– HID headlamp type
(1) Headlamp (Low/High)
(2) Turn signal lamp
(3) Parking lamp
(4) Side marker
Headlamp
If the light bulb does not operate,
have the vehicle checked by an
authorized HYUNDAI dealer.
Information
If your vehicle is equipped with High
Intensity Discharge (HID) headlamps,
these headlamps contain mercury. So
if you need to have your vehicle dis-
posed, you should remove the HID
Headlamps before disposal. The
removed HID headlamps should be
recycled, re-used or disposed as haz-
ardous waste.
iOAE076029
HID headlamp
Do not attempt to replace or
inspect the headlamp (XENON
bulb) due to electric shock dan-
ger. If the headlamp (XENON
bulb) is not working, have your
vehicle checked by an author-
ized HYUNDAI Dealer.
WARNING
OAEPH077075N
Page 504 of 603
7-59
7
Maintenance
Information
HID lamps have superior perform-
ance vs. halogen bulbs.
HID lamps are estimated by the man-
ufacturer to last twice as long or
longer than halogen bulbs depending
on their frequency of use. They will
probably require replacement at some
point in the life of the vehicle. Cycling
the headlamps on and off more than
typical use will shorten HID lamps
life. HID lamps do not fail in the same
manner as halogen incandescent
lamps. If a headlamp goes out after a
period of operation but will immedi-
ately relight when the headlamp
switch is cycled it is likely the HID
lamp needs to be replaced. HID light-
ing components are more complex
than conventional halogen bulbs thus
have higher replacement cost.
Information
The headlamp aiming should be
adjusted after an accident or after the
headlamp assembly is reinstalled at an
authorized HYUNDAI dealer.
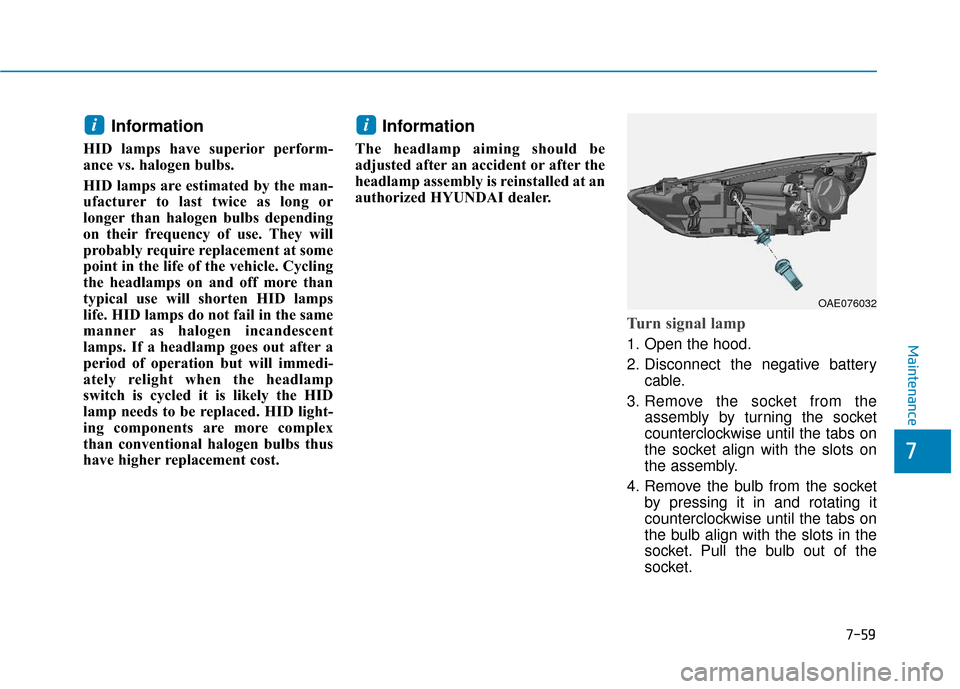
Turn signal lamp
1. Open the hood.
2. Disconnect the negative batterycable.
3. Remove the socket from the assembly by turning the socket
counterclockwise until the tabs on
the socket align with the slots on
the assembly.
4. Remove the bulb from the socket by pressing it in and rotating it
counterclockwise until the tabs on
the bulb align with the slots in the
socket. Pull the bulb out of the
socket.
ii
OAE076032
Page 505 of 603
7-60
Maintenance
5. Install a new bulb by inserting it into the socket and rotating it until
it locks into place.
6. Install the socket into the assem- bly by aligning the tabs on the
socket with the slots in the assem-
bly.
7. Push the socket into the assembly and turn the socket clockwise.
Side marker
1. Open the hood.
2. Disconnect the negative batterycable.
3. Remove the socket from the assembly by turning the socket
counterclockwise until the tabs on
the socket align with the slots on
the assembly.
4. Remove the bulb from the socket by pulling out the bulb.
5. Insert a new bulb.
Daytime Running Light (DRL)
Your vehicle is equipped with LED
lamps. LED lamps do not have
replaceable bulbs. If the LED lamp
does not operate, have the vehicle
checked by an authorized HYUNDAI
dealer.
OAEE076030N
OAEPH077074N
Page 506 of 603
7-61
7
Maintenance
Side Repeater Lamp
Replacement
Your vehicle is equipped with LED
lamps. LED lamps do not have
replaceable bulbs. If the LED lamp
does not operate, have the vehicle
checked by an authorized HYUNDAI
dealer.
Rear Combination Light Bulb
Replacement
Type A
(1) Tail/Stop lamp
(2) Turn signal lamp
(3) Tail lamp
(4) Back-up lamp
(5) Side marker
Tail/Stop lamp, turn signal lamp
and side marker lamp
1. Open the liftgate.
2. Open the lamp assembly retainingscrew covers.
3. Loosen the lamp assembly retain- ing screws with a cross-tip screw-
driver.OAE077035N
OAE076037
OAE076034
Page 509 of 603
7-64
Maintenance
Backup lamp
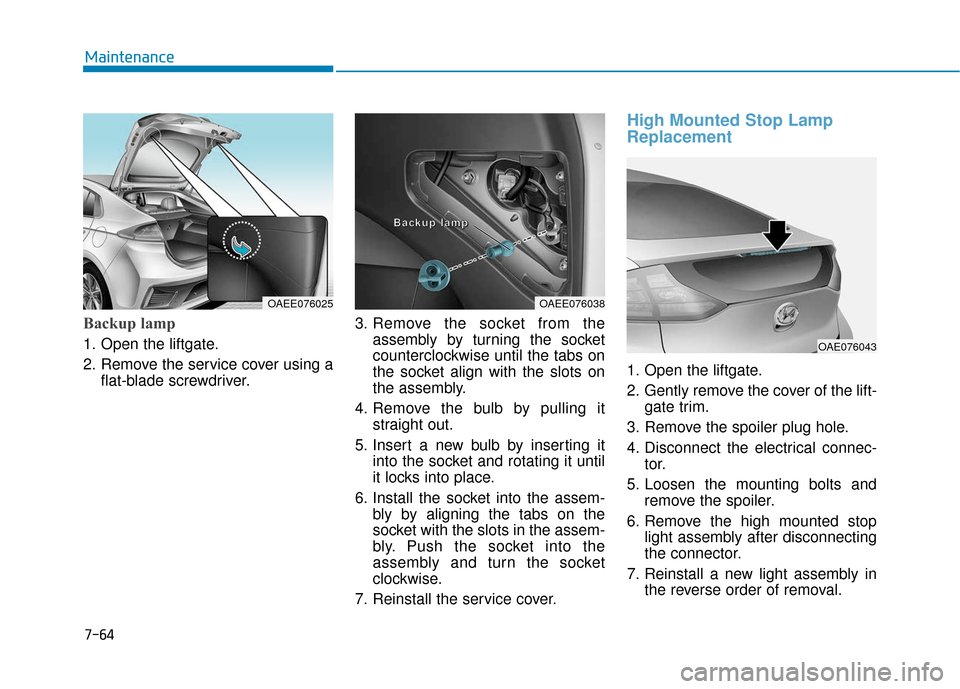
1. Open the liftgate.
2. Remove the service cover using aflat-blade screwdriver. 3. Remove the socket from the
assembly by turning the socket
counterclockwise until the tabs on
the socket align with the slots on
the assembly.
4. Remove the bulb by pulling it straight out.
5. Insert a new bulb by inserting it into the socket and rotating it until
it locks into place.
6. Install the socket into the assem- bly by aligning the tabs on the
socket with the slots in the assem-
bly. Push the socket into the
assembly and turn the socket
clockwise.
7. Reinstall the service cover.
High Mounted Stop Lamp
Replacement
1. Open the liftgate.
2. Gently remove the cover of the lift- gate trim.
3. Remove the spoiler plug hole.
4. Disconnect the electrical connec- tor.
5. Loosen the mounting bolts and remove the spoiler.
6. Remove the high mounted stop light assembly after disconnecting
the connector.
7. Reinstall a new light assembly in the reverse order of removal.
OAEE076025OAEE076038
B
B
B
B
a
a
a
a
c
c
c
c
k
k
k
k
u
u
u
u
p
p
p
p
l
l
l
l
a
a
a
a
m
m
m
m
p
p
p
p
OAE076043