2019 Hyundai Ioniq Hybrid cooling
[x] Cancel search: coolingPage 44 of 603

2-22
Safety system of your vehicle
Each time you push the switch, the
temperature setting of the seat is
changed as follows :
The seat warmer defaults to the OFF
position whenever the Engine Start/
Stop button is placed in the ON posi-
tion.
Information
With the seat warmer switch in the
ON position, the heating system in the
seat turns off or on automatically
depending on the seat temperature.
Battery cooling duct
The high voltage battery cooling duct
is located on the left side of the rear
seats. The cooling duct cools down
the high voltage battery. When the high voltage battery cool-
ing duct is blocked, the high voltage
battery may be overheated. Do not
obstruct the cooling duct with any
other objects.
i
OFF →
HIGH ( ) → LOW ( )
→
OAE036024
■Hybrid vehicle
OAEPH036024
■Plug-in hybrid vehicle
Page 178 of 603
3-86
Convenient features of your vehicle
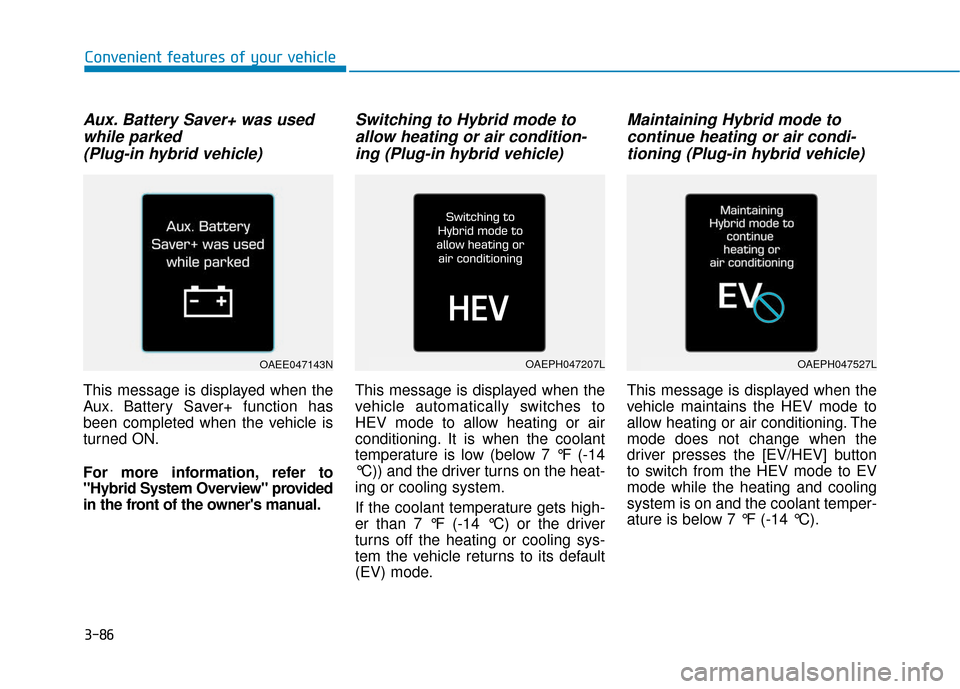
Aux. Battery Saver+ was usedwhile parked (Plug-in hybrid vehicle)
This message is displayed when the
Aux. Battery Saver+ function has
been completed when the vehicle is
turned ON.
For more information, refer to
"Hybrid System Overview" provided
in the front of the owner's manual.
Switching to Hybrid mode toallow heating or air condition-ing (Plug-in hybrid vehicle)
This message is displayed when the
vehicle automatically switches to
HEV mode to allow heating or air
conditioning. It is when the coolant
temperature is low (below 7 °F (-14
°C)) and the driver turns on the heat-
ing or cooling system.
If the coolant temperature gets high-
er than 7 °F (-14 °C) or the driver
turns off the heating or cooling sys-
tem the vehicle returns to its default
(EV) mode.
Maintaining Hybrid mode tocontinue heating or air condi-tioning (Plug-in hybrid vehicle)
This message is displayed when the
vehicle maintains the HEV mode to
allow heating or air conditioning. The
mode does not change when the
driver presses the [EV/HEV] button
to switch from the HEV mode to EV
mode while the heating and cooling
system is on and the coolant temper-
ature is below 7 °F (-14 °C).
OAEE047143NOAEPH047207LOAEPH047527L
Page 227 of 603

3-135
Convenient features of your vehicle
3
Never place anything near the
sensor to ensure better control of
the heating and cooling system.
Manual Heating and Air
Conditioning
The heating and cooling system can
be controlled manually by pushing
buttons other than the AUTO button.
In this case, the system works
sequentially according to the order of
buttons selected.
When pressing any button except the
AUTO button while using automatic
operation, the functions not selected
will be controlled automatically.
1. Start the vehicle ( indicatorON).
2. Set the mode to the desired posi- tion.
To improve the effectiveness of heating and cooling, select:
- Heating:
- Cooling: 3. Set the temperature control to the
desired position.
4. Set the air intake control to the outside (fresh) air position.
5. Set the fan speed control to the desired speed.
6. If air conditioning is desired, turn the air conditioning system on.
7. Press the AUTO button to convert to full automatic control of the sys-
tem.
NOTICE
OAE046304N
Page 234 of 603

3-142
Convenient features of your vehicle
System Operation
Ventilation
1. Select the Face Level mode.
2. Set the air intake control to theoutside (fresh) air position.
3. Set the temperature control to the desired position.
4. Set the fan speed control to the desired speed.
Heating
1. Select the Floor Level mode.
2. Set the air intake control to theoutside (fresh) air position.
3. Set the temperature control to the desired position.
4. Set the fan speed control to the desired speed.
5. If dehumidified heating is desired, turn the air conditioning system on.
If the windshield fogs up, select the
Floor & Defrost mode or press
the Front Defrost mode.
Operation Tips
To keep dust or unpleasant fumes from entering the car through the
ventilation system, temporarily set
the air intake control to the recircu-
lated air position. Return the con-
trol to the fresh air position when
the irritation has passed. This will
help keep the driver alert and com-
fortable.
To prevent the inside of the wind- shield from fogging, set the air
intake control to the fresh air posi-
tion and fan speed to the desired
position, turn on the air conditioning
system, and adjust the temperature
control to the desired temperature.
Air conditioning
All HYUNDAI Air Conditioning
Systems are filled with environmen-
tally friendly R-134a refrigerant.
1. Start the vehicle.
2. Push the air conditioning button.
3. Set the mode to the Face Level mode.
4. Set the air intake control to the recirculated air position. However,
prolonged operation of the recircu-
lated air position will excessively
dry the air. In this case, change the
air position.
5. Adjust the fan speed control and temperature control to maintain
maximum comfort.
When maximum cooling is desired,
set the temperature control to the
extreme left position then set the fan
speed control to the highest speed.
Page 235 of 603

3-143
Convenient features of your vehicle
3
Air conditioning system operation
tips
If the vehicle has been parked indirect sunlight during hot weather,
open the windows for a short time
to let the hot air inside the vehicle
escape.
After sufficient cooling has been achieved, switch back from the
recirculated air to the fresh outside
air position.
To help reduce moisture inside of the windows on rainy or humid
days, decrease the humidity inside
the vehicle by operating the air
conditioning system with the win-
dows and sunroof closed.
Use the air conditioning system every month only for a few minutes
to ensure maximum system per-
formance. If you operate air conditioner
excessively, the difference between
the temperature of the outside air
and that of the windshield could
cause the outer surface of the
windshield to fog up, causing loss
of visibility. In this case, set the
mode selection knob or button to
the position and fan speed
control to the lower speed.
System Maintenance
Climate control air filter
This filter is installed behind the glove
box. It filters the dust or other pollu-
tants that enter the vehicle through the
heating and air conditioning system.
Have the climate control air filter be
replaced by an authorized HYUNDAI
dealer according to the maintenance
schedule. If the vehicle is being driv-
en in severe conditions such as dusty
or rough roads, more frequent air
conditioner filter inspections and
changes are required.
If the air flow rate suddenly decreas-
es, the system should be checked at
an authorized HYUNDAI dealer.
1LDA5047
Outside air
Recirculatedair
Climate control air filter Blower
Evaporatorcore Heater core
Page 237 of 603

3-145
Convenient features of your vehicle
3
W
WI
IN
N D
DS
SH
H I
IE
E L
LD
D
D
D E
EF
FR
R O
O S
ST
T I
IN
N G
G
A
A N
N D
D
D
D E
EF
FO
O G
GG
GI
IN
N G
G
Windshield heating
Do not use the or posi-
tion during cooling operation in
extremely humid weather. The
difference between the temper-
ature of the outside air and that
of the windshield could cause
the outer surface of the wind-
shield to fog up, causing loss of
visibility could cause an acci-
dent resulting in serious injury
or death. In this case, set the
mode selection knob or button
to the position and fan
speed control knob or button to
a lower speed.
WARNING For maximum defrosting, set the
temperature control to the extreme
right/hot position and the fan speed
control to the highest speed.
If warm air to the floor is desired while defrosting or defogging, set the
mode to the floor-defrost position.
Before driving, clear all snow and ice from the windshield, rear win-
dow, side view mirrors, and all side
windows.
Clear all snow and ice from the hood and air inlet in the cowl grill to
improve heater and defroster effi-
ciency and to reduce the probability
of fogging up the inside of the wind-
shield.
Information
If the engine temperature is still cold
after starting, then a brief engine
warm up period may be required for
the vented air flow to become warm or
hot.
To Defog Inside Windshield
1. Select the desired fan speed.
2. Select the desired temperature.
3. Press the defroster button ( ).
4. The outside (fresh) air position will be selected automatically.
If the outside (fresh) air position is
not selected automatically, adjust the
corresponding button manually.
If the position is selected, lower
fan speed is adjusted to a higher fan
speed.
i
OAE046317
Page 394 of 603

5-98
Driving your vehicle
- When using tire chains:
Wrong size chains or improperly installed chains can damage
your vehicle's brake lines, sus-
pension, body and wheels.
Use SAE "S" class or wire chains.
If you hear noise caused by chains contacting the body,
retighten the chain to prevent
contact with the vehicle body.
To prevent body damage, retighten the chains after driving
0.3~0.6 miles (0.5~1.0 km).
Do not use tire chains on vehi- cles equipped with aluminum
wheels. If unavoidable, use a
wire type chain.
Use wire chains less than 0.47 inch (12 mm) wide to prevent
damage to the chain's connec-
tion.
Winter Precautions
Use high quality ethylene glycolcoolant
Your vehicle is delivered with high
quality ethylene glycol coolant in the
cooling system. It is the only type of
coolant that should be used because
it helps prevent corrosion in the cool-
ing system, lubricates the water
pump and prevents freezing. Be sure
to replace or replenish your coolant
in accordance with the maintenance
schedule in chapter 7. Before winter,
have your coolant tested to assure
that its freezing point is sufficient for
the temperatures anticipated during
the winter.
Change to "winter weight" oil ifnecessary
In some climates it is recommended
that a lower viscosity "winter weight"
oil be used during cold weather. See
chapter 8 for recommendations. If
you aren't sure what weight oil you
should use, consult an authorized
HYUNDAI dealer.
Check battery and cables
Winter puts additional burdens on
the battery system. Visually inspect
the battery and cables as described
in chapter 7. The level of charge in
your battery can be checked by an
authorized HYUNDAI dealer or a
service station.
NOTICE
Page 395 of 603

5-99
Driving your vehicle
5
Check spark plugs and ignitionsystem
Inspect your spark plugs as
described in chapter 7 and replace
them if necessary. Also check all
ignition wiring and components to be
sure they are not cracked, worn or
damaged in any way.
Use approved window washeranti-freeze in system
To keep the water in the window
washer system from freezing, add an
approved window washer anti-freeze
solution in accordance with instruc-
tions on the container. Window wash-
er anti-freeze is available from an
authorized HYUNDAI dealer and
most auto parts outlets. Do not use
engine coolant or other types of anti-
freeze as these may damage the
paint finish.
Do not let your parking brakefreeze
Under some conditions your parking
brake can freeze in the engaged
position. This is most likely to happen
when there is an accumulation of
snow or ice around or near the rear
brakes or if the brakes are wet. If
there is a risk the parking brake may
freeze, apply it only temporarily while
you put the gear selector lever in P
and block the rear wheels so the car
cannot roll. Then release the parking
brake.
Do not let ice and snow accu-mulate underneath
Under some conditions, snow and
ice can build up under the fenders
and interfere with the steering. When
driving in severe winter conditions
where this may happen, you should
periodically check underneath the
car to be sure the movement of the
front wheels and the steering com-
ponents is not obstructed.
Don't place foreign objects ormaterials in the engine com-partment
Placement of foreign object or mate-
rials which prevent cooling of the
engine, in the engine compartment,
may cause a failure or combustion.
The manufacturer is not responsible
for the damage caused by such
placement.
To keep locks from freezing
To keep the locks from freezing,
squirt an approved de-icer fluid or
glycerine into the key opening. If a
lock is covered with ice, squirt it with
an approved de-icing fluid to remove
the ice. If the lock is frozen internally,
you may be able to thaw it out by
using a heated key. Handle the heat-
ed key with care to avoid injury.