Page 199 of 603
3-107
Convenient features of your vehicle
3
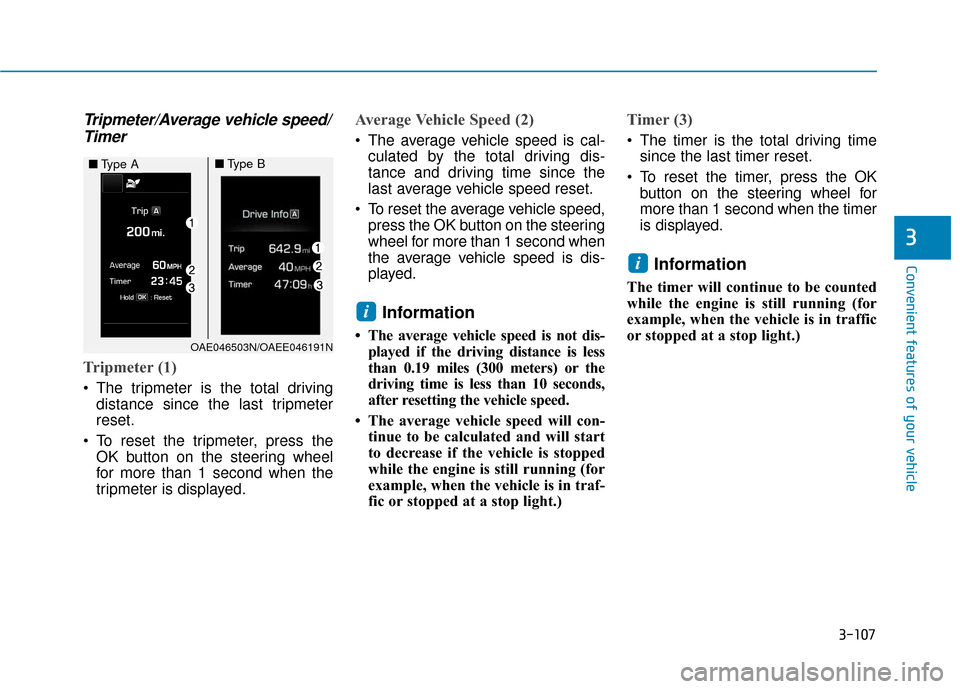
Tripmeter/Average vehicle speed/Timer
Tripmeter (1)
The tripmeter is the total driving
distance since the last tripmeter
reset.
To reset the tripmeter, press the OK button on the steering wheel
for more than 1 second when the
tripmeter is displayed.
Average Vehicle Speed (2)
The average vehicle speed is cal-culated by the total driving dis-
tance and driving time since the
last average vehicle speed reset.
To reset the average vehicle speed, press the OK button on the steering
wheel for more than 1 second when
the average vehicle speed is dis-
played.
Information
• The average vehicle speed is not dis-played if the driving distance is less
than 0.19 miles (300 meters) or the
driving time is less than 10 seconds,
after resetting the vehicle speed.
• The average vehicle speed will con- tinue to be calculated and will start
to decrease if the vehicle is stopped
while the engine is still running (for
example, when the vehicle is in traf-
fic or stopped at a stop light.)
Timer (3)
The timer is the total driving timesince the last timer reset.
To reset the timer, press the OK button on the steering wheel for
more than 1 second when the timer
is displayed.
Information
The timer will continue to be counted
while the engine is still running (for
example, when the vehicle is in traffic
or stopped at a stop light.)
i
i
OAE046503N/OAEE046191N
■ Type A■Type B
Page 205 of 603
3-113
Convenient features of your vehicle
3
Instant Fuel Economy (3)
This mode displays the instanta-neous fuel economy while driving.
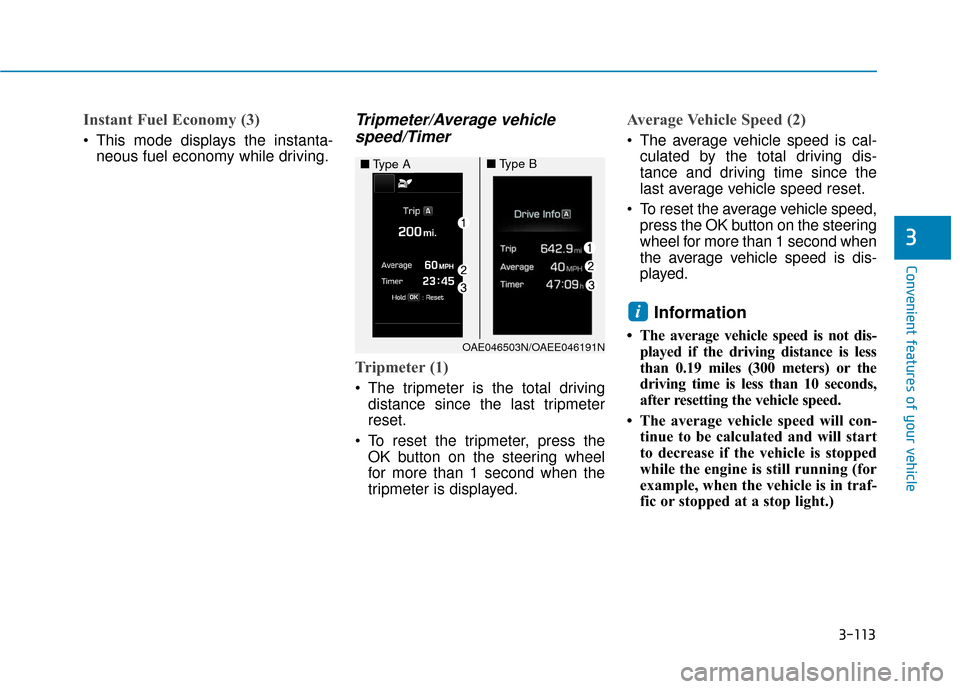
Tripmeter/Average vehiclespeed/Timer
Tripmeter (1)
The tripmeter is the total driving
distance since the last tripmeter
reset.
To reset the tripmeter, press the OK button on the steering wheel
for more than 1 second when the
tripmeter is displayed.
Average Vehicle Speed (2)
The average vehicle speed is cal-culated by the total driving dis-
tance and driving time since the
last average vehicle speed reset.
To reset the average vehicle speed, press the OK button on the steering
wheel for more than 1 second when
the average vehicle speed is dis-
played.
Information
• The average vehicle speed is not dis-played if the driving distance is less
than 0.19 miles (300 meters) or the
driving time is less than 10 seconds,
after resetting the vehicle speed.
• The average vehicle speed will con- tinue to be calculated and will start
to decrease if the vehicle is stopped
while the engine is still running (for
example, when the vehicle is in traf-
fic or stopped at a stop light.)
i
OAE046503N/OAEE046191N
■ Type A■Type B
Page 206 of 603
3-114
Convenient features of your vehicle
Timer (3)
The timer is the total driving timesince the last timer reset.
To reset the timer, press the OK button on the steering wheel for
more than 1 second when the timer
is displayed.
Information
The timer will continue to be counted
while the engine is still running (for
example, when the vehicle is in traffic
or stopped at a stop light.)
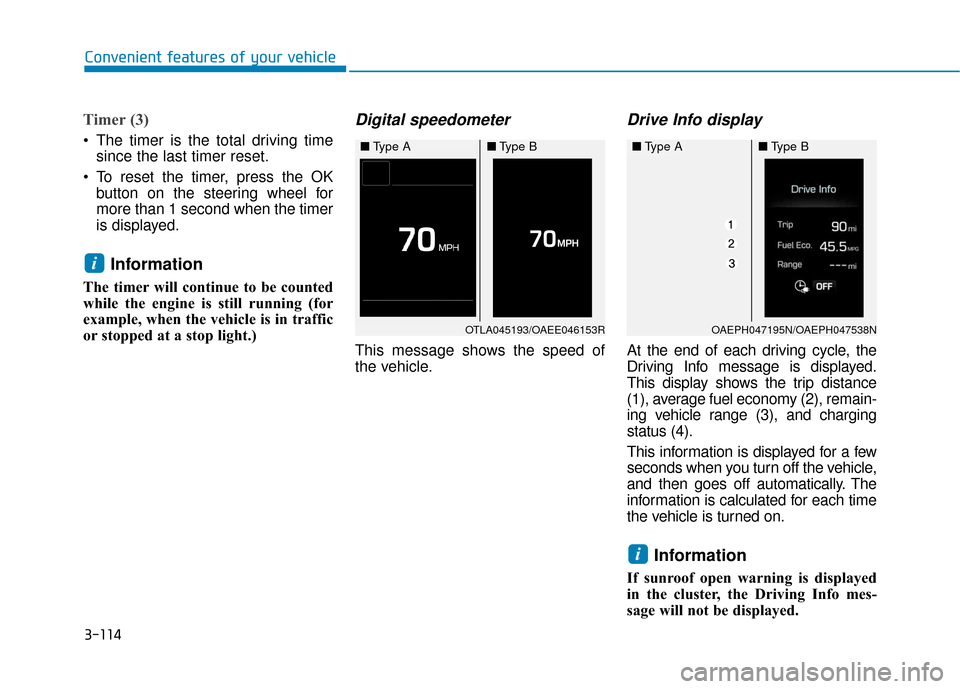
Digital speedometer
This message shows the speed of
the vehicle.
Drive Info display
At the end of each driving cycle, the
Driving Info message is displayed.
This display shows the trip distance
(1), average fuel economy (2), remain-
ing vehicle range (3), and charging
status (4).
This information is displayed for a few
seconds when you turn off the vehicle,
and then goes off automatically. The
information is calculated for each time
the vehicle is turned on.
Information
If sunroof open warning is displayed
in the cluster, the Driving Info mes-
sage will not be displayed.
i
i
OTLA045193/OAEE046153R
■ Type A■Type B
OAEPH047195N/OAEPH047538N
■Type A■Type B
Page 208 of 603

3-116
Convenient features of your vehicle
L
LI
IG
G H
H T
TI
IN
N G
G
Exterior Lights
Lighting control
To operate the lights, turn the knob at
the end of the control lever to one of
the following positions:
1. DRL (Daytime Running Lights)
OFF position
2. AUTO light position
3. Parking lamp position
4. Headlamp position
Daytime running light (DRL)
(if equipped)
The Daytime Running Lights (DRL)
can make it easier for others to see
the front of your vehicle during the
day, especially after dawn and before
sunset.
The DRL system will turn the dedi-
cated lamp OFF when :
• The light switch is in the DRL OFF position.
The headlamps are ON.
The parking lamps are ON.
The vehicle is turned off.
AUTO light position (if equipped)
The parking lamp and headlamp will
be turned ON or OFF automatically
depending on the amount of light
outside the vehicle.
Even with the AUTO light feature in
operation, it is recommended to
manually turn ON the lamps when
driving at night or in a fog, driving in
the rain, or when you enter dark
areas, such as tunnels and parking
facilities.
OLF044084N
OAEE046510N
Page 209 of 603
3-117
Convenient features of your vehicle
3
• Do not cover or spill anything onthe sensor (1) located in front of
the instrument panel.
Do not clean the sensor using a window cleaner, the cleanser may
leave a light film which could
interfere with sensor operation.
If your vehicle has window tint or other types of metallic coat-
ing on the front windshield, the
AUTO light system may not work
properly.
Parking lamp position ( )
The parking lamp, license plate lamp
and instrument panel lamp are turned
ON.
Headlamp position ( )
The headlamp, parking lamp, license
plate lamp and instrument panel
lamp are turned ON.
Information
The Engine Start/Stop button must be
in the ON position to turn on the
headlamp.
i
NOTICE
OLF044086NOLF044087N
Page 210 of 603

3-118
Convenient features of your vehicle
High beam operation
To turn on the high beam headlamp,
push the lever away from you. The
lever will return to its original position.
The high beam indicator will light
when the headlamp high beams are
switched on.
To turn off the high beam headlamp,
pull the lever towards you. The low
beams will turn on.To flash the high beam headlamp,
pull the lever towards you, then
release the lever. The high beams
will remain ON as long as you hold
the lever towards you.
High Beam Assist (HBA)
(if equipped)
The High Beam Assist (HBA) is a
system that automatically adjusts the
headlamp range (switches between
high beam and low beam) according
to the brightness of other vehicles
and road conditions.
Operating condition
1. Place the headlamp switch in the
AUTO position.
2. Turn on the high beam by pushing the lever away from you.
The High Beam Assist (HBA) ( ) indicator will illuminate.
Do not use high beam when there
are other vehicles approaching
you. Using high beam could
obstruct the other driver's vision.
WARNING
OLF044089N
OLF044088N
OAE048581L
Page 211 of 603
3-119
Convenient features of your vehicle
3
3. The High Beam Assist (HBA) willturn on when vehicle speed is
above 25 mph (40 km/h).
away when the High Beam Assist
(HBA) is operating, the High Beam
Assist (HBA) will turn off and the
high beam will be on continuously.
the headlamp switch is pulled
towards you when the high beam
is off, the high beam will turn on
without the High Beam Assist
(HBA) canceled. When you let go
of the light switch, the lever will
move to the middle and the high
beam will turn off.
the headlamp switch is pulled
towards you when the high beam
is on by the High Beam Assist
(HBA), the low beam will be on
and the High Beam Assist (HBA)
will turn off.
to the headlamp ON position, the
High Beam Assist (HBA) will turn
off and the low beam will be on
continuously. When the High Beam Assist (HBA) is
operating, the high beam switches to
low beamif any of the following condi-
tions occur :
- When the headlamp of an on-com-
ing vehicle is detected.
- When the tail lamp of a vehicle in front is detected.
- When the headlamp or tail lamp of a motorcycle or a bicycle is detect-
ed.
- When the surrounding ambient light is bright enough that high beams
are not required.
- When streetlights or other lights are detected.
- When the headlamp s witch is not in
the AUTO position.
- When the High Beam Assist (HBA) is off.
- When vehicle speed is below 15 mph (24 km/h).
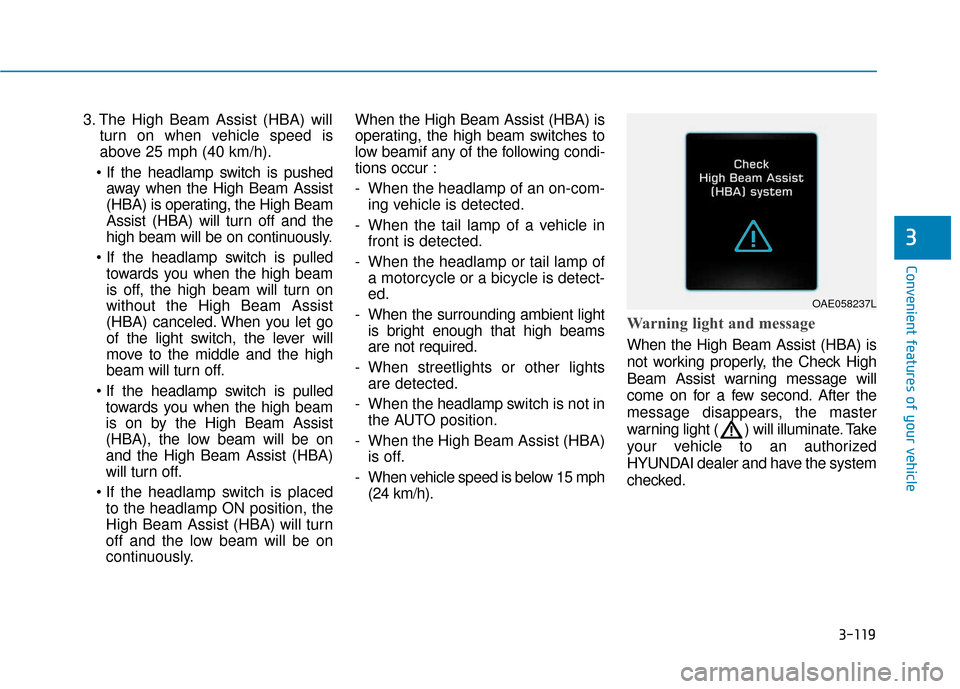
Warning light and message
When the High Beam Assist (HBA) is
not working properly, the Check High
Beam Assist warning message will
come on for a few second. After the
message disappears, the master
warning light ( ) will illuminate. Take
your vehicle to an authorized
HYUNDAI dealer and have the system
checked.
OAE058237L
Page 212 of 603
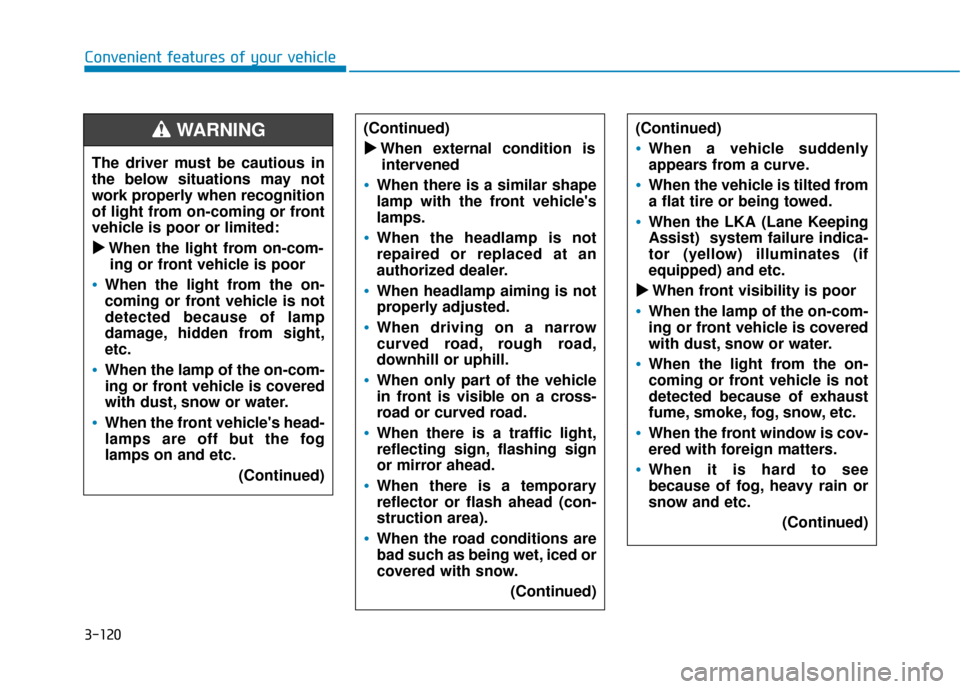
3-120
Convenient features of your vehicleThe driver must be cautious in
the below situations may not
work properly when recognition
of light from on-coming or front
vehicle is poor or limited:� � When the light from on-com-
ing or front vehicle is poor
When the light from the on-
coming or front vehicle is not
detected because of lamp
damage, hidden from sight,
etc.
When the lamp of the on-com-
ing or front vehicle is covered
with dust, snow or water.
When the front vehicle's head-
lamps are off but the fog
lamps on and etc.
(Continued)
(Continued)� � When external condition is
intervened
When there is a similar shape
lamp with the front vehicle's
lamps.
When the headlamp is not
repaired or replaced at an
authorized dealer.
When headlamp aiming is not
properly adjusted.
When driving on a narrow
curved road, rough road,
downhill or uphill.
When only part of the vehicle
in front is visible on a cross-
road or curved road.
When there is a traffic light,
reflecting sign, flashing sign
or mirror ahead.
When there is a temporary
reflector or flash ahead (con-
struction area).
When the road conditions are
bad such as being wet, iced or
covered with snow.
(Continued)
(Continued)
When a vehicle suddenly
appears from a curve.
When the vehicle is tilted from
a flat tire or being towed.
When the LKA (Lane Keeping
Assist) system failure indica-
tor (yellow) illuminates (if
equipped) and etc.
� � When front visibility is poor
When the lamp of the on-com-
ing or front vehicle is covered
with dust, snow or water.
When the light from the on-
coming or front vehicle is not
detected because of exhaust
fume, smoke, fog, snow, etc.
When the front window is cov-
ered with foreign matters.
When it is hard to see
because of fog, heavy rain or
snow and etc.
(Continued)
WARNING