2019 Hyundai Ioniq Electric tires
[x] Cancel search: tiresPage 385 of 555
6-12
What to do in an emergency
The TPMS Malfunction Indicator
may illuminate after blinking for
one minute if the vehicle is near
electric power supply cables or
radio transmitters such as police
stations, government and public
offices, broadcasting stations,
military installations, airports,
transmitting towers, etc.
Additionally, the TPMS Malfunction
Indicator may illuminate if snow
chains are used or electronic
devices such as computers, charg-
ers, remote starters, navigation,
etc. This may interfere with normal
operation of the TPMS.
Changing a Tire with TPMS
If you have a flat tire, the Low Tire
Pressure and LCD position indicator
will come on. Have the flat tire
repaired by an authorized HYUNDAI
dealer as soon as possible or
replace the flat tire with the spare
tire. Once the original tire equipped with
a tire pressure monitoring sensor is
reinflated to the recommended pres-
sure and reinstalled on the vehicle,
the Low Tire Pressure LCD position
indicator and TPMS Malfunction
Indicator will go off within a few min-
utes of driving.
If the indicators do not disappear
after a few minutes, please visit an
authorized HYUNDAI dealer.
Each wheel is equipped with a tire
pressure sensor mounted inside the
tire behind the valve stem. You must
use TPMS specific wheels. It is rec-
ommended that you always have
your tires serviced by an authorized
HYUNDAI dealer.
NOTICE
Never use a puncture-repairing
agent not approved by HYUNDAI
dealer to repair and/or inflate a
low pressure tire. Tire sealant
not approved by HYUNDAI deal-
er may damage the tire pressure
sensor.
CAUTION
Page 387 of 555
6-14
What to do in an emergency
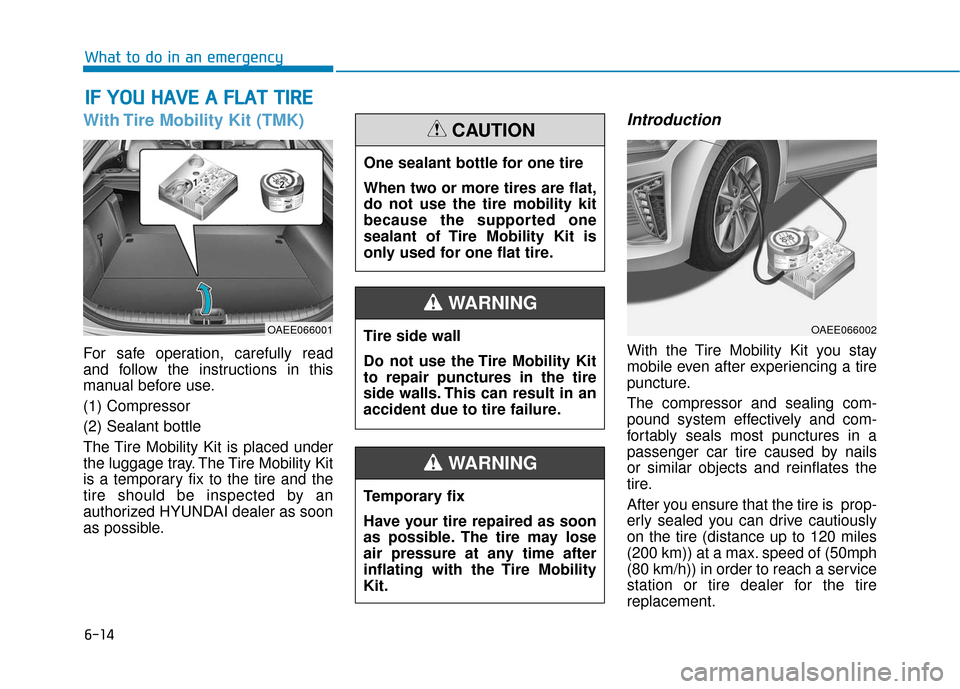
With Tire Mobility Kit (TMK)
For safe operation, carefully read
and follow the instructions in this
manual before use.
(1) Compressor
(2) Sealant bottle
The Tire Mobility Kit is placed under
the luggage tray. The Tire Mobility Kit
is a temporary fix to the tire and the
tire should be inspected by an
authorized HYUNDAI dealer as soon
as possible.
Introduction
With the Tire Mobility Kit you stay
mobile even after experiencing a tire
puncture.
The compressor and sealing com-
pound system effectively and com-
fortably seals most punctures in a
passenger car tire caused by nails
or similar objects and reinflates the
tire.
After you ensure that the tire is prop-
erly sealed you can drive cautiously
on the tire (distance up to 120 miles
(200 km)) at a max. speed of (50mph
(80 km/h)) in order to reach a service
station or tire dealer for the tire
replacement.
I IF
F
Y
Y O
O U
U
H
H A
AV
VE
E
A
A
F
F L
LA
A T
T
T
T I
IR
R E
E
OAEE066001OAEE066002
One sealant bottle for one tire
When two or more tires are flat,
do not use the tire mobility kit
because the supported one
sealant of Tire Mobility Kit is
only used for one flat tire.
CAUTION
Tire side wall
Do not use the Tire Mobility Kit
to repair punctures in the tire
side walls. This can result in an
accident due to tire failure.
WARNING
Temporary fix
Have your tire repaired as soon
as possible. The tire may lose
air pressure at any time after
inflating with the Tire Mobility
Kit.
WARNING
Page 388 of 555
6-15
What to do in an emergency
6
It is possible that some tires, espe-
cially with larger punctures or dam-
age to the sidewall, cannot be sealed
completely.
Air pressure loss in the tire may
adversely affect tire performance.
For this reason, you should avoid
abrupt steering or other driving
maneuvers, especially if the vehicle is
heavily loaded or if a trailer is in use.
The Tire Mobility Kit is not designed
or intended as a permanent tire
repair method and is to be used for
one tire only.
This instruction shows you step by
step how to temporarily seal the
puncture simply and reliably.
Read the section "Notes on the safe
use of the Tire Mobility Kit".
Notes on the safe use of theTire Mobility Kit
Park your car at the side of the
road so that you can work with the
Tire Mobility Kit away from moving
traffic.
To be sure your vehicle will not move, even when you're on fairly
level ground, always set your park-
ing brake. Only use the Tire Mobility Kit for
sealing/inflation passenger car tires.
Only punctured areas located with-
in the tread region of the tire can be
sealed using the tire mobility kit.
Do not use on motorcycles, bicy- cles or any other type of tires.
When the tire and wheel are dam- aged, do not use Tire Mobility Kit
for your safety.
Use of the Tire Mobility Kit may not be effective for tire damage larger
than approximately 0.24 inch (6
mm).
Please contact the nearest
HYUNDAI dealership if the tire
cannot be made roadworthy with
the Tire Mobility Kit.
Do not use the Tire Mobility Kit, if a flat tire or an under-inflated tire is
further severely damaged by being
continuously driven.
Do not remove any foreign objects such as nails or screws that have
penetrated the tire.
Provided the car is outdoors, leave the vehicle ON ( indicator ON).
Otherwise operating the compres-
sor may eventually drain the car
battery. Never leave the Tire Mobility Kit
unattended while it is being used.
Do not leave the compressor run- ning for more than 10 minutes at a
time or it may overheat.
Do not use the Tire Mobility Kit if the ambient temperature is below
-22°F (-30°C).
In case of skin contact with the sealant, wash the area thoroughly
with plenty of water. If the irritation
persists, seek medical attention.
In case of eye contact with the sealant, flush your eyes for at least
15 minutes. If the irritation persists,
seek medical attention.
In case of swallowing the sealant, rinse the mouth and drink plenty of
water. However, never give any-
thing to an unconscious person
and seek medical attention imme-
diately.
Long time exposure to the sealant may cause damage to bodily tissue
such as kidney, etc.
Page 398 of 555
7
Maintenance
7
Maintenance
Motor Compartment ..............................................7-3
Maintenance Services ...........................................7-4
Owner's Responsibility .....................................................7-4
Owner Maintenance Precautions..................................7-4
Owner Maintenance ..............................................7-5
Owner Maintenance Schedule .......................................7-6
Scheduled Maintenance Services........................7-7
Normal Maintenance Schedule ......................................7-8
Maintenance Under Severe Usage Conditions ........7-10
Explanation of Scheduled Maintenance Items..7-11
Coolant.................................................................\
..7-12
Checking the Coolant Level ..........................................7-12
Changing Coolant ............................................................7-15
Brake Fluid ............................................................7-16
Checking the Brake Fluid Level ...................................7-16
Washer Fluid .........................................................7-17
Checking the Washer Fluid Level................................7-17
Climate Control Air Filter ....................................7-18
Filter Inspection ...............................................................7-18
Wiper Blades.........................................................7-20
Blade Inspection ..............................................................7-20
Blade Replacement .........................................................7-20
12v Battery ...........................................................7-23
For Best Battery Service ..............................................7-24
Battery Recharging ........................................................7-24
Reset Features.................................................................7-25
Tires and Wheels .................................................7-26
Tire Care ........................................................................\
....7-26
Recommended Cold Tire Inflation Pressures ...........7-27
Check Tire Inflation Pressure ......................................7-28
Tire Rotation...................................................................\
..7-29
Wheel Alignment and Tire Balance ............................7-30
Tire Replacement ............................................................7-30
Wheel Replacement ........................................................7-31
Tire Traction .....................................................................7-3\
1
Tire Maintenance ............................................................7-31
Tire Sidewall Labeling ....................................................7-31
Tire Terminology and Definitions................................7-35
All Season Tires ...............................................................7-39
Summer Tires ...................................................................7-39
Snow Tires ........................................................................\
7-39
Radial-Ply Tires ...............................................................7-39
Low Aspect Ratio Tires..................................................7-40
7
Page 402 of 555
7-5
7
Maintenance
O
OW
W N
NE
ER
R
M
M A
AI
IN
N T
TE
EN
N A
AN
N C
CE
E
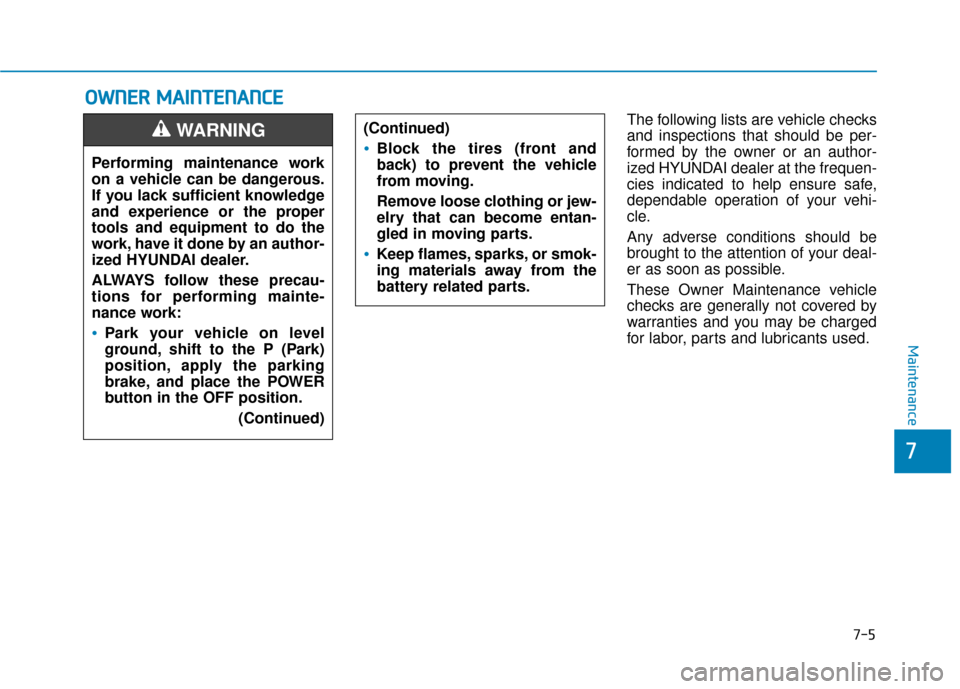
The following lists are vehicle checks
and inspections that should be per-
formed by the owner or an author-
ized HYUNDAI dealer at the frequen-
cies indicated to help ensure safe,
dependable operation of your vehi-
cle.
Any adverse conditions should be
brought to the attention of your deal-
er as soon as possible.
These Owner Maintenance vehicle
checks are generally not covered by
warranties and you may be charged
for labor, parts and lubricants used.
Performing maintenance work
on a vehicle can be dangerous.
If you lack sufficient knowledge
and experience or the proper
tools and equipment to do the
work, have it done by an author-
ized HYUNDAI dealer.
ALWAYS follow these precau-
tions for performing mainte-
nance work:
•Park your vehicle on level
ground, shift to the P (Park)
position, apply the parking
brake, and place the POWER
button in the OFF position.
(Continued)
WARNING (Continued)
Block the tires (front and
back) to prevent the vehicle
from moving.
Remove loose clothing or jew-
elry that can become entan-
gled in moving parts.
Keep flames, sparks, or smok-
ing materials away from the
battery related parts.
Page 403 of 555
7-6
Maintenance
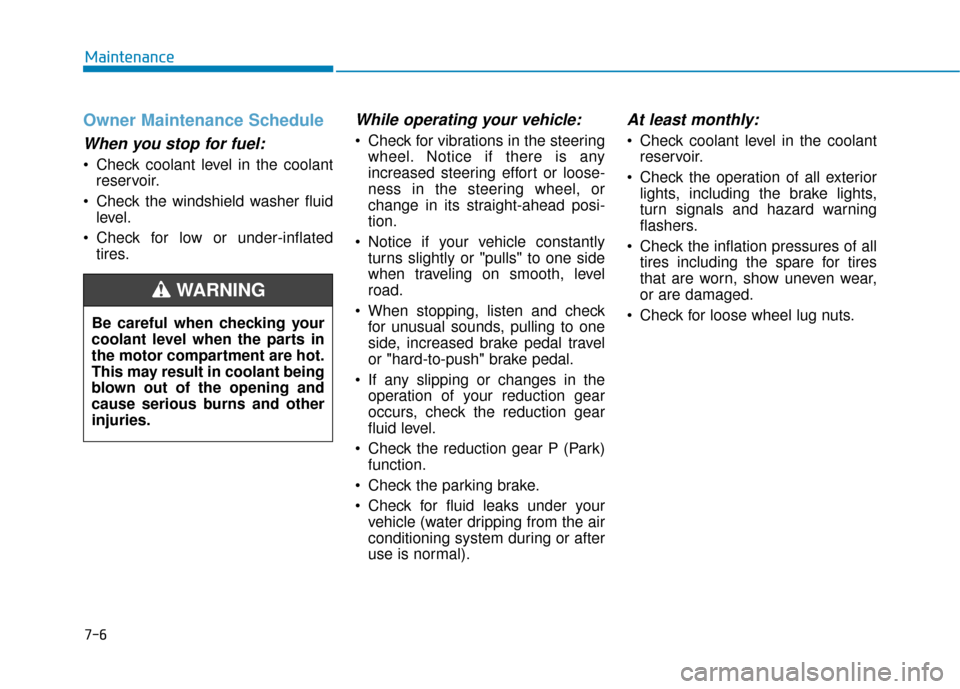
Owner Maintenance Schedule
When you stop for fuel:
• Check coolant level in the coolantreservoir.
Check the windshield washer fluid level.
Check for low or under-inflated tires.
While operating your vehicle:
Check for vibrations in the steeringwheel. Notice if there is any
increased steering effort or loose-
ness in the steering wheel, or
change in its straight-ahead posi-
tion.
Notice if your vehicle constantly turns slightly or "pulls" to one side
when traveling on smooth, level
road.
When stopping, listen and check for unusual sounds, pulling to one
side, increased brake pedal travel
or "hard-to-push" brake pedal.
If any slipping or changes in the operation of your reduction gear
occurs, check the reduction gear
fluid level.
Check the reduction gear P (Park) function.
Check the parking brake.
Check for fluid leaks under your vehicle (water dripping from the air
conditioning system during or after
use is normal).
At least monthly:
Check coolant level in the coolantreservoir.
Check the operation of all exterior lights, including the brake lights,
turn signals and hazard warning
flashers.
Check the inflation pressures of all tires including the spare for tires
that are worn, show uneven wear,
or are damaged.
Check for loose wheel lug nuts.
Be careful when checking your
coolant level when the parts in
the motor compartment are hot.
This may result in coolant being
blown out of the opening and
cause serious burns and other
injuries.
WARNING
Page 405 of 555
7-8
Maintenance
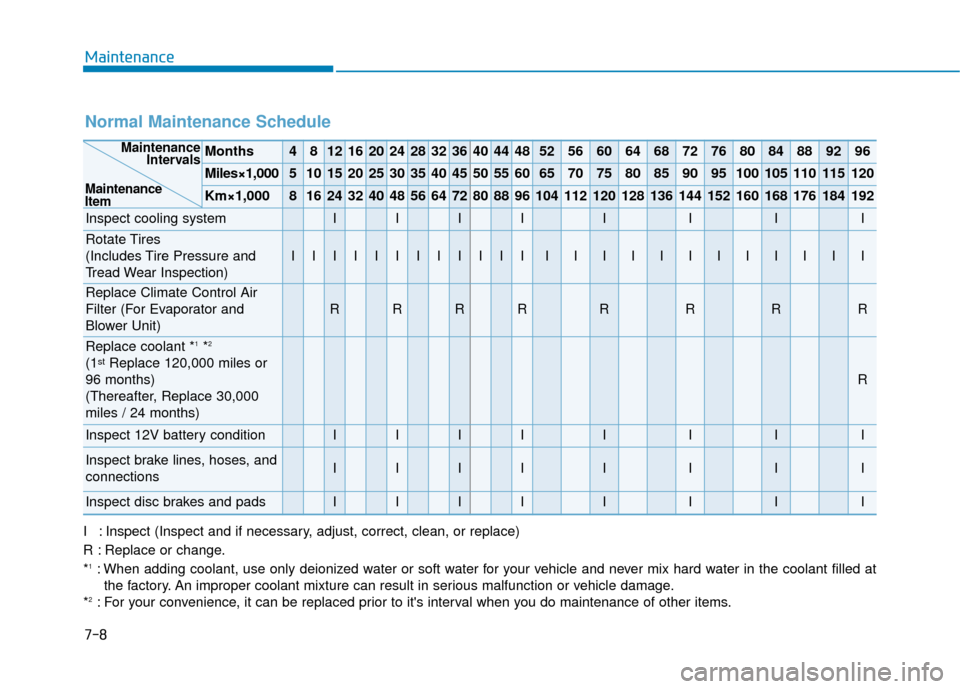
Normal Maintenance Schedule
Months4812162024283236404448525660646872768084889296
Miles×1,0005101520253035404550556065707580859095100105110115120
Km×1,00081624324048566472808896104112120128136144152160168176184192
Inspect cooling systemIIIIIIII
Rotate Tires
(Includes Tire Pressure and
Tread Wear Inspection)
IIIIIIIIIIIIIIIIIIIIIIII
Replace Climate Control Air
Filter (For Evaporator and
Blower Unit)
RRRRRRRR
Replace coolant *1*2
(1stReplace 120,000 miles or
96 months)
(Thereafter, Replace 30,000
miles / 24 months)
R
Inspect 12V battery conditionIIIIIIII
Inspect brake lines, hoses, and
connectionsIIIIIIII
Inspect disc brakes and padsIIIIIIII
Maintenance Intervals
Maintenance
Item
I : Inspect (Inspect and if necessary, adjust, correct, clean, or replace)
R : Replace or change.
*
1: When adding coolant, use only deionized water or soft water for your vehicle and never mix hard water in the coolant filled at the factory. An improper coolant mixture can result in serious malfunction or vehicle damage.
*
2: For your convenience, it can be replaced prior to it's interval when you do maintenance of other items.
Page 423 of 555
7-26
Maintenance
T
TI
IR
R E
ES
S
A
A N
N D
D
W
W H
HE
EE
EL
LS
S
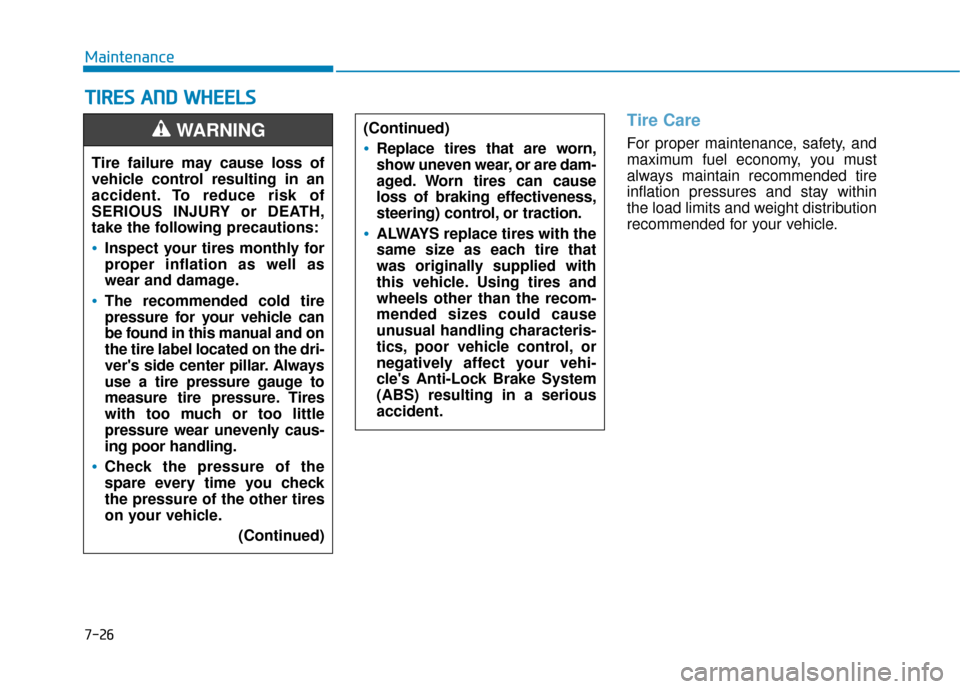
Tire Care
For proper maintenance, safety, and
maximum fuel economy, you must
always maintain recommended tire
inflation pressures and stay within
the load limits and weight distribution
recommended for your vehicle.
(Continued)Replace tires that are worn,
show uneven wear, or are dam-
aged. Worn tires can cause
loss of braking effectiveness,
steering) control, or traction.
ALWAYS replace tires with the
same size as each tire that
was originally supplied with
this vehicle. Using tires and
wheels other than the recom-
mended sizes could cause
unusual handling characteris-
tics, poor vehicle control, or
negatively affect your vehi-
cle's Anti-Lock Brake System
(ABS) resulting in a serious
accident.
Tire failure may cause loss of
vehicle control resulting in an
accident. To reduce risk of
SERIOUS INJURY or DEATH,
take the following precautions:
Inspect your tires monthly for
proper inflation as well as
wear and damage.
The recommended cold tire
pressure for your vehicle can
be found in this manual and on
the tire label located on the dri-
ver's side center pillar. Always
use a tire pressure gauge to
measure tire pressure. Tires
with too much or too little
pressure wear unevenly caus-
ing poor handling.
Check the pressure of the
spare every time you check
the pressure of the other tires
on your vehicle.
(Continued)
WARNING