Page 196 of 526
3-49
Convenient features of your vehicle
3
This indicator light illuminates for
2 seconds and goes off:
If the smart key is in the vehicleand the POWER button is ON, but
the vehicle cannot detect the smart
key.
In this case, we recommend that
you have the vehicle inspected by
a HYUNDAI authorised repairer.
This indicator light blinks:
When the battery voltage of thesmart key is low.
- At this time, you can not start thevehicle. However, you can start
the vehicle if you press the
POWER button with the smart
key. (For more details, refer to
"Starting the vehicle" in chap-
ter 5).
When there is a malfunction with the immobiliser system.
In this case, we recommend that
you have the vehicle inspected by
a HYUNDAI authorised repairer.
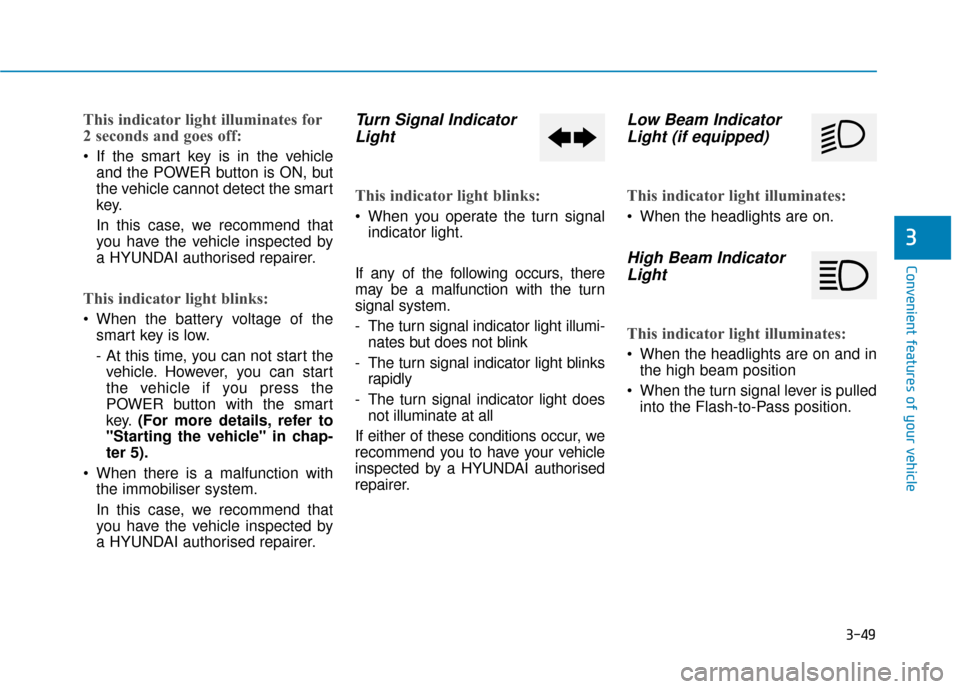
Turn Signal IndicatorLight
This indicator light blinks:
When you operate the turn signal
indicator light.
If any of the following occurs, there
may be a malfunction with the turn
signal system.
- The turn signal indicator light illumi- nates but does not blink
- The turn signal indicator light blinks rapidly
- The turn signal indicator light does not illuminate at all
If either of these conditions occur, we
recommend you to have your vehicle
inspected by a HYUNDAI authorised
repairer.
Low Beam Indicator Light (if equipped)
This indicator light illuminates:
When the headlights are on.
High Beam IndicatorLight
This indicator light illuminates:
When the headlights are on and in
the high beam position
When the turn signal lever is pulled into the Flash-to-Pass position.
Page 225 of 526
3-78
Convenient features of your vehicle
Position lamp position ( )
The position lamp, license plate lamp
and instrument panel lamp are turned
ON.
Headlamp position ( )
The headlamp, position lamp, license
plate lamp and instrument panel
lamp are turned ON.
Information
The POWER button must be in the
ON position to turn on the headlamp.
High beam operation
To turn on the high beam headlamp,
push the lever away from you. The
lever will return to its original position.
The high beam indicator will light
when the headlamp high beams are
switched on.
i
OAE046469LOAE046467L
OAE046453L
Page 226 of 526
3-79
Convenient features of your vehicle
3
To turn off the high beam headlamp,
pull the lever towards you. The low
beams will turn on.To flash the high beam headlamp,
pull the lever towards you, then
release the lever. The high beams
will remain ON as long as you hold
the lever towards you.Turn signals and lane changesignals
To signal a turn, push down on the
lever for a left turn or up for a right
turn in position (A). To signal a lane
change, move the turn signal lever
slightly and hold it in position (B).
The lever will return to the O (off)
position when released or when the
turn is completed.
If an indicator stays on and does not
flash or if it flashes abnormally, one of
the turn signal bulbs may be burned
out and will require replacement.
Do not use high beam when there
are other vehicles approaching
you. Using high beam could
obstruct the other driver's vision.
WARNING
OAE046455L
OAE046457L
Page 229 of 526
3-82
Convenient features of your vehicle
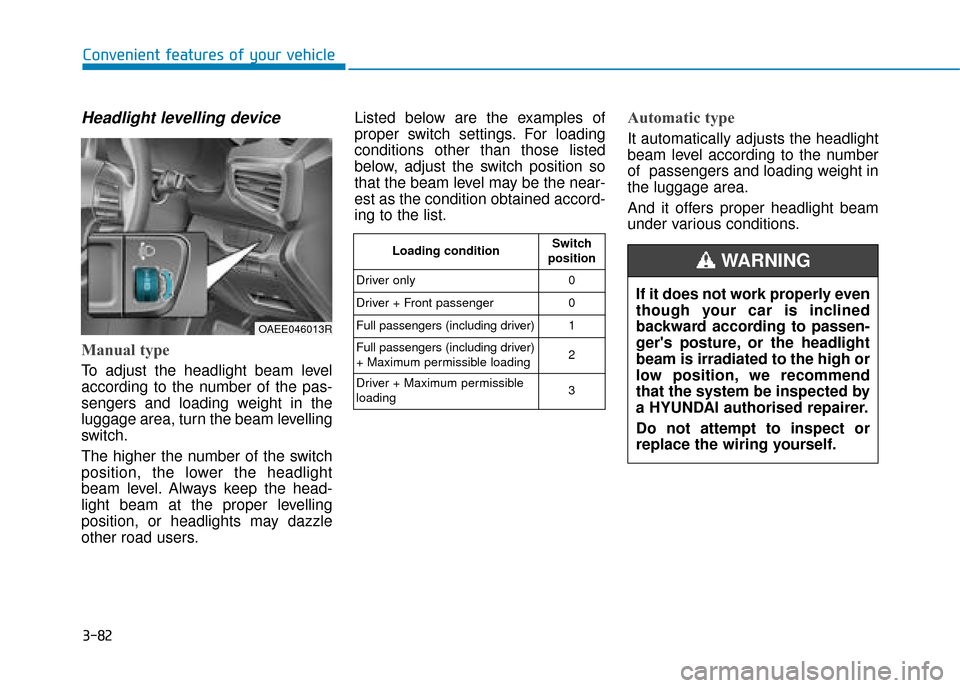
Headlight levelling device
Manual type
To adjust the headlight beam level
according to the number of the pas-
sengers and loading weight in the
luggage area, turn the beam levelling
switch.
The higher the number of the switch
position, the lower the headlight
beam level. Always keep the head-
light beam at the proper levelling
position, or headlights may dazzle
other road users.Listed below are the examples of
proper switch settings. For loading
conditions other than those listed
below, adjust the switch position so
that the beam level may be the near-
est as the condition obtained accord-
ing to the list.
Automatic type
It automatically adjusts the headlight
beam level according to the number
of passengers and loading weight in
the luggage area.
And it offers proper headlight beam
under various conditions.
OAEE046013R
Loading condition
Switch
position
Driver only 0
Driver + Front passenger 0
Full passengers (including driver) 1
Full passengers (including driver)
+ Maximum permissible loading 2
Driver + Maximum permissible
loading 3
If it does not work properly even
though your car is inclined
backward according to passen-
ger's posture, or the headlight
beam is irradiated to the high or
low position, we recommend
that the system be inspected by
a HYUNDAI authorised repairer.
Do not attempt to inspect or
replace the wiring yourself.
WARNING
Page 498 of 526
7-50
Maintenance
Headlamp, position lamp,
turn signal lamp bulb replace-
ment
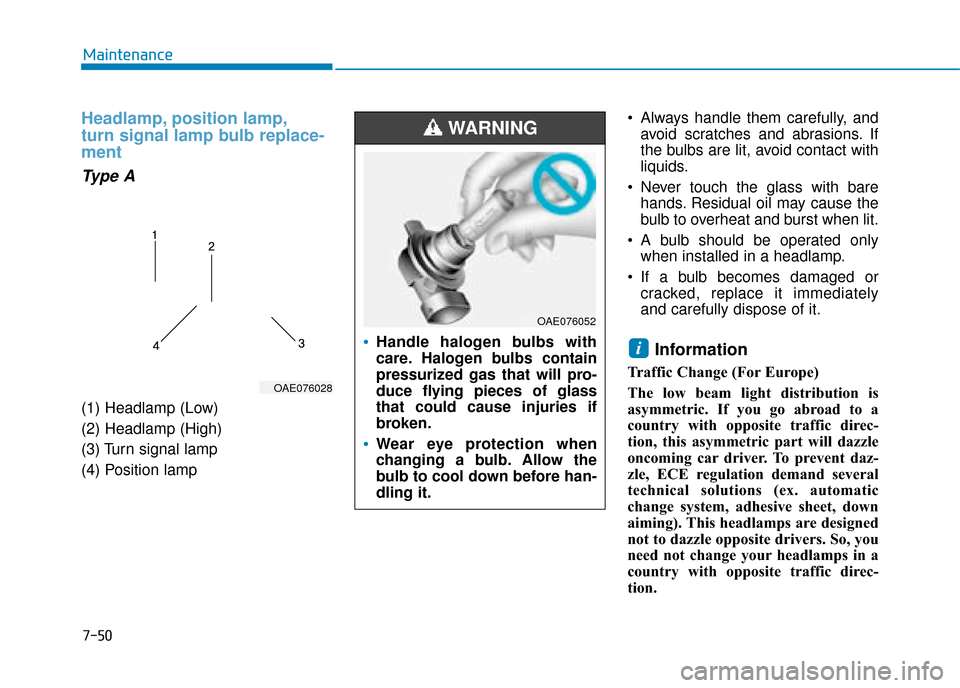
Type A
(1) Headlamp (Low)
(2) Headlamp (High)
(3) Turn signal lamp
(4) Position lamp Always handle them carefully, and
avoid scratches and abrasions. If
the bulbs are lit, avoid contact with
liquids.
Never touch the glass with bare hands. Residual oil may cause the
bulb to overheat and burst when lit.
A bulb should be operated only when installed in a headlamp.
If a bulb becomes damaged or cracked, replace it immediately
and carefully dispose of it.
Information
Traffic Change (For Europe)
The low beam light distribution is
asymmetric. If you go abroad to a
country with opposite traffic direc-
tion, this asymmetric part will dazzle
oncoming car driver. To prevent daz-
zle, ECE regulation demand several
technical solutions (ex. automatic
change system, adhesive sheet, down
aiming). This headlamps are designed
not to dazzle opposite drivers. So, you
need not change your headlamps in a
country with opposite traffic direc-
tion.
i
OAE076028
Handle halogen bulbs with
care. Halogen bulbs contain
pressurized gas that will pro-
duce flying pieces of glass
that could cause injuries if
broken.
Wear eye protection when
changing a bulb. Allow the
bulb to cool down before han-
dling it.
WARNING
OAE076052
Page 499 of 526
7-51
7
Maintenance
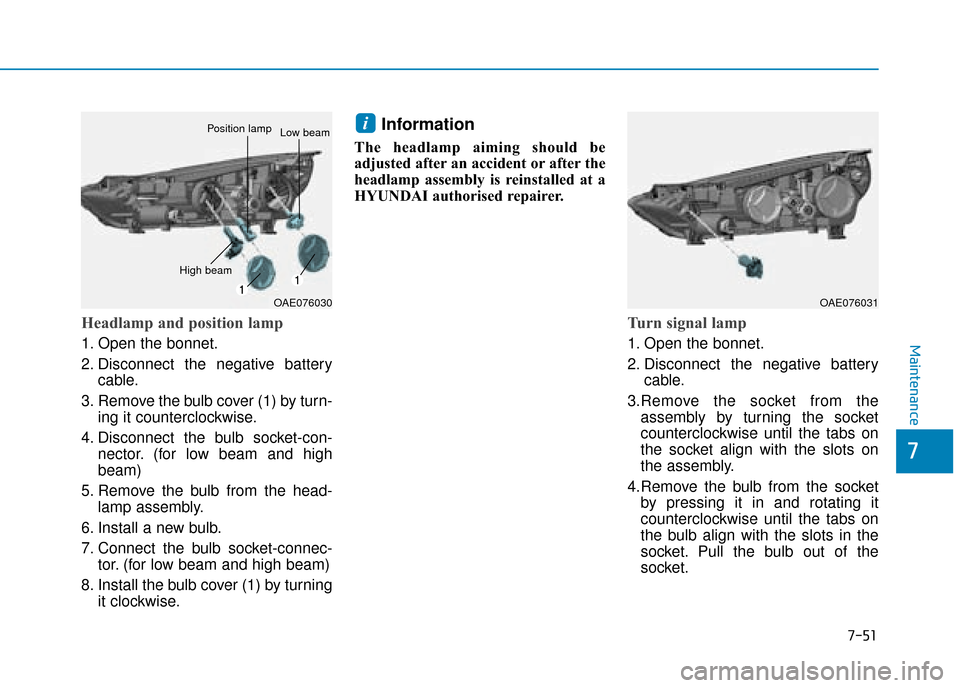
Headlamp and position lamp
1. Open the bonnet.
2. Disconnect the negative batterycable.
3. Remove the bulb cover (1) by turn- ing it counterclockwise.
4. Disconnect the bulb socket-con- nector. (for low beam and high
beam)
5. Remove the bulb from the head- lamp assembly.
6. Install a new bulb.
7. Connect the bulb socket-connec- tor. (for low beam and high beam)
8. Install the bulb cover (1) by turning it clockwise.
Information
The headlamp aiming should be
adjusted after an accident or after the
headlamp assembly is reinstalled at a
HYUNDAI authorised repairer.
Turn signal lamp
1. Open the bonnet.
2. Disconnect the negative batterycable.
3.Remove the socket from the assembly by turning the socket
counterclockwise until the tabs on
the socket align with the slots on
the assembly.
4.Remove the bulb from the socket by pressing it in and rotating it
counterclockwise until the tabs on
the bulb align with the slots in the
socket. Pull the bulb out of the
socket.
i
OAE076031OAE076030
Position lampLow beam
High beam
Page 501 of 526
7-53
7
Maintenance
Always handle them carefully, andavoid scratches and abrasions. If
the bulbs are lit, avoid contact with
liquids.
Never touch the glass with bare hands. Residual oil may cause the
bulb to overheat and burst when lit.
A bulb should be operated only when installed in a headlamp.
If a bulb becomes damaged or cracked, replace it immediately
and carefully dispose of it.
Information
The headlamp aiming should be
adjusted after an accident or after the
headlamp assembly is reinstalled at a
HYUNDAI authorised repairer.
Information
Traffic Change (For Europe)
The low beam light distribution is
asymmetric. If you go abroad to a
country with opposite traffic direc-
tion, this asymmetric part will dazzle
oncoming car driver. To prevent daz-
zle, ECE regulation demand several
technical solutions (ex. automatic
change system, adhesive sheet, down
aiming). This headlamps are designed
not to dazzle opposite drivers. So, you
need not change your headlamps in a
country with opposite traffic direc-
tion.
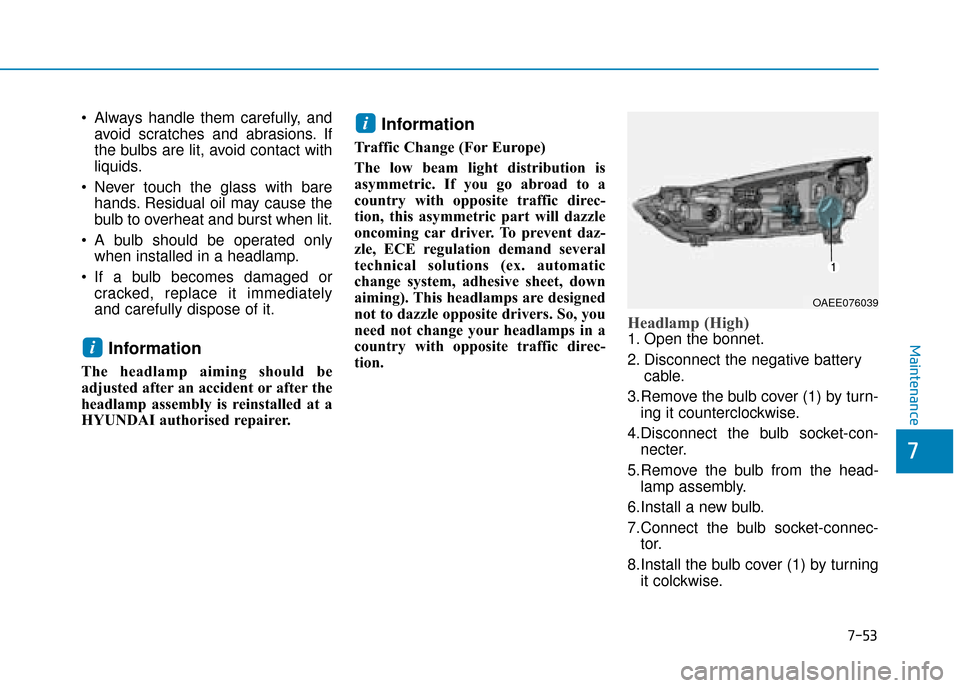
Headlamp (High)
1. Open the bonnet.
2. Disconnect the negative battery cable.
3.Remove the bulb cover (1) by turn- ing it counterclockwise.
4.Disconnect the bulb socket-con- necter.
5.Remove the bulb from the head- lamp assembly.
6.Install a new bulb.
7.Connect the bulb socket-connec- tor.
8.Install the bulb cover (1) by turning it colckwise.
i
i
OAEE076039
Page 502 of 526
7-54
Maintenance
Headlamp aiming
Headlamp aiming
1. Inflate the tyres to the specifiedpressure and remove any loads
from the vehicle except the driver,
spare tyre, and tools.
2. The vehicle should be placed on a flat floor.
3. Draw vertical lines (Vertical lines passing through respective head
lamp centres) and a horizontal line
(Horizontal line passing through
centre of head lamps) on the
screen. 4. With the headlamp and battery in
normal condition, aim the head-
lamps so the brightest portion falls
on the horizontal and vertical
lines.
5. To aim the low beam left or right, turn the driver clockwise or coun-
terclockwise. To aim the low beam
up or down, turn the driver clock-
wise or counterclockwise.
To aim the high beam up or down,turn the driver clockwise or coun-
terclockwise.
OAE076056L/OAEE076049L
■ Without headlight levelling device
OAE076057L/OAEE076050L
■With headlight levelling device