2019 Hyundai Ioniq Electric stop start
[x] Cancel search: stop startPage 401 of 526
5-85
Driving your vehicle
5
To temporarily accelerate withthe Smart Cruise Control on
If you want to speed up temporarily
when the Smart Cruise Control is on,
depress the accelerator pedal.
Increased speed will not interfere
with Smart Cruise Control operation
or change the set speed.
To return to the set speed, take your
foot off the accelerator pedal.
If you push the toggle switch down
(SET-) at increased speed, the cruis-
ing speed will be set again.
Information
Be careful when accelerating tem-
porarily, because the speed is not con-
trolled automatically at this time even
if there is a vehicle in front of you.
Smart Cruise Control will betemporarily cancelled when:
Cancelled manually
Depressing the brake pedal.
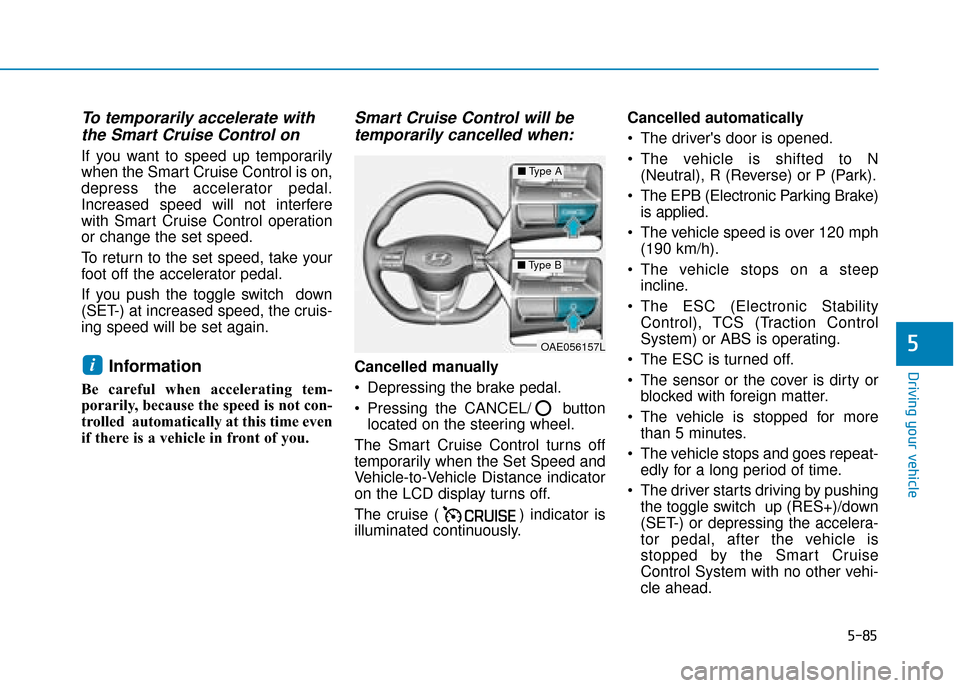
Pressing the CANCEL/ button
located on the steering wheel.
The Smart Cruise Control turns off
temporarily when the Set Speed and
Vehicle-to-Vehicle Distance indicator
on the LCD display turns off.
The cruise ( ) indicator is
illuminated continuously. Cancelled automatically
The driver's door is opened.
The vehicle is shifted to N
(Neutral), R (Reverse) or P (Park).
The EPB (Electronic Parking Brake) is applied.
The vehicle speed is over 120 mph (190 km/h).
The vehicle stops on a steep incline.
The ESC (Electronic Stability Control), TCS (Traction Control
System) or ABS is operating.
The ESC is turned off.
The sensor or the cover is dirty or blocked with foreign matter.
The vehicle is stopped for more than 5 minutes.
The vehicle stops and goes repeat- edly for a long period of time.
The driver starts driving by pushing the toggle switch up (RES+)/down
(SET-) or depressing the accelera-
tor pedal, after the vehicle is
stopped by the Smart Cruise
Control System with no other vehi-
cle ahead.i
OAE056157L
■ Type A
■Type B
Page 402 of 526
5-86
Driving your vehicle
The driver starts driving by pushing the toggle switch up (RES+)/down
(SET-) or depressing the accelera-
tor pedal, after stopping the vehicle
with a vehicle stopped far away in
front.
The accelerator pedal is continu- ously depressed for more than one
minute.
The FCA is activated. Each of these actions will cancel
the Smart Cruise Control opera-
tion. The Set Speed and Vehicle-to-
Vehicle Distance on the LCD dis-
play will go off.
In a condition the Smart Cruise
Control is cancelled automatically,
the Smart Cruise Control will not
resume even though the RES+ or
SET- toggle switch is pushed.
Information
If the Smart Cruise Control is cancelled
by other than the reasons mentioned,
we recommend that the system be
checked by a HYUNDAI authorised
repairer.
SCC (Smart Cruise Cntrl.) can-
celled
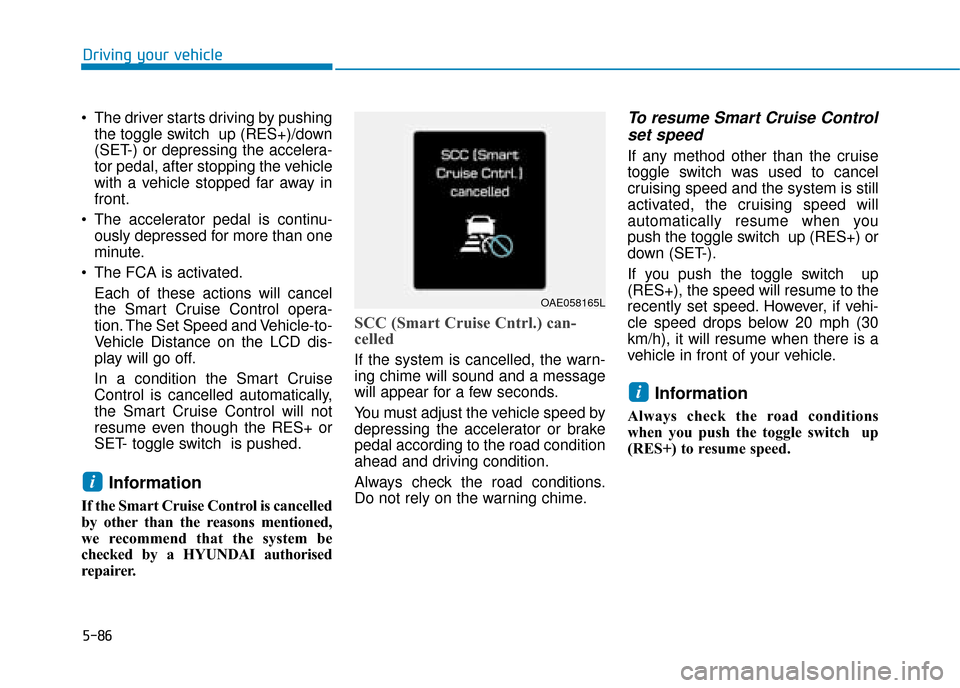
If the system is cancelled, the warn-
ing chime will sound and a message
will appear for a few seconds.
You must adjust the vehicle speed by
depressing the accelerator or brake
pedal according to the road condition
ahead and driving condition.
Always check the road conditions.
Do not rely on the warning chime.
To resume Smart Cruise Control set speed
If any method other than the cruise
toggle switch was used to cancel
cruising speed and the system is still
activated, the cruising speed will
automatically resume when you
push the toggle switch up (RES+) or
down (SET-).
If you push the toggle switch up
(RES+), the speed will resume to the
recently set speed. However, if vehi-
cle speed drops below 20 mph (30
km/h), it will resume when there is a
vehicle in front of your vehicle.
Information
Always check the road conditions
when you push the toggle switch up
(RES+) to resume speed.
i
i
OAE058165L
Page 406 of 526
5-90
Driving your vehicle
In traffic situation
Use switch or pedal to accelerate
In traffic, your vehicle will stop if thevehicle ahead of you stops. Also, if
the vehicle ahead of you starts
moving, your vehicle will start as
well. However, if the vehicle stops
for more than 3 seconds, you must
depress the accelerator pedal or
push up the toggle switch (RES+)
to start driving. If you push the smart cruise control
toggle switch (RES+ or SET-)
whilst Auto Hold and smart cruise
control is operating the Auto Hold
will be released regardless of
accelerator pedal operation and
the vehicle will start to move. The
AUTO HOLD indicator changes
from green to white.
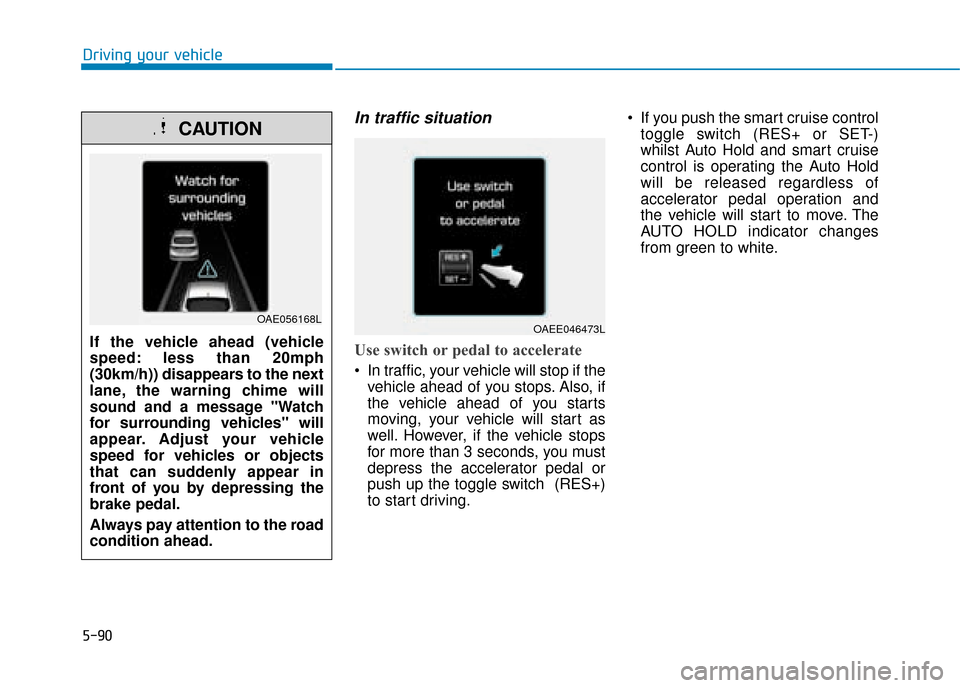
If the vehicle ahead (vehicle
speed: less than 20mph
(30km/h)) disappears to the next
lane, the warning chime will
sound and a message "Watch
for surrounding vehicles" will
appear. Adjust your vehicle
speed for vehicles or objects
that can suddenly appear in
front of you by depressing the
brake pedal.
Always pay attention to the road
condition ahead.
CAUTION
OAE056168LOAEE046473L
Page 425 of 526
6-2
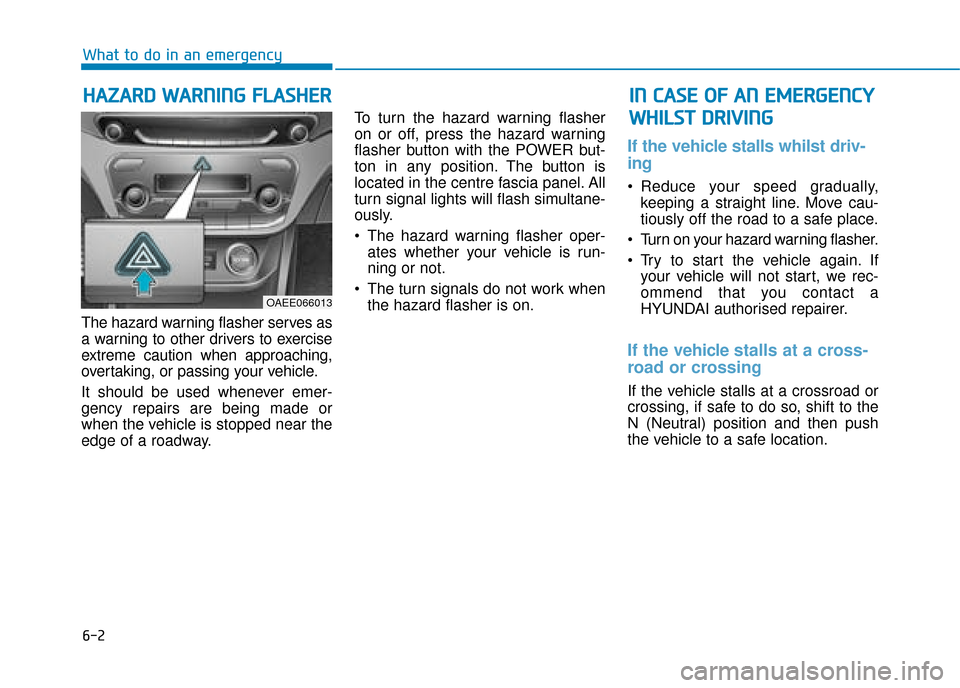
The hazard warning flasher serves as
a warning to other drivers to exercise
extreme caution when approaching,
overtaking, or passing your vehicle.
It should be used whenever emer-
gency repairs are being made or
when the vehicle is stopped near the
edge of a roadway.To turn the hazard warning flasher
on or off, press the hazard warning
flasher button with the POWER but-
ton in any position. The button is
located in the centre fascia panel. All
turn signal lights will flash simultane-
ously.
• The hazard warning flasher oper-
ates whether your vehicle is run-
ning or not.
The turn signals do not work when the hazard flasher is on.
If the vehicle stalls whilst driv-
ing
Reduce your speed gradually,keeping a straight line. Move cau-
tiously off the road to a safe place.
Turn on your hazard warning flasher.
Try to start the vehicle again. If your vehicle will not start, we rec-
ommend that you contact a
HYUNDAI authorised repairer.
If the vehicle s talls at a cross-
road or crossing
If the vehicle stalls at a crossroad or
crossing, if safe to do so, shift to the
N (Neutral) position and then push
the vehicle to a safe location.
H H A
AZ
ZA
A R
RD
D
W
W A
AR
RN
N I
IN
N G
G
F
F L
LA
A S
SH
H E
ER
R
What to do in an emergency
I
IN
N
C
C A
A S
SE
E
O
O F
F
A
A N
N
E
E M
M E
ER
R G
G E
EN
N C
CY
Y
W
W H
HI
IL
L S
S T
T
D
D R
RI
IV
V I
IN
N G
G
OAEE066013
Page 432 of 526
6-9
What to do in an emergency
6
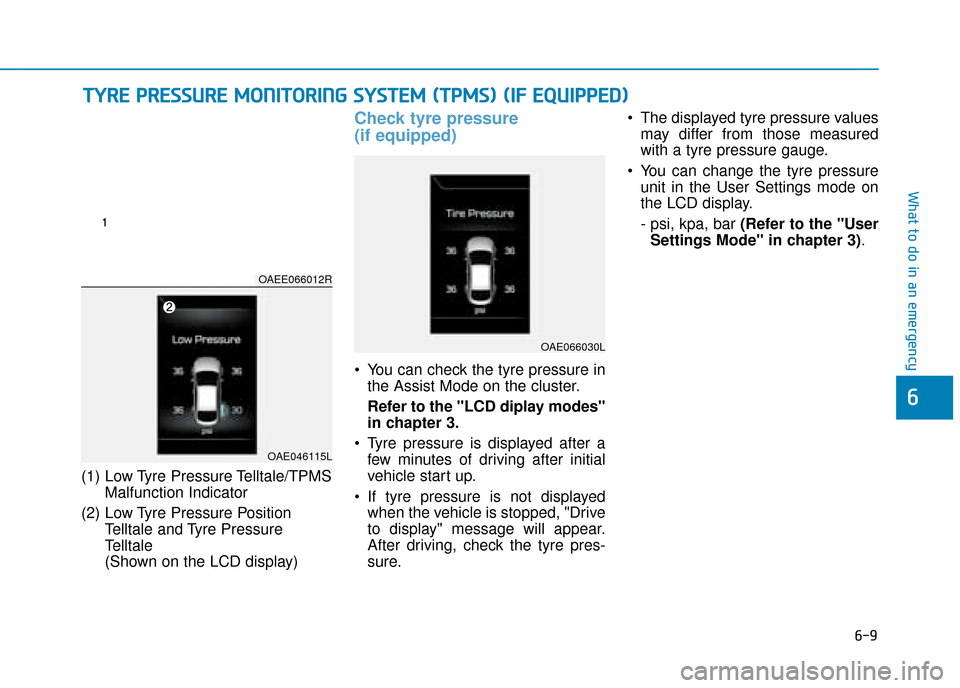
(1) Low Tyre Pressure Telltale/TPMSMalfunction Indicator
(2) Low Tyre Pressure Position Telltale and Tyre Pressure
Telltale
(Shown on the LCD display)
Check tyre pressure
(if equipped)
You can check the tyre pressure inthe Assist Mode on the cluster.
Refer to the "LCD diplay modes"
in chapter 3.
Tyre pressure is displayed after a few minutes of driving after initial
vehicle start up.
If tyre pressure is not displayed when the vehicle is stopped, "Drive
to display" message will appear.
After driving, check the tyre pres-
sure. The displayed tyre pressure values
may differ from those measured
with a tyre pressure gauge.
You can change the tyre pressure unit in the User Settings mode on
the LCD display.
- psi, kpa, bar (Refer to the "User
Settings Mode" in chapter 3) .
T TY
Y R
RE
E
P
P R
R E
ES
SS
SU
U R
RE
E
M
M O
ON
NI
IT
T O
O R
RI
IN
N G
G
S
S Y
Y S
ST
T E
EM
M
(
( T
T P
P M
M S
S)
)
(
( I
IF
F
E
E Q
Q U
UI
IP
P P
PE
ED
D )
)
OAEE066012R
OAE046115L
OAE066030L
Page 433 of 526
6-10
What to do in an emergency
Tyre pressure monitoring sys-
tem
Each tyre should be checked month-
ly when cold and inflated to the infla-
tion pressure recommended by the
vehicle manufacturer on the vehicle
placard or tyre inflation pressure
label. (If your vehicle has tyres of a
different size than the size indicated
on the vehicle placard or tyre infla-
tion pressure label, you should deter-
mine the proper tyre inflation pres-
sure for those tyres.)As an added safety feature, your
vehicle has been equipped with a
tyre pressure monitoring system
(TPMS) that illuminates a low tyre
pressure telltale when one or more
of your tyres is significantly under-
inflated. Accordingly, when the low
tyre pressure telltale illuminates, you
should stop and check your tyres as
soon as possible, and inflate them to
the proper pressure. Driving on a sig-
nificantly under-inflated tyre causes
the tyre to overheat and can lead to
tyre failure.
Under-inflation also reduces fuel effi-
ciency and tyre tread life, and may
affect the vehicle’s handling and
stopping ability.
Please note that the TPMS is not a
substitute for proper tyre mainte-
nance, and it is the driver’s responsi-
bility to maintain correct tyre pres-
sure, even if under-inflation has not
reached the level to trigger illumina-
tion of the TPMS low tyre pressure
telltale.Your vehicle has also been equipped
with a TPMS malfunction indicator to
indicate when the system is not
operating properly. The TPMS mal-
function indicator is combined with
the low tyre pressure telltale. When
the system detects a malfunction,
the telltale will flash for approximate-
ly one minute and then remain con-
tinuously illuminated. This sequence
will continue upon subsequent vehi-
cle start-ups as long as the malfunc-
tion exists.
When the malfunction indicator is illu-
minated, the system may not be able
to detect or signal low tyre pressure
as intended. TPMS malfunctions may
occur for a variety of reasons, includ-
ing the installation of replacement or
alternate tyres or wheels on the vehi-
cle that prevent the TPMS from func-
tioning properly.
Always check the TPMS malfunction
telltale after replacing one or more
tyres or wheels on your vehicle to
ensure that the replacement or alter-
nate tyres and wheels allow the
TPMS to continue to function proper-
ly.
Over-inflation or under-inflation
can reduce tyre life, adversely
affect vehicle handling, and
lead to sudden tyre failure that
may cause loss of vehicle con-
trol resulting in an accident.
WARNING
Page 458 of 526
7-10
MaintenanceThe electric motor for the cooling fan
is controlled by coolant temperature,
refrigerant pressure and vehicle
speed. As the coolant temperature
decreases, the electric motor will
automatically shut off. This is a nor-
mal condition.
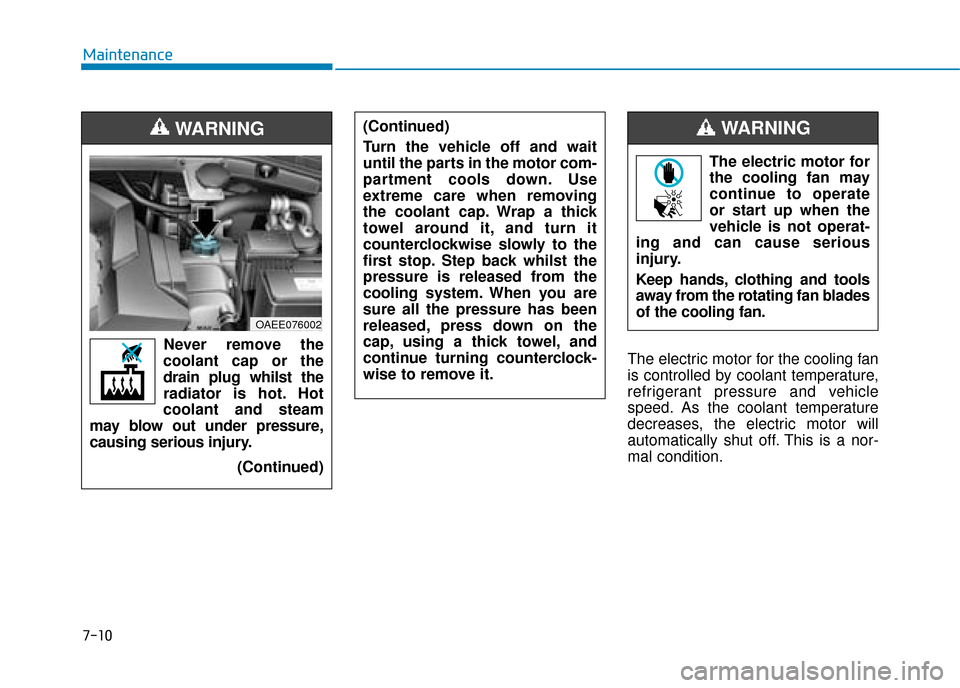
Never remove the
coolant cap or the
drain plug whilst the
radiator is hot. Hot
coolant and steam
may blow out under pressure,
causing serious injury.
(Continued)
WARNING
OAEE076002
The electric motor for
the cooling fan may
continue to operate
or start up when the
vehicle is not operat-
ing and can cause serious
injury.
Keep hands, clothing and tools
away from the rotating fan blades
of the cooling fan.
WARNING (Continued)
Turn the vehicle off and wait
until the parts in the motor com-
partment cools down. Use
extreme care when removing
the coolant cap. Wrap a thick
towel around it, and turn it
counterclockwise slowly to the
first stop. Step back whilst the
pressure is released from the
cooling system. When you are
sure all the pressure has been
released, press down on the
cap, using a thick towel, and
continue turning counterclock-
wise to remove it.
Page 489 of 526
7-41
7
Maintenance
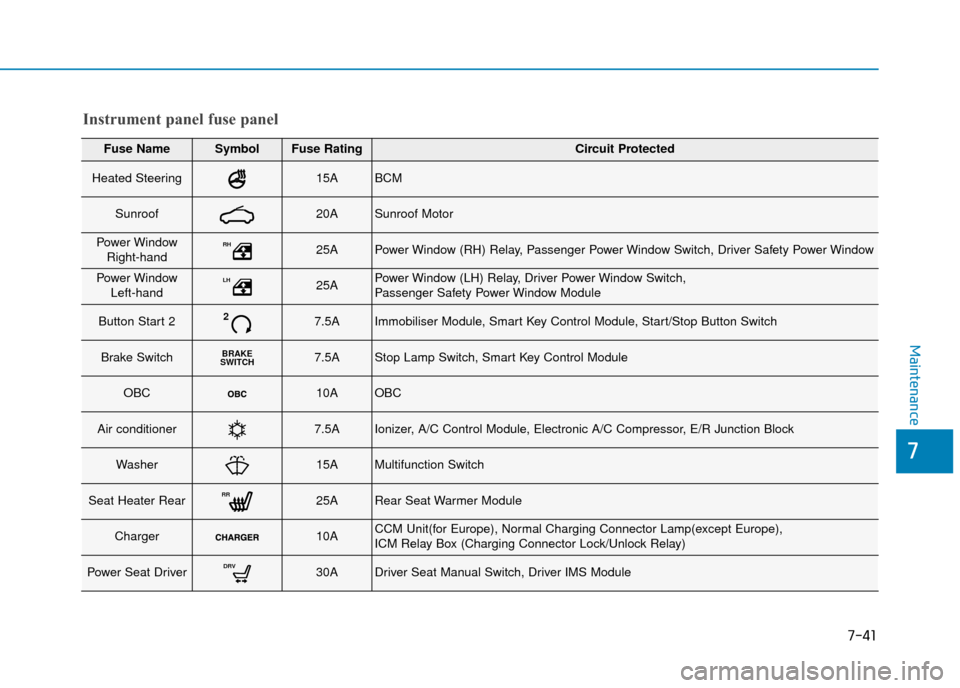
Fuse NameSymbolFuse RatingCircuit Protected
Heated Steering15ABCM
Sunroof20ASunroof Motor
Power WindowRight-handRH25APower Window (RH) Relay, Passenger Power Window Switch, Driver Safety Power Window
Power Window Left-handLH25APower Window (LH) Relay, Driver Power Window Switch,
Passenger Safety Power Window Module
Button Start 227.5AImmobiliser Module, Smart Key Control Module, Start/Stop Button Switch
Brake SwitchBRAKE
SWITCH7.5AStop Lamp Switch, Smart Key Control Module
OBC10AOBC
Air conditioner7.5AIonizer, A/C Control Module, Electronic A/C Compressor, E/R Junction Block
Washer15AMultifunction Switch
Seat Heater RearRR25ARear Seat Warmer Module
Charger10ACCM Unit(for Europe), Normal Charging Connector Lamp(except Europe),
ICM Relay Box (Charging Connector Lock/Unlock Relay)
Power Seat DriverDRV30ADriver Seat Manual Switch, Driver IMS Module
Instrument panel fuse panel