2019 Hyundai Ioniq Electric air conditioning
[x] Cancel search: air conditioningPage 255 of 526
3-108
Convenient features of your vehicle
Air conditioning
HYUNDAI Air Conditioning Systems
are filled with R-134a or R1234yf
refrigerant.
1. Start the vehicle. Push the air con-ditioning button.
2. Set the mode to the position.
3. Set the air intake control to the out- side air or recirculated air position.
4. Adjust the fan speed control and temperature control to maintain
maximum comfort.
Information
Your vehicle is filled with R-134a or
R-1234yf according to the regulation
in your country at the time of produc-
tion. You can find out which air condi-
tioning refrigerant is applied to your
vehicle on the label located inside of
the bonnet. The refrigerant system should
only be serviced by trained and
certified technicians to insure
proper and safe operation.
The refrigerant system should be serviced in a well-ventilated
place.
The air conditioning evaporator (cooling coil) shall never be
repaired or replaced with one
removed from a used or sal-
vaged vehicle and new replace-
ment MAC evaporators shall be
certified (and labeled) as meet-
ing SAE Standard J2842.
Information
When opening the windows in humid
weather air conditioning may create
water droplets inside the vehicle.
Since excessive water droplets may
cause damage to electrical equipment,
air conditioning should only be used
with the windows closed.
iNOTICE
i
Page 256 of 526
3-109
Convenient features of your vehicle
3
Air conditioning system operation
tips
If the vehicle has been parked indirect sunlight during hot weather,
open the windows for a short time
to let the hot air inside the vehicle
escape.
Use air conditioning to reduce humidity and moisture inside the
vehicle on rainy or humid days.
During air conditioning system operation, you may occasionally
notice a slight change in the vehicle
speed as the air conditioning com-
pressor cycles. This is a normal
system operation characteristic. Use the air conditioning system
every month only for a few minutes
to ensure maximum system per-
formance.
When using the air conditioning system, you may notice clear water
dripping (or even puddling) on the
ground under the passenger side of
the vehicle. This is a normal system
operation characteristic.
Operating the air conditioning sys- tem in the recirculated air position
provides maximum cooling, howev-
er, continual operation in this mode
may cause the air inside the vehicle
to become stale.
During cooling operation, you may occasionally notice a misty air flow
because of r apid cooling and
humid air intake. This is a normal
system operation characteristic.
System maintenance
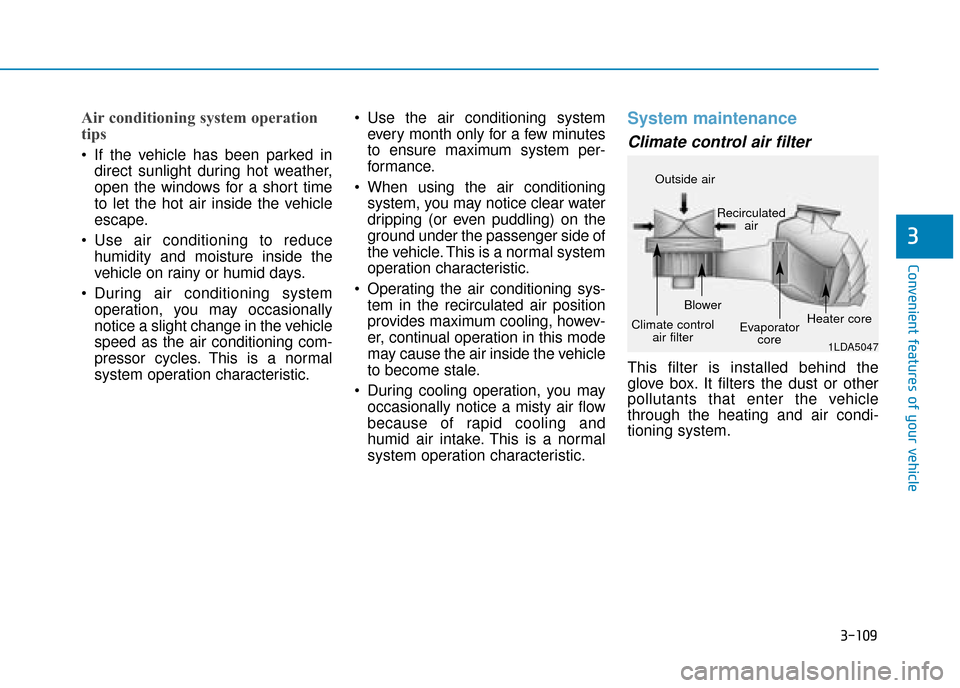
Climate control air filter
This filter is installed behind the
glove box. It filters the dust or other
pollutants that enter the vehicle
through the heating and air condi-
tioning system.
1LDA5047
Outside air
Recirculatedair
Climate control air filter Blower
Evaporatorcore Heater core
Page 259 of 526
3-112
Convenient features of your vehicle For maximum defrosting, set thetemperature control to the extreme
right/hot position and the fan speed
control to the highest speed.
If warm air to the floor is desired whilst defrosting or defogging, set
the mode to the floor-defrost posi-
tion.
Before driving, clear all snow and ice from the windscreen, rear win-
dow, outside rear view mirrors, and
all side windows.
Clear all snow and ice from the bonnet and air inlet in the cowl grill
to improve heater and defroster
efficiency and to reduce the proba-
bility of fogging up inside of the
windscreen.
Automatic climate control
system
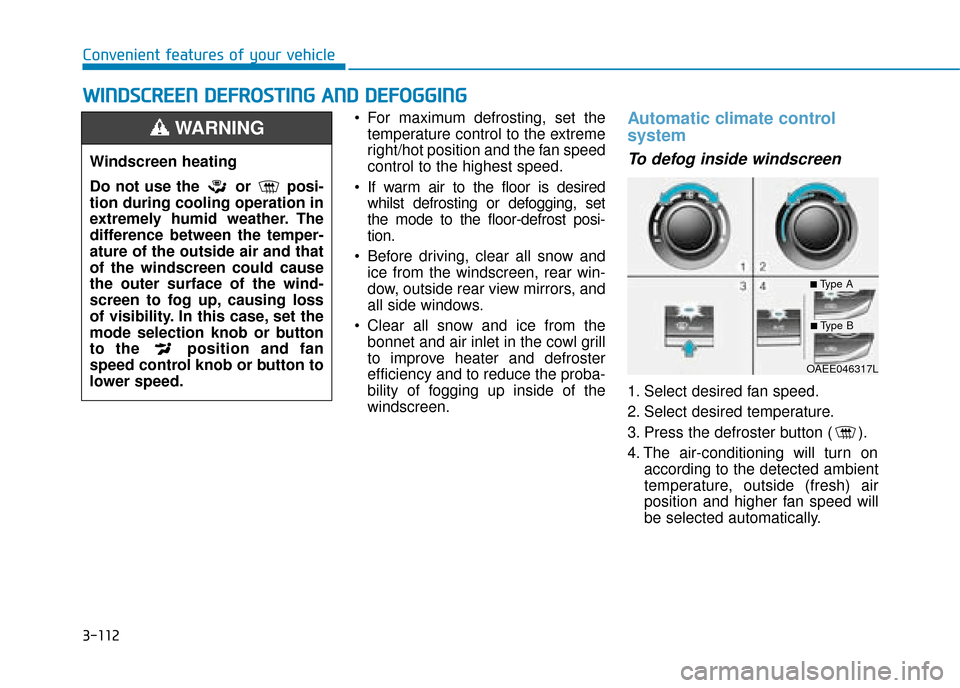
To defog inside windscreen
1. Select desired fan speed.
2. Select desired temperature.
3. Press the defroster button ( ).
4. The air-conditioning will turn on according to the detected ambient
temperature, outside (fresh) air
position and higher fan speed will
be selected automatically.
W
WI
IN
N D
DS
SC
C R
R E
EE
EN
N
D
D E
EF
FR
R O
O S
ST
T I
IN
N G
G
A
A N
N D
D
D
D E
EF
FO
O G
GG
GI
IN
N G
G
Windscreen heating
Do not use the or posi-
tion during cooling operation in
extremely humid weather. The
difference between the temper-
ature of the outside air and that
of the windscreen could cause
the outer surface of the wind-
screen to fog up, causing loss
of visibility. In this case, set the
mode selection knob or button
to the position and fan
speed control knob or button to
lower speed.
WARNING
OAEE046317L
■Type A
■Type B
Page 260 of 526
3-113
Convenient features of your vehicle
3
If the air-conditioning, outside (fresh)
air position and higher fan speed are
not selected automatically, adjust the
corresponding button or knob manu-
ally.
If the position is selected, lower
fan speed is controlled to higher fan
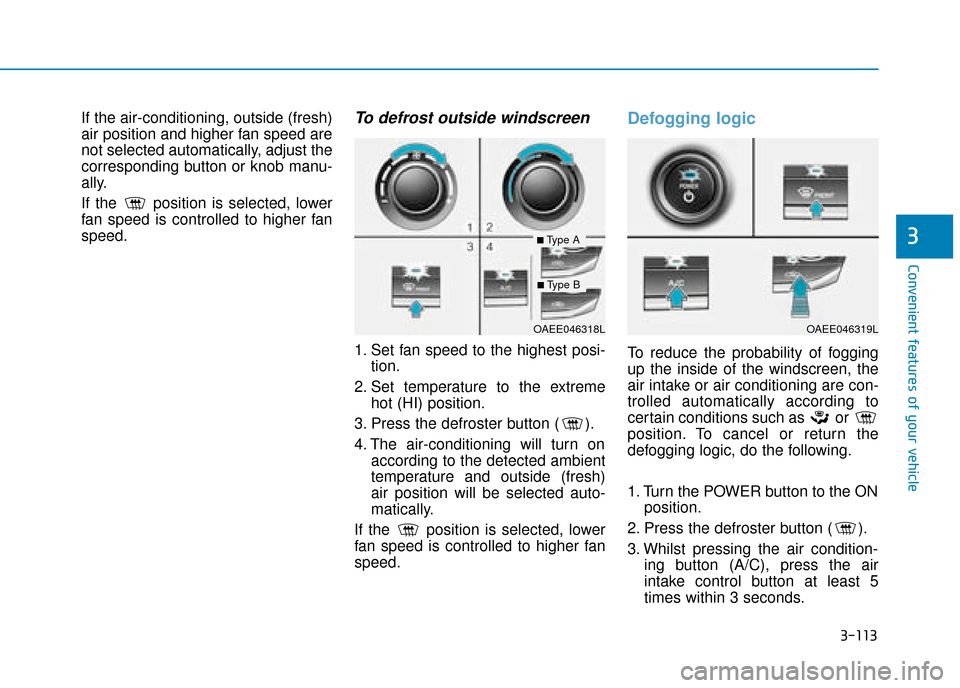
speed.To defrost outside windscreen
1. Set fan speed to the highest posi-tion.
2. Set temperature to the extreme hot (HI) position.
3. Press the defroster button ( ).
4. The air-conditioning will turn on according to the detected ambient
temperature and outside (fresh)
air position will be selected auto-
matically.
If the position is selected, lower
fan speed is controlled to higher fan
speed.
Defogging logic
To reduce the probability of fogging
up the inside of the windscreen, the
air intake or air conditioning are con-
trolled automatically according to
certain conditions such as or
position. To cancel or return the
defogging logic, do the following.
1. Turn the POWER button to the ON position.
2. Press the defroster button ( ).
3. Whilst pressing the air condition- ing button (A/C), press the air
intake control button at least 5
times within 3 seconds.
OAEE046318LOAEE046319L
■Type A
■Type B
Page 261 of 526
3-114
Convenient features of your vehicle
The climate control information
screen will blink 3 times. It indicates
that the defogging logic is cancelled
or returned to the programmed sta-
tus.
If the battery has been discharged or
disconnected, it resets to the defog
logic status.
Auto defogging system
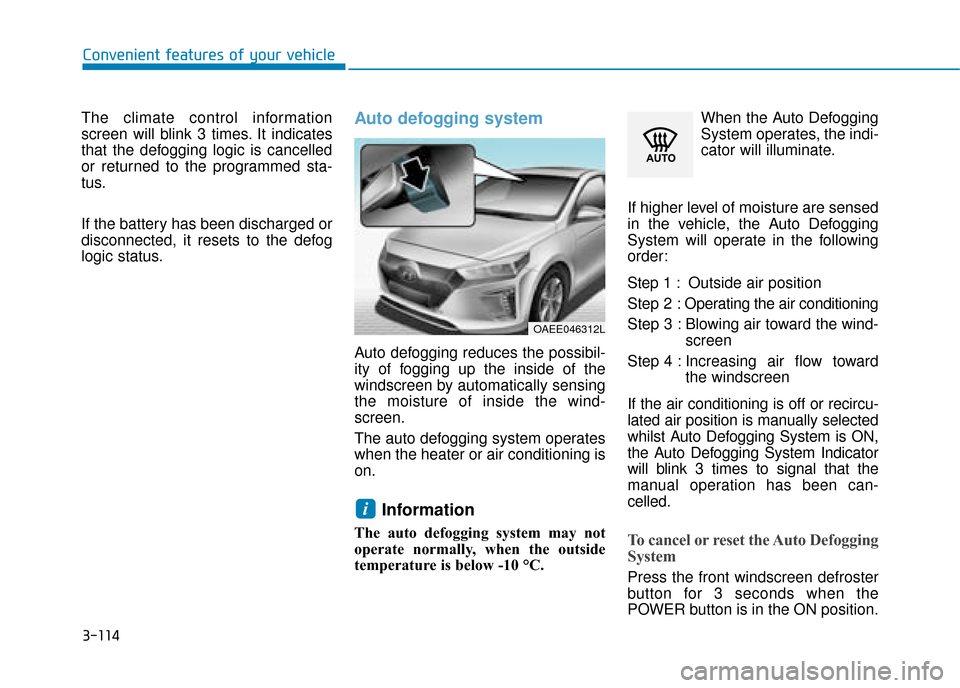
Auto defogging reduces the possibil-
ity of fogging up the inside of the
windscreen by automatically sensing
the moisture of inside the wind-
screen.
The auto defogging system operates
when the heater or air conditioning is
on.
Information
The auto defogging system may not
operate normally, when the outside
temperature is below -10 °C. When the Auto Defogging
System operates, the indi-
cator will illuminate.
If higher level of moisture are sensed
in the vehicle, the Auto Defogging
System will operate in the following
order:
Step 1 : Outside air position
Step 2 : Operating the air conditioning
Step 3 : Blowing air toward the wind- screen
Step 4 : Increasing air flow toward the windscreen
If the air conditioning is off or recircu-
lated air position is manually selected
whilst Auto Defogging System is ON,
the Auto Defogging System Indicator
will blink 3 times to signal that the
manual operation has been can-
celled.To cancel or reset the Auto Defogging
System
Press the front windscreen defroster
button for 3 seconds when the
POWER button is in the ON position.
i
OAEE046312L
Page 262 of 526
3-115
Convenient features of your vehicle
3
When the Auto Defogging System is
cancelled, ADS OFF symbol will
blink 3 times and the ADS OFF will
be displayed on the climate control
information screen.
When the Auto Defogging System is
reset, ADS OFF symbol will blink 6
times without a signal.
Information
• When the air conditioning is turnedon by Auto defogging system, if you
try to turn off the air conditioning, the
indicator will blink 3 times and the air
conditioning will not be turned off.
• For efficiency, do not select recircu- lated air position whilst Auto defog-
ging system is operating.
Do not remove the sensor cover
located on the upper end of the
windscreen glass.
Damage to system parts could
occur and may not be covered by
your vehicle warranty.
Sunroof inside air recirculation
(if equipped)
If the sunroof opens whilst the heater
or Air Conditioning system operates,
the outside (fresh) air will be select-
ed automatically for ventilating the
car. Then, if you select the recirculat-
ed air position, the outside (fresh) air
will be selected automatically after 3
minutes.
If you close the sunroof, the intake
mode will be changed to the previous
selected mode.
NOTICE
i
C C L
LI
IM
M A
AT
TE
E
C
C O
O N
NT
TR
R O
O L
L
A
A D
DD
DI
IT
T I
IO
O N
NA
AL
L
F
F E
E A
A T
TU
U R
RE
ES
S
Page 429 of 526
6-6
What to do in an emergency
Jump starting procedure
1. Position the vehicles close enoughthat the jumper cables will reach,
but do not allow the vehicles to
touch.
2. Avoid fans or any moving parts in the motor compartment at all
times, even when the vehicles are
turned off.
3. Turn off all electrical devices such as radios, lights, air conditioning,
etc. Put the vehicles in P (Park)
and set the parking brakes. Turn
both vehicles OFF. 4. Connect the jumper cables in the
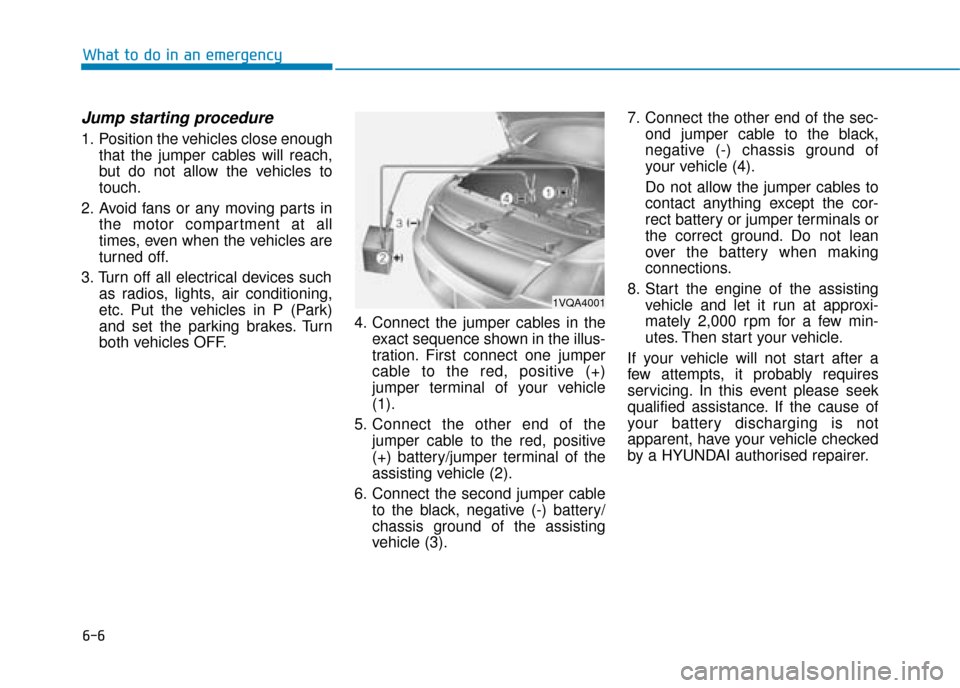
exact sequence shown in the illus-
tration. First connect one jumper
cable to the red, positive (+)
jumper terminal of your vehicle
(1).
5. Connect the other end of the jumper cable to the red, positive
(+) battery/jumper terminal of the
assisting vehicle (2).
6. Connect the second jumper cable to the black, negative (-) battery/
chassis ground of the assisting
vehicle (3). 7. Connect the other end of the sec-
ond jumper cable to the black,
negative (-) chassis ground of
your vehicle (4).
Do not allow the jumper cables to
contact anything except the cor-
rect battery or jumper terminals or
the correct ground. Do not lean
over the battery when making
connections.
8. Start the engine of the assisting vehicle and let it run at approxi-
mately 2,000 rpm for a few min-
utes. Then start your vehicle.
If your vehicle will not start after a
few attempts, it probably requires
servicing. In this event please seek
qualified assistance. If the cause of
your battery discharging is not
apparent, have your vehicle checked
by a HYUNDAI authorised repairer.
1VQA4001
Page 431 of 526
6-8
What to do in an emergency
1. Pull off the road and stop as soon as it is safe to do so.
2. Shift to P (Park) and set the park- ing brake. If the air conditioning is
on, turn it off.
3. If coolant is running out under the vehicle or steam is coming out
from the bonnet, stop the vehicle.
Do not open the bonnet until the
coolant has stopped running or
the steaming has stopped. If there
is no visible loss of coolant and no
steam, leave the vehicle running
and check to be sure the cooling
fan is operating. If the fan is not
running, turn the vehicle off.
4. Check for coolant leaking from the radiator, hoses or under the vehi-
cle. (If the air conditioning had
been in use, it is normal for cold
water to be draining from it when
you stop). 5. If coolant is leaking out, turn off
the vehicle immediately and we
recommend that you call a
HYUNDAI authorised repairer for
assistance.
6. If you cannot find the cause of the overheating, wait until the radiator
temperature has returned to nor-
mal. Then, if coolant has been
lost, carefully add coolant to the
reservoir to bring the fluid level in
the reservoir up to the halfway
mark. 7. Proceed with caution, keeping
alert for further signs of overheat-
ing. If overheating happens again,
we recommend that you call a
HYUNDAI authorised repairer for
assistance.
Serious loss of coolant indi- cates there is a leak in the cool-
ing system and we recommend
that the system be checked by a
HYUNDAI authorised repairer.
When overheating from low coolant, suddenly adding coolant
may cause damages in the motor
compartments. To prevent dam-
age, add coolant slowly in small
quantities.
NOTICE
I IF
F
T
T H
H E
E
V
V E
EH
H I
IC
C L
LE
E
O
O V
VE
ER
R H
H E
EA
A T
TS
S
Do not remove the coolant cap
when the radiator is hot. This
can allow coolant to blow out of
the opening and cause serious
burns.
WARNING