Page 193 of 727
Continued191
uuOperating the Switches Around the Steering Wheel uENGINE START/STOP Button
Controls
If you leave the vehicle for 30 to 60 minutes with the transmission in (P*1 and the
power mode in ACCESSORY, the vehicle automa tically goes into the mode similar to
VEHICLE OFF (LOCK) to avoid draining the battery.
When in this mode:
The steering wheel does not lock.
You cannot lock or unlock doors with the re mote transmitter or the smart entry with
push button start system
*.
Press the ENGINE START/STOP button twice to switch the mode to VEHICLE OFF
(LOCK).
If you open the driver’s door when the power mode is set to ACCESSORY, a warning
buzzer sounds.
*1 : Automatic transmission/Continuously variable transmission models
■Automatic Power Off
■Power Mode Reminder
1 Changing the Power Mode
If the power mode does not change from VEHICLE
OFF to ACCESSORY, press the ENGINE START/STOP
button while moving the st eering wheel left and
right. The steering wheel will unlock, allowing the
mode to change.
Do not leave the power mode in ACCESSORY or ON
when you get out.
Manual transmission modelsContinuously variable transmission models
for Canadian models
Manual transmission models
Continuously variable transmission models
for Canadian models
* Not available on all models
Page 194 of 727
uuOperating the Switches Around the Steering Wheel uENGINE START/STOP Button
192
Controls
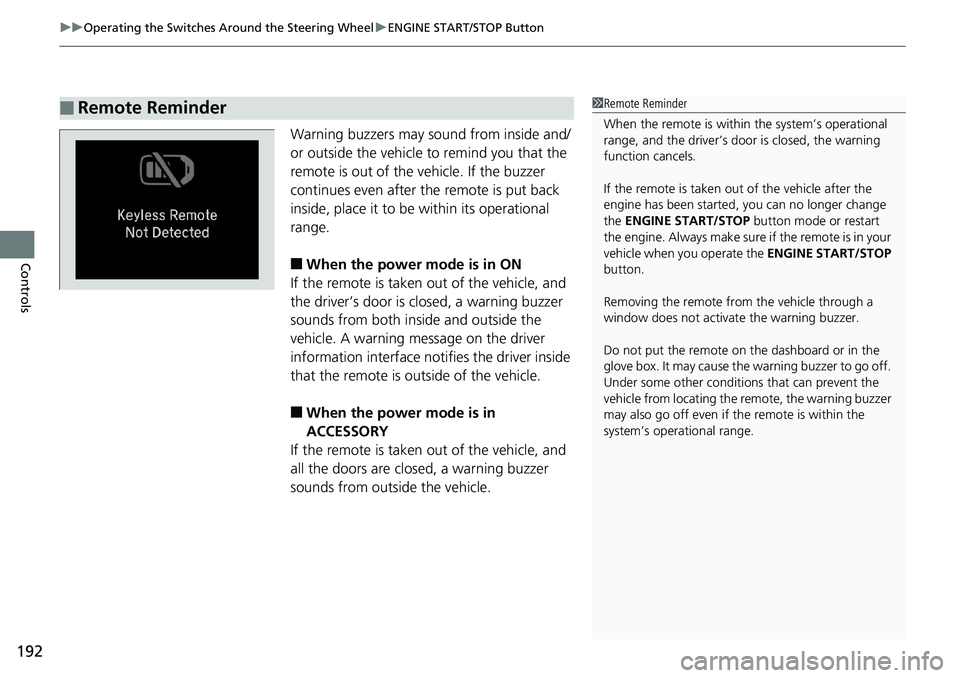
Warning buzzers may sound from inside and/
or outside the vehicle to remind you that the
remote is out of the vehicle. If the buzzer
continues even after the remote is put back
inside, place it to be within its operational
range.
■When the power mode is in ON
If the remote is taken out of the vehicle, and
the driver’s door is closed, a warning buzzer
sounds from both inside and outside the
vehicle. A warning me ssage on the driver
information interface notifies the driver inside
that the remote is outside of the vehicle.
■When the power mode is in
ACCESSORY
If the remote is taken out of the vehicle, and
all the doors are closed, a warning buzzer
sounds from outside the vehicle.
■Remote Reminder1 Remote Reminder
When the remote is within the system’s operational
range, and the driver’s door is closed, the warning
function cancels.
If the remote is taken out of the vehicle after the
engine has been started, you can no longer change
the ENGINE START/STOP button mode or restart
the engin e. Always make sure if the remote is in your
vehicle when you operate the ENGINE START/STOP
button.
Removing the remote fr om the vehicle through a
window does not activate the warning buzzer.
Do not put the remote on the dashboard or in the
glove box. It may cause the warning buzzer to go off.
Under some other conditions that can prevent the
vehicle from locating the remote, the warning buzzer
may also go off even if the remote is within the
system’s operational range.
Page 195 of 727

193
uuOperating the Switches Around the Steering Wheel uTurn Signals
Continued
Controls
Turn Signals
The turn signals can be used when the power
mode is in ON.
■One-touch turn signal
When you lightly push up or down and release
the turn signal lever, th e exterior turn signals
and turn signal indicator blink three times.
This feature can be used when signaling for a
lane change.
Light Switches
Rotating the light switch turns the lights on
and off, regardless of the power mode
setting.
■High beams
Push the lever forward until you hear a click.
■Low beams
When in high beams, pull the lever back to
return to low beams.
■Flashing the high beams
Pull the lever back, and release it.
Right Turn
Left Turn
■Manual Operation
1 Light Switches
If you leave the power mode in VEHICLE OFF while
the lights are on, a chime sounds when the driver’s
door is opened.
When the lights are on, the lights on indicator in the
instrument pane l will be on.
2 Lights On Indicator P. 94
Do not leave the lights on when the engine is off
because it will cause the battery to discharge.
If you sense that the le vel of the headlights is
abnormal, have the vehicl e inspected by a dealer.
High Beams
Flashing the high beams
Low Beams
Turns on parking, side marker,
tail, and rear license plate lights
Turns on headlights, parking, side
marker, tail, and rear license plate
lights
Page 201 of 727
199
uuOperating the Switches Around the Steering Wheel uAuto High-Beam
Controls
Disabling or re-enabling the system when the
vehicle is parked with the power mode is in
ON and the light switch is in the AUTO
position.
Disabling the system: Pull the light switch
lever towards you and hold it for 40 seconds.
The indicator blinks twice.
Re-enabling the system: Pull the light
switch lever towards you and hold it for 30
seconds. The indicator blinks once.
■Disabling or Re-enabling the System1 Disabling or Re-enabling the System
The auto high-beam is in the previously selected
disabled or re-enabled sett ing each time you start the
engine.
AUTO Position
Page 204 of 727
202
uuOperating the Switches Around the Steering Wheel uRear Defogger/Heated Door Mirror* Button
Controls
Rear Defogger/Heated Door Mirror* Button
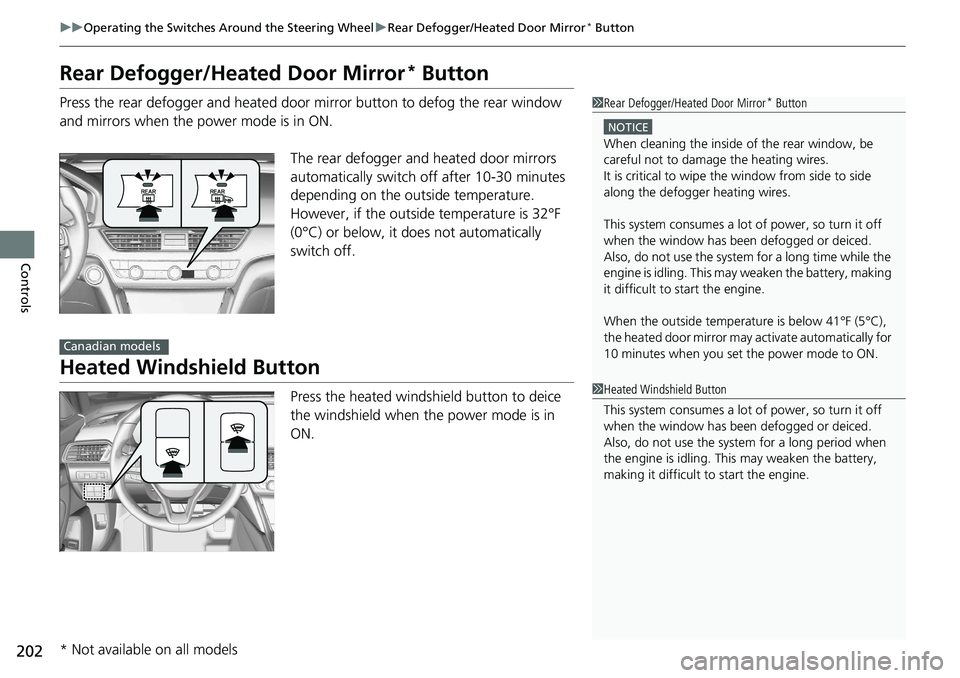
Press the rear defogger and heated door mirror button to defog the rear window
and mirrors when the power mode is in ON.
The rear defogger and heated door mirrors
automatically switch off after 10-30 minutes
depending on the outside temperature.
However, if the outside temperature is 32°F
(0°C) or below, it does not automatically
switch off.
Heated Windshield Button
Press the heated windshield button to deice
the windshield when the power mode is in
ON.
1 Rear Defogger/Heated Door Mirror* Button
NOTICE
When cleaning the inside of the rear window, be
careful not to damage the heating wires.
It is critical to wipe the window from side to side
along the defogger heating wires.
This system consumes a lot of power, so turn it off
when the window has been defogged or deiced.
Also, do not use the system for a long time while the
engine is idling. This may weaken the battery, making
it difficult to start the engine.
When the outside temperature is below 41°F (5°C),
the heated door mirror may activate automatically for
10 minutes when you set the power mode to ON.
Canadian models
1 Heated Windshield Button
This system consumes a lot of power, so turn it off
when the window has been defogged or deiced.
Also, do not use the system for a long period when
the engine is idling. This may weaken the battery,
making it difficult to start the engine.
* Not available on all models
Page 207 of 727
205
uuOperating the Switches Around the Steering Wheel uDriving Position Memory System*
Continued
Controls
Driving Position Memory System*
You can store two driver’s seat positions (except for power lumbar) with the driving
position memory system.
When you unlock and open the driver's door with a remote transmitter, or smart
entry system to one of the two preset po sitions and the seat adjusts to retracted
positions of one of the two preset positions automatically.
The seat will move to the stored position when you set the power mode to
ACCESSORY.
When you enter the vehicle, the driver information interface briefly shows you which
remote transmitter you used to unlock the vehicle.
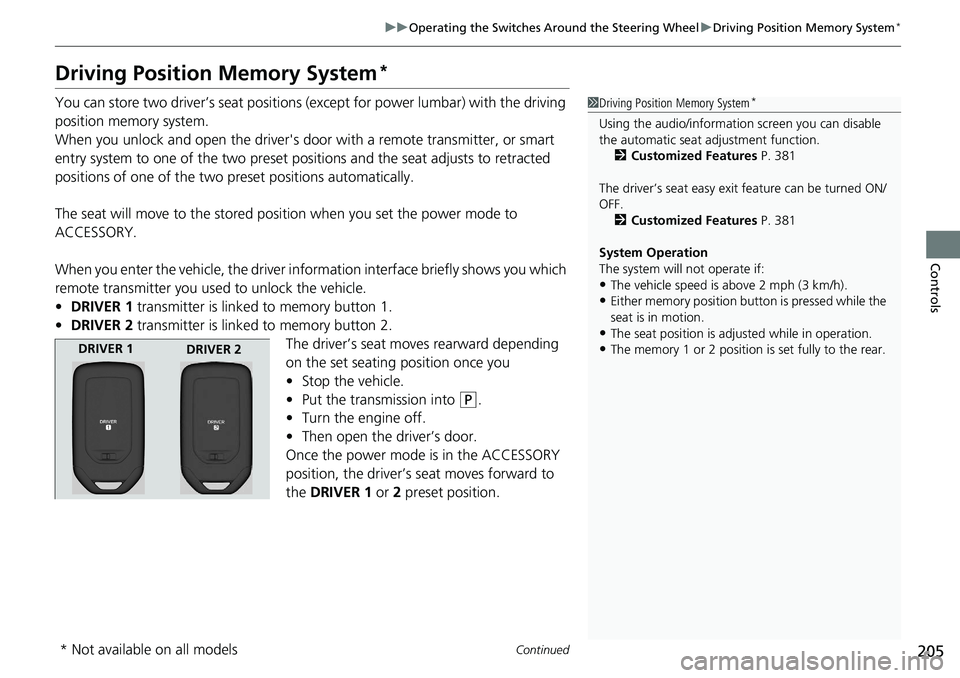
• DRIVER 1 transmitter is linked to memory button 1.
• DRIVER 2 transmitter is linked to memory button 2.
The driver’s seat moves rearward depending
on the set seating position once you
•Stop the vehicle.
• Put the transmission into
(P.
• Turn the engine off.
• Then open the driver’s door.
Once the power mode is in the ACCESSORY
position, the driver’s seat moves forward to
the DRIVER 1 or 2 preset position.
1 Driving Position Memory System*
Using the audio/informati on screen you can disable
the automatic seat adjustment function. 2 Customized Features P. 381
The driver’s seat easy exit feature can be turned ON/
OFF. 2 Customized Features P. 381
System Operation
The system will not operate if:
•The vehicle speed is above 2 mph (3 km/h).
•Either memory position button is pressed while the
seat is in motion.
•The seat position is adju sted while in operation.
•The memory 1 or 2 position is set fully to the rear.DRIVER 1
DRIVER 2
* Not available on all models
Page 223 of 727
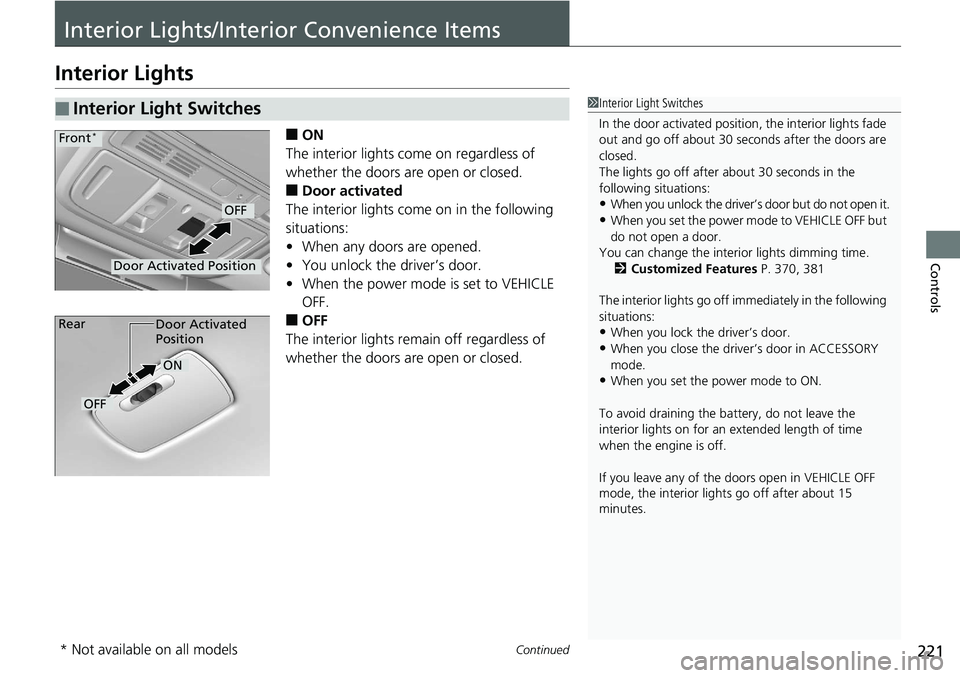
221Continued
Controls
Interior Lights/Interior Convenience Items
Interior Lights
■ON
The interior lights come on regardless of
whether the doors are open or closed.
■Door activated
The interior lights come on in the following
situations:
• When any doors are opened.
• You unlock the driver’s door.
• When the power mode is set to VEHICLE
OFF.
■OFF
The interior lights remain off regardless of
whether the doors are open or closed.
■Interior Light Switches1 Interior Light Switches
In the door activated position, the interior lights fade
out and go off about 30 se conds after the doors are
closed.
The lights go off after about 30 seconds in the
following situations:
•When you unlock the driver’s door but do not open it.
•When you set the power mode to VEHICLE OFF but
do not open a door.
You can change the interi or lights dimming time.
2 Customized Features P. 370, 381
The interior lights go off i mmediately in the following
situations:
•When you lock the driver’s door.
•When you close the driver’s door in ACCESSORY
mode.
•When you set the power mode to ON.
To avoid draining the ba ttery, do not leave the
interior lights on for an extended length of time
when the engine is off.
If you leave any of the doors open in VEHICLE OFF
mode, the interior light s go off after about 15
minutes.
Door Activated Position
OFF
Front*
Door Activated
Position
ON
OFF
Rear
* Not available on all models
Page 230 of 727
uuInterior Lights/Interior Convenience Items uInterior Convenience Items
228
Controls
The accessory power sockets can be used when the power mode is in ACCESSORY
or ON.
■Accessory power socket (center pocket)
Open the center pocket and the cover to use
it.
■Accessory Power Sockets1 Accessory Power Sockets
NOTICE
Do not insert an automotive type cigarette lighter
element. The power socket can overheat.
The accessory power socket is designed to supply
power for 12-volt DC accessories that are rated
180 watts (15 amps) or less.
To prevent battery drain, use the power socket only
when the engine is running.
When both sockets are being used, the combined
power rating of the accesso ries should not exceed
180 watts (15 amps).