2019 HONDA ACCORD SEDAN tire pressure
[x] Cancel search: tire pressurePage 503 of 727
501
uuWhen Driving uTire Pressure Monitoring System (TPMS) - Required Federal Explanation
Driving
Please note that the TPMS is not a substitute for proper tire
maintenance, and it is the driver 's responsibility to maintain
correct tire pressure, even if un der-inflation has not reached the
level to trigger illumination of th e TPMS low tire pressure telltale.
Your vehicle has also been equi pped with a TPMS malfunction
indicator to indicate when the system is not operating properly.
The TPMS malfunction indicator is combined with the low tire
pressure telltale. When the syst em detects a malfunction, the
telltale will flash fo r approximately one minute and then remain
continuously illumina ted. This sequence will continue upon
subsequent vehicle start-ups as long as the malfunction exists.
When the malfunction indicator is illuminated, the system may
not be able to detect or signal low tire pressure as intended.
TPMS malfunctions may occur for a variety of reasons, including
the installation of replacement or alternate tires or wheels on the
vehicle that prevent the TPMS from functioning properly.
Always check the TPMS malfunction telltale after replacing one or
more tires or wheels on your vehicle to ensure that the
replacement or alternate tires and wheels allow the TPMS to
continue to function properly.
Page 515 of 727
Continued513
uuHonda Sensing ®u Collision Mitigation Braking SystemTM (CMBSTM)
Driving
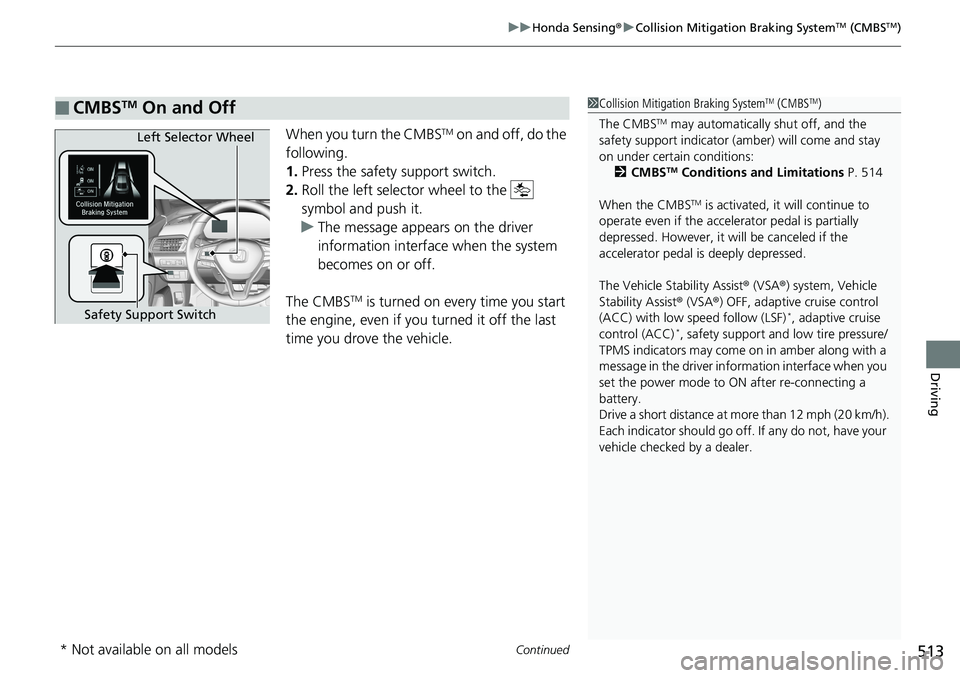
When you turn the CMBSTM on and off, do the
following.
1. Press the safety support switch.
2. Roll the left selector wheel to the
symbol and push it.
u The message appears on the driver
information interface when the system
becomes on or off.
The CMBS
TM is turned on every time you start
the engine, even if you turned it off the last
time you drove the vehicle.
■CMBSTM On and Off1 Collision Mitigation Braking SystemTM (CMBSTM)
The CMBS
TM may automatically shut off, and the
safety support indicator (amb er) will come and stay
on under certain conditions:
2 CMBS
TM Conditions and Limitations P. 514
When the CMBS
TM is activated, it will continue to
operate even if the accele rator pedal is partially
depressed. However, it w ill be canceled if the
accelerator pedal is deeply depressed.
The Vehicle Stability Assist ® (VSA ®) system, Vehicle
Stability Assist ® (VSA ®) OFF, adaptive cruise control
(ACC) with low speed follow (LSF)
*, adaptive cruise
control (ACC)*, safety support and low tire pressure/
TPMS indicators may come on in amber along with a
message in the driver information interface when you
set the power mode to ON after re-connecting a
battery.
Drive a short distance at mo re than 12 mph (20 km/h).
Each indicator should go off. If any do not, have your
vehicle checked by a dealer.
Left Selector Wheel
Safety Support Switch
* Not available on all models
Page 523 of 727
Continued521
uuHonda Sensing ®u Adaptive Cruise Control (ACC) with Low Speed Follow (LSF)*
Driving
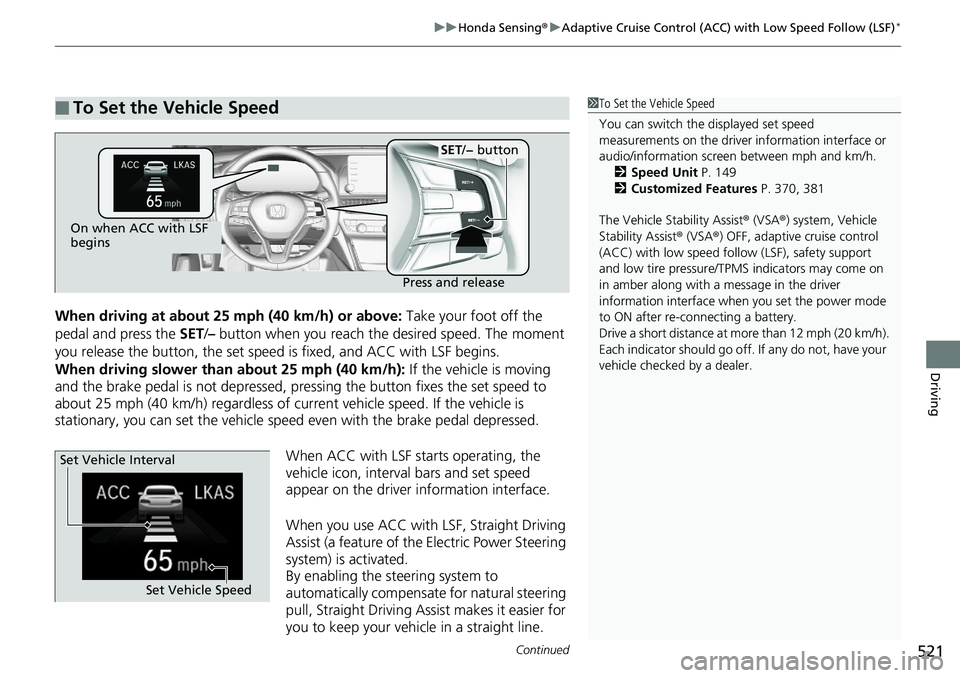
When driving at about 25 mph (40 km/h) or above: Take your foot off the
pedal and press the SET/– button when you reach th e desired speed. The moment
you release the button, th e set speed is fixed, and ACC with LSF begins.
When driving slower than about 25 mph (40 km/h): If the vehicle is moving
and the brake pedal is not depressed, pressing the button fixes the set speed to
about 25 mph (40 km/h) regardless of current vehicle speed. If the vehicle is
stationary, you can set the vehicle speed even with the brake pedal depressed.
When ACC with LSF starts operating, the
vehicle icon, interval bars and set speed
appear on the driver information interface.
When you use ACC with LSF, Straight Driving
Assist (a feature of the Electric Power Steering
system) is activated.
By enabling the steering system to
automatically compensate for natural steering
pull, Straight Driving Assist makes it easier for
you to keep your vehicle in a straight line.
■To Set the Vehicle Speed1 To Set the Vehicle Speed
You can switch the displayed set speed
measurements on the driver information interface or
audio/information screen between mph and km/h.
2 Speed Unit P. 149
2 Customized Features P. 370, 381
The Vehicle Stability Assist ® (VSA ®) system, Vehicle
Stability Assist ® (VSA ®) OFF, adaptive cruise control
(ACC) with low speed follow (LSF), safety support
and low tire pressure/TPM S indicators may come on
in amber along with a message in the driver
information interface when you set the power mode
to ON after re-connecting a battery.
Drive a short distance at mo re than 12 mph (20 km/h).
Each indicator should go off. If any do not, have your
vehicle checked by a dealer.
On when ACC with LSF
begins
Press and release
SET/− button
Set Vehicle Speed
Set Vehicle Interval
Page 539 of 727
Continued537
uuHonda Sensing ®u Adaptive Cruise Control (ACC)*
Driving
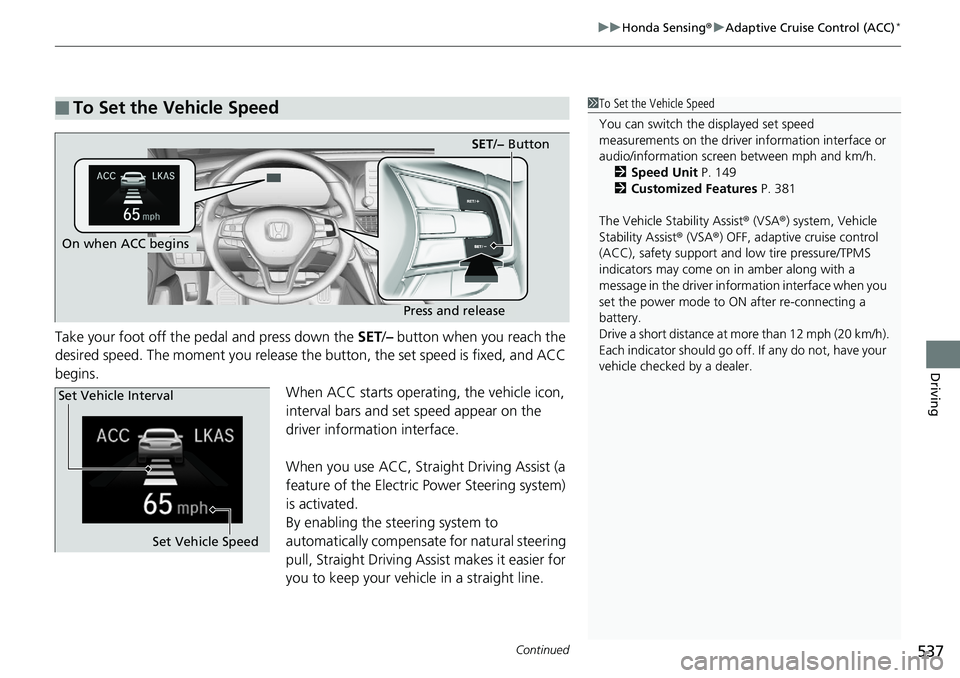
Take your foot off the pedal and press down the SET/– button when you reach the
desired speed. The moment you release the button, the set speed is fixed, and ACC
begins.
When ACC starts operating, the vehicle icon,
interval bars and set speed appear on the
driver information interface.
When you use ACC, Straight Driving Assist (a
feature of the Electric Power Steering system)
is activated.
By enabling the steering system to
automatically compensate for natural steering
pull, Straight Driving Assist makes it easier for
you to keep your vehicle in a straight line.
■To Set the Vehicle Speed1To Set the Vehicle Speed
You can switch the displayed set speed
measurements on the driver information interface or
audio/information screen between mph and km/h.
2 Speed Unit P. 149
2 Customized Features P. 381
The Vehicle Stability Assist ® (VSA ®) system, Vehicle
Stability Assist ® (VSA ®) OFF, adaptive cruise control
(ACC), safety support and low tire pressure/TPMS
indicators may come on in amber along with a
message in the driver information interface when you
set the power mode to ON after re-connecting a
battery.
Drive a short distance at mo re than 12 mph (20 km/h).
Each indicator should go off. If any do not, have your
vehicle checked by a dealer.
On when ACC begins
Press and release
SET /− Button
Set Vehicle Speed
Set Vehicle Interval
Page 562 of 727
uuHonda Sensing ®u Road Departure Mitigation (RDM) System
560
Driving
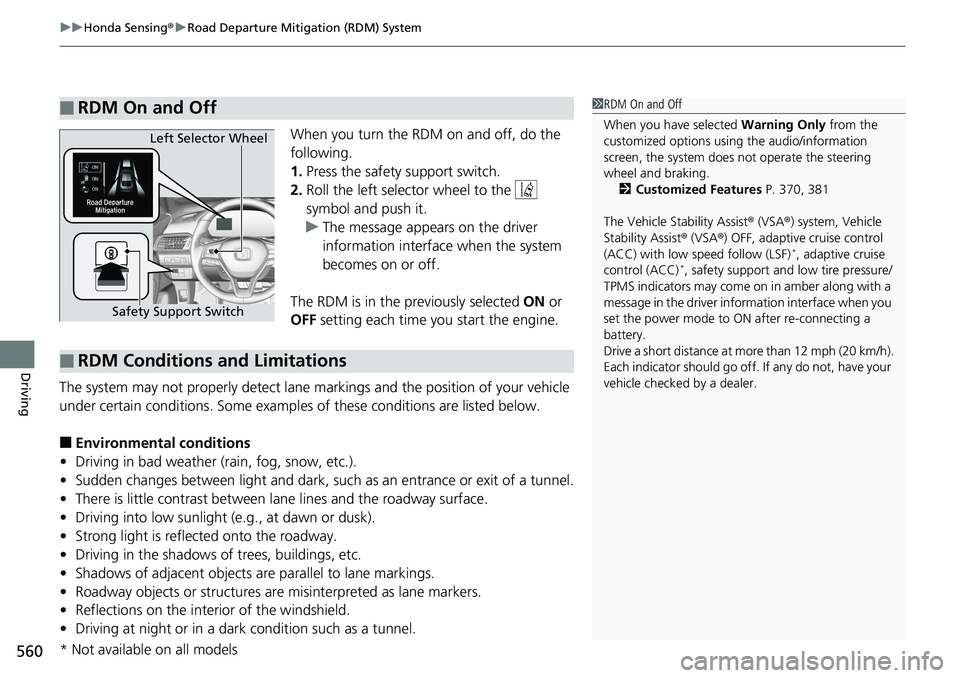
When you turn the RDM on and off, do the
following.
1. Press the safety support switch.
2. Roll the left selector wheel to the
symbol and push it.
u The message appears on the driver
information interface when the system
becomes on or off.
The RDM is in the previously selected ON or
OFF setting each time you start the engine.
The system may not properly detect lane ma rkings and the position of your vehicle
under certain conditions. Some examples of these conditions are listed below.
■Environmental conditions
• Driving in bad weather (rain, fog, snow, etc.).
• Sudden changes between light and dark, such as an entrance or exit of a tunnel.
• There is little contrast between la ne lines and the roadway surface.
• Driving into low sunlight (e.g., at dawn or dusk).
• Strong light is reflected onto the roadway.
• Driving in the shadows of trees, buildings, etc.
• Shadows of adjacent objects are parallel to lane markings.
• Roadway objects or structures are misinterpreted as lane markers.
• Reflections on the interi or of the windshield.
• Driving at night or in a dark condition such as a tunnel.
■RDM On and Off1RDM On and Off
When you have selected Warning Only from the
customized options using the audio/information
screen, the system does not operate the steering
wheel and braking. 2 Customized Features P. 370, 381
The Vehicle Stability Assist ® (VSA ®) system, Vehicle
Stability Assist ® (VSA ®) OFF, adaptive cruise control
(ACC) with low speed follow (LSF)
*, adaptive cruise
control (ACC)*, safety support and low tire pressure/
TPMS indicators may come on in amber along with a
message in the driver information interface when you
set the power mode to ON after re-connecting a
battery.
Drive a short distance at mo re than 12 mph (20 km/h).
Each indicator should go off. If any do not, have your
vehicle checked by a dealer.
Safety Support Switch Left Selector Wheel
■RDM Conditions and Limitations
* Not available on all models
Page 583 of 727
581
uuBraking uAnti-lock Brake System (ABS)
Driving
Anti-lock Brake System (ABS)
Helps prevent the wheels from locking up, and helps you retain steering control by
pumping the brakes rapidly, much faster than you.
The electronic brake distribu tion (EBD) system, which is part of the ABS, also
balances the front-to-rear braking distribution according to vehicle loading.
You should never pump the brake pedal. Let the ABS work for you by always
keeping firm, steady pressure on the brake pe dal. This is sometimes referred to as
“stomp and steer.”
■ABS operation
The brake pedal may pulsate slightly when the ABS is working. Keep holding the
pedal firmly down. On dry pavement, you w ill need to press on the brake pedal very
hard before the ABS activates. However, you may feel the ABS activate immediately
if you are trying to stop on snow or ice.
ABS may activate when you depres s the brake pedal when driving on:
• Wet or snow covered roads.
• Roads paved with stone.
• Roads with uneven surf aces, such as potholes, cracks, manholes, etc.
When the vehicle speed goes under 6 mph (10 km/h), the ABS stops.
■ABS1Anti-lock Brake System (ABS)
NOTICE
The ABS may not function correc tly if you use a tire of
the wrong size or type.
If the ABS indicator comes on while driving, there
may be a problem with the system. While normal
braking will not be affected, there is a possibility that
the ABS will not be opera ting. Have your vehicle
checked by a dealer immediately.
The ABS is not designed for the purpose of reducing
the time or distance it takes for a vehicle to stop: It is
designed to limit brake lockup which can lead to
skidding and loss of steering control.
In the following cases, yo ur vehicle may need more
distance to stop than a vehicle without the ABS:
•You are driving on rough or uneven road surfaces,
such as gravel or snow.
•The tires are equipped with snow chains*.
The following may be observed with the ABS system:
•Motor sounds coming from the engine
compartment when the brakes are applied, or
when system checks are being performed after the
engine has been started and while the vehicle
accelerates.
•Brake pedal and/or the ve hicle body vibration when
ABS activates.
These vibrations and sou nds are normal to ABS
systems and are no cause for concern.
* Not available on all models
Page 602 of 727
600
Driving
Fuel Economy and CO2 Emissions
Improving Fuel Economy and Reducing CO2 Emissions
Achieving fuel economy and reducing CO2 emissions is dependent on several
factors, including driving conditions, load weight, idling time, driving habits, and
vehicle condition. Depending on these and other factors, you may not achieve the
rated fuel economy of this vehicle.
You can optimize your fuel economy with proper maintenance of your vehicle.
Always maintain your vehicle in accordance with the messages displayed on the
driver information interface.
• Use the recommended viscosity engine oil, displaying the API Certification Seal.
• Maintain the specified tire pressure.
• Do not load the vehicl e with excess cargo.
• Keep your vehicle clean. A buildup of snow or mud on your vehicle’s underside
adds weight and increases wind resistance.
■Maintenance and Fuel Economy
1Improving Fuel Economy and Reducing CO2 Emissions
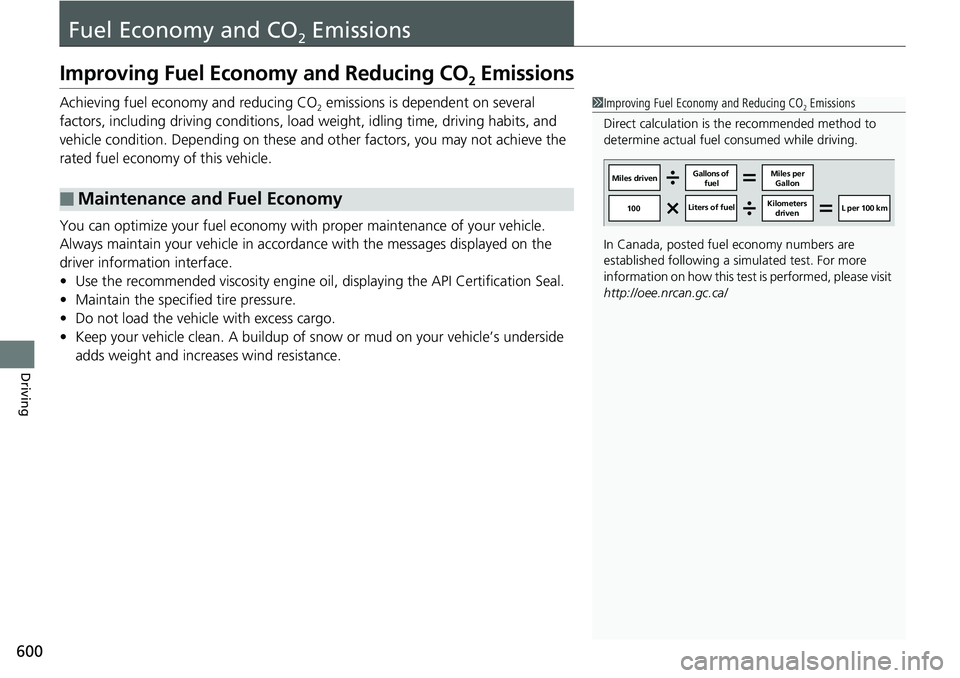
Direct calculation is the recommended method to
determine actual fuel consumed while driving.
In Canada, posted fuel economy numbers are
established following a simulated test. For more
information on how this test is performed, please visit
http://oee.nrcan.gc.ca/
Miles driven Gallons of
fuel Miles per
Gallon
100 Liters of fuel Kilometers
driven L per 100 km
Page 606 of 727
604
Maintenance
Before Performing Maintenance
Inspection and Maintenance
For your safety, perform all listed inspections and maintenance to keep your vehicle
in good condition. If you become aware of any abnormality (noise, smell, insufficient
brake fluid, oil residue on the ground, etc.), have your vehicle inspected by a dealer.
(Note, however, that service at a dealer is not mandatory to keep your warranties in
effect.)
■Daily inspections
Perform inspections before long distance trips, when washing the vehicle, or when
refueling.
■Periodic inspections
• Check the brake fluid level monthly.
2 Brake/Clutch* Fluid P. 629
•Check the tire pressure monthly. Examin e the tread for wear and foreign objects.
2Checking and Maintaining Tires P. 642
•Check the operation of the exterior lights monthly.
2Replacing Light Bulbs P. 631
•Check the condition of the wiper bl ades at least every six months.
2Checking and Maintaining Wiper Blades P. 639
■Types of Inspection and Maintenance
1Inspection and Maintenance
Maintenance, replacement, or repair of
emissions control devices and systems may be
done by any automotive repair establishment or
individuals using parts that are “certified” to
EPA standards.
According to state and fede ral regulations, failure to
perform maintenance on the maintenance main
items marked with # will not void your emissions
warranties. However, all ma intenance services should
be performed in accordan ce with the intervals
indicated by the driver information interface.
2 Maintenance Service Items P. 611
If you want to perform complex maintenance tasks
that require more skills a nd tools, you can purchase a
subscription to the Service Express website at
www.techinfo.honda.com .
2 Authorized Manuals P. 711
If you want to perform ma intenance yourself, make
sure that you have the necessary tools and skills first.
After performing ma intenance, update the records in
the separate maintenance booklet.
U.S. models
* Not available on all models