Page 196 of 370

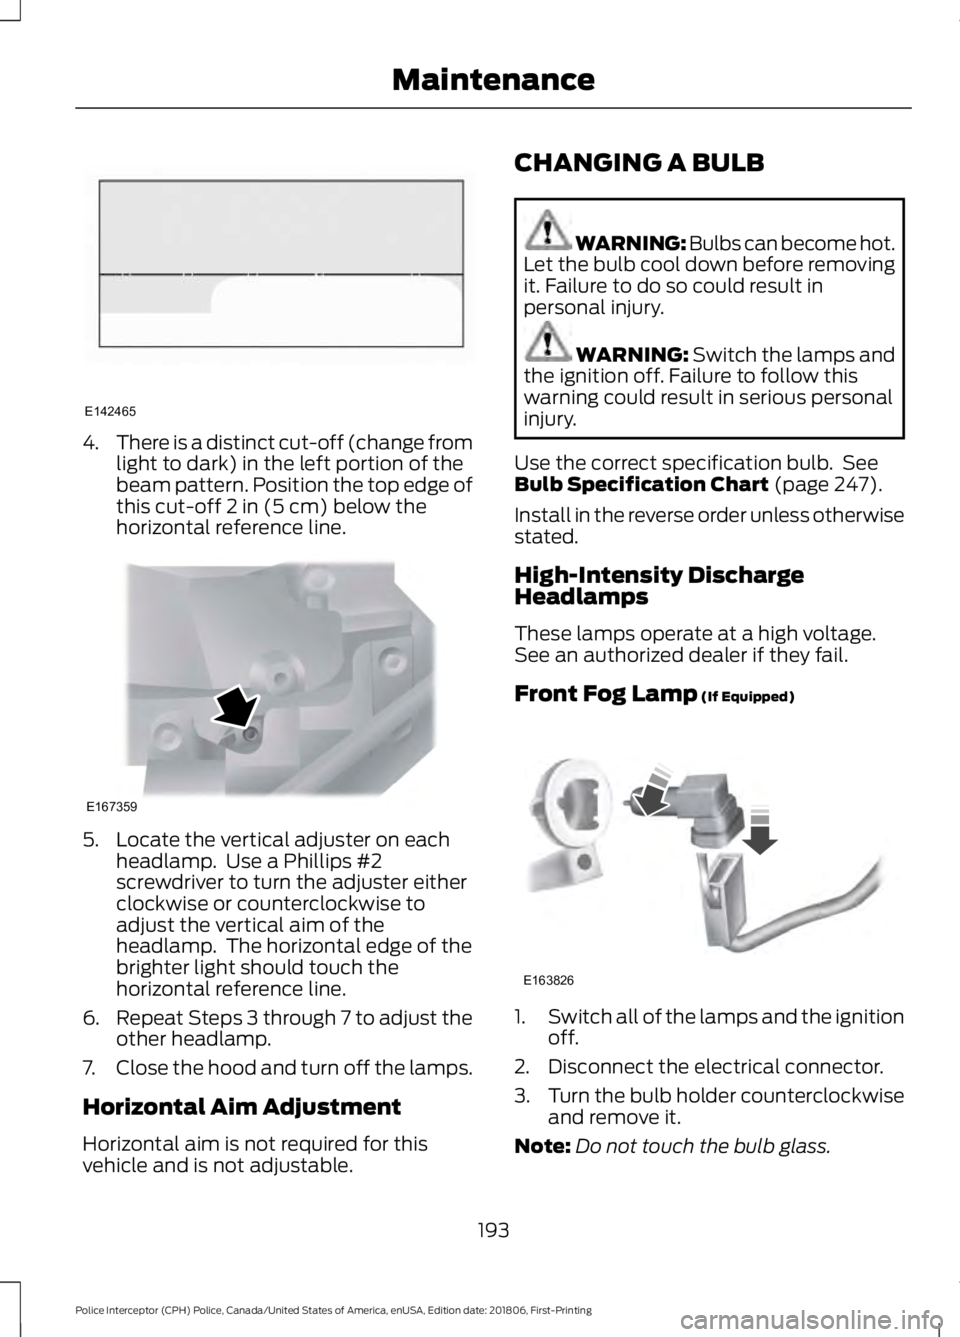
4.
There is a distinct cut-off (change from
light to dark) in the left portion of the
beam pattern. Position the top edge of
this cut-off 2 in (5 cm) below the
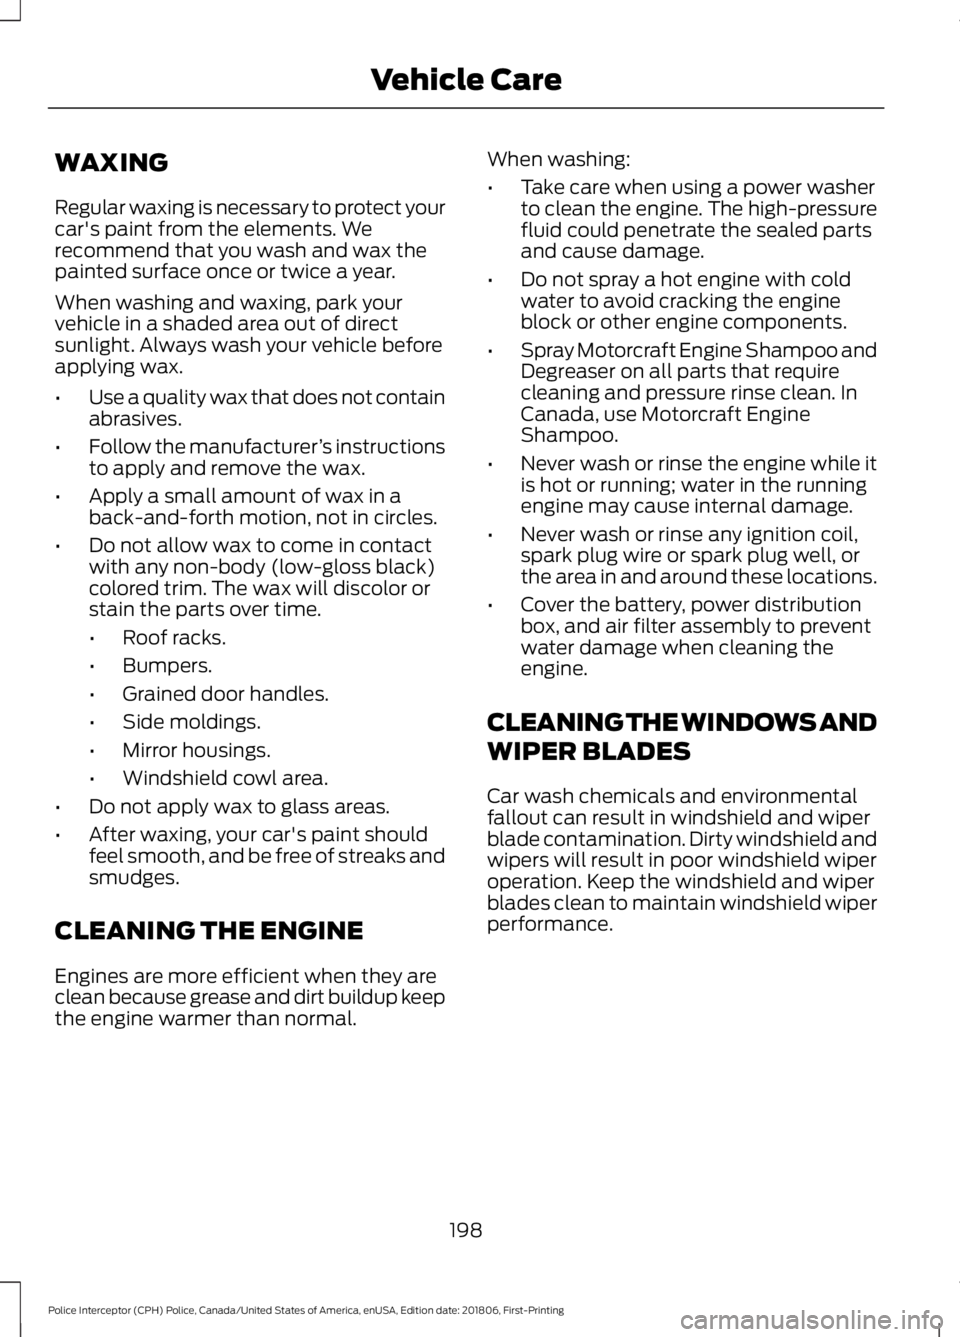
horizontal reference line. 5. Locate the vertical adjuster on each
headlamp. Use a Phillips #2
screwdriver to turn the adjuster either
clockwise or counterclockwise to
adjust the vertical aim of the
headlamp. The horizontal edge of the
brighter light should touch the
horizontal reference line.
6. Repeat Steps 3 through 7 to adjust the
other headlamp.
7. Close the hood and turn off the lamps.
Horizontal Aim Adjustment
Horizontal aim is not required for this
vehicle and is not adjustable. CHANGING A BULB WARNING: Bulbs can become hot.
Let the bulb cool down before removing
it. Failure to do so could result in
personal injury. WARNING:
Switch the lamps and
the ignition off. Failure to follow this
warning could result in serious personal
injury.
Use the correct specification bulb. See
Bulb Specification Chart
(page 247).
Install in the reverse order unless otherwise
stated.
High-Intensity Discharge
Headlamps
These lamps operate at a high voltage.
See an authorized dealer if they fail.
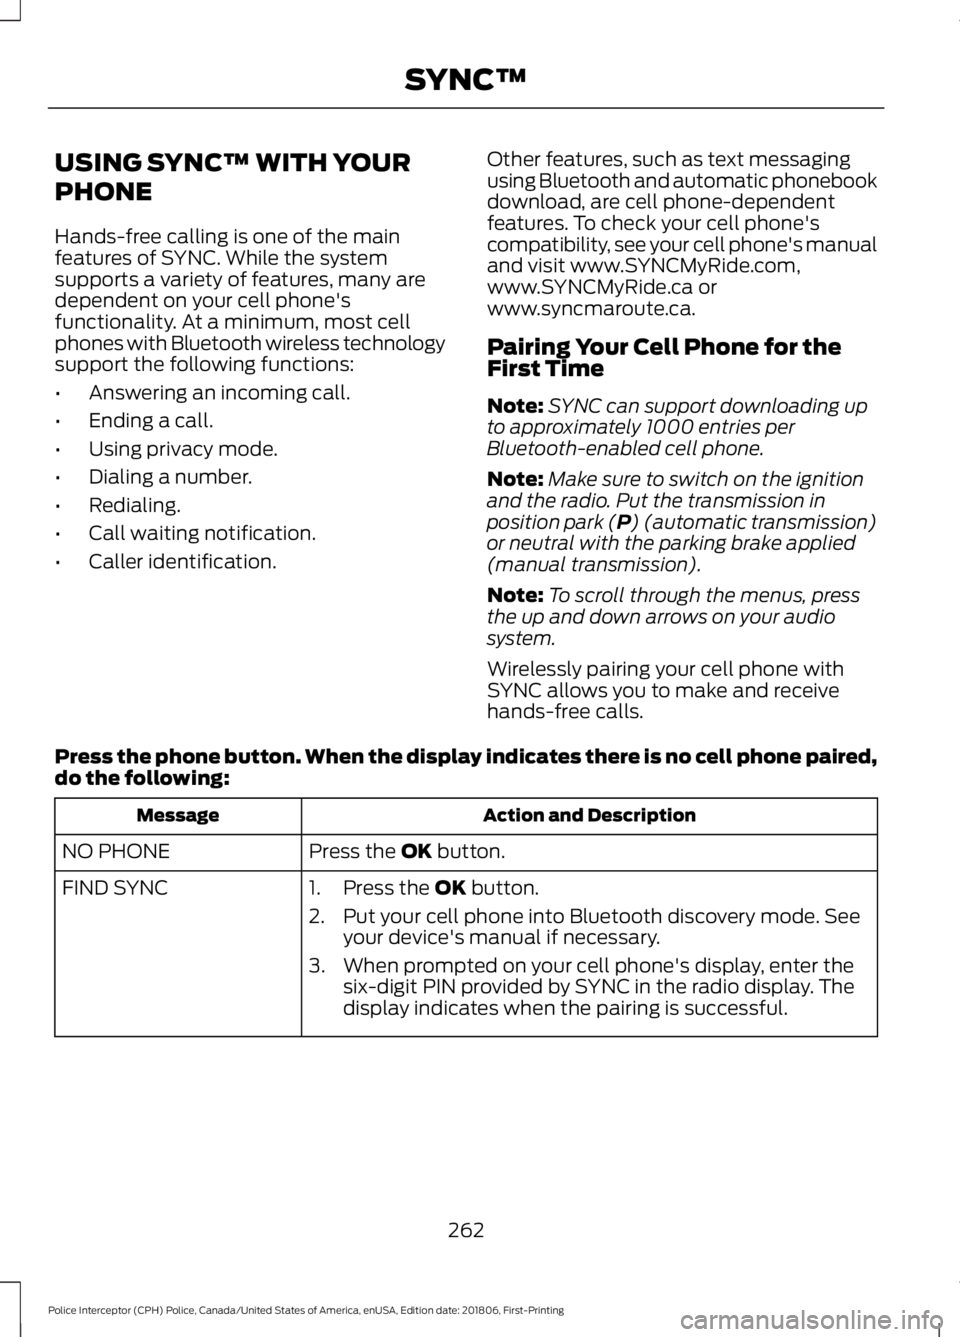
Front Fog Lamp
(If Equipped) 1.
Switch all of the lamps and the ignition
off.
2. Disconnect the electrical connector.
3. Turn the bulb holder counterclockwise
and remove it.
Note: Do not touch the bulb glass.
193
Police Interceptor (CPH) Police, Canada/United States of America, enUSA, Edition date: 201806, First-Printing MaintenanceE142465 E167359 E163826
Page 197 of 370

Note:
You cannot separate the bulb from
the bulb holder.
LED Lamps
LED lamps are not serviceable items. See
an authorized dealer if they fail.
The following lamps are LED:
• Front parking lamps.
• Front side marker lamps.
• Front direction indicators.
• Side direction indicators.
• Brake and rear lamps.
• Central high mounted brake lamp.
• Rear direction indicators.
• Reversing lamps.
License Plate Lamp
1. Switch all of the lamps and the ignition
off. 2. Remove the screws that secure the
lamp assembly. 3. Remove the bulb.
CHANGING THE ENGINE AIR
FILTER
WARNING: Do not start the engine
with the air cleaner removed. This can
cause damage not covered by the
vehicle Warranty and can result in
serious injury.
When changing the air filter element, use
only the air filter element listed. See
Capacities and Specifications (page
228).
For vehicles with EcoBoost engines, when
servicing the air cleaner, it is important that
no foreign material enters the air induction
system. The engine and turbocharger are
susceptible to damage from even small
particles.
Change the air filter element at the correct
interval. See
Scheduled Maintenance
(page 299).
Note: Failure to use the correct air filter
element may result in severe engine
damage. Resulting component damage
may not be covered by the vehicle Warranty.
To replace the air filter element do the
following:
194
Police Interceptor (CPH) Police, Canada/United States of America, enUSA, Edition date: 201806, First-Printing MaintenanceE178598 E178599
Page 198 of 370
1. Switch the ignition off.
2. Remove the clips that secure the air
filter housing cover.
3. Carefully lift the air filter housing cover.
4. Remove the air filter element from the
air filter housing.
5. Wipe any dirt or debris from the air filter
housing and cover to make sure no dirt
gets in the engine and that you have a
good seal.
6. Install a new air filter element.
7. Install the air filter housing cover. Be careful not to crimp the filter element
edges between the air filter housing
and cover. This could cause filter
damage and allow unfiltered air to
enter the engine if it is not properly
seated.
8. Engage the clips to secure the air filter housing cover to the air filter housing.
195
Police Interceptor (CPH) Police, Canada/United States of America, enUSA, Edition date: 201806, First-Printing MaintenanceE173520
Page 201 of 370

WAXING
Regular waxing is necessary to protect your
car's paint from the elements. We
recommend that you wash and wax the
painted surface once or twice a year.
When washing and waxing, park your
vehicle in a shaded area out of direct
sunlight. Always wash your vehicle before
applying wax.
•
Use a quality wax that does not contain
abrasives.
• Follow the manufacturer ’s instructions
to apply and remove the wax.
• Apply a small amount of wax in a
back-and-forth motion, not in circles.
• Do not allow wax to come in contact
with any non-body (low-gloss black)
colored trim. The wax will discolor or
stain the parts over time.
•Roof racks.
• Bumpers.
• Grained door handles.
• Side moldings.
• Mirror housings.
• Windshield cowl area.
• Do not apply wax to glass areas.
• After waxing, your car's paint should
feel smooth, and be free of streaks and
smudges.
CLEANING THE ENGINE
Engines are more efficient when they are
clean because grease and dirt buildup keep
the engine warmer than normal. When washing:
•
Take care when using a power washer
to clean the engine. The high-pressure
fluid could penetrate the sealed parts
and cause damage.
• Do not spray a hot engine with cold
water to avoid cracking the engine
block or other engine components.
• Spray Motorcraft Engine Shampoo and
Degreaser on all parts that require
cleaning and pressure rinse clean. In
Canada, use Motorcraft Engine
Shampoo.
• Never wash or rinse the engine while it
is hot or running; water in the running
engine may cause internal damage.
• Never wash or rinse any ignition coil,
spark plug wire or spark plug well, or
the area in and around these locations.
• Cover the battery, power distribution
box, and air filter assembly to prevent
water damage when cleaning the
engine.
CLEANING THE WINDOWS AND
WIPER BLADES
Car wash chemicals and environmental
fallout can result in windshield and wiper
blade contamination. Dirty windshield and
wipers will result in poor windshield wiper
operation. Keep the windshield and wiper
blades clean to maintain windshield wiper
performance.
198
Police Interceptor (CPH) Police, Canada/United States of America, enUSA, Edition date: 201806, First-Printing Vehicle Care
Page 231 of 370
ENGINE SPECIFICATIONS - 3.5L DURATEC
Specification
Measurement
214
Cubic inches.
1-4-2-5-3-6
Firing order.
Coil on plug
Ignition system.
0.049–0.053 in (1.25–1.35 mm)
Spark plug gap.
10.8:1
Compression ratio.
Drivebelt Routing
3.5L Duratec ENGINE SPECIFICATIONS - 3.5L ECOBOOST™
Specification
Measurement
214
Cubic inches
1-4-2-5-3-6
Firing order
Coil on plug
Ignition system
0.030–0.033 in (0.75–0.85 mm)
Spark plug gap
10.0:1
Compression ratio
228
Police Interceptor (CPH) Police, Canada/United States of America, enUSA, Edition date: 201806, First-Printing Capacities and SpecificationsE191904
Page 232 of 370
Drivebelt Routing
3.5L EcoBoostENGINE SPECIFICATIONS - 3.7L
Specification
Measurement
227
Cubic inches.
1-4-2-5-3-6
Firing order.
Coil on plug
Ignition system.
0.049 - 0.053 in (1.25 - 1.35 mm)
Spark plug gap.
10.5:1
Compression ratio.
Drivebelt Routing
3.7L Duratec 229
Police Interceptor (CPH) Police, Canada/United States of America, enUSA, Edition date: 201806, First-Printing Capacities and SpecificationsE191904 E191904
Page 265 of 370

USING SYNC™ WITH YOUR
PHONE
Hands-free calling is one of the main
features of SYNC. While the system
supports a variety of features, many are
dependent on your cell phone's
functionality. At a minimum, most cell
phones with Bluetooth wireless technology
support the following functions:
•
Answering an incoming call.
• Ending a call.
• Using privacy mode.
• Dialing a number.
• Redialing.
• Call waiting notification.
• Caller identification. Other features, such as text messaging
using Bluetooth and automatic phonebook
download, are cell phone-dependent
features. To check your cell phone's
compatibility, see your cell phone's manual
and visit www.SYNCMyRide.com,
www.SYNCMyRide.ca or
www.syncmaroute.ca.
Pairing Your Cell Phone for the
First Time
Note:
SYNC can support downloading up
to approximately 1000 entries per
Bluetooth-enabled cell phone.
Note: Make sure to switch on the ignition
and the radio. Put the transmission in
position park (P) (automatic transmission)
or neutral with the parking brake applied
(manual transmission).
Note: To scroll through the menus, press
the up and down arrows on your audio
system.
Wirelessly pairing your cell phone with
SYNC allows you to make and receive
hands-free calls.
Press the phone button. When the display indicates there is no cell phone paired,
do the following: Action and Description
Message
Press the
OK button.
NO PHONE
FIND SYNC 1. Press the
OK button.
2. Put your cell phone into Bluetooth discovery mode. See your device's manual if necessary.
3. When prompted on your cell phone's display, enter the six-digit PIN provided by SYNC in the radio display. The
display indicates when the pairing is successful.
262
Police Interceptor (CPH) Police, Canada/United States of America, enUSA, Edition date: 201806, First-Printing SYNC™
Page 266 of 370

Depending on your cell phone's capability
and your market, the system may prompt
you with questions, such as setting the
current cell phone as the primary cell
phone (the cell phone SYNC automatically
tries to connect with first upon vehicle
start-up) and downloading your
phonebook.
Pairing Subsequent Cell Phones
Note:
To scroll through the menus, press
the up and down arrows on your audio
system.
Note: Make sure to switch on the ignition
and the radio. Put the transmission in
position park (P) (automatic transmission)
or neutral with the parking brake applied
(manual transmission).
Press the phone button, then scroll to: Action
Message
Press the
OK button.
PHONE SETNGS
Press the
OK button.
BT DEVICES
Press the
OK button. When the following message appears
in the display.
ADD DEVICE
FIND SYNC
1. Press the
OK button.
2. Put your cell phone into Bluetooth discovery mode. See your device's manual if necessary.
3. When prompted on your cell phone's display, enter the six-digit PIN provided by SYNC in the radio display. The
display indicates when the pairing is successful.
The system then prompts with questions, such as if you would like to set the current cell
phone as the primary cell phone (the cell phone SYNC automatically tries to connect
with first upon vehicle start-up) or download your phonebook.
Phone Voice Commands
Press the voice icon and say: Voice Commands
Phone
You can then say any of the following
commands.
Call History Incoming
Call History Missed
Call History Outgoing Voice Commands
Phonebook ___
Phonebook ___ at Home
Phonebook ___ at Work
Phonebook ___ in Office
Phonebook ___ on Cell
___ is a dynamic listing that should be the
name of a contact in your phonebook. For
example you could say "Call Mom".
263
Police Interceptor (CPH) Police, Canada/United States of America, enUSA, Edition date: 201806, First-Printing SYNC™