2019 FORD F-53 service
[x] Cancel search: servicePage 38 of 176

•Incorrect fuel for climatic conditions.
•Incorrect engine oil viscosity forclimactic conditions.
Note:Some vehicles have a lifetime fuelfilter that is integrated with the fuel tank.Regular maintenance or replacement is notneeded.
Note:If these checks do not help youcorrect the concern, have your vehiclechecked as soon as possible.
Noise Emissions Warranty,Prohibited Tampering Acts andMaintenance
On January 1, 1978, Federal regulationbecame effective governing the noiseemission on trucks over 10,000 lb(4,536 kg) Gross Vehicle Weight Rating(GVWR). The preceding statementsconcerning prohibited tampering acts andmaintenance, and the noise warrantyfound in the Warranty Guide, areapplicable to complete chassis cabs over10,000 lb (4,536 kg) GVWR.
CATALYTIC CONVERTER
WARNING: Do not park, idle ordrive your vehicle on dry grass or otherdry ground cover. The emission systemheats up the engine compartment andexhaust system, creating the risk of fire.
WARNING: The normal operatingtemperature of the exhaust system isvery high. Never work around or attemptto repair any part of the exhaust systemuntil it has cooled. Use special care whenworking around the catalytic converter.The catalytic converter heats up to a veryhigh temperature after only a shortperiod of engine operation and stays hotafter the engine is switched off.
WARNING: Exhaust leaks mayresult in entry of harmful and potentiallylethal fumes into the passengercompartment. If you smell exhaustfumes inside your vehicle, have yourvehicle inspected immediately. Do notdrive if you smell exhaust fumes.
Your vehicle has various emission controlcomponents and a catalytic converter thatenables it to comply with applicableexhaust emission standards.
To make sure that the catalytic converterand other emission control componentscontinue to work properly:
•Do not crank the engine for more than10 seconds at a time.
•Do not run the engine with a spark pluglead disconnected.
•Do not push-start or tow-start yourvehicle. Use booster cables. See JumpStarting the Vehicle (page 60).
•Use only the specified fuel listed.
•Do not switch the ignition off when yourvehicle is moving.
•Avoid running out of fuel.
•Have the items listed in scheduledmaintenance information performedaccording to the specified schedule.
Note:Resulting component damage maynot be covered by the vehicle Warranty.
The scheduled maintenance items listedin scheduled maintenance information areessential to the life and performance ofyour vehicle and to its emissions system.
If you use anything other than Ford,Motorcraft or Ford-authorized parts formaintenance replacements or for serviceof components affecting emission control,such non-Ford parts should be equivalentto genuine Ford Motor Company parts inperformance and durability.
35
Motorhome (TY3) Canada/United States of America, enUSA, Edition date: 201803, Third-Printing-Engine Emission Control
Page 39 of 176

Illumination of the service engine soonindicator, charging system warning light orthe temperature warning light, fluid leaks,strange odors, smoke or loss of enginepower could indicate that the emissioncontrol system is not working properly.
An improperly operating or damagedexhaust system may allow exhaust toenter the vehicle. Have a damaged orimproperly operating exhaust systeminspected and repaired immediately.
Do not make any unauthorized changes toyour vehicle or engine. By law, vehicleowners and anyone who manufactures,repairs, services, sells, leases, tradesvehicles, or supervises a fleet of vehiclesare not permitted to intentionally removean emission control device or prevent itfrom working. Information about yourvehicle’s emission system is on the VehicleEmission Control Information Decallocated on or near the engine. This decalalso lists engine displacement.
Please consult your warranty informationfor complete details.
On-Board Diagnostics (OBD-II)
Your vehicle has a computer known as theon-board diagnostics system (OBD-II) thatmonitors the engine’s emission controlsystem. The system protects theenvironment by making sure that yourvehicle continues to meet governmentemission standards. The OBD-II systemalso assists a service technician in properlyservicing your vehicle.
When the service engine soonindicator illuminates, the OBD-IIsystem has detected amalfunction. Temporary malfunctions maycause the service engine soon indicator toilluminate. Examples are:
1.Your vehicle has run out of fuel—theengine may misfire or run poorly.
2.Poor fuel quality or water in thefuel—the engine may misfire or runpoorly.
3.The fuel fill inlet may not have closedproperly. See Refueling (page 31).
4.Driving through deep water—theelectrical system may be wet.
You can correct these temporarymalfunctions by filling the fuel tank withgood quality fuel, properly closing the fuelfill inlet or letting the electrical system dryout. After three driving cycles without theseor any other temporary malfunctionspresent, the service engine soon indicatorshould stay off the next time you start theengine. A driving cycle consists of a coldengine startup followed by mixed city andhighway driving. No additional vehicleservice is required.
If the service engine soon indicator remainson, have your vehicle serviced at the firstavailable opportunity. Although somemalfunctions detected by the OBD-II maynot have symptoms that are apparent,continued driving with the service enginesoon indicator on can result in increasedemissions, lower fuel economy, reducedengine and transmission smoothness andlead to more costly repairs.
Readiness for Inspection andMaintenance (I/M) Testing
Some state and provincial and localgovernments may haveInspection/Maintenance (I/M) programsto inspect the emission control equipmenton your vehicle. Failure to pass thisinspection could prevent you from gettinga vehicle registration.
If the service engine soonindicator is on or the bulb doesnot work, your vehicle may needservice. See On-Board Diagnostics.
36
Motorhome (TY3) Canada/United States of America, enUSA, Edition date: 201803, Third-Printing-Engine Emission Control
Page 40 of 176

Your vehicle may not pass the I/M test ifthe service engine soon indicator is on ornot working properly (bulb is burned out),or if the OBD-II system has determinedthat some of the emission control systemshave not been properly checked. In thiscase, the vehicle is not ready for I/Mtesting.
If the vehicle’s engine or transmission hasjust been serviced, or the battery hasrecently run down or been replaced, theOBD-II system may indicate that thevehicle is not ready for I/M testing. Todetermine if the vehicle is ready for I/Mtesting, turn the ignition key to the onposition for 15 seconds without crankingthe engine. If the service engine soonindicator blinks eight times, it means thatthe vehicle is not ready for I/M testing; ifthe service engine soon indicator stays onsolid, it means that your vehicle is readyfor I/M testing.
The OBD-II system checks the emissioncontrol system during normal driving. Acomplete check may take several days.
If the vehicle is not ready for I/M testing,you can perform the following driving cycleconsisting of mixed city and highwaydriving:
1.15 minutes of steady driving on anexpressway or highway followed by 20minutes of stop-and-go driving with atleast four 30-second idle periods.
2.Allow your vehicle to sit for at leasteight hours with the ignition off. Then,start the vehicle and complete theabove driving cycle. The vehicle mustwarm up to its normal operatingtemperature. Once started, do not turnoff the vehicle until the above drivingcycle is complete.
If the vehicle is still not ready for I/Mtesting, you need to repeat the abovedriving cycle.
37
Motorhome (TY3) Canada/United States of America, enUSA, Edition date: 201803, Third-Printing-Engine Emission Control
Page 44 of 176

GENERAL INFORMATION
Note: Occasional brake noise is normal. Ifa metal-to-metal, continuous grinding orcontinuous squeal sound is present, thebrake linings may be worn-out and shouldbe inspected by an authorized dealer. If thevehicle has continuous vibration or shudderin the steering wheel while braking, thevehicle should be inspected by anauthorized dealer.
Note:Brake dust may accumulate on thewheels, even under normal drivingconditions. Some dust is inevitable as thebrakes wear and does not contribute tobrake noise. See Cleaning the Wheels(page 110).
Note:Indicators vary depending on region.
See Warning Lamps andIndicators (page 18).
Wet brakes result in reduced brakingefficiency. Gently press the brake pedal afew times when driving from a car wash orstanding water to dry the brakes.
Brake Over Accelerator
In the event the accelerator pedalbecomes stuck or entrapped, apply steadyand firm pressure to the brake pedal toslow the vehicle and reduce engine power.If you experience this condition, apply thebrakes and bring your vehicle to a safestop. Switch the engine off, shift thetransmission into park (P), apply theparking brake, and then inspect theaccelerator pedal for any interferences. Ifnone are found and the condition persists,have your vehicle towed to the nearestauthorized dealer.
Hydraulic brake booster system(Hydroboost or Hydromax)
The Hydroboost and Hydromax systemsreceive fluid pressure from the powersteering pump to provide power assistduring braking.
The Hydromax booster receives backuppressure from the reserve system electricpump whenever the fluid in the powersteering system is not flowing. When theengine is off, the pump turns on if you applythe brake pedal, or if you switch the ignitionto the on position.
The sound of the pump operating may beheard by the driver. This is a normalcharacteristic of the system.
The reserve system provides reducedbraking power, so the vehicle should beoperated under these conditions withcaution, and only to seek service repair andremoval of the vehicle from the roadway.
Note:For vehicles with the Hydromaxsystem operating under normal conditions,the noise of the fluid flowing through thebooster may be heard whenever you applythe brake. This condition is normal. Vehicleservice is not required.
If braking performance or pedal responsebecomes very poor, even when youstrongly press the pedal, it may indicatethe presence of air in the hydraulic systemor leakage of fluid. Stop the vehicle safelyas soon as possible and seek serviceimmediately.
HINTS ON DRIVING WITH
ANTI-LOCK BRAKES
The anti-lock braking system does noteliminate the risks when:
•You drive too closely to the vehicle infront of you.
•Your vehicle is hydroplaning.
41
Motorhome (TY3) Canada/United States of America, enUSA, Edition date: 201803, Third-Printing-BrakesE144522
Page 56 of 176

ESSENTIAL TOWING CHECKS
Follow these guidelines for safe towing:
•Do not tow a trailer until you drive yourvehicle at least 1,000 mi (1,600 km).
•Consult your local motor vehicle lawsfor towing a trailer.
•See the instructions included withtowing accessories for the properinstallation and adjustmentspecifications.
•Service your vehicle more frequently ifyou tow a trailer. See ScheduledMaintenance (page 145).
•If you use a rental trailer, follow theinstructions the rental agency givesyou.
Another chapter of this manual containsload specification terms found on the tirelabel and Safety Compliance label andinstructions on calculating your vehicle'sload. See Load Limit (page 45).
Remember to account for the trailertongue weight as part of your vehicle loadwhen calculating the total vehicle weight.
Hitches
Do not use a hitch that either clamps ontothe bumper or attaches to the axle.
Distribute the trailer load so 10-15% of thetotal trailer weight is on the tongue.
Weight-Distributing Hitches
WARNING: Do not adjust thespring bars so that your vehicle's rearbumper is higher than before attachingthe trailer. Doing so will defeat thefunction of the weight-distributing hitch,which may cause unpredictablehandling, and could result in seriouspersonal injury.
When hooking-up a trailer using aweight-distributing hitch, always use thefollowing procedure:
1.Park the loaded vehicle, without thetrailer, on a level surface.
2.Measure the height to the top of yourvehicle’s front wheel opening on thefender. This is H1.
3.Securely attach the loaded trailer toyour vehicle without theweight-distributing bars connected.
4.Measure the height to the top of yourvehicle’s front wheel opening on thefender a second time. This is H2.
5.Install and adjust the tension in theweight-distributing bars so that theheight of your vehicle’s front wheelopening on the fender is approximatelyhalfway between H1 and H2.
6.Check that the trailer is level or slightlynose down toward your vehicle. If not,adjust the ball height accordingly andrepeat Steps 1-6.
7.Lock the bar tension adjuster in place.
8.Check that the trailer tongue securelyattaches and locks onto the hitch.
9.Install safety chains, lighting and trailerbrake controls as required by law or thetrailer manufacturer.
Safety Chains
Note:Never attach safety chains to thebumper.
Always connect the safety chains to thehook retainers of your vehicle hitch.
To connect the safety chains, cross themunder the trailer tongue and allow enoughslack for turning tight corners. Do not allowthe chains to drag on the ground.
53
Motorhome (TY3) Canada/United States of America, enUSA, Edition date: 201803, Third-Printing-Towing
Page 62 of 176

ROADSIDE ASSISTANCE
Vehicles Sold in the United States:Getting Roadside Assistance
To fully assist you should you have avehicle concern, Ford Motor Companyoffers a complimentary roadsideassistance program. This program isseparate from the New Vehicle LimitedWarranty.
The service is available:
•24 hours a day, seven days a week.
•For the coverage period supplied withyour vehicle.
Roadside Assistance covers:
•A flat tire change with a good spare(except vehicles supplied with a tireinflation kit).
•Battery jump start.
•Lock-out assistance (key replacementcost is the customer's responsibility).
•Fuel delivery — independent servicecontractors, if not prohibited by state,local or municipal law, shall deliver upto 2 gal (8 L) of gasoline or 5 gal (20 L)of diesel fuel to a disabled vehicle.Roadside Assistance limits fuel deliveryservice to two no-charge occurrenceswithin a 12-month period.
•Winch out — available within 100 ft(30 m) of a paved or countymaintained road, no recoveries.
•Towing — independent servicecontractors, if not prohibited by state,local or municipal law, shall tow Fordeligible vehicles to an authorized dealerwithin 35 mi (56 km) of thedisablement location or to the nearestauthorized dealer. If a memberrequests a tow to an authorized dealerthat is more than 35 mi (56 km) fromthe disablement location, the membershall be responsible for any mileagecosts in excess of 35 mi (56 km).
•Roadside Assistance includes up to$200 for a towed trailer if the disabledeligible vehicle requires service at thenearest authorized dealer. If the towingvehicle is operational but the trailer isnot, then the trailer does not qualify forany roadside services.
Vehicles Sold in the United States:Using Roadside Assistance
Complete the roadside assistanceidentification card and place it in yourwallet for quick reference. This card is inthe Owner's Manual kit.
United States vehicle customers whorequire Roadside Assistance, call1-800-241-3673.
If you need to arrange roadside assistancefor yourself, Ford Motor Companyreimburses a reasonable amount fortowing to the nearest dealership within35 mi (56 km). To obtain reimbursementinformation, United States vehiclecustomers call 1-800-241-3673.Customers need to submit their originalreceipts.
59
Motorhome (TY3) Canada/United States of America, enUSA, Edition date: 201803, Third-Printing-Roadside Emergencies
Page 63 of 176

Vehicles Sold in Canada: GettingRoadside Assistance
To fully assist you should you have avehicle concern, Ford Motor Company ofCanada, Limited offers a complimentaryroadside assistance program. This programis eligible within Canada or the continentalUnited States.
The service is available 24 hours a day,seven days a week.
This program is separate from the NewVehicle Limited Warranty, but the coverageis concurrent with the powertrain coverageperiod of your vehicle. Canadian roadsidecoverage and benefits may differ from theU.S. coverage.
If you require more information, please callus in Canada at 1-800-665-2006, or visitour website at www.ford.ca.
HAZARD FLASHERS
Note:If used when the vehicle is notrunning, the battery loses charge. As a result,there may be insufficient power to restartyour vehicle.
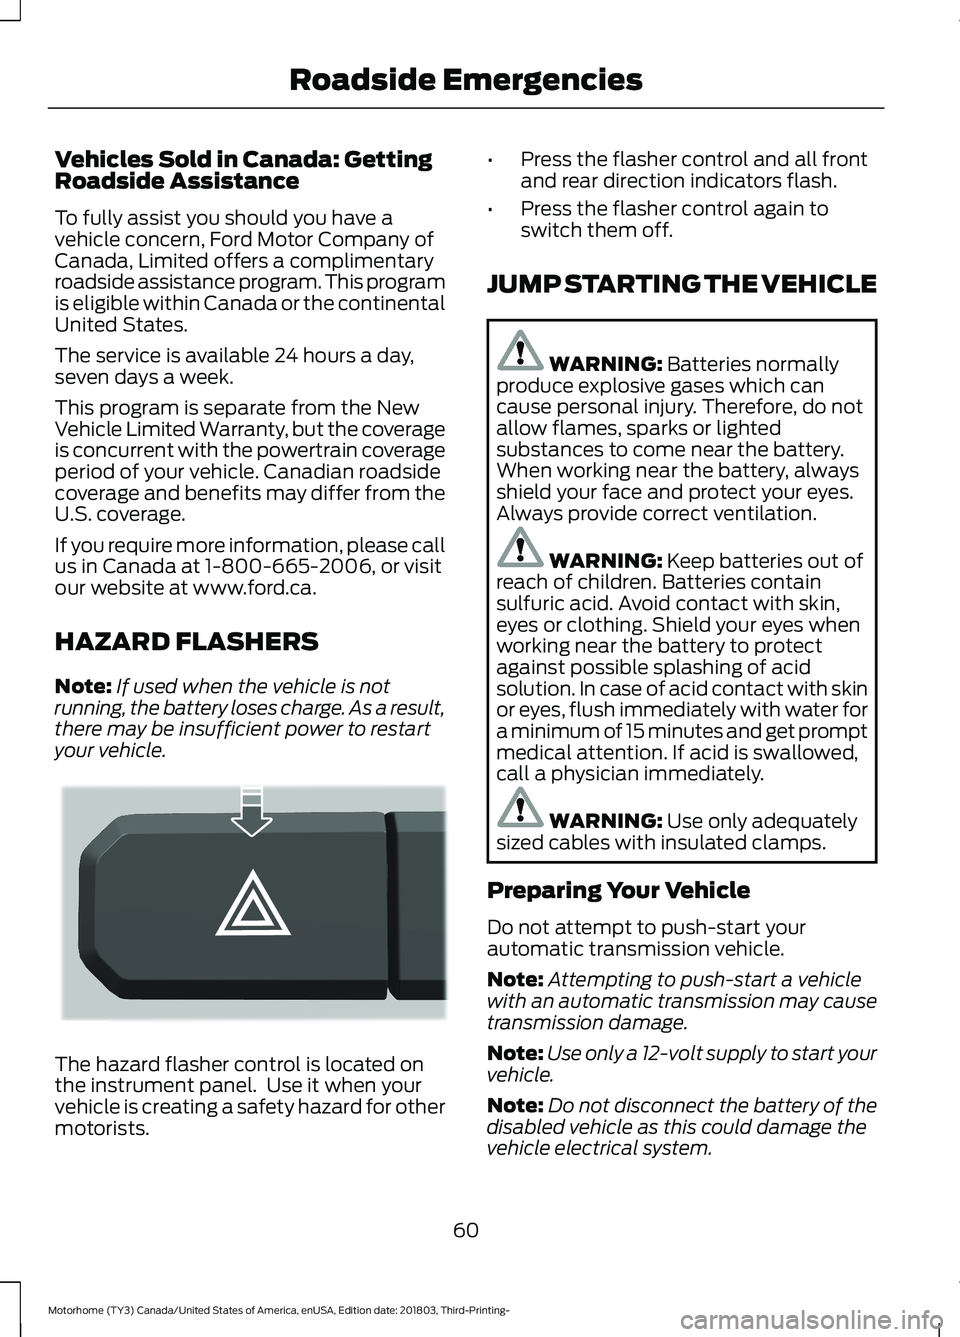
The hazard flasher control is located onthe instrument panel. Use it when yourvehicle is creating a safety hazard for othermotorists.
•Press the flasher control and all frontand rear direction indicators flash.
•Press the flasher control again toswitch them off.
JUMP STARTING THE VEHICLE
WARNING: Batteries normallyproduce explosive gases which cancause personal injury. Therefore, do notallow flames, sparks or lightedsubstances to come near the battery.When working near the battery, alwaysshield your face and protect your eyes.Always provide correct ventilation.
WARNING: Keep batteries out ofreach of children. Batteries containsulfuric acid. Avoid contact with skin,eyes or clothing. Shield your eyes whenworking near the battery to protectagainst possible splashing of acidsolution. In case of acid contact with skinor eyes, flush immediately with water fora minimum of 15 minutes and get promptmedical attention. If acid is swallowed,call a physician immediately.
WARNING: Use only adequatelysized cables with insulated clamps.
Preparing Your Vehicle
Do not attempt to push-start yourautomatic transmission vehicle.
Note:Attempting to push-start a vehiclewith an automatic transmission may causetransmission damage.
Note:Use only a 12-volt supply to start yourvehicle.
Note:Do not disconnect the battery of thedisabled vehicle as this could damage thevehicle electrical system.
60
Motorhome (TY3) Canada/United States of America, enUSA, Edition date: 201803, Third-Printing-Roadside EmergenciesE304635
Page 65 of 176

Jump Starting
1.Start the engine of the booster vehicleand rev the engine moderately, or pressthe accelerator gently to keep yourengine speed between 2000 and 3000RPM, as shown in your tachometer.
2.Start the engine of the disabled vehicle.
3.Once the disabled vehicle has beenstarted, run both vehicle engines for anadditional three minutes beforedisconnecting the jumper cables.
Removing the Jumper Cables
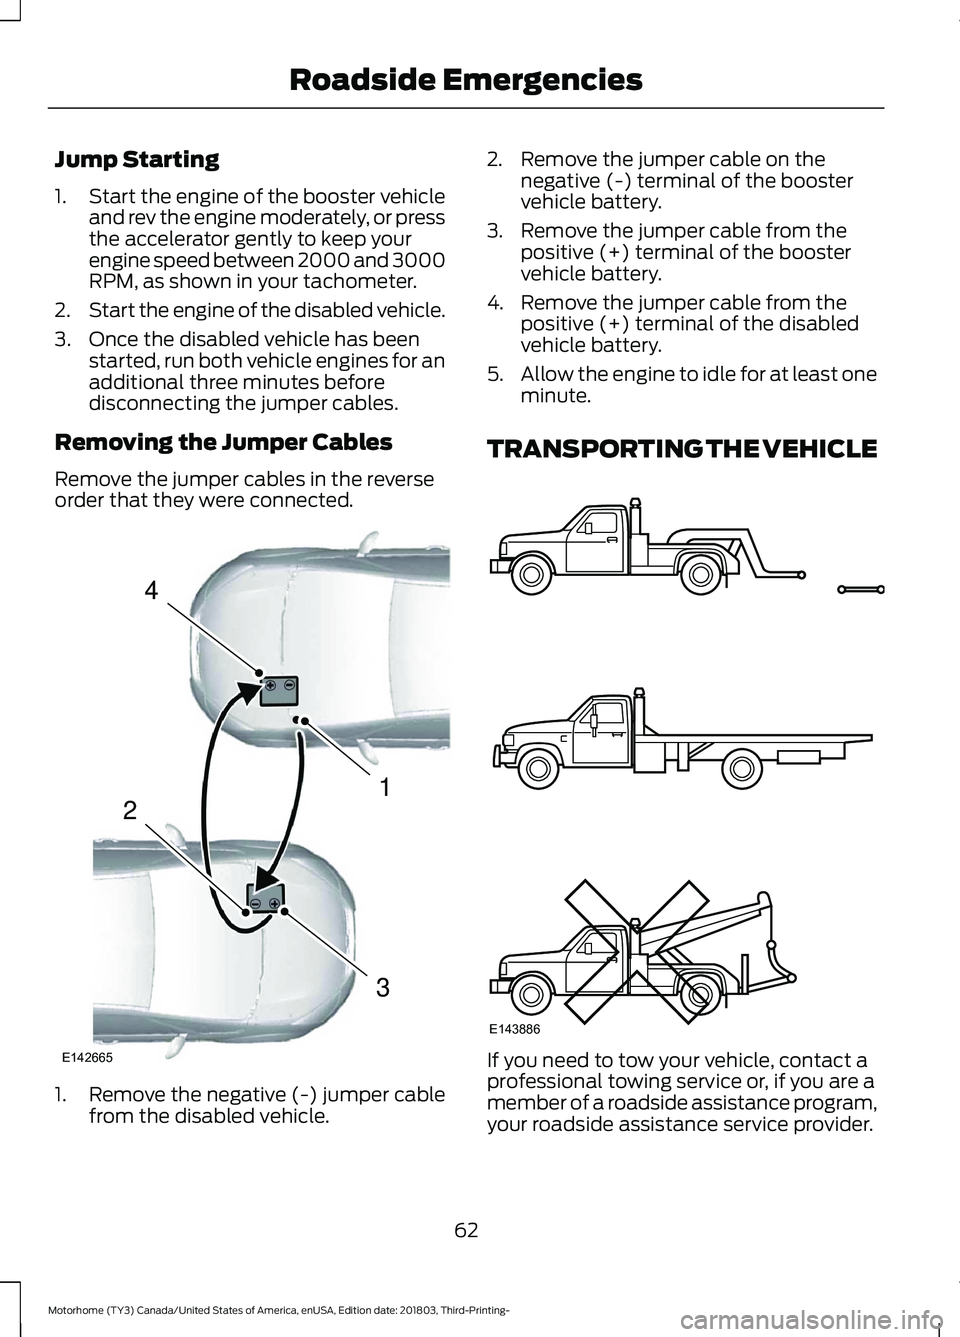
Remove the jumper cables in the reverseorder that they were connected.
1.Remove the negative (-) jumper cablefrom the disabled vehicle.
2.Remove the jumper cable on thenegative (-) terminal of the boostervehicle battery.
3.Remove the jumper cable from thepositive (+) terminal of the boostervehicle battery.
4.Remove the jumper cable from thepositive (+) terminal of the disabledvehicle battery.
5.Allow the engine to idle for at least oneminute.
TRANSPORTING THE VEHICLE
If you need to tow your vehicle, contact aprofessional towing service or, if you are amember of a roadside assistance program,your roadside assistance service provider.
62
Motorhome (TY3) Canada/United States of America, enUSA, Edition date: 201803, Third-Printing-Roadside Emergencies4132E142665 E143886