2019 FORD F-350 key
[x] Cancel search: keyPage 228 of 666
You can use this feature with tow/haul or
progressive range selection to provide
further increased engine braking. The
transmission automatically upshifts to
prevent the engine from entering the red
zone on the tachometer. See Automatic
Transmission (page 206).
HINTS ON DRIVING WITH
ANTI-LOCK BRAKES
The anti-lock braking system does not
eliminate the risks when:
• You drive too closely to the vehicle in
front of you.
• Your vehicle is hydroplaning.
• You take corners too fast.
• The road surface is poor.
Note: If the system activates, the brake
pedal may pulse and may travel further.
Maintain pressure on the brake pedal. You
may also hear a noise from the system. This
is normal.
PARKING BRAKE WARNING:
Always set the parking
brake fully and make sure the
transmission is placed in park (P). Failure
to set the parking brake and engage park
could result in vehicle roll-away, property
damage or bodily injury. Turn the ignition
to the lock position and remove the key
whenever you leave your vehicle.
Apply the parking brake whenever your
vehicle is parked. Press the pedal
downward to set the parking brake. The
brake warning lamp in the instrument
cluster will illuminate and remains
illuminated until the parking brake is
released. To release, pull the brake release lever
located at the lower left side of the
instrument panel.
If you are parking your vehicle on a grade
or with a trailer, press and hold the brake
pedal down, then set the parking brake.
There may be a little vehicle movement as
the parking brake sets to hold the vehicle's
weight. This is normal and should be no
reason for concern. If needed, press and
hold the service brake pedal down, then
try reapplying the parking brake. Chock the
wheels if required. If the parking brake
cannot hold the weight of the vehicle, the
parking brake may need to be serviced or
the vehicle may be overloaded.
HILL START ASSIST
WARNING:
The system does not
replace the parking brake. When you
leave your vehicle, always apply the
parking brake. WARNING:
You must remain in
your vehicle when the system turns on.
At all times, you are responsible for
controlling your vehicle, supervising the
system and intervening, if required.
Failure to take care may result in the loss
of control of your vehicle, serious
personal injury or death. WARNING:
The system will turn
off if a malfunction is apparent or if you
rev the engine excessively. Failure to take
care may result in the loss of control of
your vehicle, serious personal injury or
death.
The system makes it easier to pull away
when your vehicle is on a slope without the
need to use the parking brake.
225
Super Duty (TFE) Canada/United States of America, enUSA, Edition date: 201804, Fourth-Printing Brakes
Page 232 of 666
Roll Stability Control
The system enhances your vehicle
’s ability
to prevent rollovers by detecting your
vehicle ’s roll motion and the rate at which
it changes by applying the brakes to one
or more wheels individually.
Traction Control
The system enhances your vehicle ’s ability
to maintain traction of the wheels by
detecting and controlling wheel spin. See
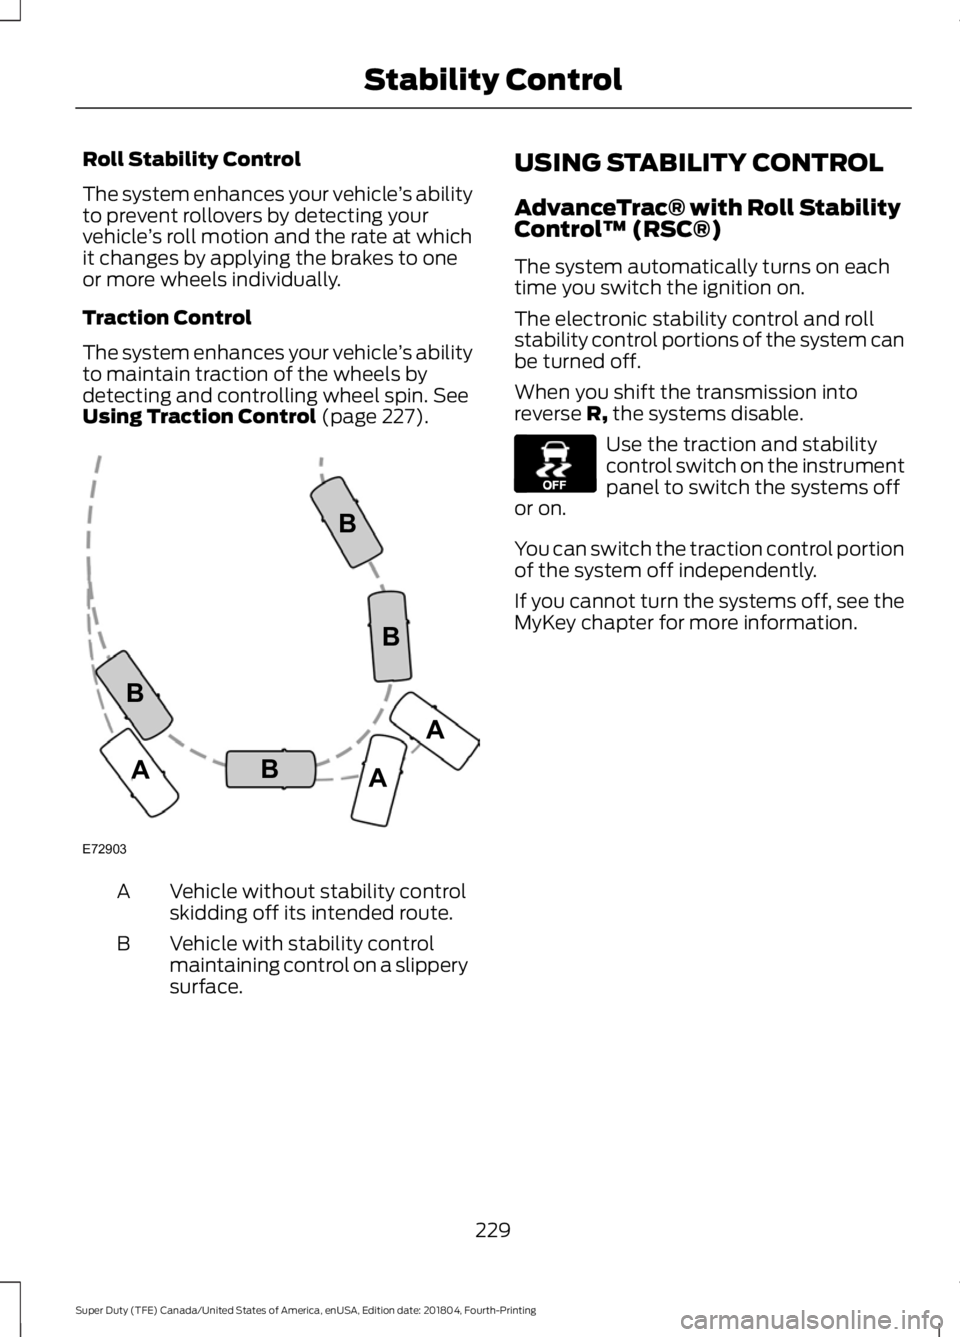
Using Traction Control (page 227). Vehicle without stability control
skidding off its intended route.
A
Vehicle with stability control
maintaining control on a slippery
surface.
B USING STABILITY CONTROL
AdvanceTrac® with Roll Stability
Control
™ (RSC®)
The system automatically turns on each
time you switch the ignition on.
The electronic stability control and roll
stability control portions of the system can
be turned off.
When you shift the transmission into
reverse R, the systems disable. Use the traction and stability
control switch on the instrument
panel to switch the systems off
or on.
You can switch the traction control portion
of the system off independently.
If you cannot turn the systems off, see the
MyKey chapter for more information.
229
Super Duty (TFE) Canada/United States of America, enUSA, Edition date: 201804, Fourth-Printing Stability ControlE72903A
AA
B
BB
B E130458
Page 236 of 666

PRINCIPLE OF OPERATION
WARNING: To help avoid personal
injury, always use caution when in
reverse (R) and when using the sensing
system. WARNING: The system may not
detect objects with surfaces that absorb
reflection. Always drive with due care
and attention. Failure to take care may
result in a crash. WARNING:
Traffic control
systems, inclement weather, air brakes,
external motors and fans may affect the
correct operation of the sensing
system.This may cause reduced
performance or false alerts. WARNING:
The system may not
detect small or moving objects,
particularly those close to the ground.
Note: Certain add-on devices installed
around the bumper or fascia may create
false beeps. For example, large trailer
hitches, bike or surfboard racks, license plate
brackets, bumper covers or any other device
that may block the normal detection zone
of the system.
Note: Keep the sensors, located on the
bumper or fascia, free from snow, ice and
large accumulations of dirt. If the sensors
are covered, the system ’s accuracy can be
affected. Do not clean the sensors with
sharp objects.
Note: If your vehicle sustains damage to
the bumper or fascia, leaving it misaligned
or bent, the sensing zone may be altered
causing inaccurate measurement of
obstacles or false alarms. See your
authorized technician. Note:
When a trailer is connected to your
vehicle, the rear parking aid may detect the
trailer and therefore provide warnings.
Disable the rear parking aid when a trailer
is connected to prevent these warnings.
Note: The sensing system cannot be turned
off when a MyKey is present. See Principle
of Operation
(page 65).
The sensing system warns the driver of
obstacles within a certain range of your
vehicle. The system turns on automatically
whenever you switch the ignition on.
When receiving a detection warning, the
radio volume reduces to a predetermined
level. After the warning goes away, the
radio volume returns to the previous level.
The sensing system can be switched off
through the information display menu or
from the pop-up message that appears
once you shift the transmission into reverse
(R). See General Information (page 112).
If a fault is present in the system, a warning
message appears in the information
display and you cannot switch the system
on through the pop-up message. See
Information Messages
(page 128).
REAR PARKING AID
(IF EQUIPPED)
The rear sensors are only active when the
transmission is in reverse (R). As your
vehicle moves closer to the obstacle, the
rate of the audible warning increases.
When the obstacle is less than
11.81 in
(30 cm) away, the warning sounds
continuously. If the system detects a
stationary or receding object farther than
11.81 in (30 cm)
from the corners of the
bumper, the tone sounds for only two
seconds. Once the system detects an
object approaching, the warning sounds
again.
233
Super Duty (TFE) Canada/United States of America, enUSA, Edition date: 201804, Fourth-Printing Parking Aids
Page 252 of 666

DRIVER ALERT (IF EQUIPPED)
WARNING:
The system is
designed to aid the driver. It is not
intended to replace your attention and
judgment. You are still responsible to
drive with due care and attention. WARNING:
At all times, you are
responsible for controlling your vehicle,
supervising the system and intervening,
if required. Failure to take care may result
in the loss of control of your vehicle,
serious personal injury or death. WARNING:
The system may not
function if the sensor is blocked. WARNING:
Take regular rest
breaks if you feel tired. Do not wait for
the system to warn you. WARNING:
Certain driving styles
may result in the system warning you
even if you are not feeling tired. WARNING:
In cold and severe
weather conditions the system may not
function. Rain, snow and spray can all
limit sensor performance. WARNING:
The system will not
operate if the sensor cannot track the
road lane markings. WARNING:
If damage occurs in
the immediate area surrounding the
sensor, have your vehicle checked as
soon as possible. WARNING:
The system may not
correctly operate if your vehicle is fitted
with a suspension kit not approved by
us. Note:
Keep the windshield free from
obstructions. For example, bird droppings,
insects and snow or ice.
Note: If the camera is blocked or if the
windshield is damaged, the system may not
function.
Note: The system remembers the last
setting when you start your vehicle, unless
a MyKey ™ is detected.
Note: If enabled in the menu, the system
activates at speeds above
40 mph
(64 km/h). The system automatically monitors your
driving behavior using various inputs
including the front camera sensor.
If the system detects that your driving
alertness is reduced below a certain
threshold, the system will alert you using
a chime and a message in the information
display.
Using Driver Alert
Switching the system on and off
You may switch the system on or off
through the information display by
selecting Settings then Driver Assist then
Driver Alert in the menu. When activated,
the system will monitor your alertness level
based upon your driving behavior in relation
to the lane markings, and other factors.
249
Super Duty (TFE) Canada/United States of America, enUSA, Edition date: 201804, Fourth-Printing Driving AidsE249505
Page 254 of 666
When you switch the system on and it
detects an unintentional drift out of your
lane is likely to occur, the system notifies
or assists you to stay in your lane through
the steering system and information
display. The system provides an audible
warning and by vibrating the steering
wheel.
Switching the System On and Off
Note:
The system on or off setting is stored
until it is manually changed, unless a MyKey
is detected. If the system detects a MyKey,
it defaults to on and the mode is set to alert.
Note: If a MyKey is detected, pressing the
button does not affect the on or off status
of the system. You can only change the
mode and intensity settings. Press the button to switch the
system on or off. The button is
above the audio unit or on the
center console.
System Settings
The system sensitivity and intensity can
be adjusted through the display screen.
See General Information (page 112). The
system remembers the last selection. You
do not need to readjust the setting each
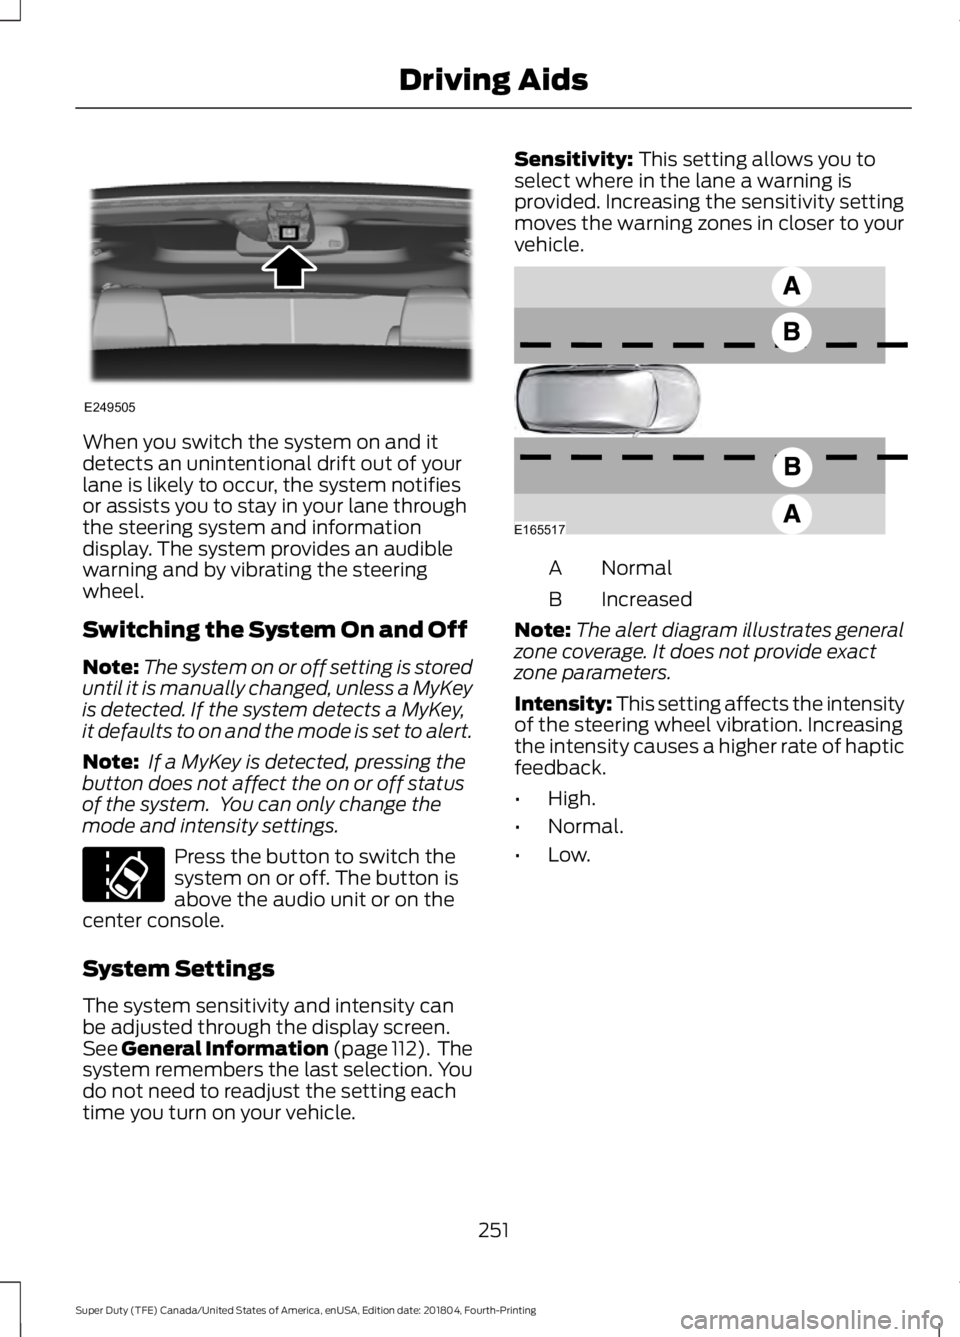
time you turn on your vehicle. Sensitivity: This setting allows you to
select where in the lane a warning is
provided. Increasing the sensitivity setting
moves the warning zones in closer to your
vehicle. Normal
A
Increased
B
Note: The alert diagram illustrates general
zone coverage. It does not provide exact
zone parameters.
Intensity: This setting affects the intensity
of the steering wheel vibration. Increasing
the intensity causes a higher rate of haptic
feedback.
• High.
• Normal.
• Low.
251
Super Duty (TFE) Canada/United States of America, enUSA, Edition date: 201804, Fourth-Printing Driving AidsE249505 E173233 E165517
Page 266 of 666

WARNING: This system is an extra
driving aid. It does not replace your
attention and judgment, or the need to
apply the brakes. This system does NOT
automatically brake your vehicle. If you
fail to press the brake pedal when
necessary, you may collide with another
vehicle. WARNING: The Pre-Collision
Assist system with brake support cannot
help prevent all collisions. Do not rely on
this system to replace your judgment
and the need to maintain correct
distance and speed. WARNING: The pre-collision assist
system's brake support reduces collision
speed only if you brake your vehicle
before any collision. You must press your
brake pedal as you would in any typical
braking situation.
Note: The system does not detect, warn or
respond to potential collisions with vehicles
to the rear or side of your vehicle.
Note: The system is active at speeds above
approximately
5 mph (8 km/h).
Note: The system becomes unavailable if
you disable the electronic stability control.
See
Using Stability Control (page 229). The system is designed to alert the driver
of certain collision risks. A radar detects if
your vehicle is rapidly approaching another
vehicle traveling in the same direction as
yours. When your vehicle rapidly approaches
another vehicle, a red warning light
illuminates and an audible warning tone
sounds.
The brake support system assists the driver
in reducing the collision speed by charging
the brakes. If the risk of collision further
increases after the warning light
illuminates, the brake support prepares
the brake system for rapid braking. This
may be apparent to the driver. Brake
support does not automatically apply the
brakes. If you press the brake pedal, the
system could apply additional braking up
to maximum braking force, even if you
lightly press the brake pedal.
Using the System
You can use your information display
control to adjust the system's sensitivity
or to switch the system on or off. Your
vehicle remembers the settings across key
cycles. You may change the system
sensitivity to any one of three possible
settings.
See General Information (page
112).
Note: We recommend that you switch the
system off if you install a snow plow or
similar object in such a way that it may
block the radar sensor. Your vehicle
remembers the selected setting across key
cycles.
263
Super Duty (TFE) Canada/United States of America, enUSA, Edition date: 201804, Fourth-Printing Driving AidsE156130 E156131
Page 278 of 666
TRAILER REVERSING AIDS
Trailer Reverse Guidance
WARNING: Driving while
distracted can result in loss of vehicle
control, crash and injury. We strongly
recommend that you use extreme
caution when using any device that may
take your focus off the road. Your
primary responsibility is the safe
operation of your vehicle. We
recommend against the use of any
hand-held device while driving and
encourage the use of voice-operated
systems when possible. Make sure you
are aware of all applicable local laws
that may affect the use of electronic
devices while driving.
Note: You must always be aware of the
vehicle and trailer combination and the
surrounding environment.
Note: The system does not detect or
prevent the vehicle or trailer from making
contact with obstacles in the surrounding
environment.
Note: Keep in mind that the front end of
the vehicle swings out when changing the
direction of the trailer.
Note: The system relies on user
measurements to determine sticker
placement and system limits. It is critical to
take the key measurements correctly.
Incorrect measurements can result in the
improper function of the system up to and
including contact between the vehicle and
trailer.
Note: The system limits vehicle speed when
backing up. The system is not a replacement
for proper use of the throttle and brake
pedals.
Note: Some features associated with this
system do not work until you set it up. Principle of Operation
Trailer reverse guidance is a driver
assistance feature that helps take the
guesswork out of getting your trailer
positioned where you want it, quickly and
easily, when driving in reverse (R).
Each trailer you use with your vehicle has
to be setup once. Sticker placement is
extremely important and there are specific
placement rules.
Setting Up Trailer Reverse
Guidance
Note:
Your vehicle saves the trailer
information when you enter it into the
system. A maximum of 10 trailers can be
added to the system.
Step 1: Position your Vehicle and Trailer
Hitch your trailer to the truck and connect
the electrical wiring harness. Check to
make sure that the wiring is working.
See
Essential Towing Checks (page 287).
Park your vehicle and hitched trailer on a
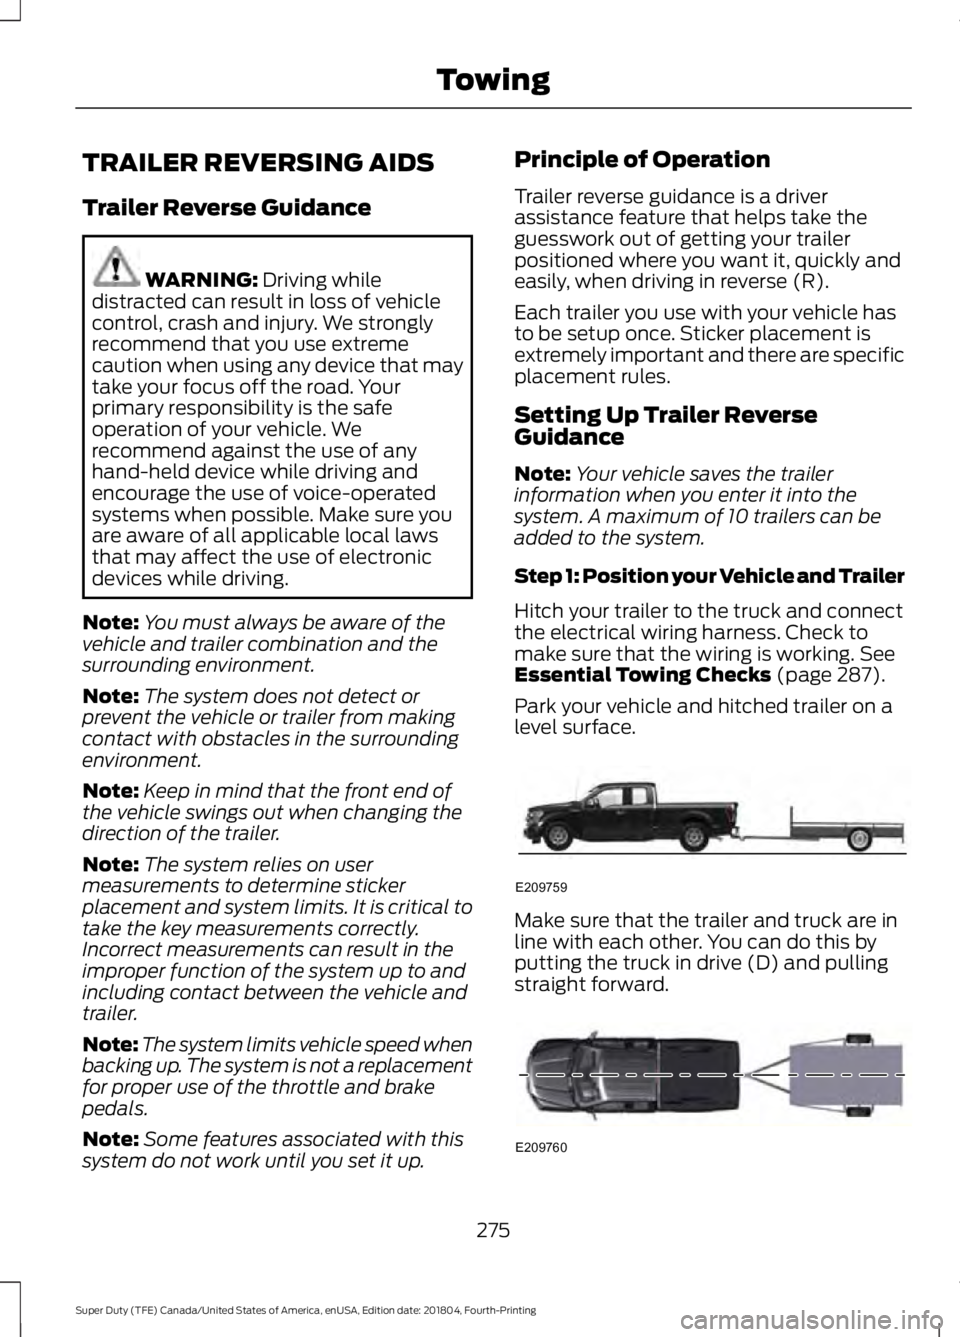
level surface. Make sure that the trailer and truck are in
line with each other. You can do this by
putting the truck in drive (D) and pulling
straight forward.
275
Super Duty (TFE) Canada/United States of America, enUSA, Edition date: 201804, Fourth-Printing TowingE209759 E209760
Page 280 of 666
Use the supplied measurement card, a
tape measure and pen to carefully mark
the area where to attach the sticker. The
sticker is supplied in the back cover pocket
of your quick start guide. Make sure the
entire sticker is within the gray zone
between the two arcs or distance markers
on the diagram, and is also visible in the
rear view camera display. It should be
between 7
– 20 in (17 –51 cm) from the
trailer ball hitch.
Once you have found the correct location,
place the sticker.
Step 4: Take Measurements
After you place the sticker on the trailer
you must take some measurements.
Note: You must take accurate
measurements for the system to operate
properly.
Note: Round measurement figures to the
nearest half inch.
Note: Round upward if the measured length
is a quarter inch or greater. Round
downward if the measure length is less than
a quarter inch. For example
12.25 in
(31.11 cm) would be rounded up to 12.50 in
(31.75 cm). 12.13 in (30.8 cm) would be
rounded down to 12.00 in (30.48 cm).
Note: Use consistent metric or imperial
units as required by your country or vehicle.
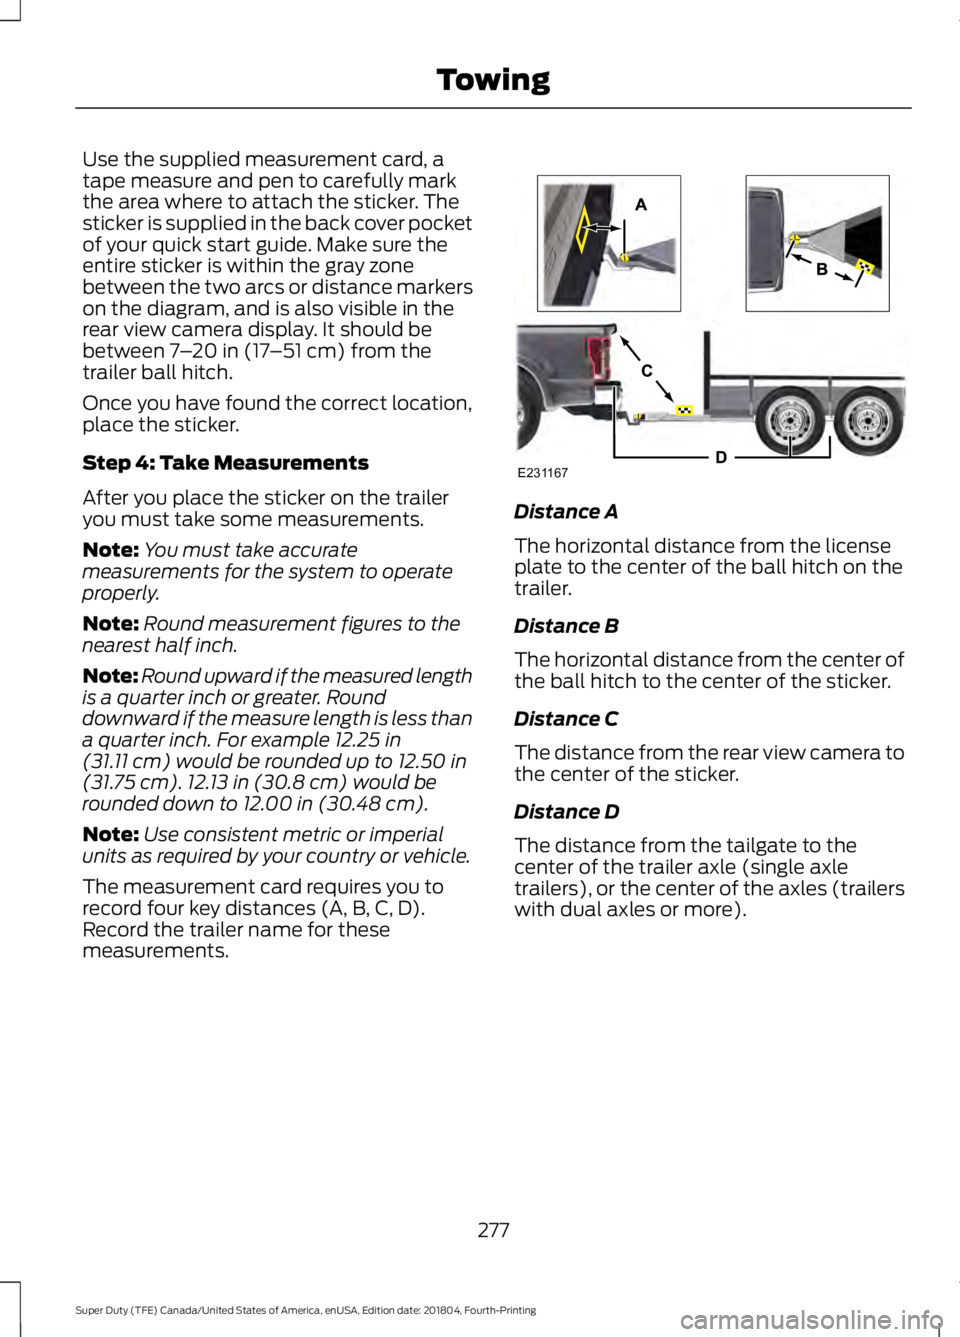
The measurement card requires you to
record four key distances (A, B, C, D).
Record the trailer name for these
measurements. Distance A
The horizontal distance from the license
plate to the center of the ball hitch on the
trailer.
Distance B
The horizontal distance from the center of
the ball hitch to the center of the sticker.
Distance C
The distance from the rear view camera to
the center of the sticker.
Distance D
The distance from the tailgate to the
center of the trailer axle (single axle
trailers), or the center of the axles (trailers
with dual axles or more).
277
Super Duty (TFE) Canada/United States of America, enUSA, Edition date: 201804, Fourth-Printing TowingE231167