2019 FORD F-350 door lock
[x] Cancel search: door lockPage 138 of 666

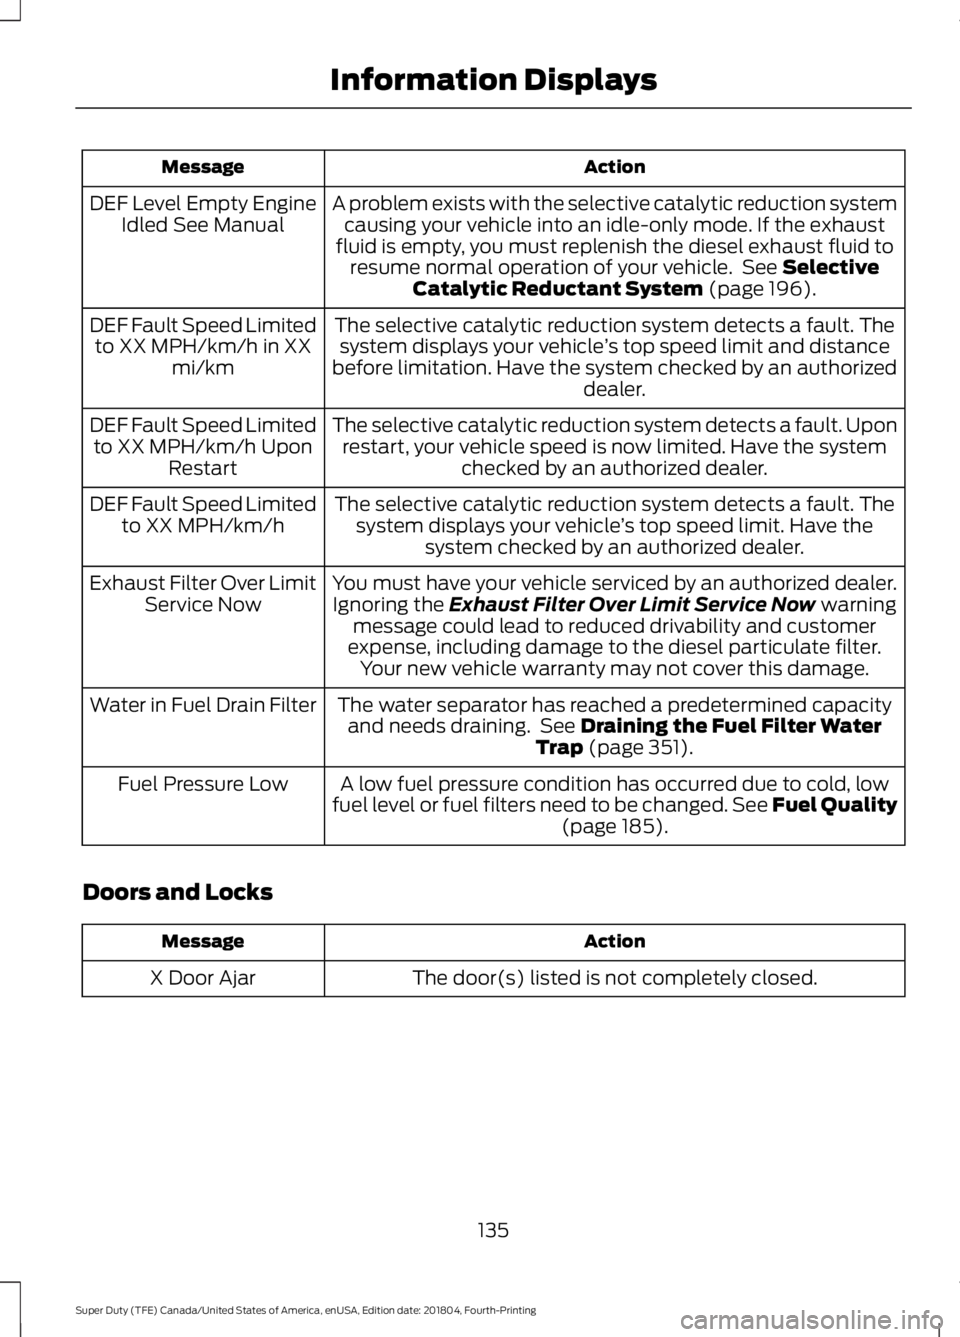
Action
Message
A problem exists with the selective catalytic reduction systemcausing your vehicle into an idle-only mode. If the exhaust
fluid is empty, you must replenish the diesel exhaust fluid to resume normal operation of your vehicle. See Selective
Catalytic Reductant System (page 196).
DEF Level Empty Engine
Idled See Manual
The selective catalytic reduction system detects a fault. Thesystem displays your vehicle ’s top speed limit and distance
before limitation. Have the system checked by an authorized dealer.
DEF Fault Speed Limited
to XX MPH/km/h in XX mi/km
The selective catalytic reduction system detects a fault. Uponrestart, your vehicle speed is now limited. Have the system checked by an authorized dealer.
DEF Fault Speed Limited
to XX MPH/km/h Upon Restart
The selective catalytic reduction system detects a fault. Thesystem displays your vehicle ’s top speed limit. Have the
system checked by an authorized dealer.
DEF Fault Speed Limited
to XX MPH/km/h
You must have your vehicle serviced by an authorized dealer.Ignoring the
Exhaust Filter Over Limit Service Now warning
message could lead to reduced drivability and customer
expense, including damage to the diesel particulate filter. Your new vehicle warranty may not cover this damage.
Exhaust Filter Over Limit
Service Now
The water separator has reached a predetermined capacityand needs draining. See
Draining the Fuel Filter Water
Trap (page 351).
Water in Fuel Drain Filter
A low fuel pressure condition has occurred due to cold, low
fuel level or fuel filters need to be changed. See Fuel Quality (page
185).
Fuel Pressure Low
Doors and Locks Action
Message
The door(s) listed is not completely closed.
X Door Ajar
135
Super Duty (TFE) Canada/United States of America, enUSA, Edition date: 201804, Fourth-Printing Information Displays
Page 161 of 666

MEMORY FUNCTION (IF EQUIPPED)
WARNING:
Before activating the
memory seat, make sure that the area
immediately surrounding the seat is clear
of obstructions and that all occupants
are clear of moving parts. WARNING:
Do not use the
memory function when your vehicle is
moving.
This feature automatically recalls the
position of the following:
• Driver seat.
• Power mirrors.
• Optional adjustable pedals.
The memory control is on the driver door. Saving a Preset Position
1. Switch the ignition on.
2.
Adjust the features to the positions you
desire.
3. Press and hold the preset button until you hear a single tone.
Note: You can save up to three preset
memory positions.
Note: You can save a memory preset at any
time. Recalling a Preset Position
1. Switch the ignition on.
2. Press and release the preset button
associated with your desired driving
position. The seat and mirrors move to
the position stored for that preset.
Note: You can only recall preset memory
positions when you switch the ignition off,
or when the transmission is in park (P) or
neutral (N) if you switch the ignition on.
Note: You can also recall a preset memory
position by pressing the unlock button on
your remote control if it is linked to a preset
position.
Note: Using a linked key fob to recall your
memory position when the ignition is off
moves the seat to the easy entry position.
Note: Pressing any active memory feature
control - power seat, mirror (or any memory
button) during a memory recall cancels the
operation.
Linking a PreSet Position to your
Remote Control or Intelligent
Access Key Fob
Your vehicle can save the preset memory
positions for up to two remote controls.
1. With the ignition on, move the memory
positions to the positions you desire.
2. Press and hold the desired preset button for about five seconds. A tone
sounds after about two seconds.
Continue holding until you hear a
second tone.
3. Within three seconds, press the lock button on the remote control you are
linking.
To unlink a remote control, follow the
same procedure – except in step 3, press
the unlock button on the remote control.
158
Super Duty (TFE) Canada/United States of America, enUSA, Edition date: 201804, Fourth-Printing SeatsE142554
Page 167 of 666

UNIVERSAL GARAGE DOOR
OPENER
HomeLink Wireless Control
System
WARNING: Do not use the system
with any garage door opener that does
not have the safety stop and reverse
feature as required by U.S. Federal
Safety Standards (this includes any
garage door opener manufactured
before April 1, 1982). A garage door
opener which cannot detect an object,
signaling the door to stop and reverse,
does not meet current federal safety
standards. Using a garage door opener
without these features increases the risk
of serious injury or death.
Note: Make sure that the garage door and
security device are free from obstruction
when you are programming. Do not program
the system with the vehicle in the garage.
Note: Make sure you keep the original
remote control transmitter for use in other
vehicles as well as for future system
programming.
Note: We recommend that upon the sale
or lease termination of your vehicle, you
erase the programmed function buttons for
security reasons. See Erasing the Function
Button Codes
later in this section.
Note: You can program a maximum of
three devices. To change or replace any of
the three devices after it has been initially
programmed, you must first erase the
current settings. See Erasing the Function
Button Codes
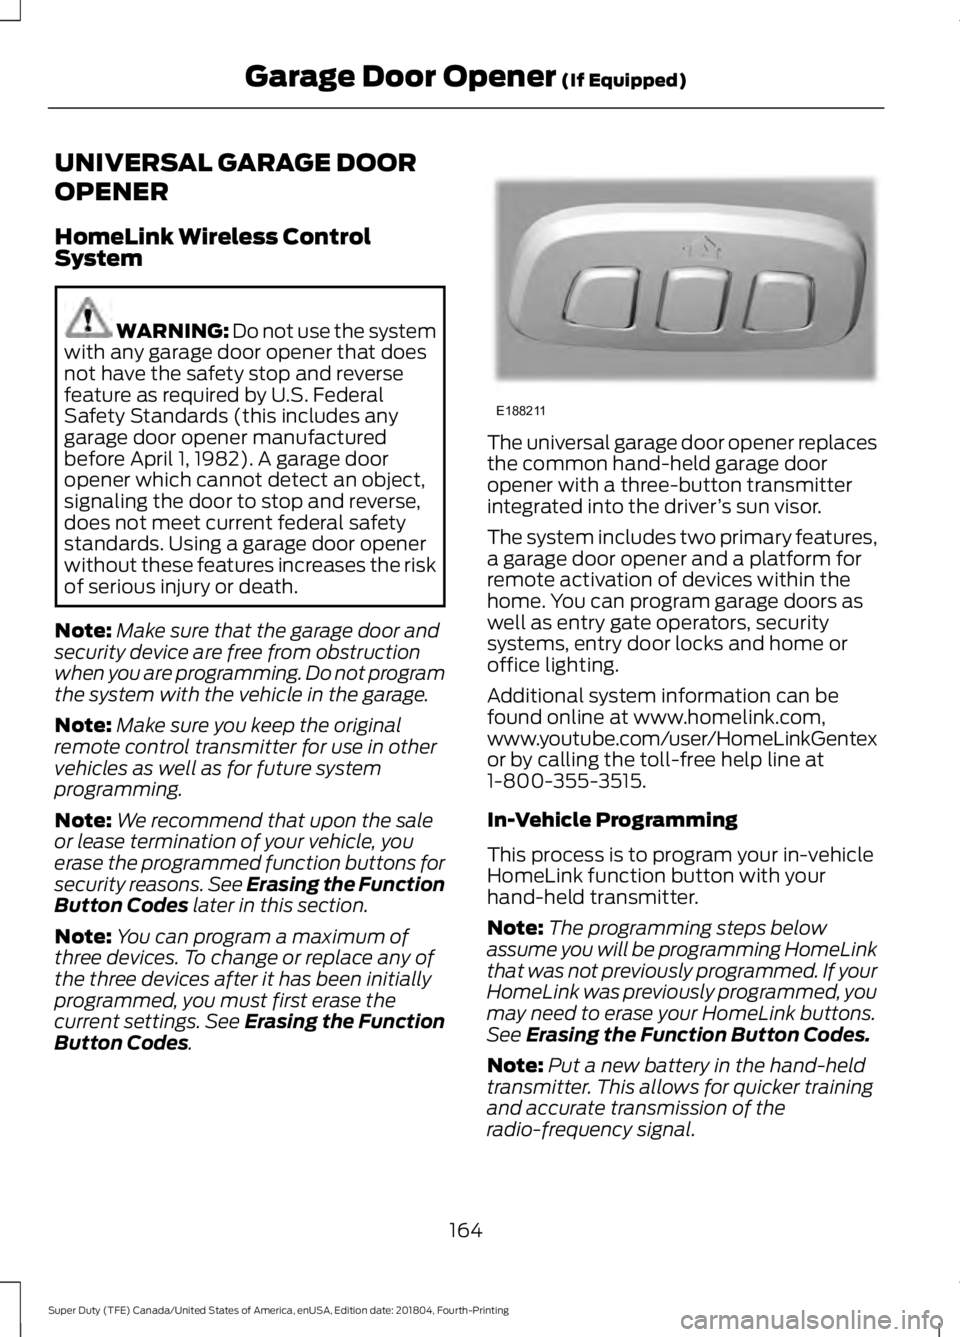
. The universal garage door opener replaces
the common hand-held garage door
opener with a three-button transmitter
integrated into the driver
’s sun visor.
The system includes two primary features,
a garage door opener and a platform for
remote activation of devices within the
home. You can program garage doors as
well as entry gate operators, security
systems, entry door locks and home or
office lighting.
Additional system information can be
found online at www.homelink.com,
www.youtube.com/user/HomeLinkGentex
or by calling the toll-free help line at
1-800-355-3515.
In-Vehicle Programming
This process is to program your in-vehicle
HomeLink function button with your
hand-held transmitter.
Note: The programming steps below
assume you will be programming HomeLink
that was not previously programmed. If your
HomeLink was previously programmed, you
may need to erase your HomeLink buttons.
See Erasing the Function Button Codes.
Note: Put a new battery in the hand-held
transmitter. This allows for quicker training
and accurate transmission of the
radio-frequency signal.
164
Super Duty (TFE) Canada/United States of America, enUSA, Edition date: 201804, Fourth-Printing Garage Door Opener
(If Equipped)E188211
Page 175 of 666

4. To collapse, release the lever (push
down to stowed position) and fold in
the side and front panels.
Note: Make sure the storage divider is not
locked into place when collapsing. Push the
button to release the divider door and swing
to stowed position on front wall
172
Super Duty (TFE) Canada/United States of America, enUSA, Edition date: 201804, Fourth-Printing Storage Compartments
Page 185 of 666

Note:
The heater is most effective when
outdoor temperatures are below 0°F
(-18°C).
For cold climates that are below
0°F
(-18°C) needing a temporary battery
installation. Order the cold climate pack.
The heater acts as a starting aid by
warming the engine coolant. This allows
the climate control system to respond
quickly. The equipment includes a heater
element (installed in the engine block) and
a wire harness. You can connect the
system to a grounded 120-volt AC
electrical source. We recommend that you do the following
for a safe and correct operation:
•
Make sure your vehicle is parked in a
clean area, clear of combustibles.
• locate the block heater cord in the front
tow hook pocket.
• Use a 16-gauge outdoor extension cord
that is product certified by
Underwriter ’s Laboratory (UL) or
Canadian Standards Association
(CSA). This extension cord must be
suitable for use outdoors, in cold
temperatures, and be clearly marked
Suitable for Use with Outdoor
Appliances. Do not use an indoor
extension cord outdoors. This could
result in an electric shock or become a
fire hazard. •
Use as short an extension cord as
possible.
• Do not use multiple extension cords.
• Make sure that when in operation, the
extension cord plug and heater cord
plug connections are free and clear of
water. This could cause an electric
shock or fire.
• Make sure the heater, heater cord and
extension cord are firmly connected.
• Check for heat anywhere in the
electrical hookup once the system has
been operating for approximately 30
minutes.
• Make sure the system is unplugged and
properly stowed before starting and
driving your vehicle. Make sure the
protective cover seals the prongs of the
block heater cord plug when not in use.
• Make sure the heater system is
checked for proper operation before
winter.
Using the Engine Block Heater
Make sure the receptacle terminals are
clean and dry prior to use. Clean them with
a dry cloth if necessary.
The heater uses 0.4 to 1.0 kilowatt-hours
of energy per hour of use. The system does
not have a thermostat. It achieves
maximum temperature after
approximately three hours of operation.
Using the heater longer than three hours
does not improve system performance and
unnecessarily uses electricity.
182
Super Duty (TFE) Canada/United States of America, enUSA, Edition date: 201804, Fourth-Printing Starting and Stopping the EngineE236180
Page 192 of 666

WARNING: Wait at least 10
seconds before removing the fuel pump
nozzle to allow any residual fuel to drain
into the fuel tank. WARNING:
Stop refueling after
the fuel pump nozzle automatically
shuts off for the second time. Failure to
follow this will fill the expansion space
in the fuel tank and could lead to fuel
overflowing. WARNING: Do not remove the fuel
pump nozzle from its fully inserted
position when refueling.
Use the following guidelines to avoid
electrostatic charge build-up when filling
an ungrounded fuel container:
• Place approved fuel container on the
ground.
• Do not fill a fuel container while it is in
the vehicle (including the cargo area).
• Keep the fuel pump nozzle in contact
with the fuel container while filling.
• Do not use a device that would hold
the fuel pump handle in the fill position.
Fuel Filler Cap WARNING:
The fuel system may
be under pressure. If you hear a hissing
sound near the fuel filler door, do not
refuel until the sound stops. Otherwise,
fuel may spray out, which could cause
serious personal injury. WARNING:
If you do not use the
proper fuel filler cap, excessive pressure
or vacuum in the fuel tank may damage
the fuel system or cause the fuel cap to
disengage in a collision, which may result
in possible personal injury. Note:
If you must replace the fuel filler cap,
replace it with a fuel filler cap that is
designed for your vehicle. The customer
warranty may be void for any damage to the
fuel tank or fuel system if the correct
genuine Ford, Motorcraft or other certified
fuel filler cap is not used.
Your fuel tank filler cap has an indexed
design with a 1/4th turn on and off feature.
When fueling your vehicle:
1. Put your vehicle in park (P).
2. Switch the engine off.
3. Carefully turn the filler cap counterclockwise until it spins off.
4. Pull to remove the cap from the fuel filler pipe.
5. To install the cap, align the tabs on the
cap with the notches on the filler pipe.
6. Turn the filler cap clockwise 1/4 of a turn clockwise until it clicks at least
once.
If the Check Fuel Cap light or a Check Fuel
Cap message appears in the instrument
cluster and stays on after you start the
engine, you may not have installed the fuel
filler properly.
If the fuel cap light remains on, at the next
opportunity, safely pull off of the road,
remove the fuel filler cap, align the cap
properly and reinstall it. The check fuel cap
light or Check fuel cap message may not
reset immediately. It may take several
driving cycles for the indicators to turn off.
A driving cycle consists of an engine
start-up (after four or more hours with the
engine off) followed by normal city and
highway driving.
REFUELING - DIESEL WARNING:
Read and follow all
the instructions on the pump island.
189
Super Duty (TFE) Canada/United States of America, enUSA, Edition date: 201804, Fourth-Printing Fuel and Refueling
Page 194 of 666

Truck stops have pumps and nozzles
designed for larger, heavy-duty trucks.
When refueling at truck stops: if the nozzle
shuts off repeatedly when refueling, wait
5–
10 seconds; then use a slower rate of
flow, do not depress the nozzle trigger as
far.
Refueling
When fueling your vehicle do the following:
1. Fully open the fuel tank filler door until
it engages and remove the fuel tank
filler cap. The fuel tank filler cap has
an indexed design with a 1/4 turn
on/off feature. Carefully turn the filler
cap counterclockwise until it spins off. 2. Insert the fuel pump nozzle up to the
first notch on the nozzle A. Keep it
resting on the cover of the fuel tank
filler pipe opening. 3.
Hold the fuel pump nozzle in the lower
position B when refueling. Holding the
fuel pump nozzle in the higher position
A may affect the flow of fuel and shut
off the fuel pump nozzle before the fuel
tank is full. 4.
Slightly raise the fuel pump nozzle and
then slowly remove it.
5. Replace the fuel tank filler cap and close the fuel tank filler door.
Note: Do not attempt to start the engine
if you have filled the fuel tank with incorrect
fuel. Incorrect fuel use can cause damage
not covered by the vehicle Warranty. Have
your vehicle checked immediately.
191
Super Duty (TFE) Canada/United States of America, enUSA, Edition date: 201804, Fourth-Printing Fuel and RefuelingE139202
A E139203
A
B E119081
Page 253 of 666

System Warnings
Note:
The system will not issue warnings
below approximately 40 mph (64 km/h).
The warning system is in two stages. At
first the system issues a temporary warning
that you need to take a rest. This message
will only appear for a short time. If the
system detects further reduction in driving
alertness, another warning may be issued
which will remain in the information display
for a longer time. Press OK on the steering
wheel control to clear the warning. When
active the system will run automatically in
the background and only issue a warning
if required.
Resetting the System
You can reset the system by either:
• Switching the ignition off and on.
• Stopping the vehicle and then opening
and closing the driver ’s door.
LANE KEEPING SYSTEM
(IF
EQUIPPED) WARNING:
You are responsible
for controlling your vehicle at all times.
The system is designed to be an aid and
does not relieve you of your responsibility
to drive with due care and attention.
Failure to follow this instruction could
result in the loss of control of your
vehicle, personal injury or death. WARNING:
Always drive with due
care and attention when using and
operating the controls and features on
your vehicle. WARNING:
In cold and severe
weather conditions the system may not
function. Rain, snow and spray can all
limit sensor performance. WARNING:
The system will not
operate if the sensor cannot track the
road lane markings. WARNING:
The sensor may
incorrectly track lane markings as other
structures or objects. This can result in
a false or missed warning. WARNING:
Large contrasts in
outside lighting can limit sensor
performance. WARNING:
The system may not
operate properly if the sensor is blocked.
Keep the windshield free from
obstruction. WARNING:
If damage occurs in
the immediate area surrounding the
sensor, have your vehicle checked as
soon as possible. WARNING:
The system may not
correctly operate if your vehicle is fitted
with a suspension kit not approved by
us.
Note: The system works as long as the
camera can detect one lane marking at a
speed above
40 mph (64 km/h).
Note: The system may not function with a
blocked camera, or if the windshield is
damaged or dirty.
250
Super Duty (TFE) Canada/United States of America, enUSA, Edition date: 201804, Fourth-Printing Driving Aids