2019 FORD F-350 park assist
[x] Cancel search: park assistPage 229 of 666

When the system is active, your vehicle
remains stationary on the slope for two to
three seconds after you release the brake
pedal. This allows time to move your foot
from the brake to the accelerator pedal.
The system releases the brakes
automatically once the engine has
developed sufficient torque to prevent your
vehicle from rolling down the slope. This
is an advantage when pulling away on a
slope, for example from a car park ramp,
traffic lights or when reversing uphill into
a parking space.
The system activates on any slope that
causes your vehicle to roll.
Note:
There is no warning light to indicate
the system is either on or off.
Using Hill Start Assist
1. Press the brake pedal to bring your vehicle to a complete standstill. Keep
the brake pedal pressed and shift into
first gear when facing uphill or reverse
(R) when facing downhill.
2. If the sensors detect that your vehicle is on a slope, the system activates
automatically.
3. When you remove your foot from the brake pedal, your vehicle remains on
the slope without rolling away for
about two to three seconds. This hold
time automatically extends if you are
in the process of driving off.
4. Drive off in the normal manner. The system releases the brakes
automatically.
Note: When you remove your foot from the
brake pedal and press the pedal again when
the system is active, you will experience
significantly reduced brake pedal travel. This
is normal. Switching the System On and Off
Vehicles with Manual Transmission
You can switch this feature on or off in the
information display. The system
remembers the last setting when you start
your vehicle.
Vehicles with Automatic Transmission
You cannot turn the system on or off.
When you switch the ignition on, the
system automatically turns on.
226
Super Duty (TFE) Canada/United States of America, enUSA, Edition date: 201804, Fourth-Printing Brakes
Page 234 of 666
PRINCIPLE OF OPERATION
WARNING: Hill descent control
cannot control descent in all surface
conditions and circumstances, such as
ice or extremely steep grades. Hill
descent control is a driver assist system
and cannot substitute for good judgment
by the driver. Failure to do so may result
in loss of vehicle control, crash or serious
injury. WARNING:
Hill descent control
does not provide hill hold at zero miles
per hour (0 kilometers per hour). When
stopped, the parking brake must be
applied or the vehicle must be placed in
P
(Park) or it may roll away.
Hill descent control allows the driver to set
and maintain vehicle speed while
descending steep grades in various surface
conditions.
Hill descent control can maintain vehicle
speeds on downhill grades between 2 mph
(3 km/h) and 12 mph (20 km/h). Above 20
mph (32 km/h), the system remains
armed, but descent speed cannot be set
or maintained.
Hill descent control requires a cooling
down interval after a period of sustained
use. The amount of time that the feature
can remain active before cooling varies
with conditions. The system will provide a
warning in the message center and a chime
will sound when the system is about to
disengage for cooling. At this time,
manually apply the brakes as needed to
maintain descent speed. USING HILL DESCENT
CONTROL Press and release the hill
descent button located on the
instrument panel. A light in the
cluster will illuminate and a chime will
sound when this feature is activated.
To increase descent speed, press the
accelerator pedal until the desired speed
is reached. To decrease descent speed,
press the brake pedal until the desired
speed is reached.
Whether accelerating or decelerating, once
the desired descent speed is reached,
remove your feet from the pedals and the
chosen vehicle speed will be maintained.
Note: Noise from the ABS pump motor may
be observed during hill descent control
operation. This is a normal characteristic of
the ABS and should be no reason for
concern.
Hill descent modes
• At speeds below 20 mph (32 km/h):
When the Hill Descent Control switch
is pressed and Hill Descent Control is
active, the Hill Descent Control telltale
will flash.
• At speeds below 20 mph (32 km/h):
When the Hill Descent Control switch
is pressed and conditions are not
correct for hill descent activation, the
Hill Descent Control system will be
enabled, the Hill Descent Control
telltale will be solid and a message will
display in the information display.
• At speeds above 20 mph (32 km/h):
When the Hill Descent Control switch
is pressed, the Hill Descent Control
system will be enabled, the telltale in
the cluster will not be illuminated and
a message will be displayed in the
information display.
231
Super Duty (TFE) Canada/United States of America, enUSA, Edition date: 201804, Fourth-Printing Terrain Control
(If Equipped)E163957
Page 241 of 666
•
Front Split View: Provides an
extended view of what is in front of
your vehicle.
• Rear High View:
Provides an image
of your truck bed and can be used to
assist you when backing up to align and
hitch a fifth wheel or gooseneck trailer.
• Auxiliary View:
Provides a rear view
image from the back of your trailer
while reversing.
The following camera views can be
accessed when you shift into reverse (R):
• Rear 360 + Normal:
Contains the
normal rear camera view next to a 360
degree camera view. Press the zoom
(+) button to quickly access Rear
Normal View from this screen.
• Rear Normal View: Provides an image
of what is directly behind your vehicle.
• Rear Split View:
Provides an
extended view of what is behind your
vehicle.
• Rear High View:
Provides an image
of your truck bed and can be used to
assist you when backing up to align and
hitch a fifth wheel or gooseneck trailer.
• Auxiliary View:
Provides a rear view
image from the back of your trailer
while reversing.
• Trailer Reverse Guidance View:
Provides an image of the rear of your
vehicle using the side cameras, useful
when reversing with a trailer. Use the
arrows at the bottom of the screen to
adjust the side camera position. See
Trailer Reversing Aids
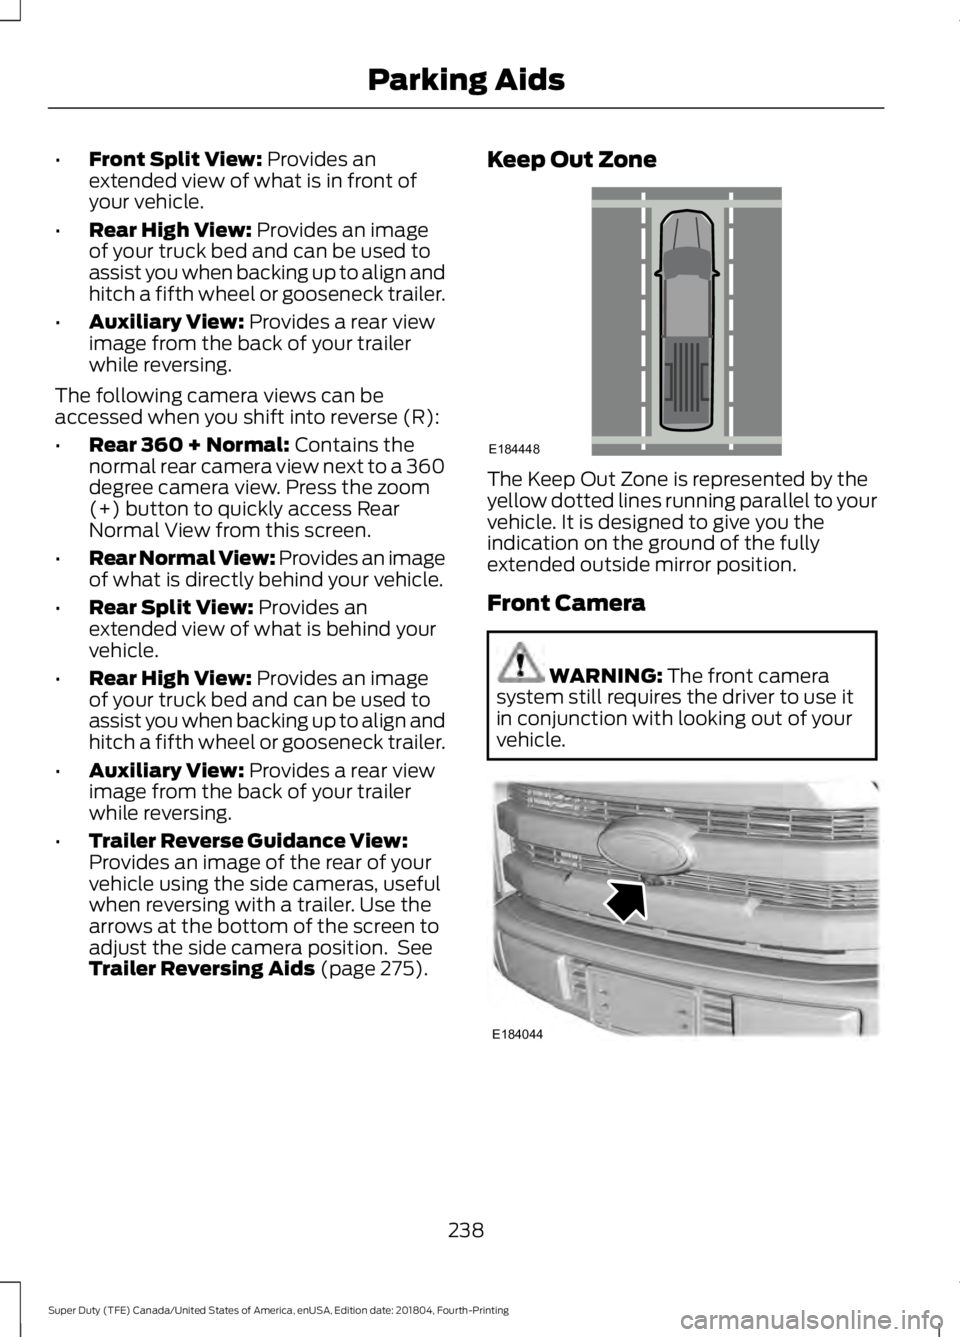
(page 275). Keep Out Zone
The Keep Out Zone is represented by the
yellow dotted lines running parallel to your
vehicle. It is designed to give you the
indication on the ground of the fully
extended outside mirror position.
Front Camera
WARNING:
The front camera
system still requires the driver to use it
in conjunction with looking out of your
vehicle. 238
Super Duty (TFE) Canada/United States of America, enUSA, Edition date: 201804, Fourth-Printing Parking AidsE184448 E184044
Page 242 of 666
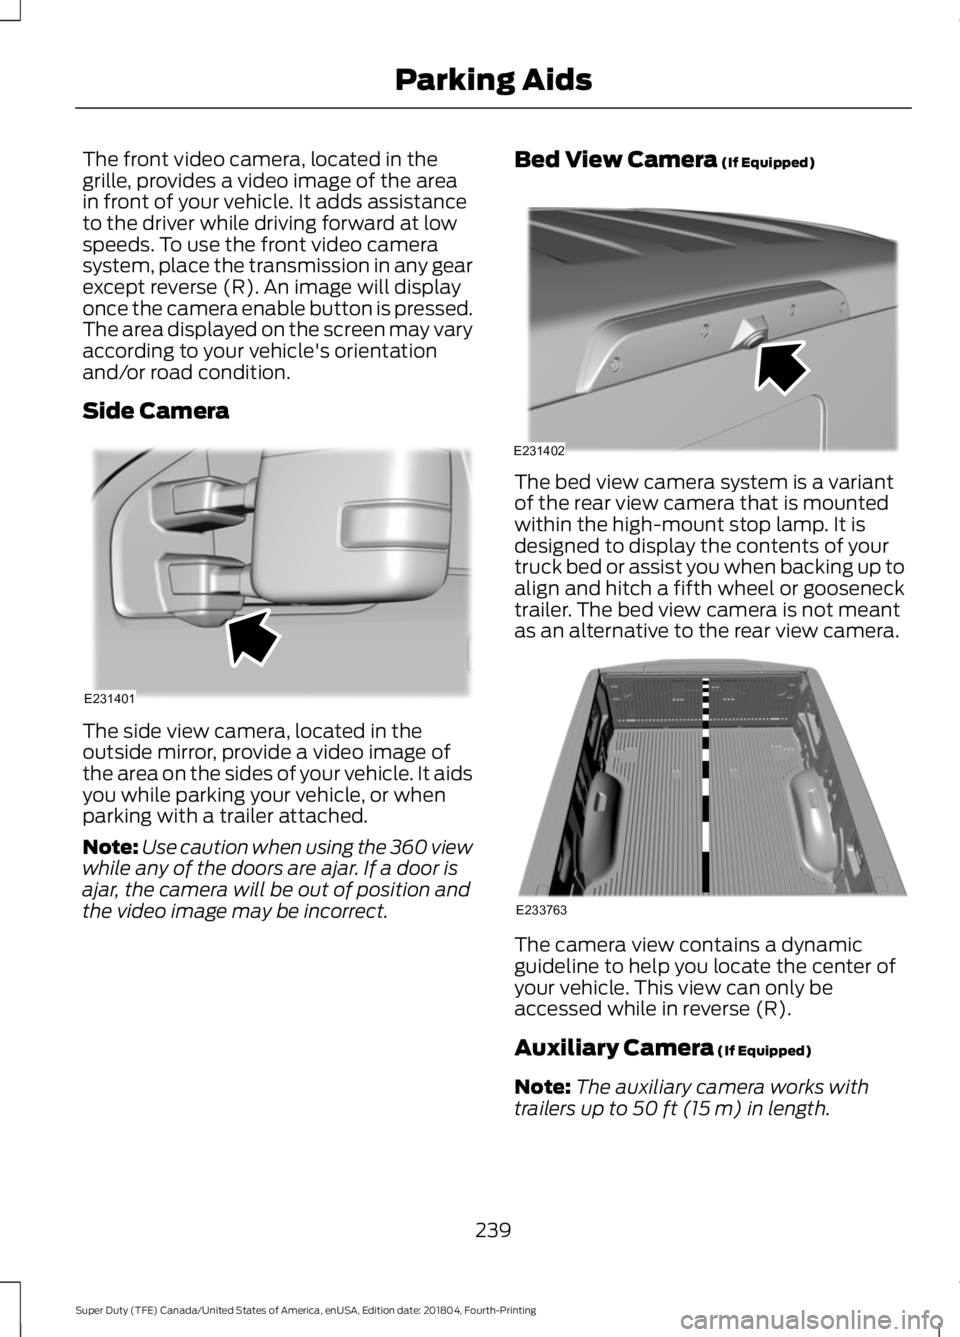
The front video camera, located in the
grille, provides a video image of the area
in front of your vehicle. It adds assistance
to the driver while driving forward at low
speeds. To use the front video camera
system, place the transmission in any gear
except reverse (R). An image will display
once the camera enable button is pressed.
The area displayed on the screen may vary
according to your vehicle's orientation
and/or road condition.
Side Camera
The side view camera, located in the
outside mirror, provide a video image of
the area on the sides of your vehicle. It aids
you while parking your vehicle, or when
parking with a trailer attached.
Note:
Use caution when using the 360 view
while any of the doors are ajar. If a door is
ajar, the camera will be out of position and
the video image may be incorrect. Bed View Camera (If Equipped) The bed view camera system is a variant
of the rear view camera that is mounted
within the high-mount stop lamp. It is
designed to display the contents of your
truck bed or assist you when backing up to
align and hitch a fifth wheel or gooseneck
trailer. The bed view camera is not meant
as an alternative to the rear view camera.
The camera view contains a dynamic
guideline to help you locate the center of
your vehicle. This view can only be
accessed while in reverse (R).
Auxiliary Camera
(If Equipped)
Note: The auxiliary camera works with
trailers up to
50 ft (15 m) in length.
239
Super Duty (TFE) Canada/United States of America, enUSA, Edition date: 201804, Fourth-Printing Parking AidsE231401 E231402 E233763
Page 263 of 666

System Limitations
Cross Traffic Alert has its limitations;
situations such as severe weather
conditions or debris build-up on the sensor
area may limit vehicle detection and cause
false alerts.
The following are other situations that may
limit the Cross Traffic Alert performance:
•
Adjacently parked vehicles or objects
obstructing the sensors.
• Approaching vehicles passing at
speeds greater than 37 mph
(60 km/h).
• Driving in reverse faster than
7 mph
(12 km/h).
• Backing out of an angled parking spot.
False Alerts
Note: If your vehicle has a tow bar with a
factory equipped trailer tow module and it
is towing a trailer, the sensors will
automatically turn the Cross Traffic Alert
off. If your vehicle has a tow bar but no
factory equipped trailer tow module, it is
recommended to turn the Cross Traffic Alert
off manually. Operating Cross Traffic Alert
with a trailer attached will cause poor Cross
Traffic Alert performance.
Note: The system may illuminate the amber
alert indicator and sound the audible alert
during heavy rain even though no vehicle is
approaching from left or right.
There may be certain instances when there
is a false alert by the Cross Traffic Alert
system that illuminates the alert indicator
with no vehicle in the coverage zone. Some
amount of false alerts are normal; they are
temporary and self-correct. System Errors
If Cross Traffic Alert senses a problem with
the left or right sensor a message appears
in the display screen. See
Information
Messages (page 128).
Switching the System Off and On
Note: The Cross Traffic Alert switches on
whenever the ignition is switched on and
ready to provide appropriate alerts when
the transmission is in reverse (R). Cross
Traffic Alert will not remember the last
selected on or off setting.
You can temporarily switch Cross Traffic
Alert off in the information display. See
General Information
(page 112). When
you switch Cross Traffic Alert off, you do
not receive alerts and the display screen
shows a system off message.
You can also have Cross Traffic Alert
switched off permanently at an authorized
dealer. Once switched off permanently,
the system can only be switched back on
at an authorized dealer.
STEERING
Hydraulic Power Steering
To help prevent damage to the power
steering system:
• Do not hold the steering wheel at its
furthest turning points for more than
three to five seconds when the engine
is running.
• Avoid continuously steering back and
forth with elevated engine RPM as this
may overheat the system. If trying to
free a stuck vehicle, pause between
attempts to allow the power steering
system to cool or seek assistance.
Typical steering and driving maneuvers
allow the system to cool.
260
Super Duty (TFE) Canada/United States of America, enUSA, Edition date: 201804, Fourth-Printing Driving Aids
Page 265 of 666
Extreme continuous steering may increase
the effort required for you to steer your
vehicle. This increased effort prevents
overheating and permanent damage to
the steering system. You do not lose the
ability to steer your vehicle manually.
Typical steering and driving maneuvers
allow the system to cool and return to
normal operation.
Adaptive Learning (If Equipped)
The electronic power steering system
adaptive learning helps correct road
irregularities and improves overall handling
and steering feel. It communicates with
the brake system to help operate
advanced stability control and accident
avoidance systems. Whenever the battery
is disconnected or a new battery installed,
you must drive your vehicle a short
distance before the system relearns the
strategy and reactivates all systems.
Adaptive Steering
(If Equipped)
Note: The adaptive steering system has
diagnostic checks that continuously monitor
the system. If the system detects a fault, a
message displays in the information display.
If a red warning message displays, stop your
vehicle as soon as it is safe to do so. The
message may clear if the fault is no longer
present. If an adaptive steering system
warning message appears each time you
start your vehicle, have the system checked
as soon as possible.
The adaptive steering system continually
changes the steering ratio with changes to
vehicle speed, optimizing the steering
response in all conditions. The system also
changes when you switch on the
transmission tow/haul feature. When you
select the tow/haul button, the adaptive
steering system reduces vehicle sensitivity
to steering inputs at higher vehicle speeds,
while maintaining the ease of parking and
maneuverability at low speeds. Note:
The adaptive steering system is
designed with a locking device. With the
lock engaged, the adaptive steering system
remains mechanically locked at a fixed
steering ratio. You may also notice a click
when you switch the vehicle on or after you
switch it off, as the lock disengages or
engages.
Note: If your vehicle loses electrical power
or detects a fault when you are driving, the
system automatically shuts down and you
retain normal steering function with a fixed
steering ratio. During this time it is possible
that the steering wheel may not be straight
when the vehicle is driving straight ahead.
In addition, the driver may notice that the
steering wheel angle required to steer the
vehicle may be different.
Note: During parking maneuvers, the
adaptive steering system balances the driver
work load for various steering wheel inputs
and vehicle loading conditions. Under
extreme operating conditions the system
locking device may engage. This strategy
prevents overheating and permanent
damage to the adaptive steering system.
Typical steering and driving maneuvers
allow the system to cool and return to
normal operation.
PRE-COLLISION ASSIST
(IF
EQUIPPED) WARNING:
You are responsible
for controlling your vehicle at all times.
The system is designed to be an aid and
does not relieve you of your responsibility
to drive with due care and attention.
Failure to follow this instruction could
result in the loss of control of your
vehicle, personal injury or death.
262
Super Duty (TFE) Canada/United States of America, enUSA, Edition date: 201804, Fourth-Printing Driving Aids
Page 278 of 666
TRAILER REVERSING AIDS
Trailer Reverse Guidance
WARNING: Driving while
distracted can result in loss of vehicle
control, crash and injury. We strongly
recommend that you use extreme
caution when using any device that may
take your focus off the road. Your
primary responsibility is the safe
operation of your vehicle. We
recommend against the use of any
hand-held device while driving and
encourage the use of voice-operated
systems when possible. Make sure you
are aware of all applicable local laws
that may affect the use of electronic
devices while driving.
Note: You must always be aware of the
vehicle and trailer combination and the
surrounding environment.
Note: The system does not detect or
prevent the vehicle or trailer from making
contact with obstacles in the surrounding
environment.
Note: Keep in mind that the front end of
the vehicle swings out when changing the
direction of the trailer.
Note: The system relies on user
measurements to determine sticker
placement and system limits. It is critical to
take the key measurements correctly.
Incorrect measurements can result in the
improper function of the system up to and
including contact between the vehicle and
trailer.
Note: The system limits vehicle speed when
backing up. The system is not a replacement
for proper use of the throttle and brake
pedals.
Note: Some features associated with this
system do not work until you set it up. Principle of Operation
Trailer reverse guidance is a driver
assistance feature that helps take the
guesswork out of getting your trailer
positioned where you want it, quickly and
easily, when driving in reverse (R).
Each trailer you use with your vehicle has
to be setup once. Sticker placement is
extremely important and there are specific
placement rules.
Setting Up Trailer Reverse
Guidance
Note:
Your vehicle saves the trailer
information when you enter it into the
system. A maximum of 10 trailers can be
added to the system.
Step 1: Position your Vehicle and Trailer
Hitch your trailer to the truck and connect
the electrical wiring harness. Check to
make sure that the wiring is working.
See
Essential Towing Checks (page 287).
Park your vehicle and hitched trailer on a
level surface. Make sure that the trailer and truck are in
line with each other. You can do this by
putting the truck in drive (D) and pulling
straight forward.
275
Super Duty (TFE) Canada/United States of America, enUSA, Edition date: 201804, Fourth-Printing TowingE209759 E209760
Page 298 of 666

When Towing a Trailer
•
Check your hitch, electrical connections
and trailer wheel lug nuts thoroughly
after you have traveled 50 mi (80 km).
• Do not drive faster than 70 mph
(113 km/h) during the first 500 mi
(800 km).
• Do not make full-throttle starts.
• When stopped in congested or heavy
traffic during hot weather, place the
gearshift in park (P) to aid engine and
transmission cooling and to help A/C
performance.
• Turn off the speed control with heavy
loads or in hilly terrain. The speed
control may turn off automatically
when you are towing on long, steep
grades.
• Shift to a lower gear when driving down
a long or steep hill. Do not apply the
brakes continuously, as they may
overheat and become less effective.
• If your transmission is equipped with a
Grade Assist or Tow/Haul feature, use
this feature when towing. This provides
engine braking and helps eliminate
excessive transmission shifting for
optimum fuel economy and
transmission cooling.
• If your vehicle is equipped with
Adaptive Steering and you have
enabled Tow/Haul, the Adaptive
Steering system adjusts the steering
response to match your vehicle ’s load.
The system reduces vehicle sensitivity
to steering inputs at higher vehicle
speeds while it maintains the ease of
parking and maneuverability at low
speeds. •
If your vehicle is equipped with
AdvanceTrac with RSC, this system
may turn on during typical cornering
maneuvers with a heavily loaded trailer.
This is normal. Turning the corner at a
slower speed while towing may reduce
this tendency.
• If you are towing a trailer frequently in
hot weather, hilly conditions, at the
gross combined weight rating (or any
combination of these factors), consider
refilling your rear axle with synthetic
gear lubricant (if the axle is not already
filled with it).
• Allow more distance for stopping with
a trailer attached. Anticipate stops and
brake gradually.
• Avoid parking on a grade. However, if
you must park on a grade:
1. Turn the steering wheel to point your vehicle tires away from traffic flow.
2. Set your vehicle parking brake.
3. Place the transmission in park (P).
4. Place wheel chocks in front and back of the trailer wheels. (Chocks not
included with vehicle.)
Your vehicle may be equipped with a
temporary or conventional spare tire. A
"temporary" spare tire is different in size
(diameter or width), tread-type
(All-Season or All Terrain) or is from a
different manufacturer than the road tires
on your vehicle. Consult information on the
tire label or Safety Compliance label for
limitations when using.
Launching or Retrieving a Boat or
Personal Watercraft (PWC)
Note: Disconnect the wiring to the trailer
before
backing the trailer into the water.
Note: Reconnect the wiring to the trailer
after
you remove the trailer from the water.
295
Super Duty (TFE) Canada/United States of America, enUSA, Edition date: 201804, Fourth-Printing Towing