2019 FORD EXPLORER warning
[x] Cancel search: warningPage 61 of 571

Car Finder
Press the button twice within
three seconds. The horn sounds
and the direction indicators
flash. We recommend you use this method
to locate your vehicle, rather than using
the panic alarm.
Sounding the Panic Alarm
Note: The panic alarm only operates when
the ignition is off. Press the button to sound the
panic alarm. Press the button
again or switch the ignition on to
turn it off.
Remote Start (If Equipped) WARNING:
To avoid exhaust
fumes, do not use remote start if your
vehicle is parked indoors or in areas that
are not well ventilated.
Note: Do not use remote start if your fuel
level is low. The remote start button is on the
remote control.
This feature allows you to start your
vehicle from the outside. Your remote
control has an extended operating range.
If your vehicle has automatic climate
control, you can configure it to operate
when you remote start your vehicle.
See
Climate Control (page 129). A manual
climate control system runs at the setting
it was set to when you switched your
vehicle off. Many states and provinces have
restrictions for the use of remote start.
Check your local and state or provincial
laws for specific requirements regarding
remote start systems.
The system does not work if:
•
The ignition is on.
• The anti-theft alarm triggers.
• You disable the feature.
• The hood is open.
• The transmission is not in park (P).
• The battery voltage is below the
minimum operating voltage.
• The service engine soon light is on.
Remote Control Feedback (If
Equipped)
An LED on the remote control provides
status feedback of remote start or stop
commands. Status
LED
Remote startsuccessful
Solid green
Remote stopsuccessful
Solid red
Request failed or
status not received
Blinking red
Status incomplete
Blinking green
Remote Starting Your Vehicle
Note: You must press each button within
three seconds of each other. If you do not
follow this sequence, your vehicle does not
start remotely, the direction indicators do
not flash twice and the horn does not sound.
58
Explorer (TUB) Canada/United States of America, enUSA, Edition date: 201807, Second-Printing Keys and Remote ControlsE138623 E138624 E138625
Page 63 of 571

PRINCIPLE OF OPERATION
MyKey allows you to program keys with
restricted driving modes to promote good
driving habits. You can program the
restrictions to all keys except one. Any keys
that you did not program are administrator
keys or admin keys.
You can use admin keys to:
•
Create a MyKey with certain vehicle
restrictions.
• Program certain MyKey settings.
• Clear all MyKey restrictions.
After you program a MyKey, you can view
the following information through the
information display:
• The total number of admin keys and
MyKeys for your vehicle.
• The total distance a MyKey driver
traveled with your vehicle.
Note: Every MyKey receives the same
restrictions and settings. You cannot
program them individually.
Note: For vehicles equipped with a
push-button start switch: When both a
MyKey and an admin key are present when
you start your vehicle, the system recognizes
the admin key only. Standard Settings
Not every vehicle includes the features
listed below. If your vehicle has this
equipment, then you cannot change the
following settings when using a MyKey:
•
Seatbelt reminder or Belt-Minder™.
MyKey mutes the audio system until
drivers, and in some instances,
passengers, fasten their seatbelts.
Note: If your vehicle includes an
AM/FM radio or a very basic audio
system, then the radio may not mute.
• Earlier low-fuel warning. The low-fuel
warning activates earlier for MyKey
drivers, giving them more time to refuel.
• Certain driver alerts, stability systems
or parking aids turn on automatically
when you use the MyKey system. For
example, Blind Spot Information
System (BLIS), cross traffic alert, lane
departure warning or forward collision
warning. Note:
MyKey drivers may be
able to turn the lane departure warning
feature off, but this feature turns back
on automatically with every new key
cycle.
• Restricted touchscreen operation in
some markets. For example, MyKey
may prevent manual navigation
destination input while the vehicle is in
any gear other than park (P) or when
the vehicle reaches a certain rate of
speed.
• Satellite radio adult content
restrictions, if this feature is available
in your market.
Optional Settings
You can configure certain vehicle feature
settings when you first create a MyKey. You
can also change the settings afterward
with an admin key.
60
Explorer (TUB) Canada/United States of America, enUSA, Edition date: 201807, Second-Printing MyKey
™
Page 64 of 571

Note:
Not every feature applies to every
vehicle in every market. When they are
available for your vehicle, then they appear
in your information display, providing
choices to switch them on or off, or to select
a more specific setting.
• Various vehicle speed limits so the
MyKey driver cannot exceed certain
speeds. The information display shows
warnings followed by an audible tone
when the MyKey driver reaches the set
speed. You cannot override the set
speed by fully depressing the
accelerator pedal. WARNING: Do not set MyKey
maximum speed limit to a limit that will
prevent the driver from maintaining a
safe speed considering posted speed
limits and prevailing road conditions. The
driver is always responsible to drive in
accordance with local laws and
prevailing conditions. Failure to do so
could result in accident or injury. •
Various vehicle speed reminders so
MyKey drivers know when their vehicle
speed approaches the limits. Warnings
appear in your information display and
a tone sounds when the MyKey drivers
exceed the set vehicle speed.
• The audio system's maximum volume
limits to 45% so MyKey drivers can
concentrate on the road. A message
appears in the information display
when MyKey drivers attempt to exceed
the limited volume. MyKey also
disables the automatic volume control.
Note:
If your vehicle includes an
AM/FM radio or a very basic audio
system, then the radio may not limit.
• Always on setting. This setting forces
certain features to remain on and
active for MyKey drivers. For example,
E911 or emergency assistance and the
do not disturb features stay on even if
a MyKey driver uses the feature's
control to switch it off. When you
select, you will not be able to turn off
Advance Trac or traction control (if
your vehicle has this feature).
CREATING A MYKEY
Use the information display to create a
MyKey:
1. Insert the key you want to program into
the ignition. See Starting a Gasoline
Engine
(page 167). If your vehicle is
equipped with a push-button start,
place the remote control into the
backup slot. See Passive Anti-Theft
System
(page 75).
2. Switch the ignition on.
61
Explorer (TUB) Canada/United States of America, enUSA, Edition date: 201807, Second-Printing MyKey
™
Page 73 of 571

MANUAL LIFTGATE (IF EQUIPPED)
WARNING:
It is extremely
dangerous to ride in a cargo area, inside
or outside of a vehicle. In a crash, people
riding in these areas are more likely to be
seriously injured or killed. Do not allow
people to ride in any area of your vehicle
that is not equipped with seats and
seatbelts. Make sure everyone in your
vehicle is in a seat and properly using a
seatbelt. Failure to follow this warning
could result in serious personal injury or
death. WARNING: Make sure to close and
latch the liftgate to prevent drawing
exhaust fumes into your vehicle. This will
also prevent passengers and cargo from
falling out. If you must drive with the
liftgate open, keep the vents or windows
open so outside air comes into your
vehicle. Failure to follow this warning
could result in serious personal injury.
Note: Be careful when opening or closing
the liftgate in a garage or other enclosed
area to avoid damaging the liftgate.
Note: Do not hang anything, for example a
bike rack, from the glass or liftgate. This
could damage the liftgate and its
components.
Note: Do not leave the liftgate open while
driving. This could damage the liftgate and
its components. Opening the Liftgate
Manually
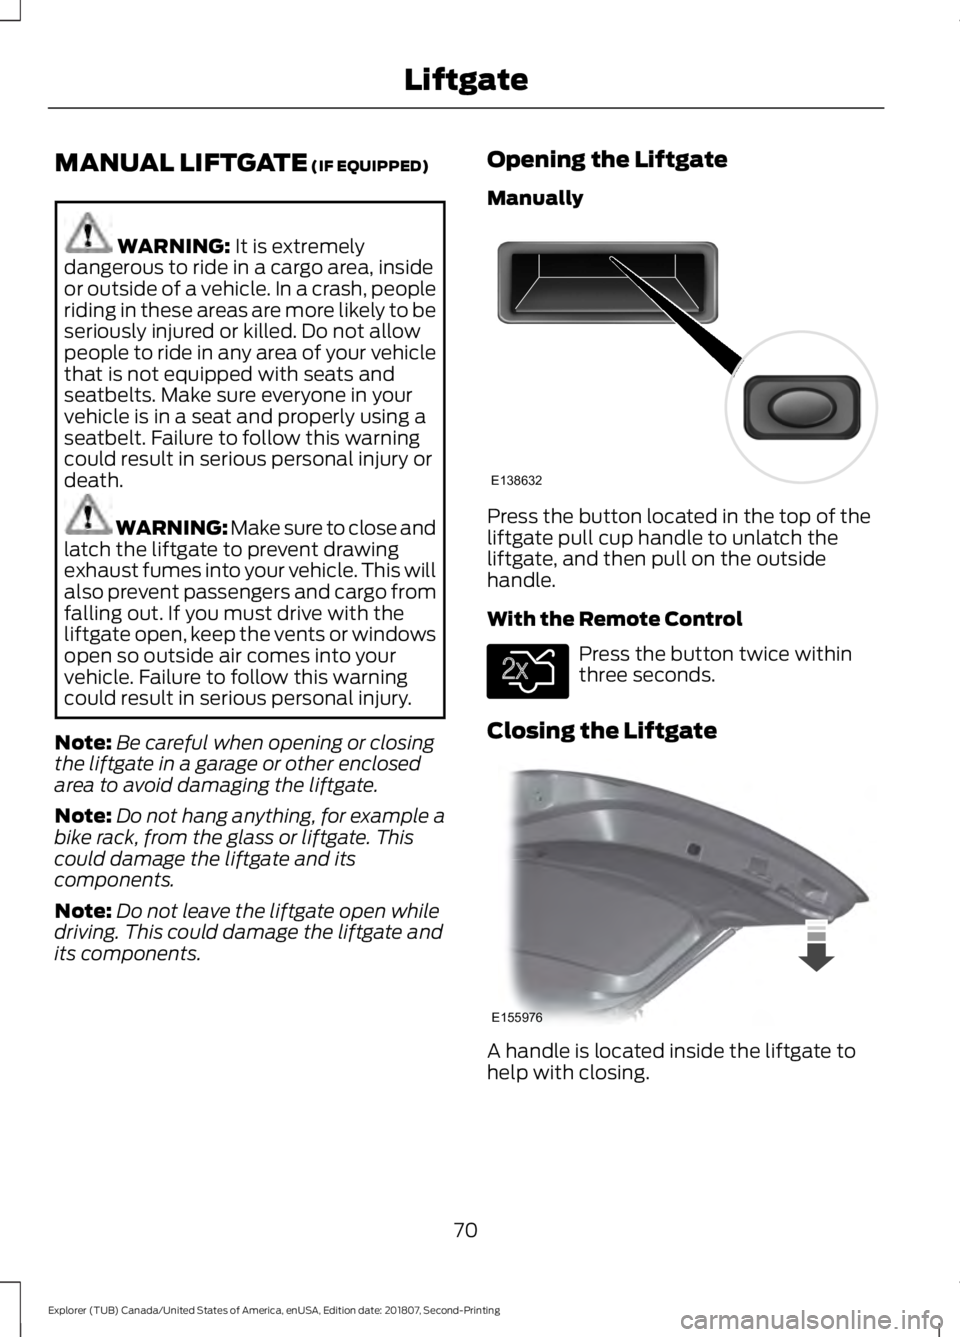
Press the button located in the top of the
liftgate pull cup handle to unlatch the
liftgate, and then pull on the outside
handle.
With the Remote Control
Press the button twice within
three seconds.
Closing the Liftgate A handle is located inside the liftgate to
help with closing.
70
Explorer (TUB) Canada/United States of America, enUSA, Edition date: 201807, Second-Printing LiftgateE138632 E138630 E155976
Page 74 of 571

POWER LIFTGATE (IF EQUIPPED)
WARNING:
It is extremely
dangerous to ride in a cargo area, inside
or outside of a vehicle. In a crash, people
riding in these areas are more likely to be
seriously injured or killed. Do not allow
people to ride in any area of your vehicle
that is not equipped with seats and
seatbelts. Make sure everyone in your
vehicle is in a seat and properly using a
seatbelt. Failure to follow this warning
could result in serious personal injury or
death. WARNING:
Make sure that you
fully close the liftgate to prevent exhaust
fumes from entering your vehicle. If you
are unable to fully close the liftgate,
open the air vents or the windows to
allow fresh air to enter your vehicle.
Failure to follow this instruction could
result in personal injury or death. WARNING:
Keep keys out of reach
of children. Do not allow children to
operate or play near an open or moving
power liftgate. You should supervise the
operation of the power liftgate at all
times.
Note: Make sure that you close the liftgate
before operating or moving your vehicle,
especially in an enclosure, like a garage or
a parking structure. This could damage the
liftgate and its components.
Note: Do not hang anything, for example
a bike rack, from the glass or liftgate. This
could damage the liftgate and its
components.
The liftgate only operates with the
transmission in park (P). If there is a problem with the open or close
request, a tone sounds for one of the
following reasons:
•
The ignition is on and the transmission
is not in park (P).
• The battery voltage is below the
minimum operating voltage.
• The liftgate is not fully closed and your
vehicle speed is at or above
3 mph
(5 km/h).
If the liftgate starts to close after it has
fully opened, this indicates there may be
excessive weight on the liftgate or a
possible strut failure. A repetitive tone
sounds and the liftgate closes under
control. Remove any excessive weight
from the liftgate. If the liftgate continues
to close after opening, have the system
checked by an authorized dealer.
Opening and Closing the Liftgate WARNING:
Make sure all persons
are clear of the power liftgate area
before using the power liftgate control.
Note: Make sure the area behind your
vehicle is free from obstruction and that
there is enough room for you to operate the
liftgate. Objects too close to your vehicle,
for example a wall, garage door or another
vehicle may come into contact with the
moving liftgate. This could damage the
liftgate and its components.
Note: Be careful when opening or closing
the liftgate in a garage or other enclosed
area to avoid damaging the liftgate.
Note: Do not leave the liftgate open when
you are driving. This could damage the
liftgate and its components.
71
Explorer (TUB) Canada/United States of America, enUSA, Edition date: 201807, Second-Printing Liftgate
Page 75 of 571

From the Instrument Panel
With the transmission in park
(P), press the button on the
instrument panel.
With the Remote Control Press the button twice within
three seconds.
With the Outside Control Button
Opening the Liftgate
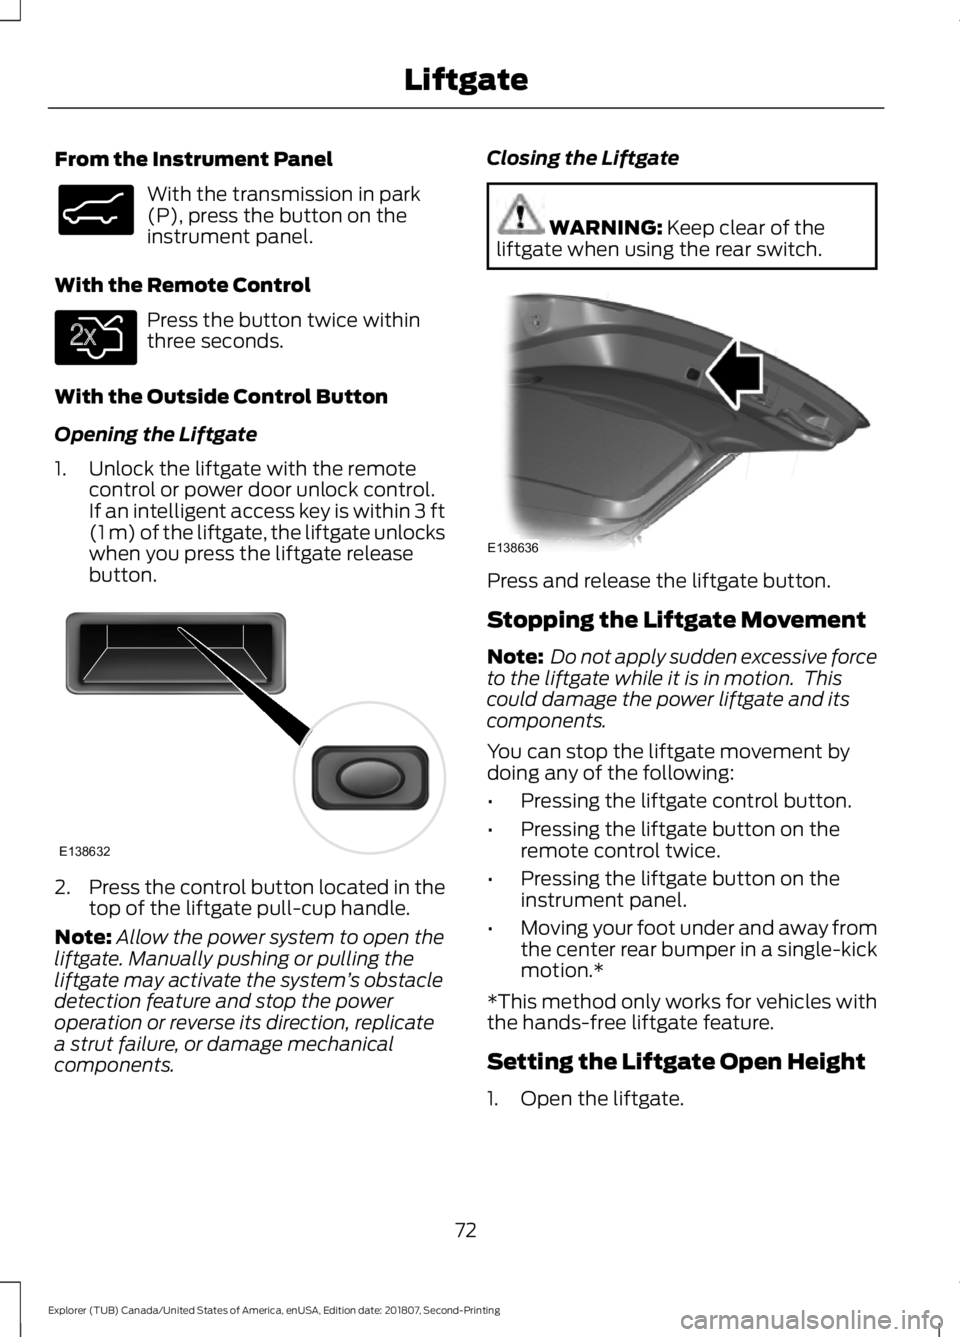
1. Unlock the liftgate with the remote control or power door unlock control.
If an intelligent access key is within 3 ft
(1 m) of the liftgate, the liftgate unlocks
when you press the liftgate release
button. 2.
Press the control button located in the
top of the liftgate pull-cup handle.
Note: Allow the power system to open the
liftgate. Manually pushing or pulling the
liftgate may activate the system ’s obstacle
detection feature and stop the power
operation or reverse its direction, replicate
a strut failure, or damage mechanical
components. Closing the Liftgate WARNING:
Keep clear of the
liftgate when using the rear switch. Press and release the liftgate button.
Stopping the Liftgate Movement
Note:
Do not apply sudden excessive force
to the liftgate while it is in motion. This
could damage the power liftgate and its
components.
You can stop the liftgate movement by
doing any of the following:
• Pressing the liftgate control button.
• Pressing the liftgate button on the
remote control twice.
• Pressing the liftgate button on the
instrument panel.
• Moving your foot under and away from
the center rear bumper in a single-kick
motion.*
*This method only works for vehicles with
the hands-free liftgate feature.
Setting the Liftgate Open Height
1. Open the liftgate.
72
Explorer (TUB) Canada/United States of America, enUSA, Edition date: 201807, Second-Printing LiftgateE138633 E138630 E138632 E138636
Page 76 of 571

2.
Stop the liftgate movement by pressing
the control button on the liftgate when
it reaches the desired height.
Note: Once the liftgate has stopped
moving, you can also manually move it to
the desired height.
3. Press and hold the liftgate control button on the liftgate until you hear a
tone, indicating programming is
complete.
Note: You can only use the liftgate control
button to program the height.
Note: You cannot program the height if the
liftgate position is too low.
The new open liftgate height is recalled
when the power liftgate is opened. To
change the programmed height, repeat the
above procedure. Once you open the
power liftgate, you can manually move it
to a different height.
Note: The system recalls the new
programmed height until you reprogram it,
even if you disconnect the battery.
When operating the power liftgate after
you have programmed a lower height than
fully open, you can fully open the liftgate
by manually pushing it upward to the
maximum open position.
Obstacle Detection
When Closing
The system stops when it detects an
obstacle. A tone sounds and the system
reverses to open. Once you remove the
obstacle, you can power close the liftgate. Note:
Entering your vehicle while the
liftgate is closing can cause your vehicle to
bounce and activate obstacle detection. To
prevent this, let the power liftgate close
completely before you enter your vehicle.
Before driving off, check the instrument
cluster for a liftgate or door ajar message or
warning indicator. Failure to do this could
result in unintentionally leaving the liftgate
open while driving.
When Opening
The system stops when it detects an
obstacle and a tone sounds. Once you
remove the obstacle, you can continue to
operate the liftgate.
Hands-Free Feature (If Equipped)
Make sure you have a passive key within
3 ft (1 m)
of the liftgate.
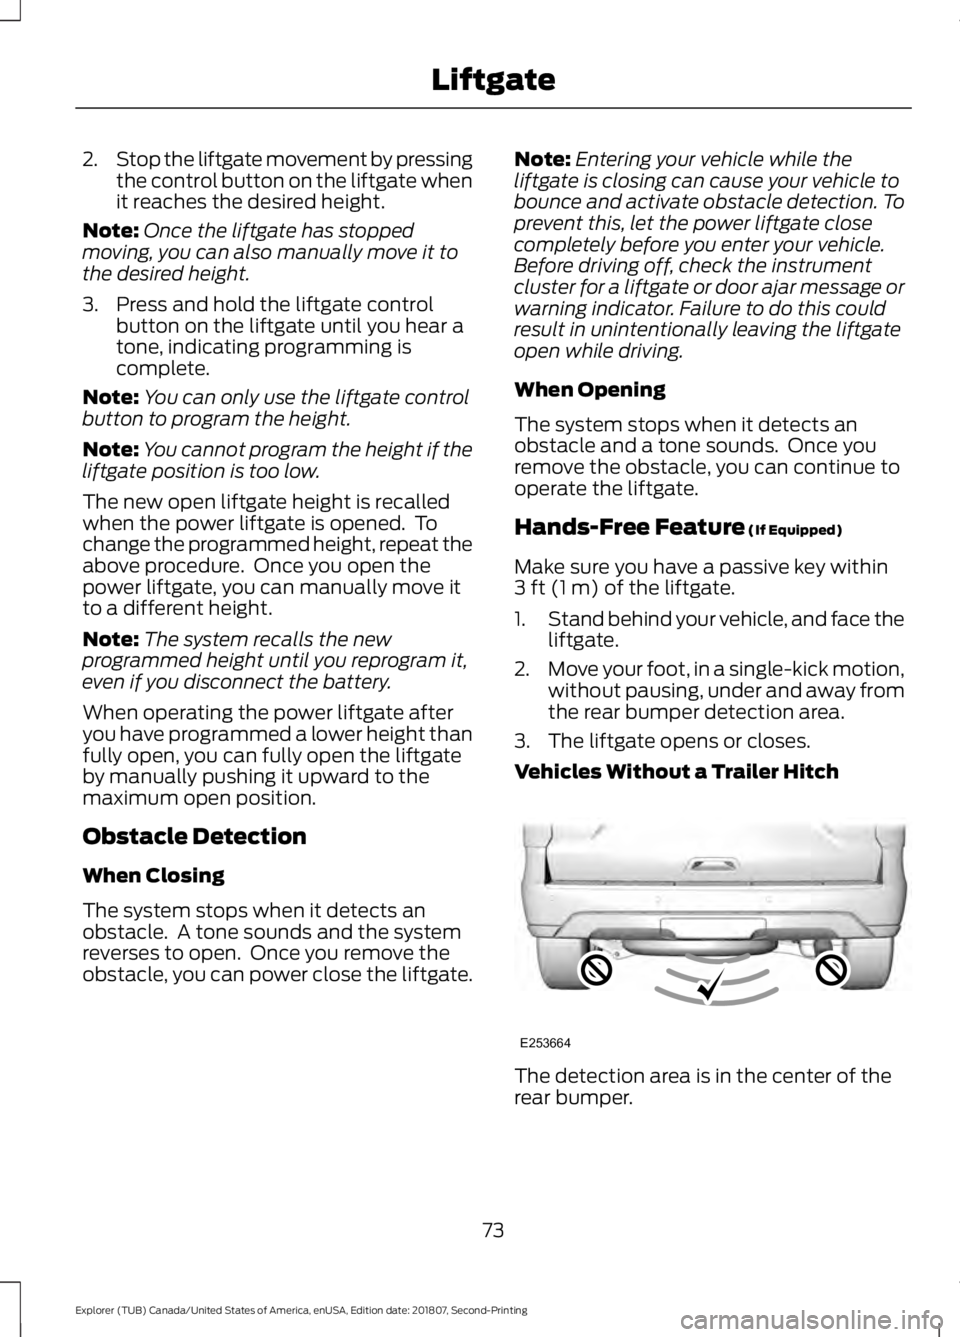
1. Stand behind your vehicle, and face the
liftgate.
2. Move your foot, in a single-kick motion,
without pausing, under and away from
the rear bumper detection area.
3. The liftgate opens or closes.
Vehicles Without a Trailer Hitch The detection area is in the center of the
rear bumper.
73
Explorer (TUB) Canada/United States of America, enUSA, Edition date: 201807, Second-Printing LiftgateE253664
Page 80 of 571

ADJUSTING THE STEERING
WHEEL - VEHICLES WITH:
MANUAL ADJUSTABLE
STEERING COLUMN
WARNING: Do not adjust the
steering wheel when your vehicle is
moving.
Note: Make sure that you are sitting in the
correct position. See Sitting in the Correct
Position
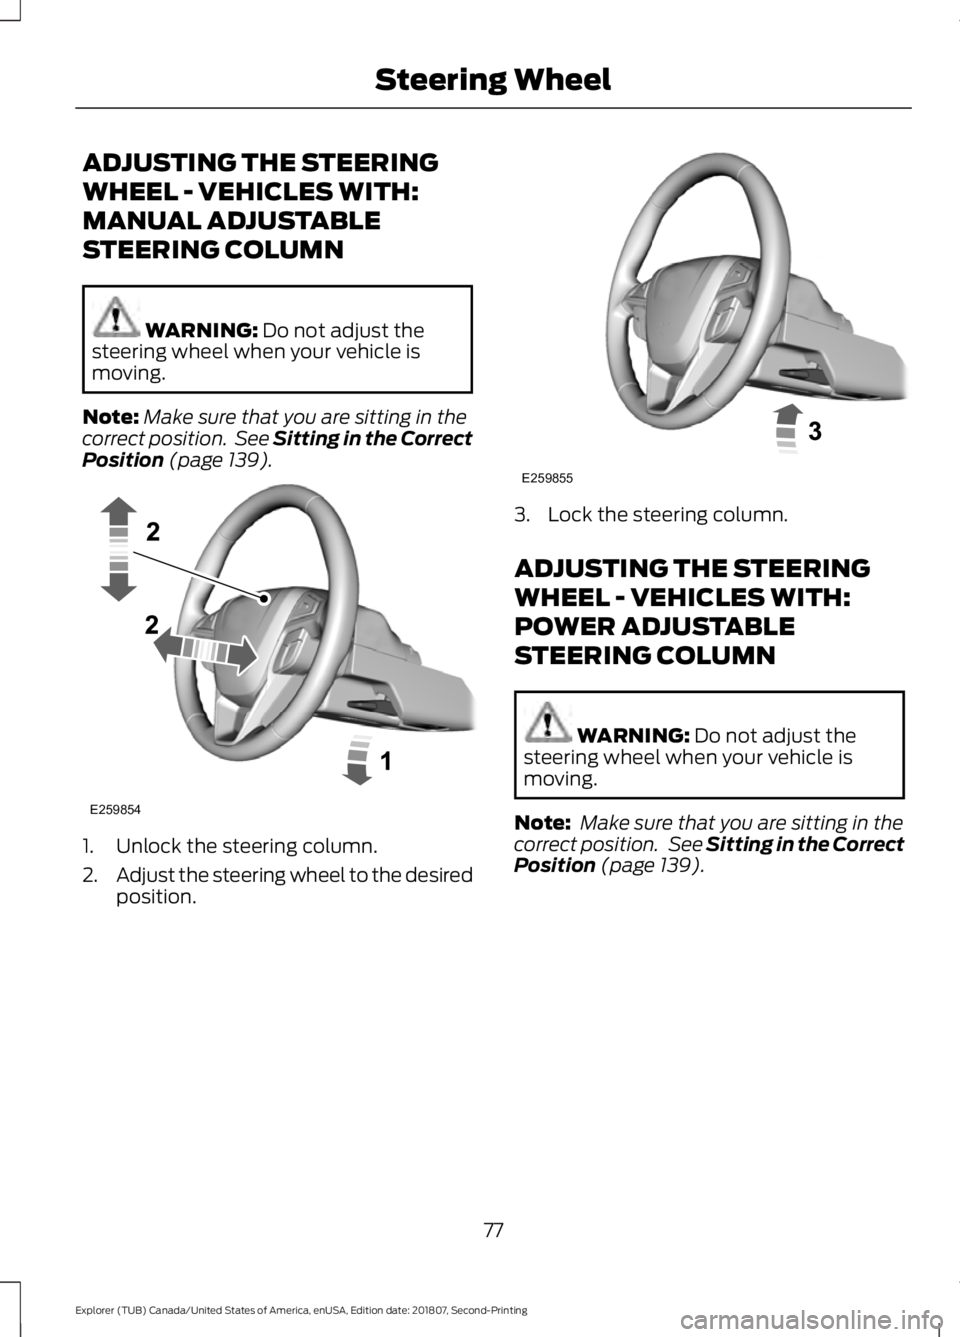
(page 139). 1. Unlock the steering column.
2.
Adjust the steering wheel to the desired
position. 3. Lock the steering column.
ADJUSTING THE STEERING
WHEEL - VEHICLES WITH:
POWER ADJUSTABLE
STEERING COLUMN
WARNING:
Do not adjust the
steering wheel when your vehicle is
moving.
Note: Make sure that you are sitting in the
correct position. See
Sitting in the Correct
Position (page 139).
77
Explorer (TUB) Canada/United States of America, enUSA, Edition date: 201807, Second-Printing Steering WheelE259854 E259855