2019 FORD EXPLORER ECU
[x] Cancel search: ECUPage 78 of 571
PASSIVE ANTI-THEFT
SYSTEM
Note:
The system is not compatible with
non-Ford aftermarket remote start systems.
Use of these systems may result in vehicle
starting problems and a loss of security
protection.
Note: Metallic objects, electronic devices
or a second coded key on the same key
chain may cause vehicle starting problems
if they are too close to the key when starting
the engine. Prevent these objects from
touching the coded key while starting the
engine. Switch the ignition off, move all
objects on the key chain away from the
coded key and restart the engine if a
problem occurs.
Note: Do not leave a duplicate coded key
in the vehicle. Always take your keys and
lock all doors when leaving the vehicle.
SecuriLock®
The system is an engine immobilization
system. It is designed to help prevent the
engine from being started unless a coded
key programmed to your vehicle is used.
Using the wrong key may prevent the
engine from starting. A message may
appear in the information display.
If you are unable to start the engine with a
correctly coded key, a malfunction has
happened and a message may appear in
the information display.
Automatic Arming
The vehicle arms immediately after you
switch the ignition off.
Automatic Disarming
Switching the ignition on with a coded key
disarms the vehicle. Replacement Keys
Note:
Your vehicle comes equipped with
two integrated keyhead transmitters or two
intelligent access keys.
The integrated keyhead transmitter
functions as a programmed ignition key
that operates all the locks and starts the
vehicle, as well as a remote control.
The intelligent access key functions as a
programmed key that operates the driver
door lock and activates the intelligent
access with push button start system, as
well as a remote control.
If your programmed transmitters or
standard SecuriLock coded keys
(integrated keyhead transmitters only) are
lost or stolen and you do not have an extra
coded key, you will need to have your
vehicle towed to an authorized dealer. You
need to erase the key codes from your
vehicle and program new coded keys.
Store an extra programmed key away from
the vehicle in a safe place to help prevent
any inconveniences. See your authorized
dealer to purchase additional spare or
replacement keys.
Programming a Spare Integrated
Keyhead Transmitter
Note: You can program a maximum of eight
coded keys to your vehicle. All eight can be
integrated keyhead transmitters.
You can program your own integrated
keyhead transmitter or standard
SecuriLock coded keys to your vehicle. This
procedure will program both the engine
immobilizer keycode and the remote entry
portion of the remote control to your
vehicle
Only use integrated keyhead transmitters
or standard SecuriLock keys.
75
Explorer (TUB) Canada/United States of America, enUSA, Edition date: 201807, Second-Printing Security
Page 79 of 571

You must have two previously
programmed coded keys and the new
unprogrammed key readily accessible. See
your authorized dealer to have the spare
key programmed if two previously
programmed coded keys are not available.
Read and understand the entire procedure
before you begin.
1.
Insert the first previously programmed
coded key into the ignition.
2. Switch the ignition from off to on. Keep
the ignition on for at least three
seconds, but no more than 10 seconds.
3. Switch the ignition off and remove the
first coded key from the ignition.
4. After three seconds but within 10 seconds of switching the ignition off,
insert the second previously coded key
into the ignition.
5. Switch the ignition from off to on. Keep
the ignition on for at least three
seconds, but no more than 10 seconds.
6. Switch the ignition off and remove the
second previously programmed coded
key from the ignition.
7. After three seconds but within 10 seconds of switching the ignition off
and removing the previously
programmed coded key, insert the new
unprogrammed key into the ignition.
8. Switch the ignition from off to on. Keep
the ignition on for at least six seconds.
9. Remove the newly programmed coded
key from the ignition.
If the key has been successfully
programmed it will start the engine and
operate the remote entry system (if the
new key is an integrated keyhead
transmitter).
If programming was not successful, wait
10 seconds and repeat Steps 1 through 8.
If you are still unsuccessful, take your
vehicle to your authorized dealer. Programming a Spare Intelligent
Access Key
See your authorized dealer to have
additional keys programmed to your
vehicle.
ANTI-THEFT ALARM (IF EQUIPPED)
The system will warn you of an
unauthorized entry to your vehicle. It will
be triggered if any door, the luggage
compartment or the hood is opened
without using the key, remote control or
keyless entry keypad.
The direction indicators will flash and the
horn will sound if unauthorized entry is
attempted while the alarm is armed.
Take all remote controls to an authorized
dealer if there is any potential alarm
problem with your vehicle.
Arming the Alarm
The alarm is ready to arm when there is
not a key in your vehicle. Electronically lock
your vehicle to arm the alarm.
Disarming the Alarm
Disarm the alarm by any of the following
actions:
• Unlock the doors or luggage
compartment with the remote control
or keyless entry keypad.
• Switch your vehicle on or start your
vehicle.
• Use a key in the driver door to unlock
your vehicle, then switch your vehicle
on within 12 seconds.
Note: Pressing the panic button on the
remote control will stop the horn and signal
indicators, but will not disarm the system.
76
Explorer (TUB) Canada/United States of America, enUSA, Edition date: 201807, Second-Printing Security
Page 122 of 571

Brake System
Action
Message
The brake fluid level is low. Check the brake system immedi-ately. See Brake Fluid Check (page 295).
Brake Fluid Level LOW
The brake system needs servicing. Stop the vehicle in a safeplace. Contact an authorized dealer.
Check Brake System
The parking brake is set, the engine is running and you drive
your vehicle more than 3 mph (5 km/h). If the warning stays
on after you release the parking brake, contact an authorized dealer as soon as possible.
Park Brake Engaged
Doors and Locks Action
Message
The driver door is not completely closed.
Driver Door Ajar
The passenger door is not completely closed.
Passenger Door Ajar
The rear left door is not completely closed.
Rear Left Door Ajar
The rear right door is not completely closed.
Rear Right Door Ajar
The liftgate is not completely closed.
Liftgate Ajar
The hood is not completely closed.
Hood Ajar
The system has disabled the door switches.
Switches Inhibited
Security Mode
The factory keypad code displays in the information display
after the system resets the keypad. See Passive Anti-Theft System
(page 75).
Factory Keypad Code
XXXXX
Driver Alert Action
Message
Stop and rest as soon as it is safe to do so.
Driver Alert Warning Rest
Now
Take a rest soon.
Driver Alert Warning Rest
Suggested
119
Explorer (TUB) Canada/United States of America, enUSA, Edition date: 201807, Second-Printing Information Displays
Page 145 of 571
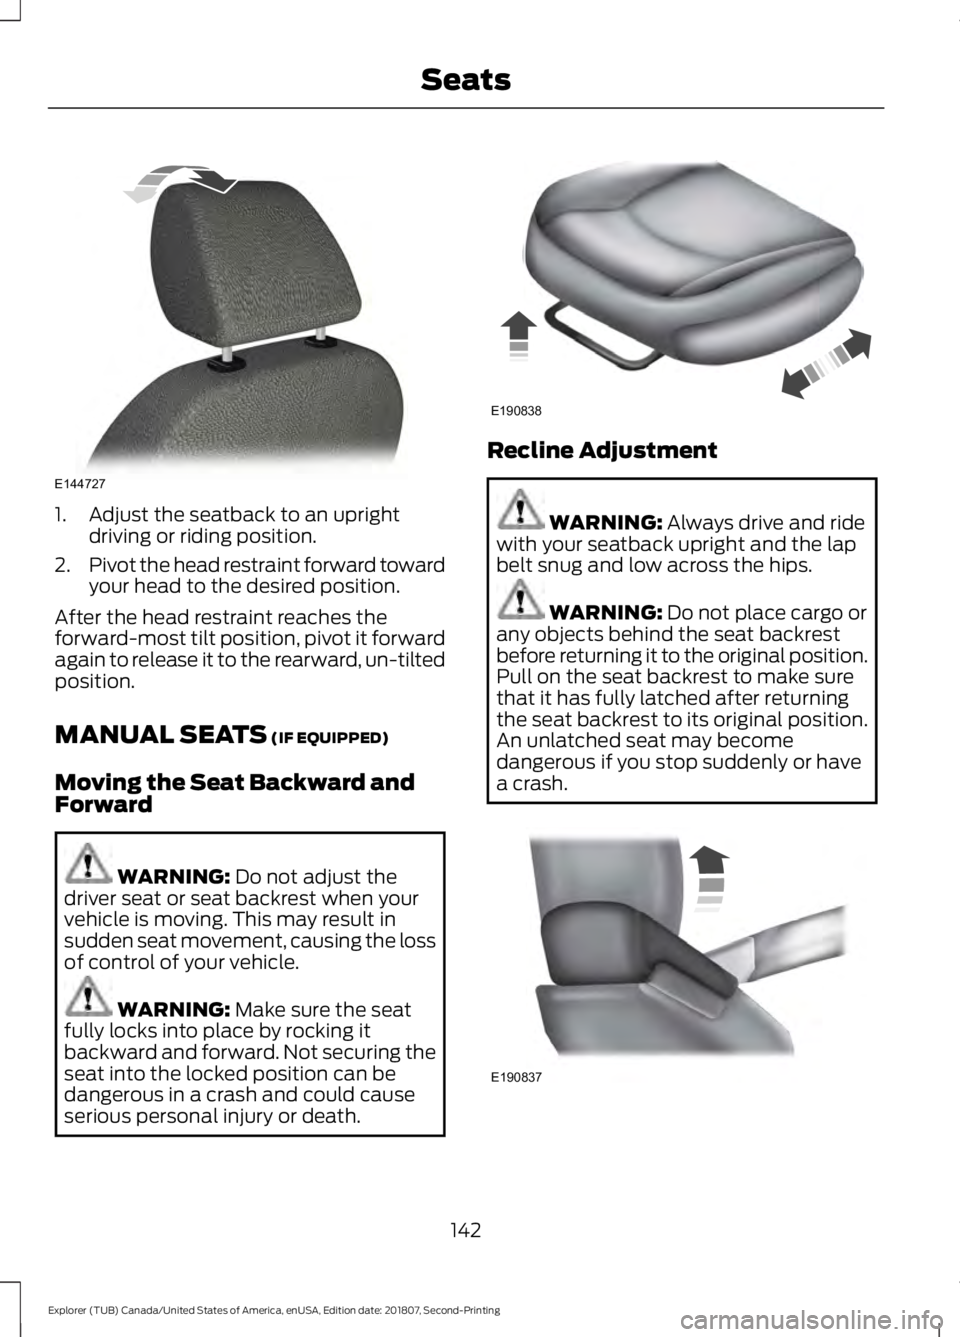
1. Adjust the seatback to an upright
driving or riding position.
2. Pivot the head restraint forward toward
your head to the desired position.
After the head restraint reaches the
forward-most tilt position, pivot it forward
again to release it to the rearward, un-tilted
position.
MANUAL SEATS (IF EQUIPPED)
Moving the Seat Backward and
Forward WARNING:
Do not adjust the
driver seat or seat backrest when your
vehicle is moving. This may result in
sudden seat movement, causing the loss
of control of your vehicle. WARNING:
Make sure the seat
fully locks into place by rocking it
backward and forward. Not securing the
seat into the locked position can be
dangerous in a crash and could cause
serious personal injury or death. Recline Adjustment
WARNING:
Always drive and ride
with your seatback upright and the lap
belt snug and low across the hips. WARNING:
Do not place cargo or
any objects behind the seat backrest
before returning it to the original position.
Pull on the seat backrest to make sure
that it has fully latched after returning
the seat backrest to its original position.
An unlatched seat may become
dangerous if you stop suddenly or have
a crash. 142
Explorer (TUB) Canada/United States of America, enUSA, Edition date: 201807, Second-Printing SeatsE144727 E190838 E190837
Page 152 of 571
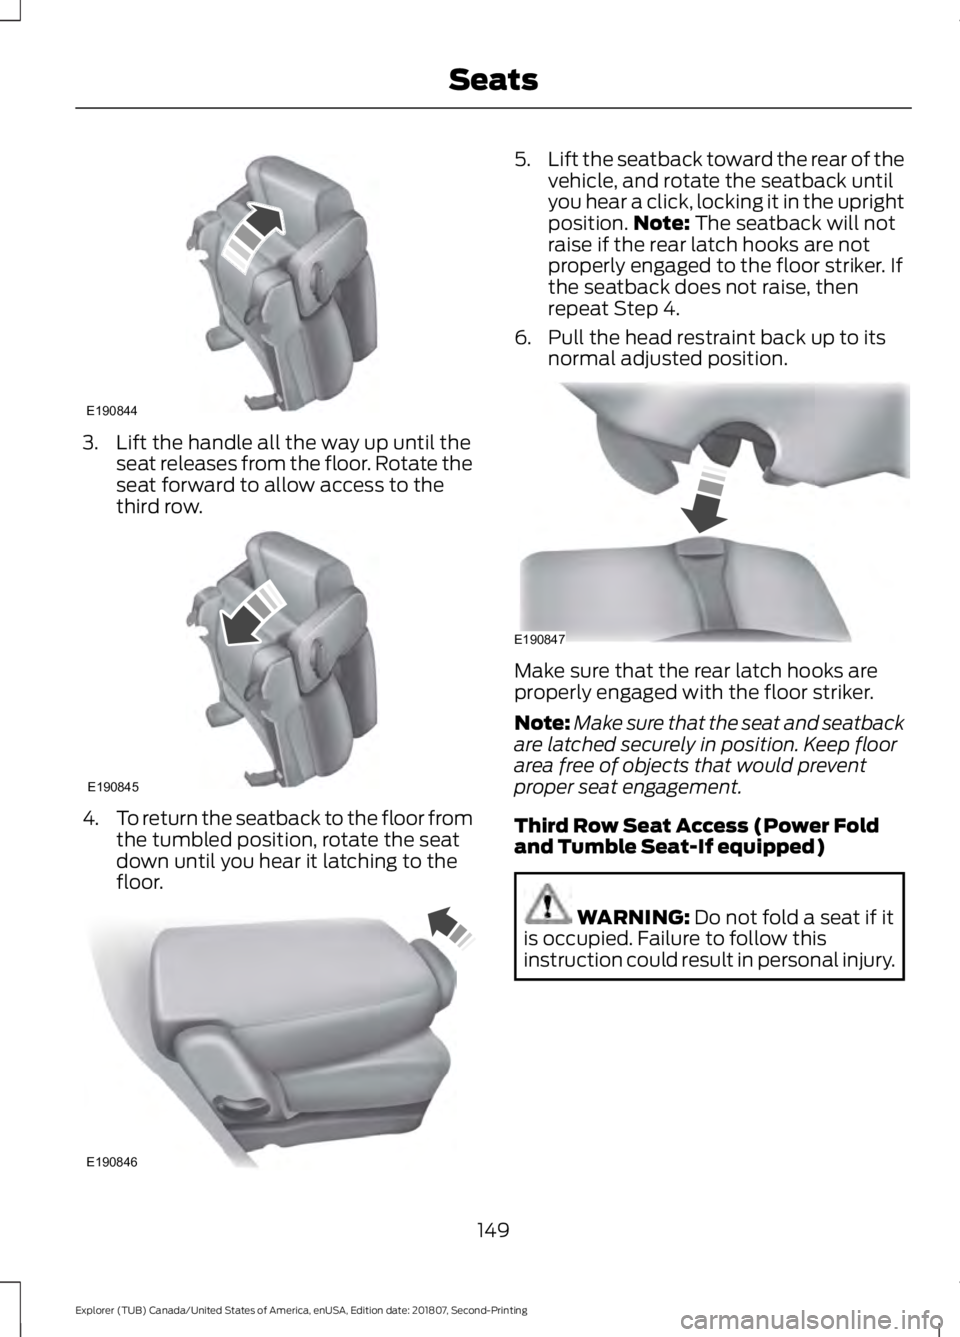
3. Lift the handle all the way up until the
seat releases from the floor. Rotate the
seat forward to allow access to the
third row. 4.
To return the seatback to the floor from
the tumbled position, rotate the seat
down until you hear it latching to the
floor. 5.
Lift the seatback toward the rear of the
vehicle, and rotate the seatback until
you hear a click, locking it in the upright
position. Note: The seatback will not
raise if the rear latch hooks are not
properly engaged to the floor striker. If
the seatback does not raise, then
repeat Step 4.
6. Pull the head restraint back up to its normal adjusted position. Make sure that the rear latch hooks are
properly engaged with the floor striker.
Note:
Make sure that the seat and seatback
are latched securely in position. Keep floor
area free of objects that would prevent
proper seat engagement.
Third Row Seat Access (Power Fold
and Tumble Seat-If equipped) WARNING:
Do not fold a seat if it
is occupied. Failure to follow this
instruction could result in personal injury.
149
Explorer (TUB) Canada/United States of America, enUSA, Edition date: 201807, Second-Printing SeatsE190844 E190845 E190846 E190847
Page 154 of 571
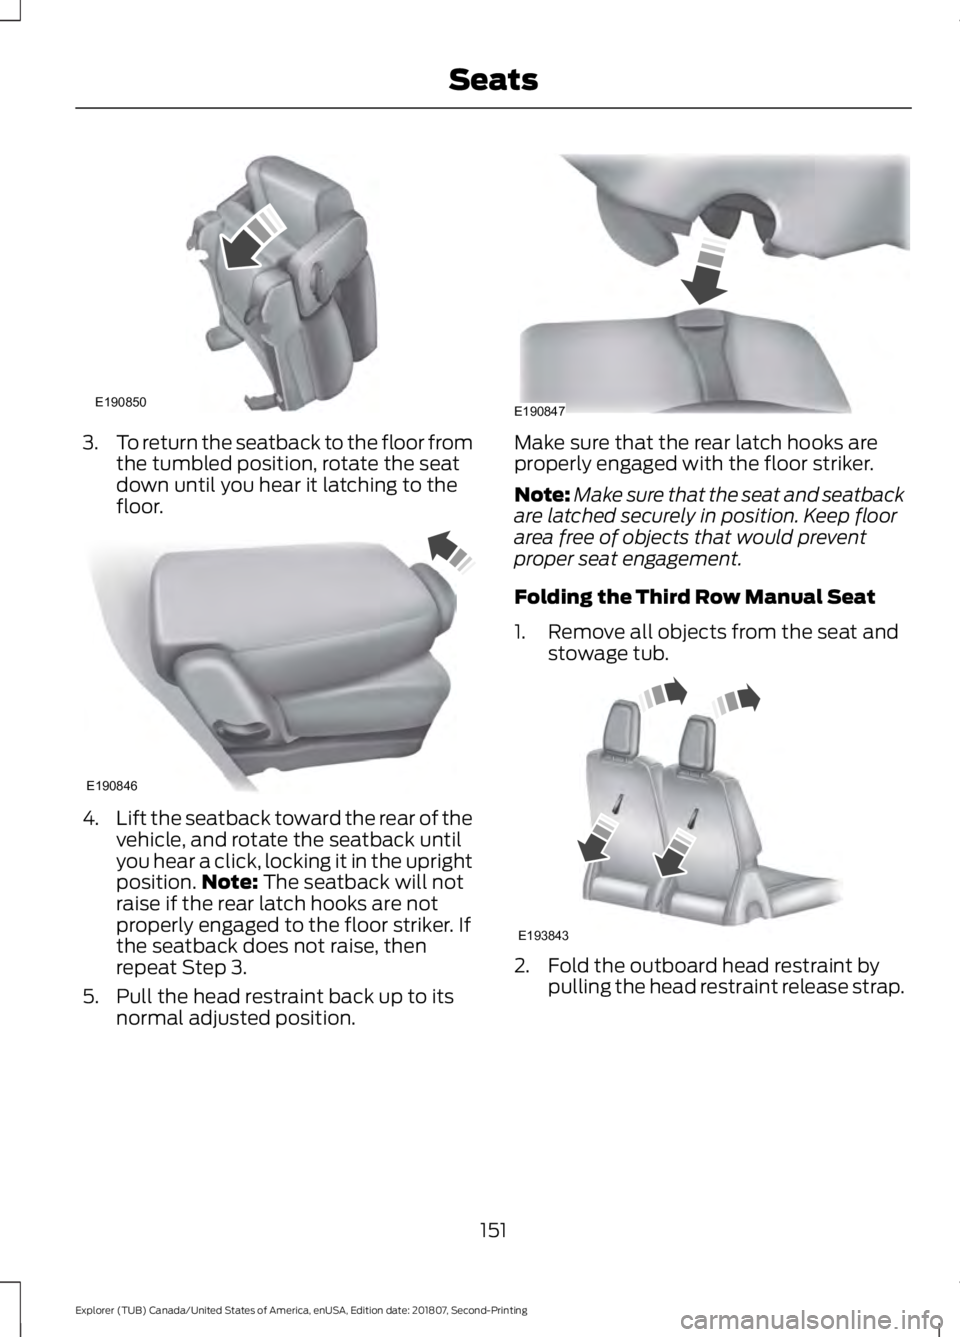
3.
To return the seatback to the floor from
the tumbled position, rotate the seat
down until you hear it latching to the
floor. 4.
Lift the seatback toward the rear of the
vehicle, and rotate the seatback until
you hear a click, locking it in the upright
position. Note: The seatback will not
raise if the rear latch hooks are not
properly engaged to the floor striker. If
the seatback does not raise, then
repeat Step 3.
5. Pull the head restraint back up to its normal adjusted position. Make sure that the rear latch hooks are
properly engaged with the floor striker.
Note:
Make sure that the seat and seatback
are latched securely in position. Keep floor
area free of objects that would prevent
proper seat engagement.
Folding the Third Row Manual Seat
1. Remove all objects from the seat and stowage tub. 2. Fold the outboard head restraint by
pulling the head restraint release strap.
151
Explorer (TUB) Canada/United States of America, enUSA, Edition date: 201807, Second-Printing SeatsE190850 E190846 E190847 E193843
Page 160 of 571
UNIVERSAL GARAGE DOOR
OPENER
HomeLink Wireless Control
System
WARNING: Do not use the system
with any garage door opener that does
not have the safety stop and reverse
feature as required by U.S. Federal
Safety Standards (this includes any
garage door opener manufactured
before April 1, 1982). A garage door
opener which cannot detect an object,
signaling the door to stop and reverse,
does not meet current federal safety
standards. Using a garage door opener
without these features increases the risk
of serious injury or death.
Note: Make sure that the garage door and
security device are free from obstruction
when you are programming. Do not program
the system with the vehicle in the garage.
Note: Make sure you keep the original
remote control transmitter for use in other
vehicles as well as for future system
programming.
Note: We recommend that upon the sale
or lease termination of your vehicle, you
erase the programmed function buttons for
security reasons. See Erasing the Function
Button Codes
.
Note: You can program a maximum of
three devices. To change or replace any of
the three devices after it has been initially
programmed, you must first erase the
current settings. See Erasing the Function
Button Codes
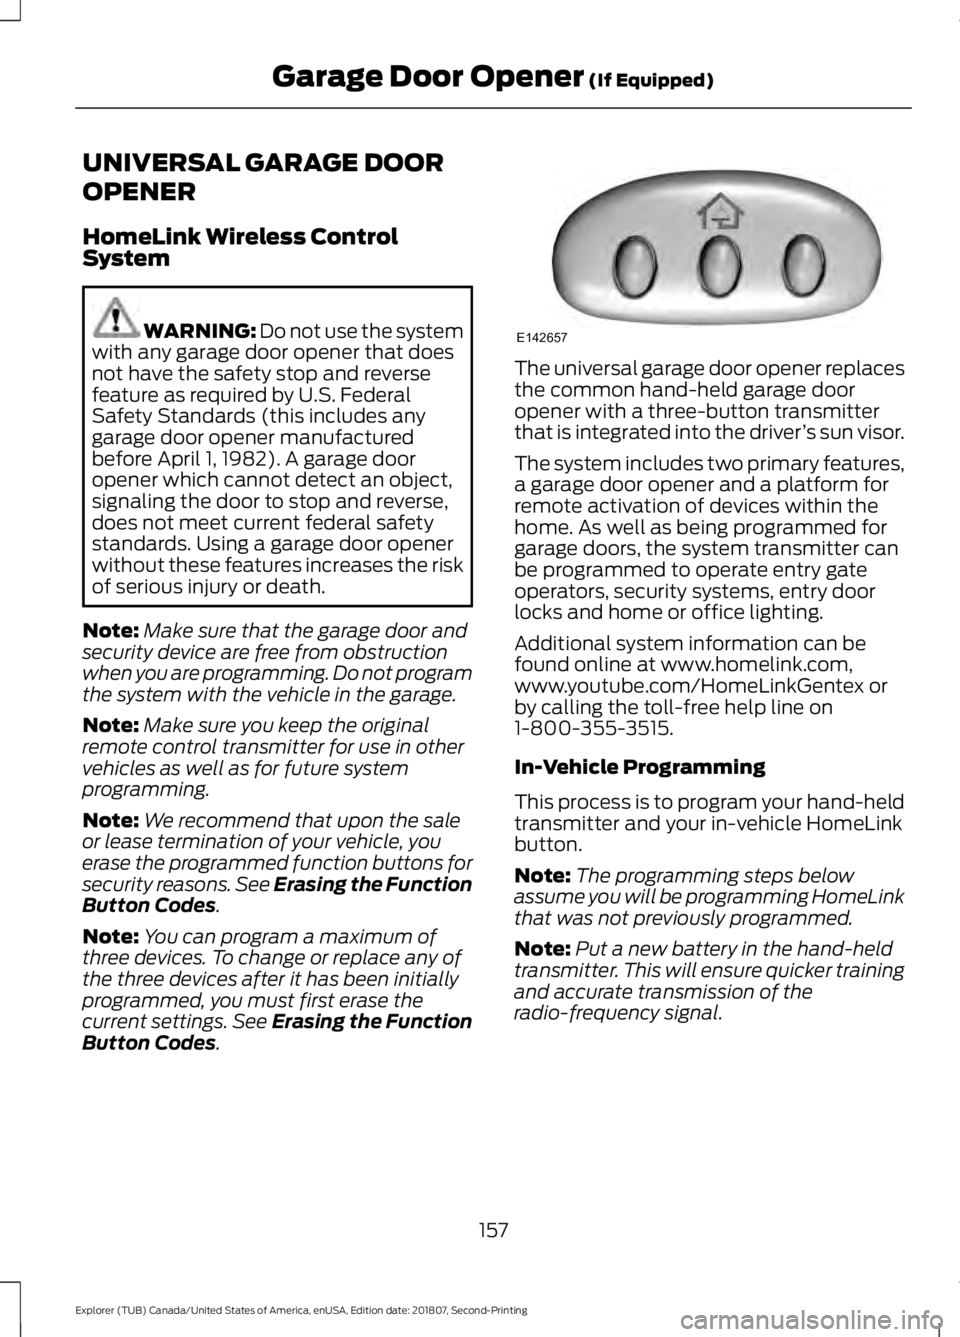
. The universal garage door opener replaces
the common hand-held garage door
opener with a three-button transmitter
that is integrated into the driver
’s sun visor.
The system includes two primary features,
a garage door opener and a platform for
remote activation of devices within the
home. As well as being programmed for
garage doors, the system transmitter can
be programmed to operate entry gate
operators, security systems, entry door
locks and home or office lighting.
Additional system information can be
found online at www.homelink.com,
www.youtube.com/HomeLinkGentex or
by calling the toll-free help line on
1-800-355-3515.
In-Vehicle Programming
This process is to program your hand-held
transmitter and your in-vehicle HomeLink
button.
Note: The programming steps below
assume you will be programming HomeLink
that was not previously programmed.
Note: Put a new battery in the hand-held
transmitter. This will ensure quicker training
and accurate transmission of the
radio-frequency signal.
157
Explorer (TUB) Canada/United States of America, enUSA, Edition date: 201807, Second-Printing Garage Door Opener
(If Equipped)E142657
Page 242 of 571
REAR UNDER FLOOR
STORAGE (IF EQUIPPED)
Cargo Management System
(If
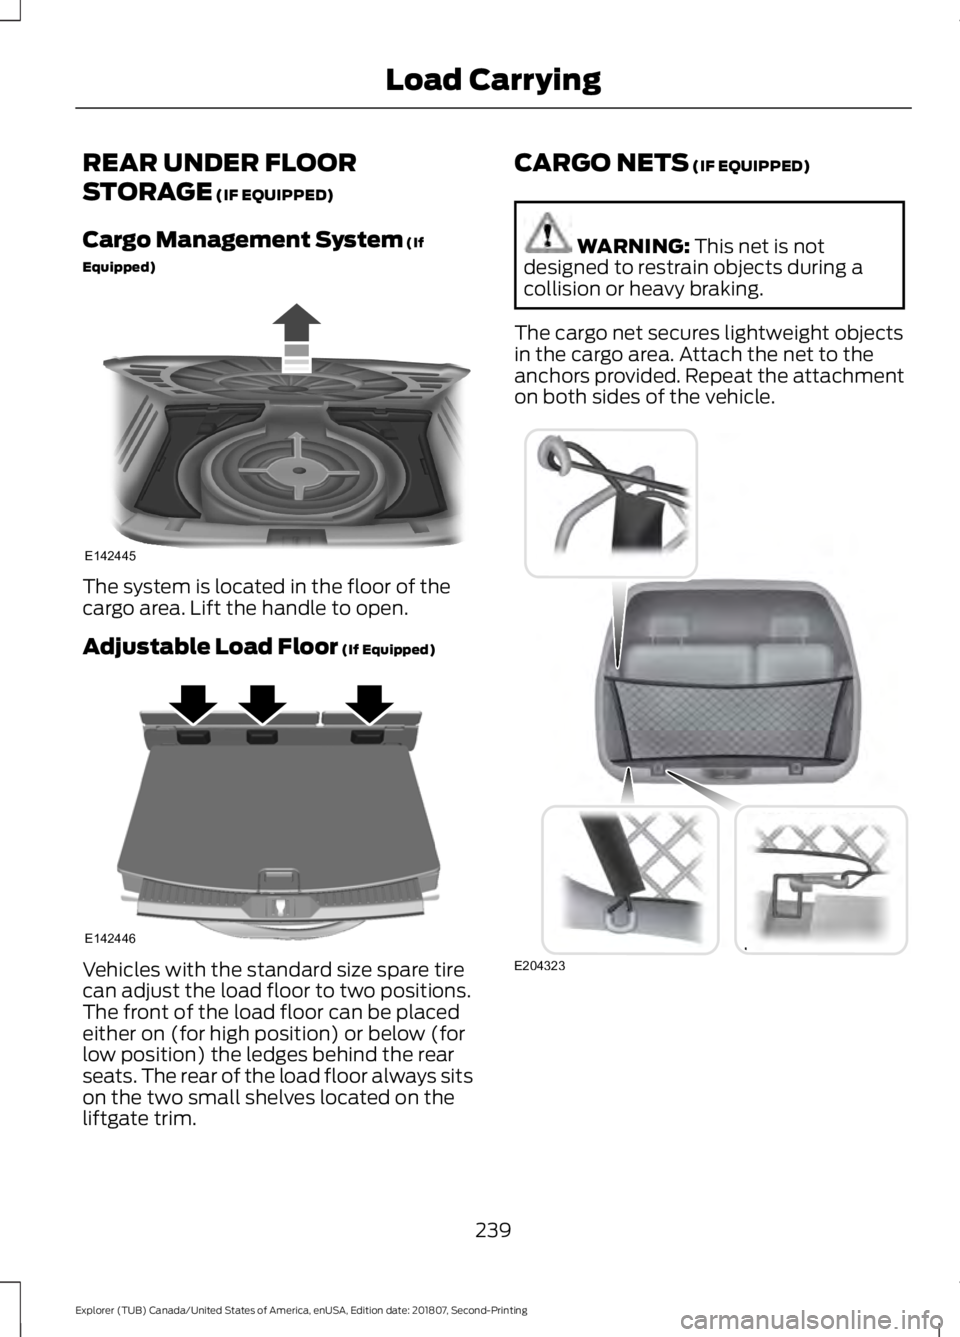
Equipped) The system is located in the floor of the
cargo area. Lift the handle to open.
Adjustable Load Floor
(If Equipped)
Vehicles with the standard size spare tire
can adjust the load floor to two positions.
The front of the load floor can be placed
either on (for high position) or below (for
low position) the ledges behind the rear
seats. The rear of the load floor always sits
on the two small shelves located on the
liftgate trim. CARGO NETS
(IF EQUIPPED) WARNING:
This net is not
designed to restrain objects during a
collision or heavy braking.
The cargo net secures lightweight objects
in the cargo area. Attach the net to the
anchors provided. Repeat the attachment
on both sides of the vehicle. 239
Explorer (TUB) Canada/United States of America, enUSA, Edition date: 201807, Second-Printing Load CarryingE142445 E142446 E204323