2019 FORD EXPLORER transmission
[x] Cancel search: transmissionPage 75 of 571
From the Instrument Panel
With the transmission in park
(P), press the button on the
instrument panel.
With the Remote Control Press the button twice within
three seconds.
With the Outside Control Button
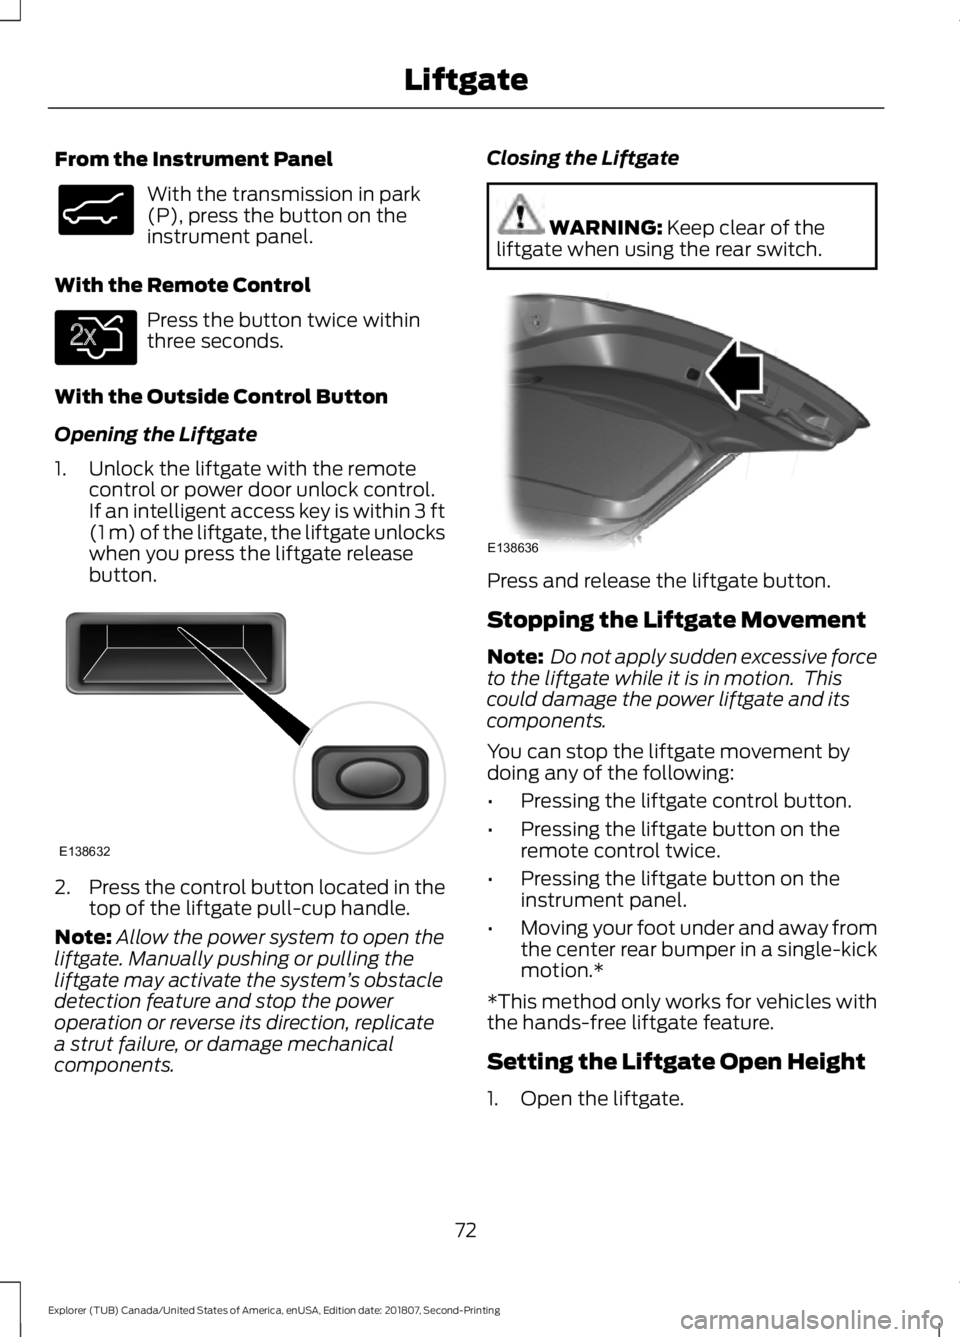
Opening the Liftgate
1. Unlock the liftgate with the remote control or power door unlock control.
If an intelligent access key is within 3 ft
(1 m) of the liftgate, the liftgate unlocks
when you press the liftgate release
button. 2.
Press the control button located in the
top of the liftgate pull-cup handle.
Note: Allow the power system to open the
liftgate. Manually pushing or pulling the
liftgate may activate the system ’s obstacle
detection feature and stop the power
operation or reverse its direction, replicate
a strut failure, or damage mechanical
components. Closing the Liftgate WARNING:
Keep clear of the
liftgate when using the rear switch. Press and release the liftgate button.
Stopping the Liftgate Movement
Note:
Do not apply sudden excessive force
to the liftgate while it is in motion. This
could damage the power liftgate and its
components.
You can stop the liftgate movement by
doing any of the following:
• Pressing the liftgate control button.
• Pressing the liftgate button on the
remote control twice.
• Pressing the liftgate button on the
instrument panel.
• Moving your foot under and away from
the center rear bumper in a single-kick
motion.*
*This method only works for vehicles with
the hands-free liftgate feature.
Setting the Liftgate Open Height
1. Open the liftgate.
72
Explorer (TUB) Canada/United States of America, enUSA, Edition date: 201807, Second-Printing LiftgateE138633 E138630 E138632 E138636
Page 89 of 571
Press repeatedly or press and hold until
you reach the desired level.
HEADLAMP EXIT DELAY
Set the delay time to keep the headlamps
on for up to three minutes after switching
off the ignition.
Follow the steps below to change the
delay time:
Note:
Complete steps 1 through 6 within 10
seconds.
1. Switch the ignition off.
2. Select the autolamp position on the lighting control.
3. Switch the lighting control to the off position.
4. Switch the ignition on.
5. Switch the ignition off.
6. Select the autolamp position on the lighting control. The headlamps and
parking lamps turn on.
7. Switch the lighting control to the off position when reaching the required
delay time. The headlamps and parking
lamps turn off.
Set the headlamp exit delay to one of the
following settings:
• Off.
• 10 seconds.
• 20 seconds.
• 120 seconds.
Note: Adjust the time delay using the
display controls in the information display.
See Information Displays (page 104). DAYTIME RUNNING LAMPS
(IF
EQUIPPED) WARNING:
The daytime running
lamps system does not activate the rear
lamps and may not provide adequate
lighting during low visibility driving
conditions. Make sure you switch the
headlamps on, as appropriate, during all
low visibility conditions. Failure to do so
may result in a crash.
Type One - Conventional (Non-
Configurable)
The daytime running lamps turn on when:
1. Switching the ignition on.
2. The transmission is not in park (P) for vehicles with automatic transmissions,
or releasing the parking brake for
vehicles with manual transmissions.
3. The lighting control is in the off, parking
lamp or autolamps positions.
4. The headlamps are off.
Type Two - Configurable
Switch the daytime running lamps on or
off using the information display. See
Information Displays
(page 104).
The daytime running lamps turn on when:
1. The lamps are on in the information display.
2. Switching the ignition on.
3. The transmission is not in park (P) for vehicles with automatic transmissions,
or releasing the parking brake for
vehicles with manual transmissions.
4. The lighting control is in the autolamps
position.
5. The headlamps are off.
86
Explorer (TUB) Canada/United States of America, enUSA, Edition date: 201807, Second-Printing Lighting
Page 95 of 571
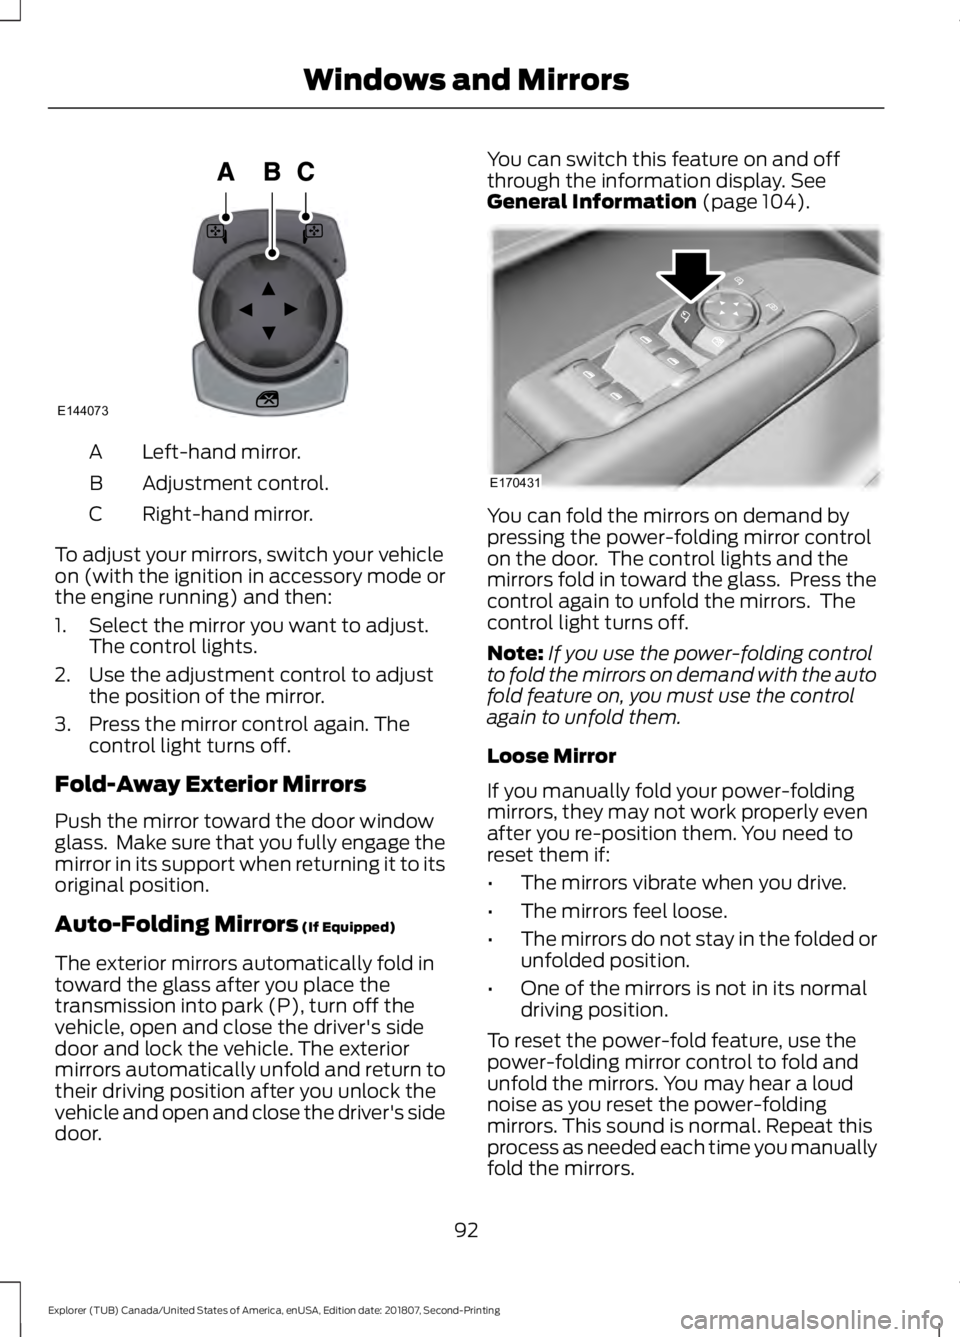
Left-hand mirror.
A
Adjustment control.
B
Right-hand mirror.
C
To adjust your mirrors, switch your vehicle
on (with the ignition in accessory mode or
the engine running) and then:
1. Select the mirror you want to adjust. The control lights.
2. Use the adjustment control to adjust the position of the mirror.
3. Press the mirror control again. The control light turns off.
Fold-Away Exterior Mirrors
Push the mirror toward the door window
glass. Make sure that you fully engage the
mirror in its support when returning it to its
original position.
Auto-Folding Mirrors (If Equipped)
The exterior mirrors automatically fold in
toward the glass after you place the
transmission into park (P), turn off the
vehicle, open and close the driver's side
door and lock the vehicle. The exterior
mirrors automatically unfold and return to
their driving position after you unlock the
vehicle and open and close the driver's side
door. You can switch this feature on and off
through the information display.
See
General Information (page 104). You can fold the mirrors on demand by
pressing the power-folding mirror control
on the door. The control lights and the
mirrors fold in toward the glass. Press the
control again to unfold the mirrors. The
control light turns off.
Note:
If you use the power-folding control
to fold the mirrors on demand with the auto
fold feature on, you must use the control
again to unfold them.
Loose Mirror
If you manually fold your power-folding
mirrors, they may not work properly even
after you re-position them. You need to
reset them if:
• The mirrors vibrate when you drive.
• The mirrors feel loose.
• The mirrors do not stay in the folded or
unfolded position.
• One of the mirrors is not in its normal
driving position.
To reset the power-fold feature, use the
power-folding mirror control to fold and
unfold the mirrors. You may hear a loud
noise as you reset the power-folding
mirrors. This sound is normal. Repeat this
process as needed each time you manually
fold the mirrors.
92
Explorer (TUB) Canada/United States of America, enUSA, Edition date: 201807, Second-Printing Windows and MirrorsE144073 E170431
Page 105 of 571

Service Engine Soon
If it illuminates when the engine
is running this indicates a
malfunction. The On Board
Diagnostics system has detected a
malfunction of the vehicle emission control
system.
If it flashes, engine misfire may be
occurring. Increased exhaust gas
temperatures could damage the catalytic
converter or other vehicle components.
Drive in a moderate fashion (avoid heavy
acceleration and deceleration) and have
your vehicle immediately serviced.
It illuminates when you switch the ignition
on prior to engine start to check the bulb
and to indicate whether your vehicle is
ready for Inspection and Maintenance
(I/M) testing.
Normally, it illuminates until the engine is
cranked and automatically turns off if no
malfunctions are present. However, if after
15 seconds it flashes eight times, this
indicates that your vehicle is not ready for
Inspection and Maintenance (I/M) testing.
See Catalytic Converter (page 181).
Stability Control It flashes when the system is
active. If it remains illuminated
or does not illuminate when you
switch the ignition on, this indicates a
malfunction. During a malfunction the
system switches off. Have the system
checked by an authorized dealer
immediately. See
Using Stability
Control (page 198).
Stability Control Off It illuminates when you switch
the system off. It goes out when
you switch the system back on
or when you switch the ignition off. See
Using Stability Control
(page 198). Transmission Tow/Haul
(If Equipped) Illuminates when you activate
the tow/haul feature. If the light
flashes steadily, have the system
serviced immediately. Damage to the
transmission could occur. See
Automatic
Transmission (page 184).
AUDIBLE WARNINGS AND
INDICATORS
Key in Ignition Warning Chime
(If
Equipped)
Sounds when you open the driver's door
and you have left the key in the ignition.
Engine On Warning Chime
A warning chime will sound when any door
is opened if the vehicle exceeds a relatively
low speed.
Keyless Warning Alert
(If Equipped)
Sounds the horn twice when you exit the
vehicle and the keyless vehicle is in RUN,
indicating the vehicle is still on.
Headlamps On Warning Chime
Sounds when you remove the key from the
ignition and open the driver's door and you
have left the headlamps or parking lamps
on.
Parking Brake On Warning Chime
Sounds when you have left the parking
brake on and drive your vehicle. If the
warning chime remains on after you have
released the parking brake, have the
system checked by your authorized dealer
immediately.
102
Explorer (TUB) Canada/United States of America, enUSA, Edition date: 201807, Second-Printing Instrument Cluster E138639 E130458 E161509
Page 106 of 571
Automatic Transmission Warning
Chime
Sounds when you have not moved the
transmission selector lever to position P.
A message will be shown in the display.
103
Explorer (TUB) Canada/United States of America, enUSA, Edition date: 201807, Second-Printing Instrument Cluster
Page 112 of 571
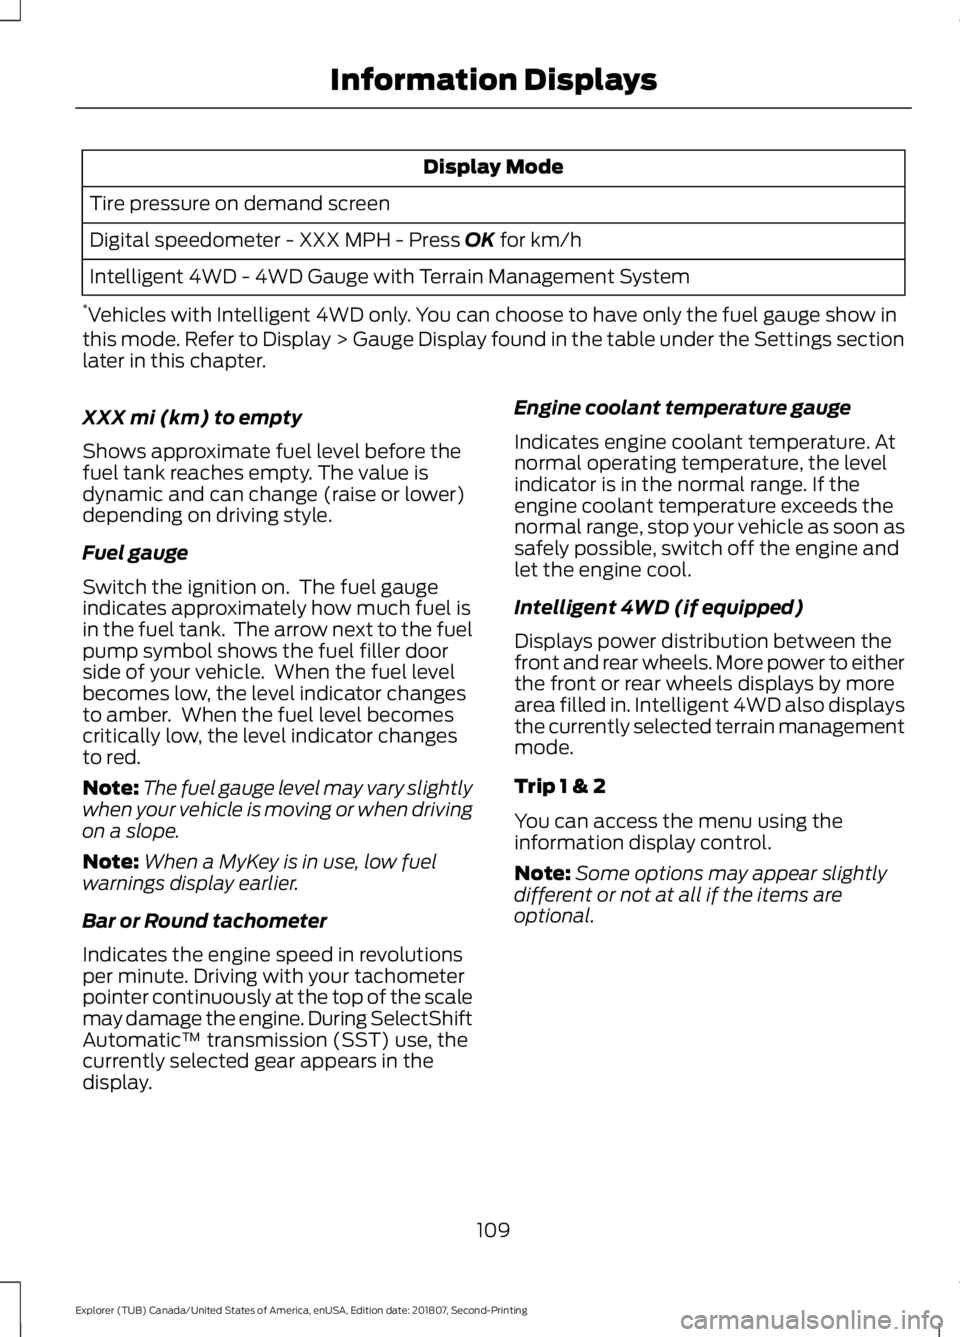
Display Mode
Tire pressure on demand screen
Digital speedometer - XXX MPH - Press OK for km/h
Intelligent 4WD - 4WD Gauge with Terrain Management System
* Vehicles with Intelligent 4WD only. You can choose to have only the fuel gauge show in
this mode. Refer to Display > Gauge Display found in the table under the Settings section
later in this chapter.
XXX mi (km) to empty
Shows approximate fuel level before the
fuel tank reaches empty. The value is
dynamic and can change (raise or lower)
depending on driving style.
Fuel gauge
Switch the ignition on. The fuel gauge
indicates approximately how much fuel is
in the fuel tank. The arrow next to the fuel
pump symbol shows the fuel filler door
side of your vehicle. When the fuel level
becomes low, the level indicator changes
to amber. When the fuel level becomes
critically low, the level indicator changes
to red.
Note: The fuel gauge level may vary slightly
when your vehicle is moving or when driving
on a slope.
Note: When a MyKey is in use, low fuel
warnings display earlier.
Bar or Round tachometer
Indicates the engine speed in revolutions
per minute. Driving with your tachometer
pointer continuously at the top of the scale
may damage the engine. During SelectShift
Automatic ™ transmission (SST) use, the
currently selected gear appears in the
display. Engine coolant temperature gauge
Indicates engine coolant temperature. At
normal operating temperature, the level
indicator is in the normal range. If the
engine coolant temperature exceeds the
normal range, stop your vehicle as soon as
safely possible, switch off the engine and
let the engine cool.
Intelligent 4WD (if equipped)
Displays power distribution between the
front and rear wheels. More power to either
the front or rear wheels displays by more
area filled in. Intelligent 4WD also displays
the currently selected terrain management
mode.
Trip 1 & 2
You can access the menu using the
information display control.
Note:
Some options may appear slightly
different or not at all if the items are
optional.
109
Explorer (TUB) Canada/United States of America, enUSA, Edition date: 201807, Second-Printing Information Displays
Page 123 of 571

Electronic Stability Control
Action
Message
The system detects a malfunction due to a blocked sensor.
ESC Service required
Displays the traction control system status.
ESC Off
Displays the traction control system status.
ESC On
Engine Action
Message
Displays when the engine temperature is too high. Stop yourvehicle in a safe place and allow the engine to cool. If the
problem persists, contact an authorized dealer. See Engine Coolant Check (page 289).
High Engine Temper-
ature Stop Safely
Engine service is required. Contact an authorized dealer.
Engine Fault Service
Now
Check the engine oil level. See Engine Oil Check (page 287).
Engine Oil Level Low
Check Level
Fuel Action
Message
An early reminder of a low fuel condition.
Fuel Level LOW
The fuel fill inlet may not be properly closed.
Check Fuel Fill Inlet
Hill Descent Control Action
Message
Displays when you deactivate hill descent control mode.
Hill Descent Control OFF
Displays when hill descent speed exceeds 20 mph (32 km/h).
For Hill Descent Reduce
Speed
Displays when hill descent control mode requires you to shift the transmission into gear.
For Hill Descent Select
Gear
Displays when the hill control mode requires you to resume control.
Hill Descent Driver
Resume Control
120
Explorer (TUB) Canada/United States of America, enUSA, Edition date: 201807, Second-Printing Information Displays
Page 130 of 571
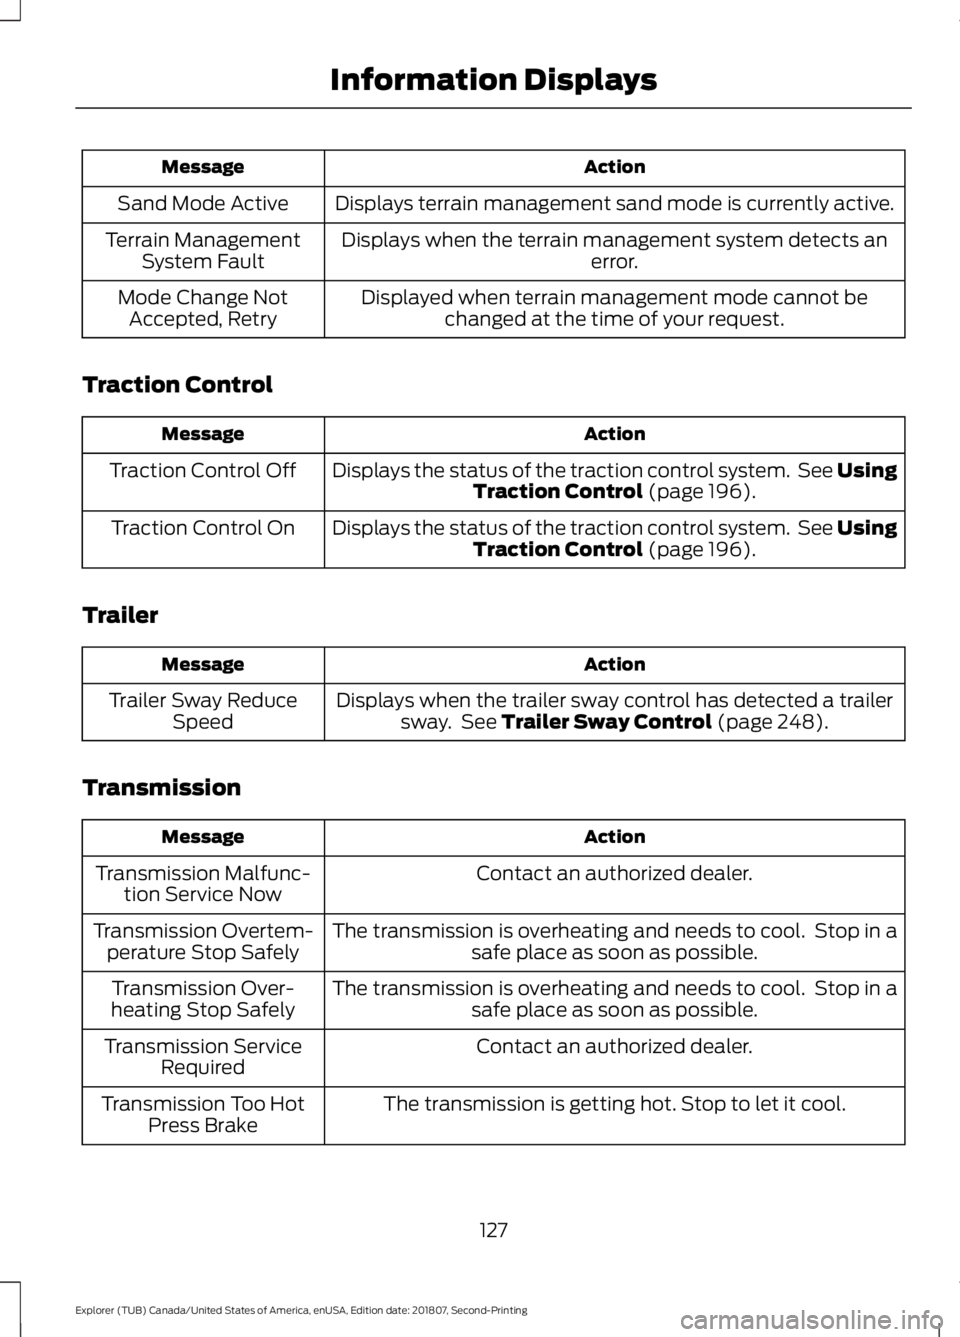
Action
Message
Displays terrain management sand mode is currently active.
Sand Mode Active
Displays when the terrain management system detects an error.
Terrain Management
System Fault
Displayed when terrain management mode cannot bechanged at the time of your request.
Mode Change Not
Accepted, Retry
Traction Control Action
Message
Displays the status of the traction control system. See UsingTraction Control (page 196).
Traction Control Off
Displays the status of the traction control system. See UsingTraction Control
(page 196).
Traction Control On
Trailer Action
Message
Displays when the trailer sway control has detected a trailersway. See
Trailer Sway Control (page 248).
Trailer Sway Reduce
Speed
Transmission Action
Message
Contact an authorized dealer.
Transmission Malfunc-
tion Service Now
The transmission is overheating and needs to cool. Stop in asafe place as soon as possible.
Transmission Overtem-
perature Stop Safely
The transmission is overheating and needs to cool. Stop in asafe place as soon as possible.
Transmission Over-
heating Stop Safely
Contact an authorized dealer.
Transmission Service
Required
The transmission is getting hot. Stop to let it cool.
Transmission Too Hot
Press Brake
127
Explorer (TUB) Canada/United States of America, enUSA, Edition date: 201807, Second-Printing Information Displays