2019 FORD EXPEDITION technical specifications
[x] Cancel search: technical specificationsPage 8 of 583

Changing the Engine Air Filter
................347
Vehicle Care
General Information ..................................
349
Cleaning Products ......................................
349
Cleaning the Exterior .................................
349
Waxing .............................................................
351
Cleaning the Engine ....................................
351
Cleaning the Windows and Wiper Blades ........................................................................\
.
351
Cleaning the Interior ..................................
352
Cleaning the Instrument Panel and Instrument Cluster Lens .......................
352
Cleaning Leather Seats ............................
353
Repairing Minor Paint Damage .............
354
Cleaning the Wheels .................................
354
Vehicle Storage ...........................................
354
Wheels and Tires
General Information ...................................
357
Tire Care .........................................................
359
Using Snow Chains ....................................
373
Tire Pressure Monitoring System ..........
374
Changing a Road Wheel ..........................
380
Technical Specifications .........................
386
Capacities and Specifications
Engine Specifications ................................
387
Motorcraft Parts ..........................................
387
Vehicle Identification Number ..............
389
Vehicle Certification Label .....................
390
Transmission Code Designation ...........
390
Capacities and Specifications ................
391
Bulb Specification Chart .........................
396
Audio System
General Information ..................................
398
Audio Unit - Vehicles Without: Touchscreen Display .............................
399Audio Unit - Vehicles With: Touchscreen
Display ........................................................
402
Digital Radio .................................................
403
Satellite Radio .............................................
405
USB Port ........................................................
408
Media Hub ....................................................
408
SYNC™
General Information .................................
409
Using Voice Recognition ...........................
410
Using SYNC™ With Your Phone ............
412
SYNC™ Applications and Services ......
413
Using SYNC™ With Your Media Player ........................................................................\
.
417
SYNC™ Troubleshooting .........................
418
SYNC™ 3
General Information ..................................
426
Home Screen ...............................................
438
Using Voice Recognition ..........................
439
Entertainment .............................................
446
Climate ...........................................................
456
Phone .............................................................
458
Navigation .....................................................
464
Apps .................................................................
472
Settings ..........................................................
475
SYNC™ 3 Troubleshooting ....................
489
Accessories
Accessories ...................................................
503
Ford Protect
Ford Protect .................................................
505
Scheduled Maintenance
General Maintenance Information .......
507
Normal Scheduled Maintenance ..........
510
Special Operating Conditions Scheduled Maintenance .............................................
513
Scheduled Maintenance Record ...........
515
5
Expedition (TB8) Canada/United States of America, enUSA, Edition date: 201808, Second-Printing Table of Contents
Page 59 of 583
GENERAL INFORMATION ON
RADIO FREQUENCIES
This device complies with Part 15 of the
FCC Rules and with Licence exempt RSS
Standards of Industry Canada. Operation
is subject to the following two conditions:
•
This device may not cause harmful
interference, and
• This device must accept any
interference received, including
interference that may cause undesired
operation.
Note: Changes or modifications not
expressively approved by the party
responsible for compliance could void the
user's authority to operate the equipment.
The term "IC:" before the radio certification
number only signifies that Industry Canada
technical specifications were met.
The typical operating range for your
transmitter is approximately 33 ft (10 m).
Vehicles with the remote start feature will
have a greater range. One of the following
could cause a decrease in operating range:
• Weather conditions.
• Nearby radio towers.
• Structures around the vehicle.
• Other vehicles parked next to your
vehicle.
The radio frequency used by your remote
control can also be used by other radio
transmitters, for example amateur radios,
medical equipment, wireless headphones,
wireless remote controls, cell phones,
battery chargers and alarm systems. If the
frequencies are jammed, you will not be
able to use your remote control. You can
lock and unlock the doors with the key.
Note: Make sure you lock your vehicle
before leaving it unattended. Note:
If you are within range of your vehicle,
the remote control will operate if you
unintentionally press any button.
Intelligent Access
(If Equipped)
The system uses a radio frequency signal
to communicate with your vehicle and
authorizes your vehicle to unlock when one
of the following conditions are met:
• You touch the unlock sensor on the
back of the door handle with the
intelligent access key within
3 ft (1 m)
of your vehicle.
• You press the luggage compartment
button.
• You press the unlock button on the
transmitter.
If excessive radio frequency interference
is present in the area or if the transmitter
battery is low, you may need to
mechanically unlock your door. You can
use the mechanical key blade in your
intelligent access key to open the driver
door in this situation. See
Remote
Control (page 56).
REMOTE CONTROL
Integrated Keyhead Transmitter (If
Equipped)
Note: A two-button remote control
operates similarly.
Use the key blade to start your vehicle and
unlock or lock the driver door from outside
your vehicle. The integrated keyhead
transmitter functions as a programmed
ignition key that operates all the locks and
starts your vehicle, as well as a remote
control.
56
Expedition (TB8) Canada/United States of America, enUSA, Edition date: 201808, Second-Printing Keys and Remote Controls
Page 176 of 583
FCC and RSS-210 Industry Canada
Compliance
This device complies with Part 15 of the
FCC Rules and with RSS-210 of Industry
Canada. Operation is subject to the
following two conditions: (1) this device
may not cause harmful interference, and
(2) this device must accept any
interference received, including
interference that may cause undesired
operation.
Note:
Changes or modifications to your
device not expressly approved by the party
responsible for compliance can void the
user ’s authority to operate the equipment.
This equipment complies with FCC
radiation exposure limits set forth for an
uncontrolled environment. End Users must
follow the specific operating instructions
for satisfying RF exposure compliance. This
transmitter must be at least 8 in (20 cm)
from the user and must not be co-located
or operating in conjunction with any other
antenna or transmitter.
The term “IC:” before the
certification/registration number only
signifies that Industry Canada technical
specifications were met.
173
Expedition (TB8) Canada/United States of America, enUSA, Edition date: 201808, Second-Printing Garage Door Opener
(If Equipped)
Page 180 of 583
Note:
Changes or modifications not
expressively approved by the party
responsible for compliance could void the
user's authority to operate the equipment.
The term "IC" before the radio certification
number only signifies that Industry Canada
technical specifications were met.
177
Expedition (TB8) Canada/United States of America, enUSA, Edition date: 201808, Second-Printing Auxiliary Power Points
Page 378 of 583
Each tire, including the spare (if
provided), should be checked
monthly when cold and inflated
to the inflation pressure recommended by
the vehicle manufacturer on the vehicle
placard or tire inflation pressure label. (If
your vehicle has tires of a different size
than the size indicated on the vehicle
placard or tire inflation pressure label, you
should determine the proper tire inflation
pressure for those tires).
As an added safety feature, your vehicle
has been equipped with a Tire Pressure
Monitoring System (TPMS) that
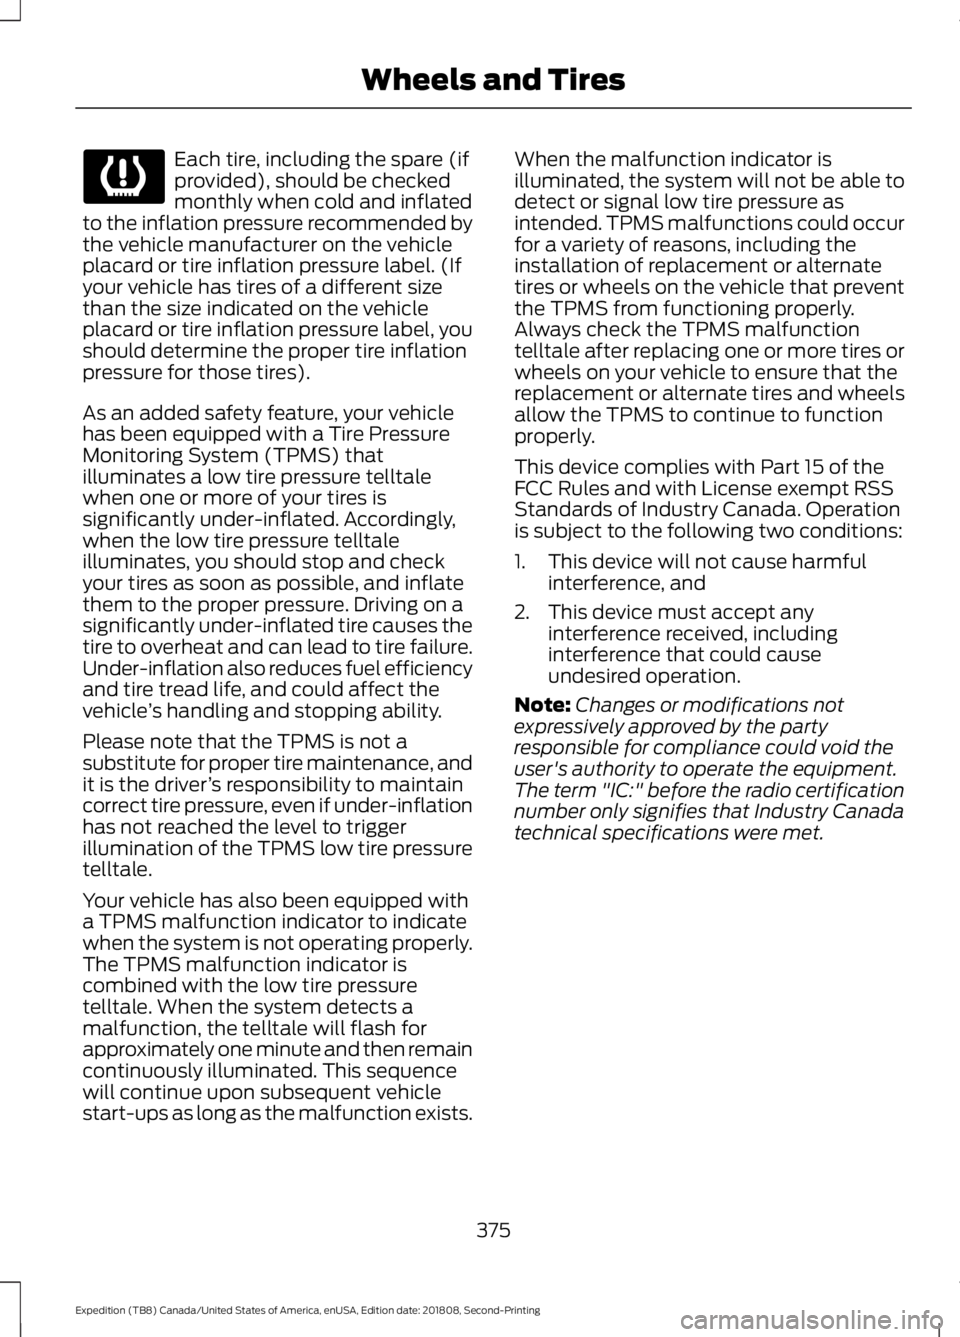
illuminates a low tire pressure telltale
when one or more of your tires is
significantly under-inflated. Accordingly,
when the low tire pressure telltale
illuminates, you should stop and check
your tires as soon as possible, and inflate
them to the proper pressure. Driving on a
significantly under-inflated tire causes the
tire to overheat and can lead to tire failure.
Under-inflation also reduces fuel efficiency
and tire tread life, and could affect the
vehicle ’s handling and stopping ability.
Please note that the TPMS is not a
substitute for proper tire maintenance, and
it is the driver ’s responsibility to maintain
correct tire pressure, even if under-inflation
has not reached the level to trigger
illumination of the TPMS low tire pressure
telltale.
Your vehicle has also been equipped with
a TPMS malfunction indicator to indicate
when the system is not operating properly.
The TPMS malfunction indicator is
combined with the low tire pressure
telltale. When the system detects a
malfunction, the telltale will flash for
approximately one minute and then remain
continuously illuminated. This sequence
will continue upon subsequent vehicle
start-ups as long as the malfunction exists. When the malfunction indicator is
illuminated, the system will not be able to
detect or signal low tire pressure as
intended. TPMS malfunctions could occur
for a variety of reasons, including the
installation of replacement or alternate
tires or wheels on the vehicle that prevent
the TPMS from functioning properly.
Always check the TPMS malfunction
telltale after replacing one or more tires or
wheels on your vehicle to ensure that the
replacement or alternate tires and wheels
allow the TPMS to continue to function
properly.
This device complies with Part 15 of the
FCC Rules and with License exempt RSS
Standards of Industry Canada. Operation
is subject to the following two conditions:
1. This device will not cause harmful
interference, and
2. This device must accept any interference received, including
interference that could cause
undesired operation.
Note: Changes or modifications not
expressively approved by the party
responsible for compliance could void the
user's authority to operate the equipment.
The term "IC:" before the radio certification
number only signifies that Industry Canada
technical specifications were met.
375
Expedition (TB8) Canada/United States of America, enUSA, Edition date: 201808, Second-Printing Wheels and Tires
Page 388 of 583
Rear jacking point
1. Remove the lug nuts with the lug
wrench. Replace the flat tire with the
spare tire, making sure the valve stem
is facing outward.
2. Reinstall the lug nuts until the wheel is
snug against the hub. Do not fully
tighten the lug nuts until the wheel has
been lowered.
3. Completely lower the vehicle by turning
the jack drive counterclockwise.
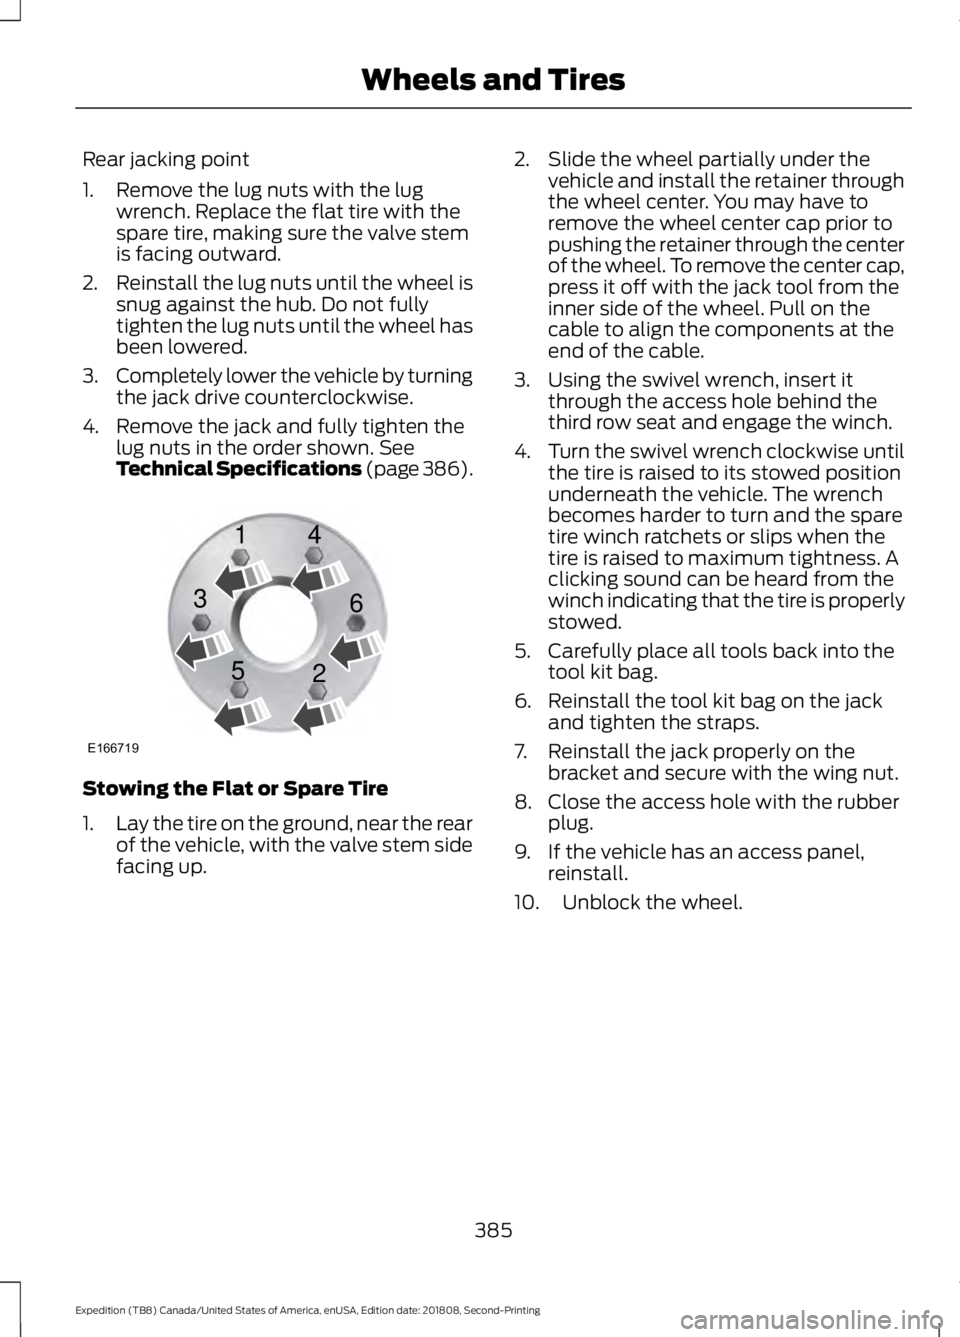
4. Remove the jack and fully tighten the lug nuts in the order shown. See
Technical Specifications (page 386). Stowing the Flat or Spare Tire
1.
Lay the tire on the ground, near the rear
of the vehicle, with the valve stem side
facing up. 2. Slide the wheel partially under the
vehicle and install the retainer through
the wheel center. You may have to
remove the wheel center cap prior to
pushing the retainer through the center
of the wheel. To remove the center cap,
press it off with the jack tool from the
inner side of the wheel. Pull on the
cable to align the components at the
end of the cable.
3. Using the swivel wrench, insert it through the access hole behind the
third row seat and engage the winch.
4. Turn the swivel wrench clockwise until
the tire is raised to its stowed position
underneath the vehicle. The wrench
becomes harder to turn and the spare
tire winch ratchets or slips when the
tire is raised to maximum tightness. A
clicking sound can be heard from the
winch indicating that the tire is properly
stowed.
5. Carefully place all tools back into the tool kit bag.
6. Reinstall the tool kit bag on the jack and tighten the straps.
7. Reinstall the jack properly on the bracket and secure with the wing nut.
8. Close the access hole with the rubber plug.
9. If the vehicle has an access panel, reinstall.
10. Unblock the wheel.
385
Expedition (TB8) Canada/United States of America, enUSA, Edition date: 201808, Second-Printing Wheels and TiresE166719
1
3
5 4
6
2
Page 389 of 583
TECHNICAL SPECIFICATIONS
Wheel Lug Nut Torque Specifications
WARNING: When you install a wheel, always remove any corrosion, dirt or foreign
materials present on the mounting surfaces of the wheel or the surface of the wheel
hub, brake drum or brake disc that contacts the wheel. Make sure to secure any fasteners
that attach the rotor to the hub so they do not interfere with the mounting surfaces of
the wheel. Installing wheels without correct metal-to-metal contact at the wheel
mounting surfaces can cause the wheel nuts to loosen and the wheel to come off while
your vehicle is in motion, resulting in loss of vehicle control, personal injury or death. lb.ft (Nm)
1
Bolt Size
150 lb.ft (204 Nm)
M14 x 1.5
1 Torque specifications are for nut and bolt threads free of dirt and rust. Use only our
recommended replacement fasteners.
Retighten the lug nuts to the specified torque within 100 miles (160 kilometers) after any
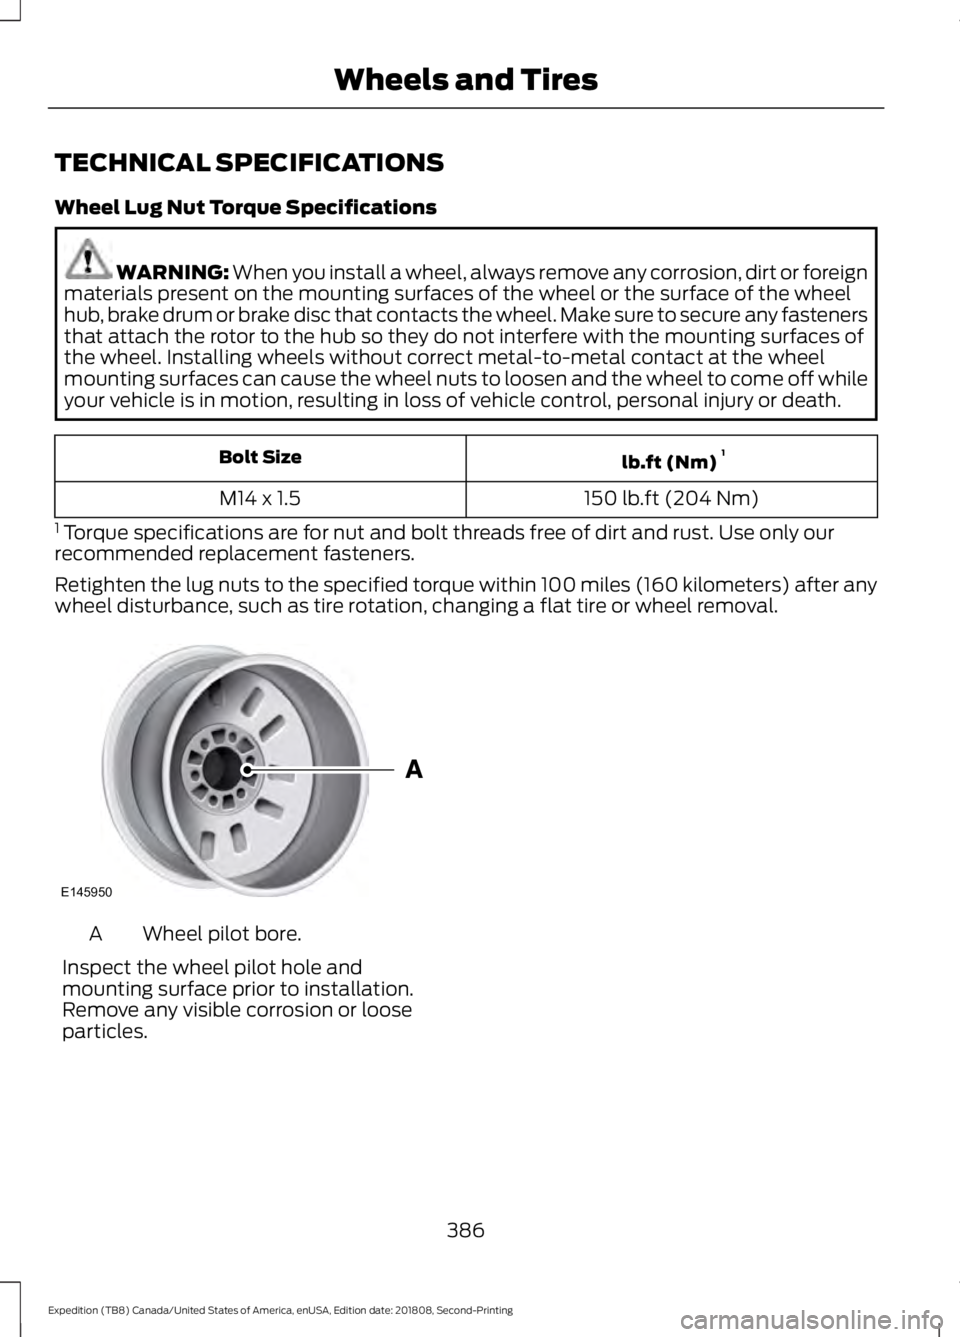
wheel disturbance, such as tire rotation, changing a flat tire or wheel removal. Wheel pilot bore.
A
Inspect the wheel pilot hole and
mounting surface prior to installation.
Remove any visible corrosion or loose
particles.
386
Expedition (TB8) Canada/United States of America, enUSA, Edition date: 201808, Second-Printing Wheels and TiresE145950
Page 555 of 583
IMPLIED WARRANTIES OF
MERCHANTABILITY, FITNESS FOR A
PARTICULAR PURPOSE, TITLE, AND
NON-INFRINGEMENT. NEITHER
GRACENOTE WARRANTS THE RESULTS
THAT WILL BE OBTAINED BY YOUR USE
OF THE GRACENOTE SOFTWARE OR ANY
GRACENOTE SERVER. IN NO CASE WILL
GRACENOTE BE LIABLE FOR ANY
CONSEQUENTIAL OR INCIDENTAL
DAMAGES OR FOR ANY LOST PROFITS
OR LOST REVENUES FOR ANY REASON
WHATSOEVER. © Gracenote 2007.
Radio Frequency Statement
FCC ID: ACJ-SYNCG3-L
IC: 216B-SYNCG3-L
This device complies with Part 15 of the
FCC Rules and with RSS-210 of Industry
Canada. Operation is subject to the
following two conditions:
(1) This device may not cause harmful
interference, and
(2)
this device must accept any
interference received, including
interference that may cause undesired
operation. WARNING:
Changes or
modifications not expressively approved
by the party responsible for compliance
could void the user's authority to operate
the equipment. The term "IC:" before the
radio certification number only signifies
that Industry Canada technical
specifications were met.
The antenna used for this transmitter must
not be co-located or operating in
conjunction with any other antenna or
transmitter. Taiwan Territory
Note: In accordance with the management
approach of low-power radio wave
radiation motors:
Article 12: For approved and certified
low-power radiation motor models,
companies, firms or users must not alter
the frequency, increase the power or
change the characteristics and functions
of the original design without authorization.
Article 14: The usage of low-power
radio-frequency motors must not affect
aviation safety and interfere with legal
telecommunications. Should interference
be detected, immediately stop using the
device and only resume usage after
ensuring that there is no longer any
interference. For the legal
telecommunication and wireless
telecommunication of the telco, the
low-power radio frequency motor must be
able to tolerate legal limits of interference
from telecommunication, industrial,
scientific and radio wave equipment.
SUNA TRAFFIC CHANNEL – TERMS
AND CONDITIONS
By activating, using and/or accessing the
SUNA Traffic Channel, SUNA Predictive or
other content or material provided by
Intelematics (together,
SUNA Products
and/or Services
), you must accept
certain terms and conditions. The following
is a brief summary of the terms and
conditions that apply to you. To view the
full terms and conditions relevant to your
use of the SUNA Products and/or Services,
please consult: Website
www.sunatraffic.com.au/termsandcon- ditions/
1. Acceptance
552
Expedition (TB8) Canada/United States of America, enUSA, Edition date: 201808, Second-Printing Appendices