2019 FORD EXPEDITION clock setting
[x] Cancel search: clock settingPage 146 of 583
Air directed to the instrument panel and
footwell air vents turns off. You can also
use this setting to defog and clear the
windshield of a thin covering of ice.
Switching Maximum Air
Conditioning On and Off
Turn the temperature control
counterclockwise to the lowest
setting for maximum cooling.
The left-hand and right-hand settings set
to LO, recirculated air flows through the
instrument panel air vents, air conditioning
turns on and the blower motor adjusts to
the highest speed.
Switching Maximum Defrost On
and Off Turn the temperature control
clockwise to the highest setting
for maximum defrosting.
The left-hand and right-hand settings set
to HI, air flows through the windshield air
vents, and the blower motor adjusts to the
highest speed.
You can also use this setting to defog and
clear the windshield of a thin covering of
ice.
Note: To prevent window fogging, you
cannot select recirculated air when
maximum defrost is on.
Note: The heated rear window also turns
on when you select maximum defrost.
Switching Recirculated Air On and
Off Press and release the button to
switch between outside air and
recirculated air. The air currently in the passenger
compartment recirculates. This may
reduce the time needed to cool the interior
(when used with A/C) and reduce
unwanted odors from entering your vehicle.
Note: Recirculated air may turn off (or
prevent you from switching on) in all air flow
modes except
MAX A/C to reduce the risk
of fogging. Recirculation may also turn on
and off in various air distribution control
combinations during hot weather to improve
cooling efficiency.
Locking the Rear Climate Control Press and release the button.
When illuminated, you can only operate
the rear passenger settings through the
front controls.
Setting the Rear Blower Motor
Speed Press and release + or - to adjust
the volume of air circulated in
the rear passenger
compartment.
Setting the Rear Temperature Press and release
+ or - to set
the temperature in the rear
passenger compartment.
Switching the Rear Climate
Control On and Off Press and release the button.
143
Expedition (TB8) Canada/United States of America, enUSA, Edition date: 201808, Second-Printing Climate Control E266664 E265400
Page 337 of 583
Do not use supplemental engine oil
additives because they are unnecessary
and could lead to engine damage that may
not be covered by the vehicle Warranty.
Only use oils certified for gasoline engines
by the American Petroleum Institute (API).
An oil with this trademark symbol
conforms to the current engine and
emission system protection standards and
fuel economy requirements of the
International Lubricants Specification
Advisory Committee (ILSAC).
To top up the engine oil level do the
following:
1. Clean the area surrounding the engine
oil filler cap before you remove it.
2. Remove the engine oil filler cap. See Under Hood Overview (page 332).
Turn it counterclockwise and remove
it.
3. Add engine oil that meets our specifications. See
Capacities and
Specifications (page 391). You may
have to use a funnel to pour the engine
oil into the opening.
4. Recheck the oil level.
5. If the oil level is correct, replace the dipstick and make sure it is fully seated.
6. Replace the engine oil filler cap. Turn it clockwise until you feel a strong
resistance. Note:
Do not add oil further than the
maximum mark. Oil levels above the
maximum mark may cause engine damage.
Note: Make sure you install the oil filler cap
correctly.
Note: Soak up any spillage with an
absorbent cloth immediately.
OIL CHANGE INDICATOR
RESET
Use the information display controls on
the steering wheel to reset the oil change
indicator.
From the main menu scroll to: Action and description
Message
Press the right arrow button,
then from this menu scroll
to the following message.
Settings
Press the right arrow button,
then from this menu scroll
to the following message.
Vehicle
Press the right arrow button,
then from this menu scroll
to the following message.
Oil Life
Press and hold the
OK
button until the instrument
cluster displays the
following message.
Hold OK to
Reset
Reset Successful
When the oil change indic-
ator resets the instrument
cluster displays 100%.
Remaining Life
{00}%
334
Expedition (TB8) Canada/United States of America, enUSA, Edition date: 201808, Second-Printing MaintenanceE142732
Page 345 of 583
If you see any corrosion on the battery or
terminals, remove the cables from the
terminals and clean with a wire brush. You
can neutralize the acid with a solution of
baking soda and water.
Because your vehicle
’s engine is
electronically controlled by a computer,
some control conditions are maintained
by power from the battery. When the
battery is disconnected or a new battery
is installed, the engine must relearn its idle
and fuel trim strategy for optimum
driveability and performance. Flexible fuel
vehicles (FFV) must also relearn the
ethanol content of the fuel for optimum
driveability and performance.
To restore the settings, do the following:
1. Apply the parking brake.
2. Shift into park (P) or neutral (N).
3. Switch off all accessories.
4. Press the brake pedal and start your vehicle.
5. Run the engine until it reaches normal operating temperature. While the
engine is warming up, complete the
following: Reset the clock. Reset the
power windows bounce-back feature.
See Windows and Mirrors (page 100).
Reset the radio station presets. See
Audio System (page 398).
6. Allow the engine to idle for at least one
minute.
7. Drive the vehicle at least 10 mi (16 km)
to completely relearn the idle trim and
fuel trim strategy.
Note: If you do not allow the engine to
relearn the idle and fuel trim strategy, the
idle quality of your vehicle may be adversely
affected until the engine computer
eventually relearns the idle trim and fuel
trim strategy. Note:
For flexible fuel vehicles, if you are
operating on E85, you may experience poor
starts or an inability to start the engine and
driveability problems until the fuel trim and
ethanol content have been relearned.
Make sure that you dispose of old batteries
in an environmentally friendly way. Seek
advice from your local authority about
recycling old batteries.
If storing your vehicle for more than 30
days without recharging the battery, we
recommend that you disconnect the
negative battery cable to maintain battery
charge for quick starting.
Battery Management System
(If
Equipped)
The battery management system monitors
battery conditions and takes actions to
extend battery life. If excessive battery
drain is detected, the system temporarily
disables some electrical systems to
protect the battery.
Systems included are:
• Heated rear window.
• Heated seats.
• Climate control.
• Heated steering wheel.
• Audio unit.
• Navigation system.
A message may appear in the information
displays to alert you that battery
protection actions are active. These
messages are only for notification that an
action is taking place, and not intended to
indicate an electrical problem or that the
battery requires replacement.
342
Expedition (TB8) Canada/United States of America, enUSA, Edition date: 201808, Second-Printing Maintenance
Page 382 of 583

•
To reduce the chances of interference
from another vehicle, perform the
system reset procedure at least 3 ft
(1 m) away from another Ford Motor
Company vehicle undergoing the
system reset procedure at the same
time.
• Do not wait more than two minutes
between resetting each tire sensor or
the system can time-out and you have
to repeat the entire procedure on all
four wheels.
• A double horn sounds indicating the
need to repeat the procedure.
Performing the System Reset Procedure
Read the entire procedure before
attempting.
1. Drive the vehicle above
20 mph
(32 km/h) for at least two minutes,
then park in a safe location where you
can easily get to all four tires and have
access to an air pump.
2. Place the ignition in the off position and
keep the key in the ignition.
3. Cycle the ignition to the on position with the engine off.
4. Turn the hazard flashers on then off three times. You must accomplish this
within 10 seconds. If you successfully
enter the reset mode, the horn sounds
once, the system indicator flashes and
a message shows in the information
display. If this does not occur, please
try again starting at step 2. If after
repeated attempts to enter the reset
mode, the horn does not sound, the
system indicator does not flash and no
message shows in the information
display, seek service from your
authorized dealer. 5. Train the tire pressure monitoring
system sensors in the tires using the
following system reset sequence
starting with the left front tire in the
following clockwise order: Left front -
driver side front tire, Right front -
passenger side front tire, Right rear -
passenger side rear tire, Left rear -
driver side rear tire.
6. Remove the valve cap from the valve stem on the left front tire. Decrease the
air pressure until the horn sounds.
Note: The single horn tone confirms that
the sensor identification code has been
learned by the module for this position. If a
double horn is heard, the reset procedure
was unsuccessful, and you must repeat it.
7. Remove the valve cap from the valve stem on the right front tire. Decrease
the air pressure until the horn sounds.
8. Remove the valve cap from the valve stem on the right rear tire. Decrease the
air pressure until the horn sounds.
9. Remove the valve cap from the valve stem on the left rear tire. Decrease the
air pressure until the horn sounds.
Training is complete after the horn
sounds for the last tire trained, driver
side rear tire, the system indicator
stops flashing, and a message shows
in the information display.
10. Turn the ignition off. If two short horn
beeps are heard, the reset procedure
was unsuccessful and you must
repeat it. If after repeating the
procedure and two short beeps are
heard when the ignition is turned to
off, seek assistance from your
authorized dealer.
379
Expedition (TB8) Canada/United States of America, enUSA, Edition date: 201808, Second-Printing Wheels and Tires
Page 403 of 583
Accessing the Clock Settings
Press and release the button to
access the clock setting.
Use the center arrow controls to
change the hours and minutes.
Accessing the Media Source Menu Press and release the button to
open the media source menu.
You can press this multiple times to
change to a SYNC-Media device or scroll
through the media sources using the arrow
buttons. Press OK to select a source.
Accessing the Phone Features Press and release the button to
access the phone features of the
SYNC system.
Accessing the Sound Settings Press and release the button to
access settings for Treble,
Midrange, Bass, Fade and
Balance.
Accessing the Settings Menu Press and release the button to
access the settings menu.
Follow the on-screen prompts
to make your selection. Adjusting the Volume
Turn to adjust the volume.
Changing Radio Stations
In radio mode, turn to search through the
radio frequency band.
In satellite radio mode, turn to find the
previous or next available satellite radio
station.
400
Expedition (TB8) Canada/United States of America, enUSA, Edition date: 201808, Second-Printing Audio SystemE265036 E265035 E142607 E265373 E265696
Page 430 of 583
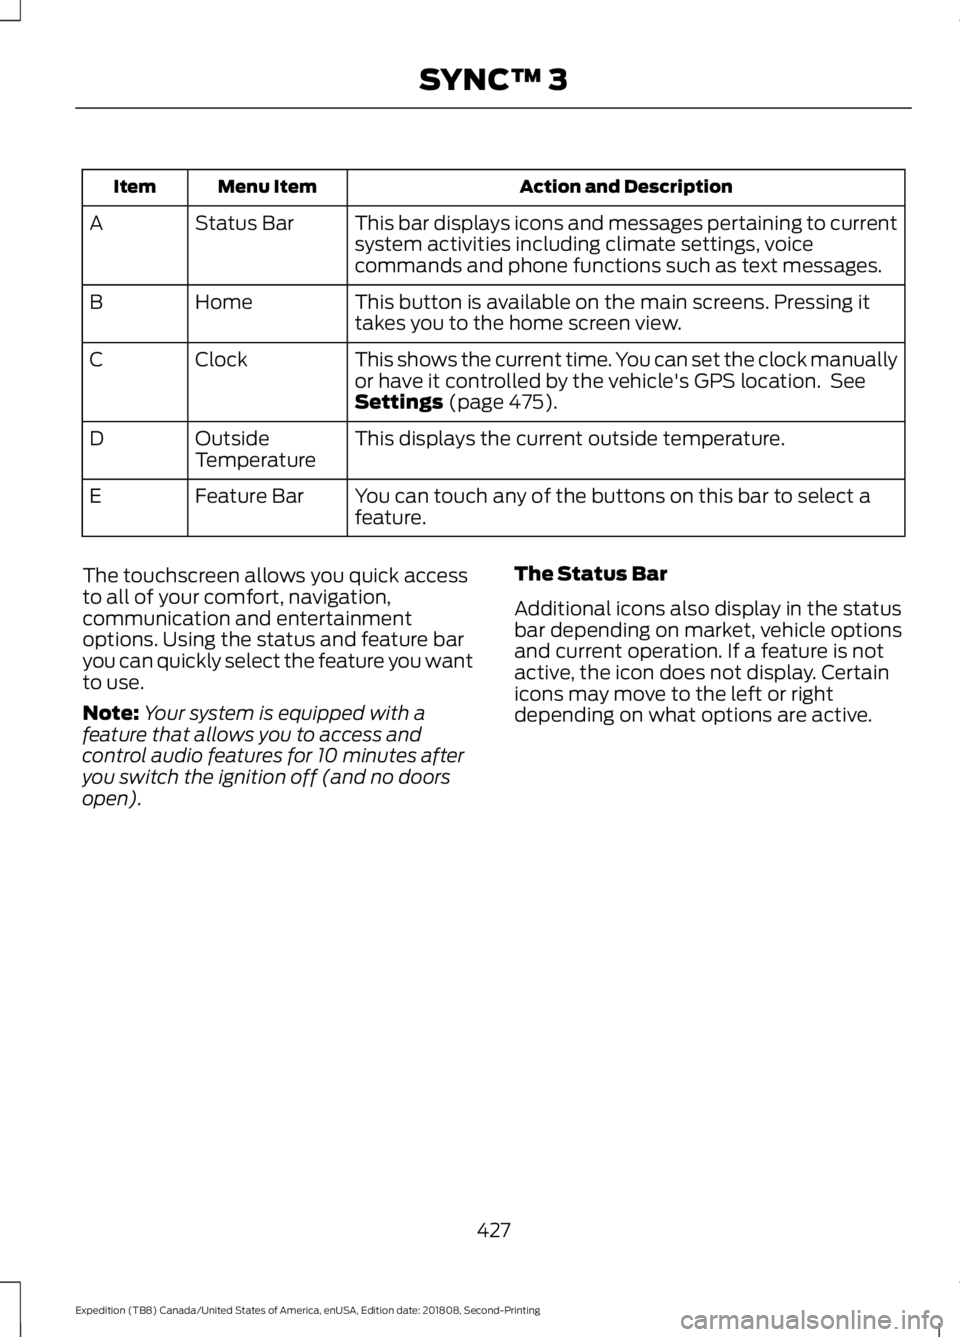
Action and Description
Menu Item
Item
This bar displays icons and messages pertaining to current
system activities including climate settings, voice
commands and phone functions such as text messages.
Status Bar
A
This button is available on the main screens. Pressing it
takes you to the home screen view.
Home
B
This shows the current time. You can set the clock manually
or have it controlled by the vehicle's GPS location. See
Settings (page 475).
Clock
C
This displays the current outside temperature.
Outside
Temperature
D
You can touch any of the buttons on this bar to select a
feature.
Feature Bar
E
The touchscreen allows you quick access
to all of your comfort, navigation,
communication and entertainment
options. Using the status and feature bar
you can quickly select the feature you want
to use.
Note: Your system is equipped with a
feature that allows you to access and
control audio features for 10 minutes after
you switch the ignition off (and no doors
open). The Status Bar
Additional icons also display in the status
bar depending on market, vehicle options
and current operation. If a feature is not
active, the icon does not display. Certain
icons may move to the left or right
depending on what options are active.
427
Expedition (TB8) Canada/United States of America, enUSA, Edition date: 201808, Second-Printing SYNC™ 3
Page 480 of 583
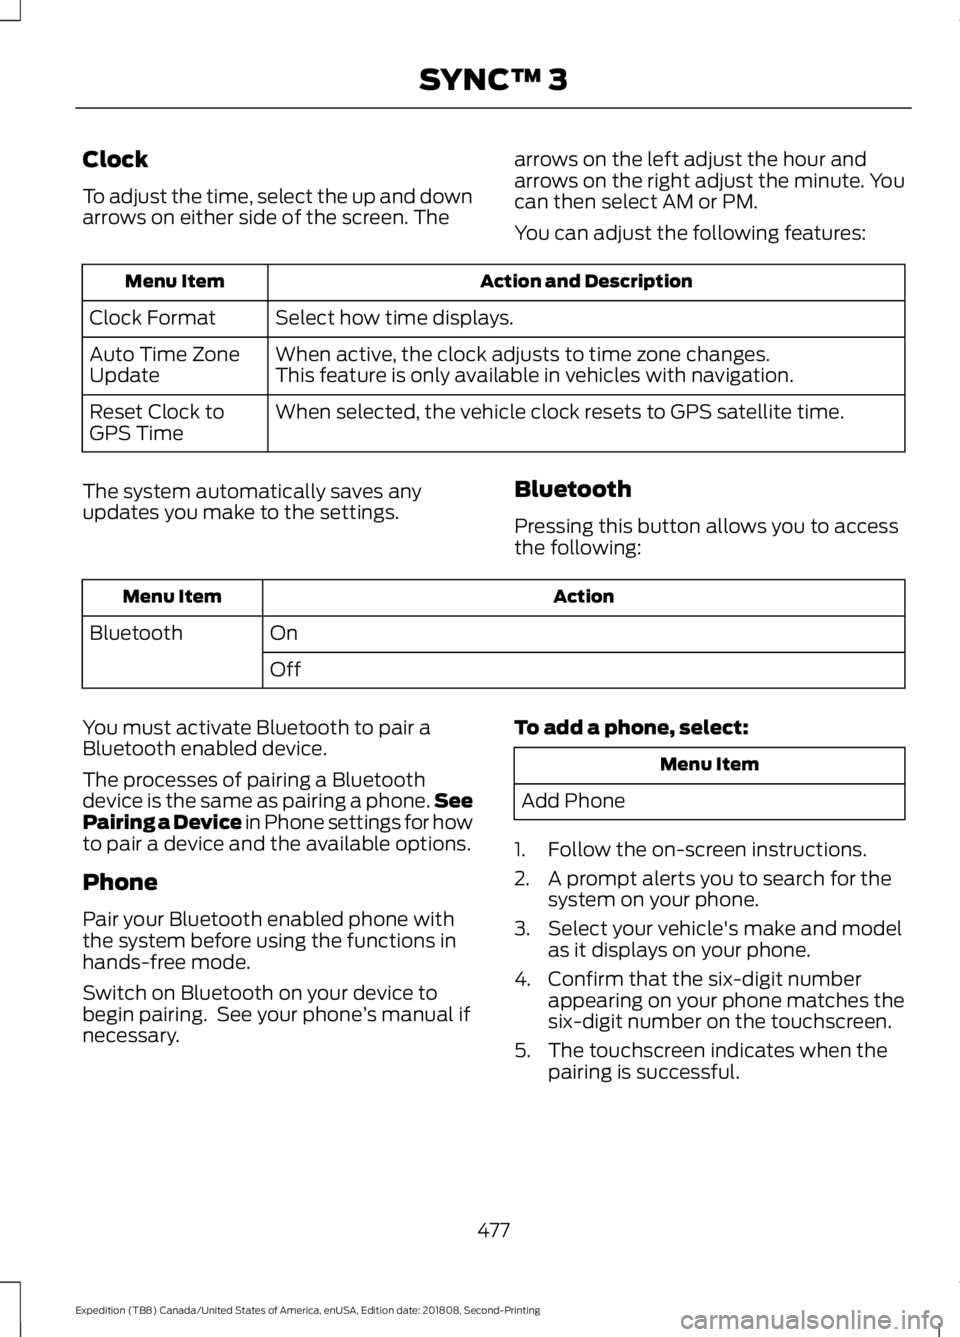
Clock
To adjust the time, select the up and down
arrows on either side of the screen. The
arrows on the left adjust the hour and
arrows on the right adjust the minute. You
can then select AM or PM.
You can adjust the following features: Action and Description
Menu Item
Select how time displays.
Clock Format
When active, the clock adjusts to time zone changes.
Auto Time Zone
Update This feature is only available in vehicles with navigation.
When selected, the vehicle clock resets to GPS satellite time.
Reset Clock to
GPS Time
The system automatically saves any
updates you make to the settings. Bluetooth
Pressing this button allows you to access
the following: Action
Menu Item
On
Bluetooth
Off
You must activate Bluetooth to pair a
Bluetooth enabled device.
The processes of pairing a Bluetooth
device is the same as pairing a phone. See
Pairing a Device in Phone settings for how
to pair a device and the available options.
Phone
Pair your Bluetooth enabled phone with
the system before using the functions in
hands-free mode.
Switch on Bluetooth on your device to
begin pairing. See your phone ’s manual if
necessary. To add a phone, select: Menu Item
Add Phone
1. Follow the on-screen instructions.
2. A prompt alerts you to search for the system on your phone.
3. Select your vehicle's make and model as it displays on your phone.
4. Confirm that the six-digit number appearing on your phone matches the
six-digit number on the touchscreen.
5. The touchscreen indicates when the pairing is successful.
477
Expedition (TB8) Canada/United States of America, enUSA, Edition date: 201808, Second-Printing SYNC™ 3
Page 571 of 583
Accessing the Clock Settings.......................
400
Accessing the Media Source Menu............400
Accessing the Phone Features.................... 400
Accessing the Settings Menu....................... 400
Accessing the Sound Settings..................... 400
Adjusting the Volume...................................... 400
Changing Radio Stations............................... 400
Listening to the Radio...................................... 401
Playing or Pausing Media................................ 401
Switching Radio Text On and Off................401
Switching Repeat Mode On and Off...........401
Switching Shuffle Mode On and Off..........401
Switching the Audio Unit On and Off.........401
Switching the Display On and Off...............401
Using Seek, Fast Forward and Reverse.............................................................. 401
Using the Display Control............................... 401
Using the Number Block................................. 401
Autolamps........................................................95 Windshield Wiper Activated
Headlamps........................................................ 95
Automatic Climate Control......................144 Accessing Rear Climate Controls.................144
Directing Air to the Footwell Air
Vents.................................................................. 144
Directing Air to the Instrument Panel Air Vents.................................................................. 144
Setting the Blower Motor Speed.................. 144
Setting the Temperature................................. 144
Switching Auto Mode On and Off................144
Switching Defrost On and Off....................... 145
Switching Dual Zone Mode On and Off........................................................................\
145
Switching Maximum Air Conditioning On and Off............................................................... 145
Switching Maximum Defrost On and Off........................................................................\
145
Switching Recirculated Air On and Off....................................................................... 146
Switching the Air Conditioning On and Off........................................................................\
145
Switching the Climate Control On and Off........................................................................\
145
Switching the Heated Seats On and Off........................................................................\
145
Switching the Ventilated Seats On and Off....................................................................... 146Automatic High Beam Control.................96
Automatic High Beam Indicator..................... 97
Switching the System On and Off.................97
Automatic Transmission...........................199 Automatic Transmission Adaptive
Learning........................................................... 205
Brake-Shift Interlock........................................ 204
If Your Vehicle Gets Stuck In Mud or Snow................................................................. 205
SelectShift™ Automatic Transmission.................................................. 203
Understanding the Shift Positions of your Automatic Transmission............................ 199
Automatic Transmission Fluid Check............................................................339
Auto-Start-Stop...........................................185 Disabling Auto-Start-Stop............................. 186
Enabling Auto-Start-Stop.............................. 185
Autowipers........................................................92
Autowipers Settings............................................ 93
Auxiliary Power Points................................174 110 Volt AC Power Point.................................... 174
12 Volt DC Power Point...................................... 174
USB Port and Power Point Locations..........174
B
Battery See: Changing the 12V Battery...................... 341
Blind Spot Information System
.............254
........................................................................\
.......... 254
Blind Spot Information System with Trailer Tow..................................................................... 256
Switching the System On and Off..............258
System Errors...................................................... 258
Using the Blind Spot Information System.............................................................. 255
BLIS See: Blind Spot Information System..........254
Bonnet Lock See: Opening and Closing the Hood...........331
Booster Seats
...................................................31
Types of Booster Seats...................................... 32
Brake Fluid Check
.......................................340
Brakes................................................................215 General Information.......................................... 215
Breaking-In....................................................303
Bulb Specification Chart..........................396
568
Expedition (TB8) Canada/United States of America, enUSA, Edition date: 201808, Second-Printing Index