2019 FORD EXPEDITION light
[x] Cancel search: lightPage 127 of 583
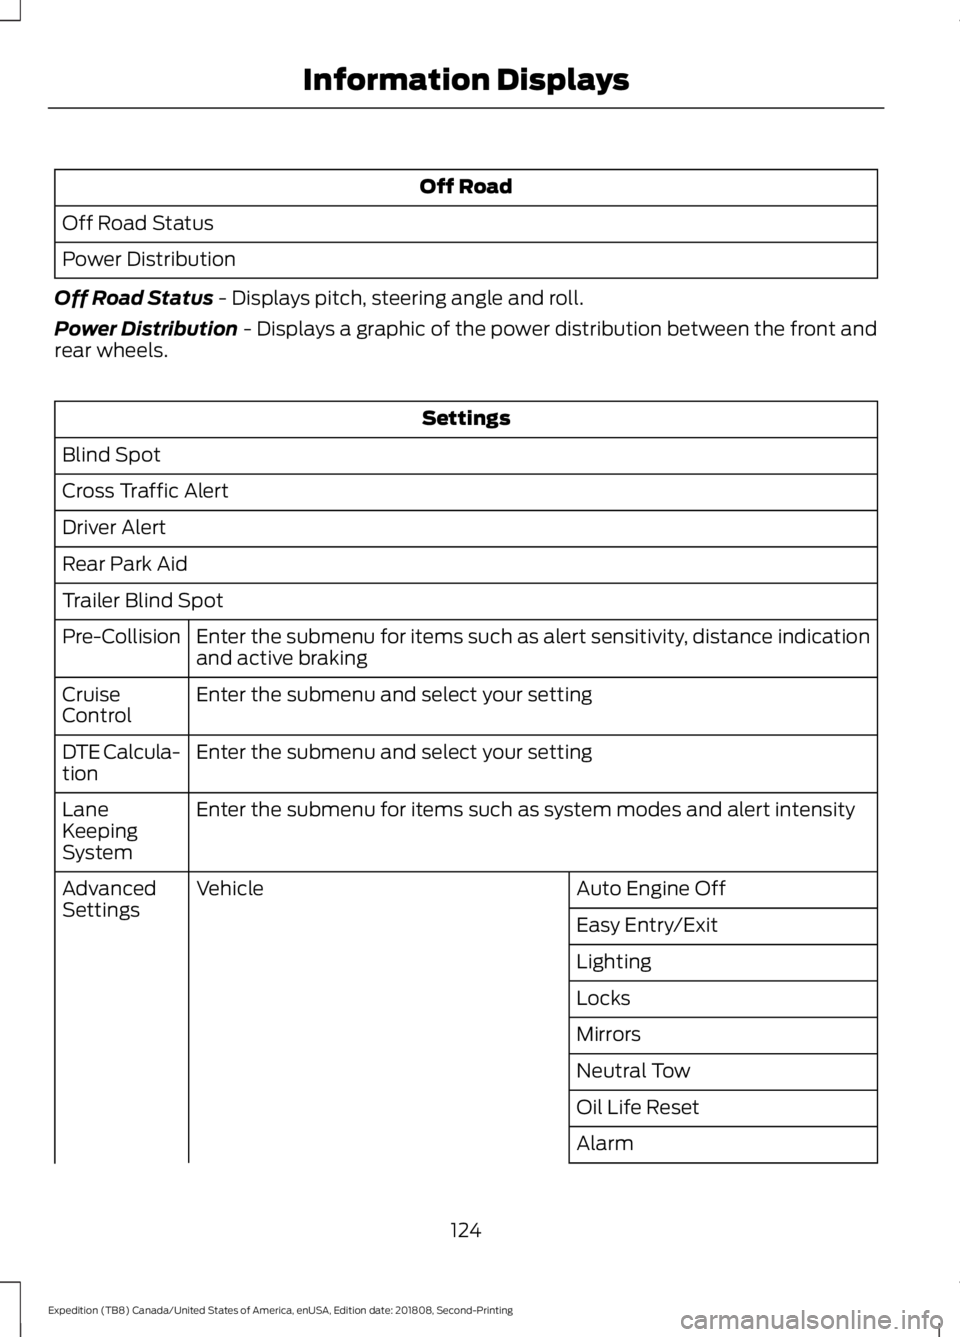
Off Road
Off Road Status
Power Distribution
Off Road Status - Displays pitch, steering angle and roll.
Power Distribution
- Displays a graphic of the power distribution between the front and
rear wheels. Settings
Blind Spot
Cross Traffic Alert
Driver Alert
Rear Park Aid
Trailer Blind Spot Enter the submenu for items such as alert sensitivity, distance indication
and active braking
Pre-Collision
Enter the submenu and select your setting
Cruise
Control
Enter the submenu and select your setting
DTE Calcula-
tion
Enter the submenu for items such as system modes and alert intensity
Lane
Keeping
System
Auto Engine Off
Vehicle
Advanced
Settings
Easy Entry/Exit
Lighting
Locks
Mirrors
Neutral Tow
Oil Life Reset
Alarm
124
Expedition (TB8) Canada/United States of America, enUSA, Edition date: 201808, Second-Printing Information Displays
Page 144 of 583
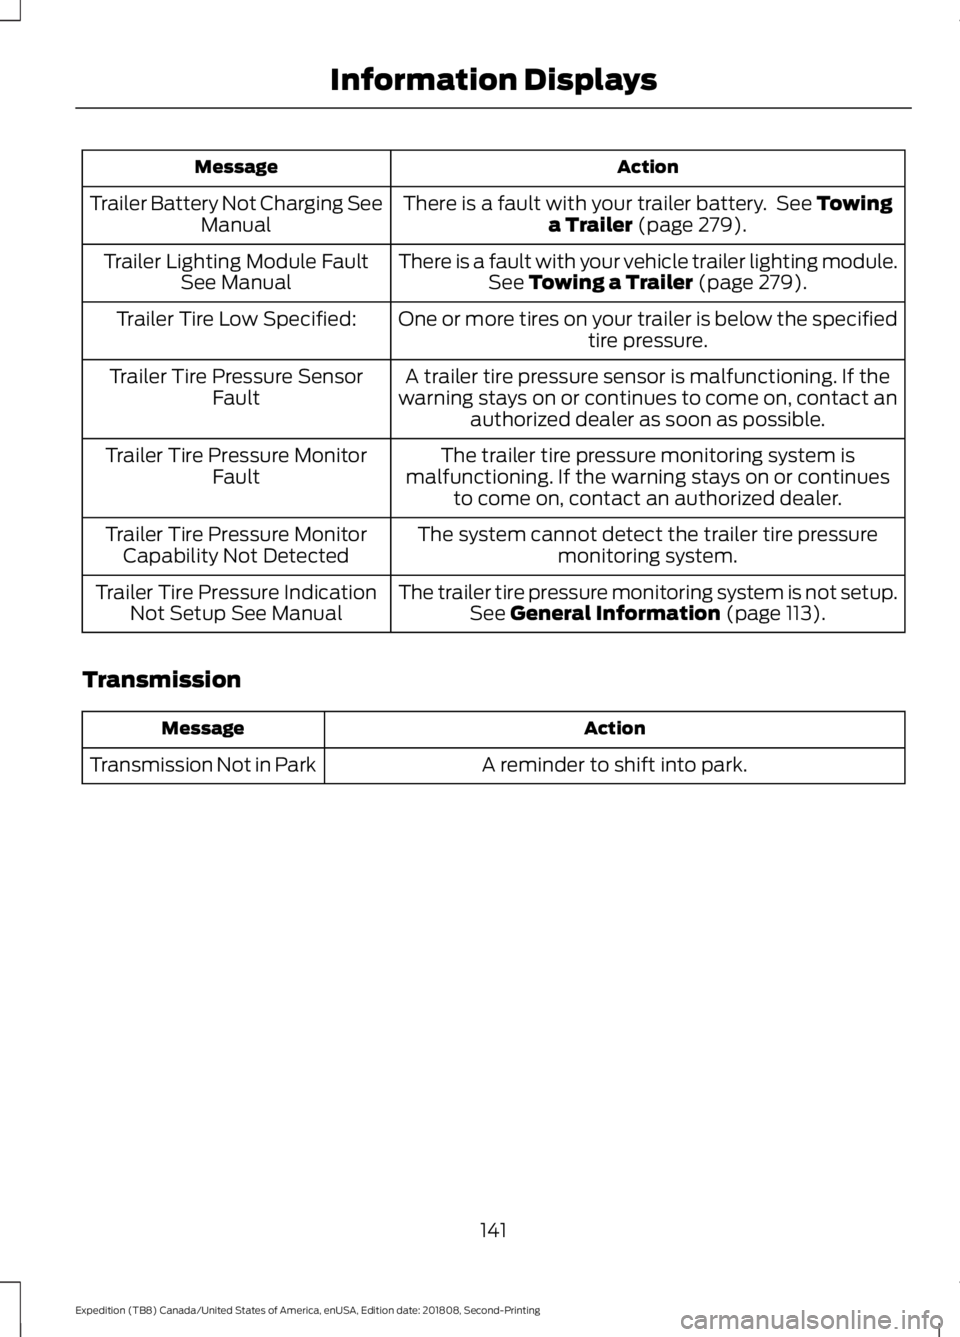
Action
Message
There is a fault with your trailer battery. See Towing
a Trailer (page 279).
Trailer Battery Not Charging See
Manual
There is a fault with your vehicle trailer lighting module.See
Towing a Trailer (page 279).
Trailer Lighting Module Fault
See Manual
One or more tires on your trailer is below the specifiedtire pressure.
Trailer Tire Low Specified:
A trailer tire pressure sensor is malfunctioning. If the
warning stays on or continues to come on, contact an authorized dealer as soon as possible.
Trailer Tire Pressure Sensor
Fault
The trailer tire pressure monitoring system is
malfunctioning. If the warning stays on or continues to come on, contact an authorized dealer.
Trailer Tire Pressure Monitor
Fault
The system cannot detect the trailer tire pressuremonitoring system.
Trailer Tire Pressure Monitor
Capability Not Detected
The trailer tire pressure monitoring system is not setup.See
General Information (page 113).
Trailer Tire Pressure Indication
Not Setup See Manual
Transmission Action
Message
A reminder to shift into park.
Transmission Not in Park
141
Expedition (TB8) Canada/United States of America, enUSA, Edition date: 201808, Second-Printing Information Displays
Page 156 of 583
SITTING IN THE CORRECT
POSITION
WARNING: Sitting improperly, out
of position or with the seatback reclined
too far can take weight off the seat
cushion and affect the decision of the
passenger sensing system, resulting in
serious injury or death in the event of a
crash. Always sit upright against your
seat back, with your feet on the floor. WARNING:
Do not recline the
seatback too far as this can cause the
occupant to slide under the seatbelt,
resulting in serious injury in the event of
a collision. WARNING:
Do not place objects
higher than the top of the seat backrest.
Failure to follow this instruction could
result in personal injury or death in the
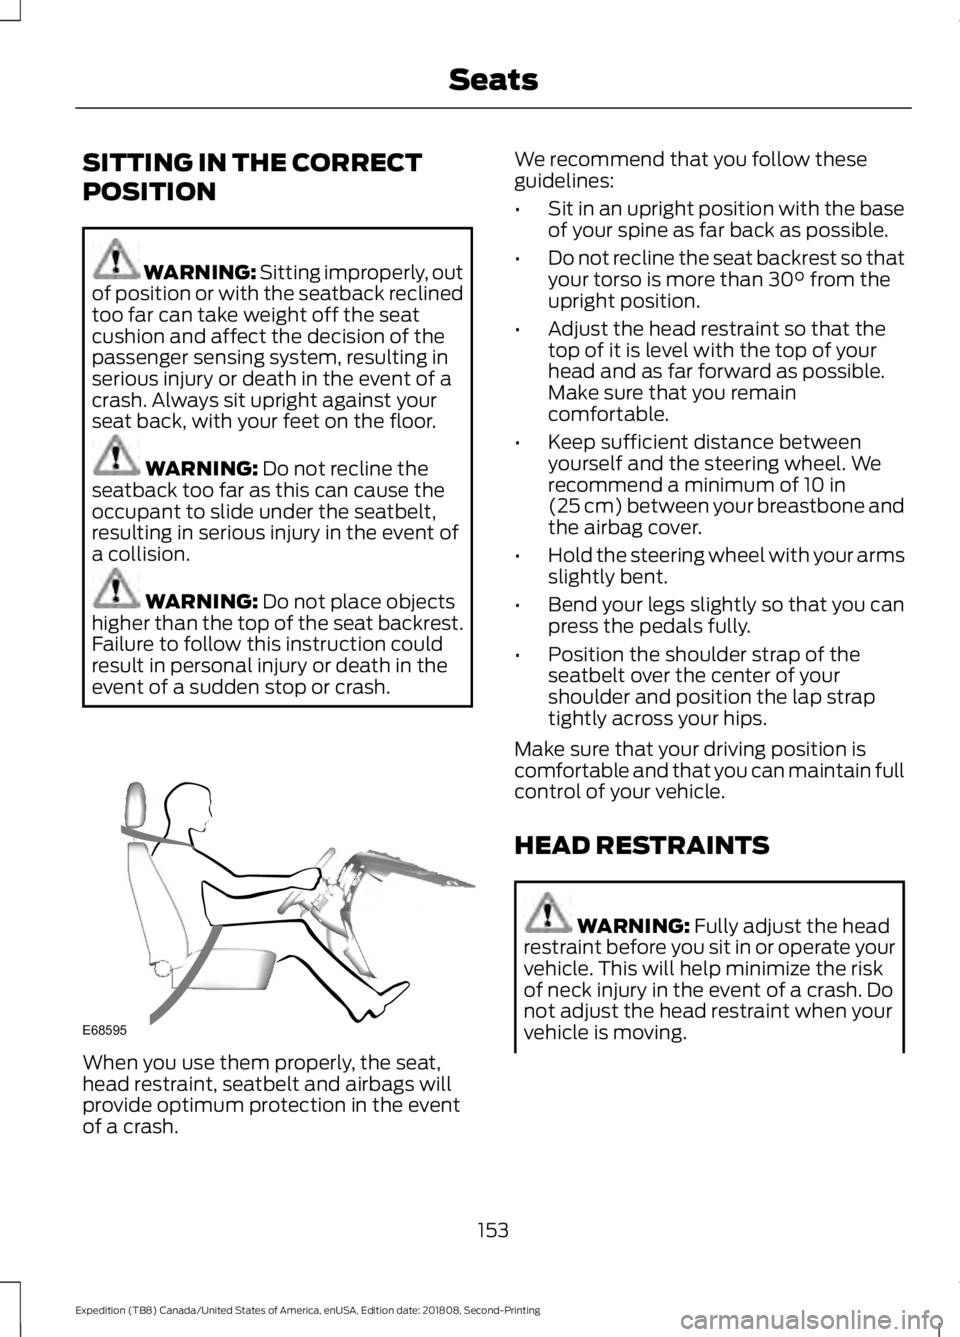
event of a sudden stop or crash. When you use them properly, the seat,
head restraint, seatbelt and airbags will
provide optimum protection in the event
of a crash. We recommend that you follow these
guidelines:
•
Sit in an upright position with the base
of your spine as far back as possible.
• Do not recline the seat backrest so that
your torso is more than
30° from the
upright position.
• Adjust the head restraint so that the
top of it is level with the top of your
head and as far forward as possible.
Make sure that you remain
comfortable.
• Keep sufficient distance between
yourself and the steering wheel. We
recommend a minimum of
10 in
(25 cm) between your breastbone and
the airbag cover.
• Hold the steering wheel with your arms
slightly bent.
• Bend your legs slightly so that you can
press the pedals fully.
• Position the shoulder strap of the
seatbelt over the center of your
shoulder and position the lap strap
tightly across your hips.
Make sure that your driving position is
comfortable and that you can maintain full
control of your vehicle.
HEAD RESTRAINTS WARNING:
Fully adjust the head
restraint before you sit in or operate your
vehicle. This will help minimize the risk
of neck injury in the event of a crash. Do
not adjust the head restraint when your
vehicle is moving.
153
Expedition (TB8) Canada/United States of America, enUSA, Edition date: 201808, Second-Printing SeatsE68595
Page 170 of 583
Do not do the following:
•
Place heavy objects on the seat.
• Operate the heated seat if water or any
other liquid spills on the seat. Allow the
seat to dry thoroughly.
• Operate the heated seats unless the
engine is running. Doing so can cause
the battery to lose charge. Press the heated seat symbol to cycle
through the various heat settings and off.
More indicator lights indicate warmer
settings.
Rear Seats
WARNING: Persons who are
unable to feel pain to the skin because
of advanced age, chronic illness,
diabetes, spinal cord injury, medication,
alcohol use, exhaustion, or other physical
conditions, must exercise care when
using the seat heater. The seat heater
may cause burns even at low
temperatures, especially if used for long
periods of time. Do not place anything
on the seat that insulates against heat,
such as a blanket or cushion, because
this may cause the seat heater to
overheat. Do not puncture the seat with
pins, needles, or other pointed objects
because this may damage the heating
element which may cause the seat
heater to overheat. An overheated seat
may cause serious personal injury. Do not do the following:
•
Place heavy objects on the seat.
• Operate the seat heater if water or any
other liquid is spilled on the seat. Allow
the seat to dry thoroughly.
• Operate the heated seats unless the
engine is running. Doing so can cause
the battery to lose charge.
The rear seat heat controls are located on
the rear of the center console. Press the heated seat symbol to cycle
through the various heat settings and off.
More indicator lights indicate warmer
settings.
The heated seat module resets at every
ignition run cycle. While the ignition is on,
press the high or low heated seat switch
to enable heating mode. When activated,
they will turn off automatically when you
turn the engine off.
CLIMATE CONTROLLED SEATS
(IF EQUIPPED)
Heated Seats
167
Expedition (TB8) Canada/United States of America, enUSA, Edition date: 201808, Second-Printing SeatsE146322 E146322
Page 171 of 583
WARNING: Use caution when
using the heated seat if you are unable
to feel pain to your skin because of
advanced age, chronic illness, diabetes,
spinal cord injury, medication, alcohol
use, exhaustion or other physical
conditions. The heated seat could cause
burns even at low temperatures,
especially if used for long periods of time.
Failure to follow this instruction could
result in personal injury. WARNING:
Do not poke sharp
objects into the seat cushion or seat
backrest. This could damage the heated
seat element and cause it to overheat.
Failure to follow this instruction could
result in personal injury. WARNING:
Do not place anything
on the seat that blocks the heat, for
example a seat cover or a cushion. This
could cause the seat to overheat. Failure
to follow this instruction could result in
personal injury.
Note: The heated seats switch on during a
remote start if they are enabled. See
Remote Start
(page 151).
Note: The heated seats may also switch
on when you start your vehicle if they were
on when you previously switched your
vehicle off.
Note: Do not do the following:
• Place heavy objects on the seat.
• Operate the seat heater if water or any
other liquid spills on the seat. Allow the
seat to dry thoroughly. Press this symbol to cycle through the
various heat settings and off. More
indicator lights indicate warmer settings.
Ventilated Seats
Note:
The ventilated seats switch on during
a remote start if they are enabled. See
Remote Start
(page 151).
Note: The ventilated seats may also switch
on when you start your vehicle if they were
on when you previously switched your
vehicle off.
Note: Do not do the following:
• Spill liquid on the front seats. This may
cause the air vent holes to become
blocked and not work properly.
• Place cargo or objects under the seats.
They may block the air intake causing
the air vents to not work properly.
The ventilated seats only function when
the engine is running. Press this symbol to cycle through the
various ventilation settings and off. More
indicator lights indicate higher fan speeds.
If the engine falls below 350 RPM while
the ventilated seats are on, the feature
turns itself off. You need to reactivate it.
168
Expedition (TB8) Canada/United States of America, enUSA, Edition date: 201808, Second-Printing SeatsE146322 E224689
Page 173 of 583
UNIVERSAL GARAGE DOOR
OPENER
HomeLink Wireless Control
System
WARNING: Make sure that the
garage door and security device are free
from obstruction when you are
programming. Do not program the
system with the vehicle in the garage. WARNING:
Do not use the system
with any garage door opener that does
not have the safety stop and reverse
feature as required by U.S. Federal
Safety Standards (this includes any
garage door opener manufactured
before April 1, 1982). A garage door
opener which cannot detect an object,
signaling the door to stop and reverse,
does not meet current federal safety
standards. Using a garage door opener
without these features increases the risk
of serious injury or death.
Note: Make sure you keep the original
remote control transmitter for use in other
vehicles as well as for future system
programming.
Note: We recommend that upon the sale
or lease termination of your vehicle, you
erase the programmed function buttons for
security reasons. See Erasing the Function
Button Codes
later in this section.
Note: You can program a maximum of
three devices. To change or replace any of
the three devices after it has been initially
programmed, you must first erase the
current settings. See Erasing the Function
Button Codes
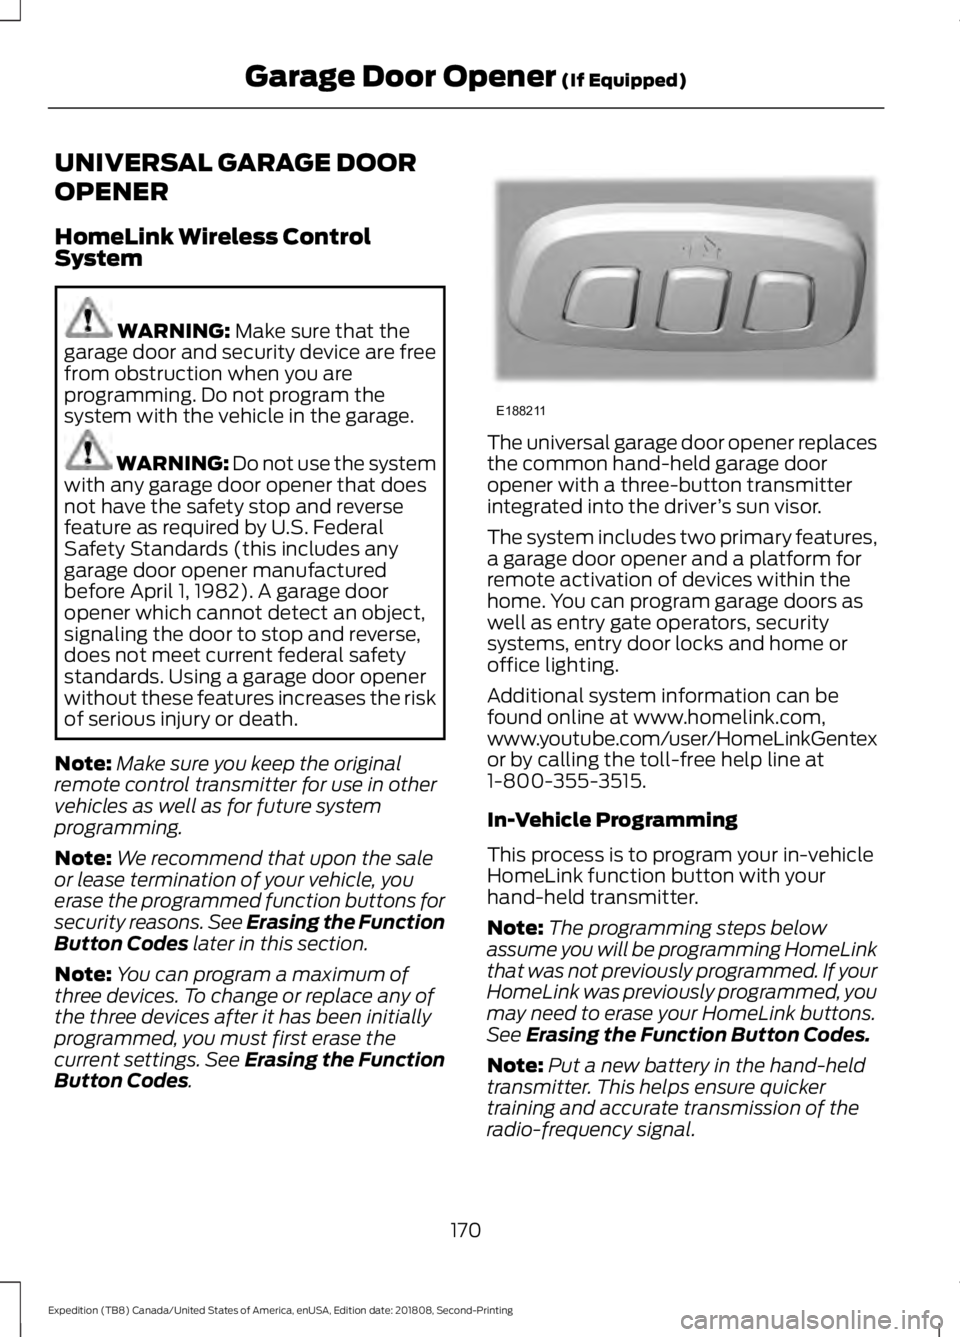
. The universal garage door opener replaces
the common hand-held garage door
opener with a three-button transmitter
integrated into the driver
’s sun visor.
The system includes two primary features,
a garage door opener and a platform for
remote activation of devices within the
home. You can program garage doors as
well as entry gate operators, security
systems, entry door locks and home or
office lighting.
Additional system information can be
found online at www.homelink.com,
www.youtube.com/user/HomeLinkGentex
or by calling the toll-free help line at
1-800-355-3515.
In-Vehicle Programming
This process is to program your in-vehicle
HomeLink function button with your
hand-held transmitter.
Note: The programming steps below
assume you will be programming HomeLink
that was not previously programmed. If your
HomeLink was previously programmed, you
may need to erase your HomeLink buttons.
See
Erasing the Function Button Codes.
Note: Put a new battery in the hand-held
transmitter. This helps ensure quicker
training and accurate transmission of the
radio-frequency signal.
170
Expedition (TB8) Canada/United States of America, enUSA, Edition date: 201808, Second-Printing Garage Door Opener
(If Equipped)E188211
Page 174 of 583
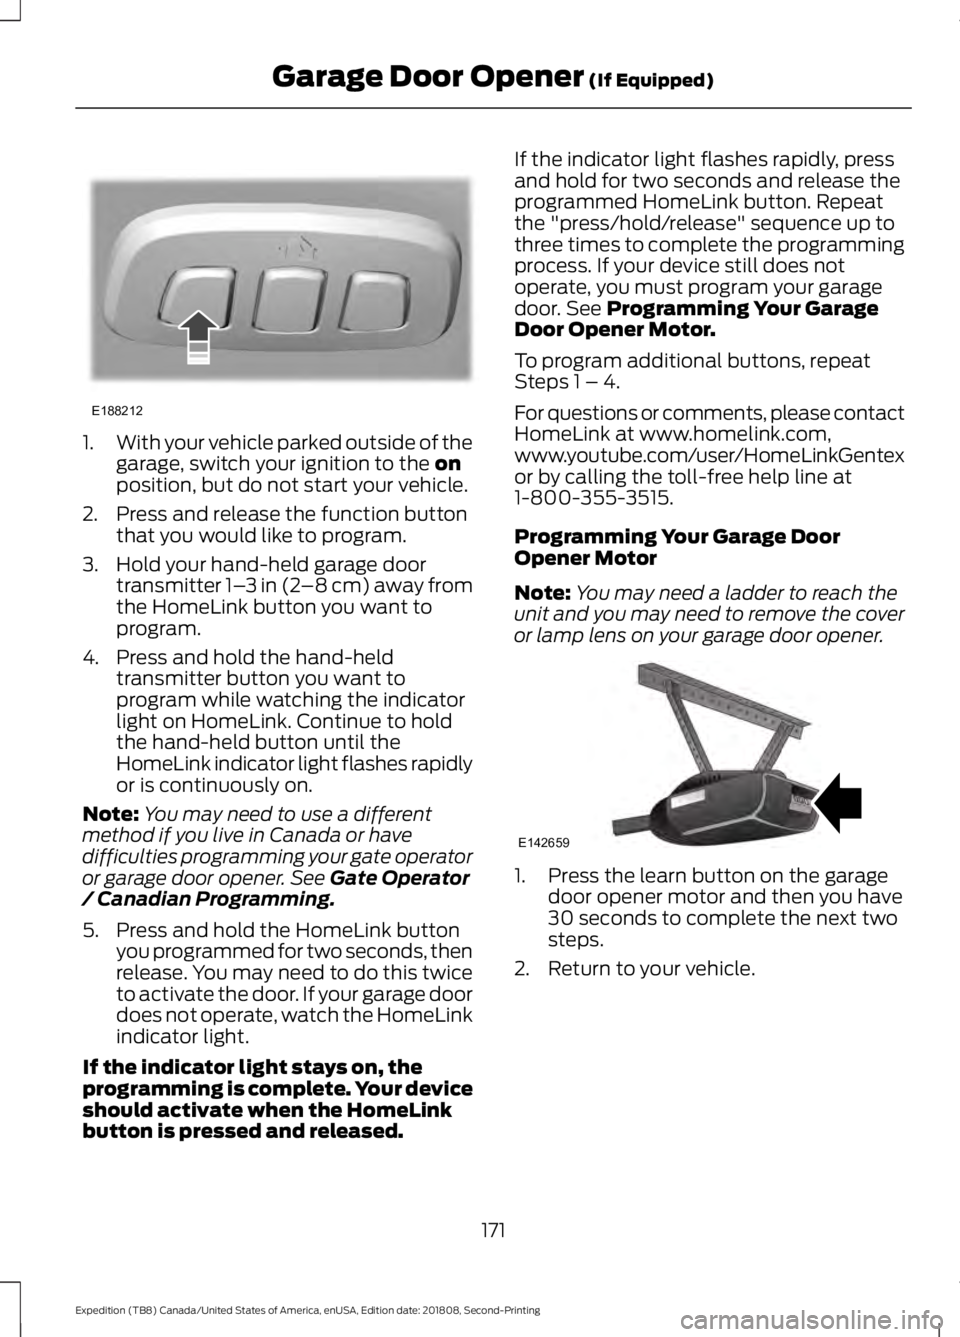
1.
With your vehicle parked outside of the
garage, switch your ignition to the on
position, but do not start your vehicle.
2. Press and release the function button that you would like to program.
3. Hold your hand-held garage door transmitter 1– 3 in (2–8 cm) away from
the HomeLink button you want to
program.
4. Press and hold the hand-held transmitter button you want to
program while watching the indicator
light on HomeLink. Continue to hold
the hand-held button until the
HomeLink indicator light flashes rapidly
or is continuously on.
Note: You may need to use a different
method if you live in Canada or have
difficulties programming your gate operator
or garage door opener. See
Gate Operator
/ Canadian Programming.
5. Press and hold the HomeLink button you programmed for two seconds, then
release. You may need to do this twice
to activate the door. If your garage door
does not operate, watch the HomeLink
indicator light.
If the indicator light stays on, the
programming is complete. Your device
should activate when the HomeLink
button is pressed and released. If the indicator light flashes rapidly, press
and hold for two seconds and release the
programmed HomeLink button. Repeat
the "press/hold/release" sequence up to
three times to complete the programming
process. If your device still does not
operate, you must program your garage
door. See
Programming Your Garage
Door Opener Motor.
To program additional buttons, repeat
Steps 1 – 4.
For questions or comments, please contact
HomeLink at www.homelink.com,
www.youtube.com/user/HomeLinkGentex
or by calling the toll-free help line at
1-800-355-3515.
Programming Your Garage Door
Opener Motor
Note: You may need a ladder to reach the
unit and you may need to remove the cover
or lamp lens on your garage door opener. 1. Press the learn button on the garage
door opener motor and then you have
30 seconds to complete the next two
steps.
2. Return to your vehicle.
171
Expedition (TB8) Canada/United States of America, enUSA, Edition date: 201808, Second-Printing Garage Door Opener
(If Equipped)E188212 E142659
Page 175 of 583
3.
Press and hold the function button you
want to program for 2 seconds, then
release. Repeat this step. Depending
on your brand of garage door opener,
you may need to repeat this sequence
a third time.
Gate Operator / Canadian
Programming
Canadian radio-frequency laws require
transmitter signals to “time-out” (or quit)
after several seconds of transmission –
which may not be long enough for
HomeLink to pick up the signal during
programming. Similar to this Canadian law,
some U.S. gate operators are designed to
“time-out” in the same manner.
Note: If programming a garage door opener
or gate operator, it is advised to unplug the
device during the “cycling” process to
prevent possible overheating.
1. Press and release, every two seconds,
your hand-held transmitter until the
HomeLink indicator light changes to a
rapidly blinking or continuously on light.
2. Release the hand-held transmitter button.
3. Continue programing HomeLink. See In-Vehicle Programming, Step 4.
Erasing the Function Button Codes
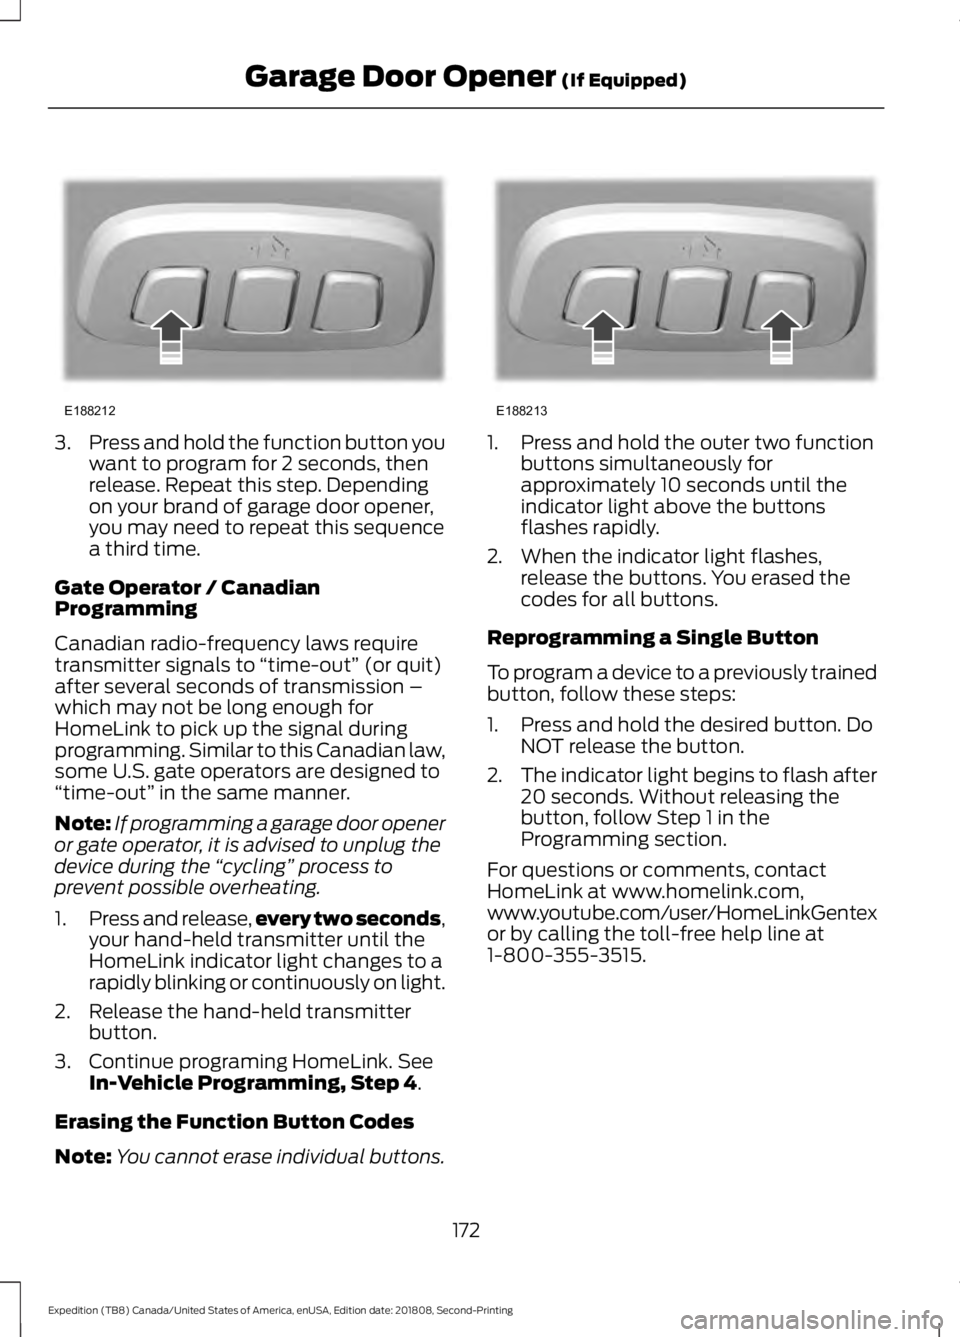
Note: You cannot erase individual buttons. 1. Press and hold the outer two function
buttons simultaneously for
approximately 10 seconds until the
indicator light above the buttons
flashes rapidly.
2. When the indicator light flashes, release the buttons. You erased the
codes for all buttons.
Reprogramming a Single Button
To program a device to a previously trained
button, follow these steps:
1. Press and hold the desired button. Do NOT release the button.
2. The indicator light begins to flash after
20 seconds. Without releasing the
button, follow Step 1 in the
Programming section.
For questions or comments, contact
HomeLink at www.homelink.com,
www.youtube.com/user/HomeLinkGentex
or by calling the toll-free help line at
1-800-355-3515.
172
Expedition (TB8) Canada/United States of America, enUSA, Edition date: 201808, Second-Printing Garage Door Opener
(If Equipped)E188212 E188213