2019 FORD EXPEDITION window
[x] Cancel search: windowPage 80 of 583

Closing the Liftgate
A handle is inside the liftgate to help with
closing.
POWER LIFTGATE (IF EQUIPPED)
WARNING:
It is extremely
dangerous to ride in a cargo area, inside
or outside of a vehicle. In a crash, people
riding in these areas are more likely to be
seriously injured or killed. Do not allow
people to ride in any area of your vehicle
that is not equipped with seats and
seatbelts. Make sure everyone in your
vehicle is in a seat and properly using a
seatbelt. Failure to follow this warning
could result in serious personal injury or
death. WARNING:
Make sure that you
fully close the liftgate to prevent exhaust
fumes from entering your vehicle. If you
are unable to fully close the tailgate,
open the air vents or the windows to
allow fresh air to enter your vehicle.
Failure to follow this instruction could
result in personal injury or death. WARNING:
Make sure that you
fully close the liftgate to prevent
passengers and cargo from falling out.
Failure to follow this instruction could
result in personal injury or death. WARNING:
Keep keys out of reach
of children. Do not allow children to
operate or play near an open or moving
power liftgate. You should supervise the
operation of the power liftgate at all
times.
Note: Make sure that you close the liftgate
before operating or moving your vehicle,
especially in an enclosure, like a garage or
a parking structure. This could damage the
liftgate and its components.
Note: Do not hang anything, for example
a bike rack, from the glass or liftgate. This
could damage the liftgate and its
components.
The liftgate only operates with the
transmission in park (P).
Three warning tones sound as the liftgate
begins to power close. If there is a problem
with the open or close request, one of the
following may occur:
• One tone sounds if the ignition is on
and the transmission is not in park (P).
• Three tones sound if the battery
voltage is below the minimum
operating voltage.
• One tone sounds if the vehicle speed
is at or above
3 mph (5 km/h).
77
Expedition (TB8) Canada/United States of America, enUSA, Edition date: 201808, Second-Printing LiftgateE252964
Page 82 of 583
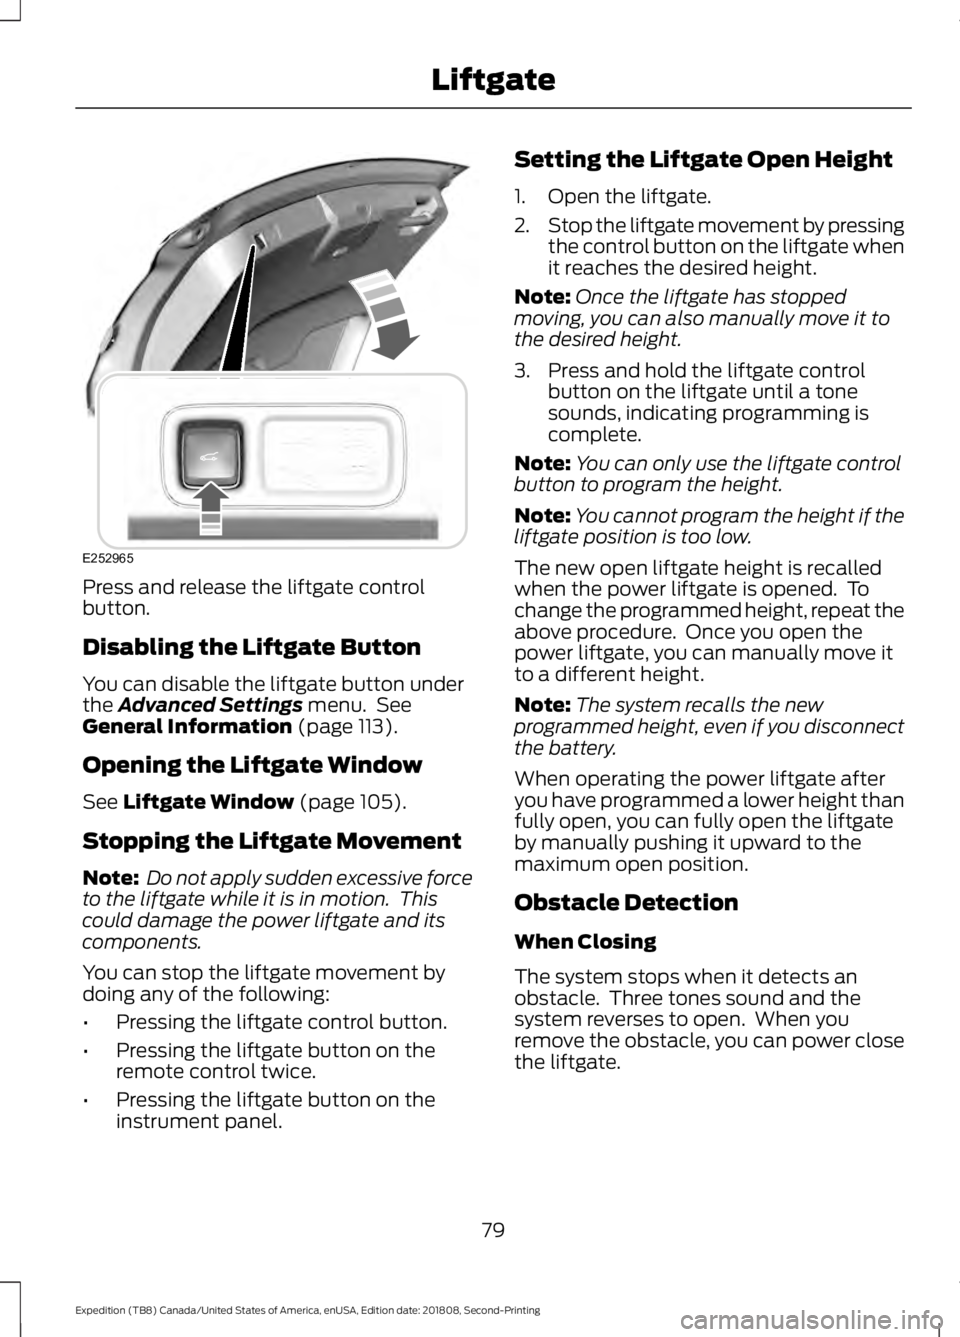
Press and release the liftgate control
button.
Disabling the Liftgate Button
You can disable the liftgate button under
the Advanced Settings menu. See
General Information (page 113).
Opening the Liftgate Window
See
Liftgate Window (page 105).
Stopping the Liftgate Movement
Note: Do not apply sudden excessive force
to the liftgate while it is in motion. This
could damage the power liftgate and its
components.
You can stop the liftgate movement by
doing any of the following:
• Pressing the liftgate control button.
• Pressing the liftgate button on the
remote control twice.
• Pressing the liftgate button on the
instrument panel. Setting the Liftgate Open Height
1. Open the liftgate.
2.
Stop the liftgate movement by pressing
the control button on the liftgate when
it reaches the desired height.
Note: Once the liftgate has stopped
moving, you can also manually move it to
the desired height.
3. Press and hold the liftgate control button on the liftgate until a tone
sounds, indicating programming is
complete.
Note: You can only use the liftgate control
button to program the height.
Note: You cannot program the height if the
liftgate position is too low.
The new open liftgate height is recalled
when the power liftgate is opened. To
change the programmed height, repeat the
above procedure. Once you open the
power liftgate, you can manually move it
to a different height.
Note: The system recalls the new
programmed height, even if you disconnect
the battery.
When operating the power liftgate after
you have programmed a lower height than
fully open, you can fully open the liftgate
by manually pushing it upward to the
maximum open position.
Obstacle Detection
When Closing
The system stops when it detects an
obstacle. Three tones sound and the
system reverses to open. When you
remove the obstacle, you can power close
the liftgate.
79
Expedition (TB8) Canada/United States of America, enUSA, Edition date: 201808, Second-Printing LiftgateE252965
Page 86 of 583
2. Insert the first programmed key in the
backup slot.
3. Press the push button ignition switch.
4. Wait five seconds and then press the push button ignition switch again.
5. Remove the intelligent access key.
6. Within 10 seconds, place a second programmed intelligent access key in
the backup slot and press the push
button ignition switch.
7. Wait five seconds and then press the push button ignition switch again.
8. Remove the intelligent access key.
9. Wait five seconds, then place the unprogrammed intelligent access key
in the backup slot and press the push
button ignition switch.
10. Once complete, the information cluster displays a message
confirming the key has been
programmed. The direction indicators
flash and the horn sounds.
Programming is now complete. Check that
the remote control functions operate and
your vehicle starts with the new intelligent
access key.
If programming was unsuccessful, wait 10
seconds and repeat steps 1 through 7. If it
still does not work, take your vehicle to an
authorized dealer.
ANTI-THEFT ALARM
The active anti-theft system is designed
to warn you in the event of unauthorized
vehicle entry and is also designed to help
prevent unwanted towing of your vehicle.
You can choose what is monitored by
arming the system in different ways. See
Information Displays (page 113).
The direction indicators flash and the horn
sounds if the system triggers while the
alarm is armed. Take all remote controls to an authorized
dealer if there is any potential alarm
problem with your vehicle.
Using the System
You can select two levels of alarm security.
You can change the level of security when
the ignition is switched off through the
information display with the two options
below:
Perimeter Only (If Equipped)
Perimeter only monitors the following:
•
Doors.
• Hood.
• Liftgate.
All Sensors (If Equipped)
All sensors monitors the following:
• Doors.
• Hood.
• Liftgate.
• Movement inside your vehicle.
• Change in vehicle inclination, for
example, unwanted towing.
Note: Do not choose all sensors monitor
mode when the vehicle is in transport or if
movement within the vehicle is likely to
occur.
Note: For correct operation of the interior
motion detection system, make sure you
close all the windows prior to arming the
system. This helps prevent accidental alarm
activation due to external influences.
Additionally, the interior motion sensing
system does not arm if any door is ajar.
83
Expedition (TB8) Canada/United States of America, enUSA, Edition date: 201808, Second-Printing Security
Page 96 of 583
In these conditions, you can do the
following:
•
Lower the sensitivity of the autowipers
to reduce the amount of smearing on
the windshield.
• Switch to normal or high-speed wipe.
• Switch autowipers off.
Autowipers Settings
Autowipers default to on and remain on
until you switch them off in the information
display. When you switch off autowipers,
the wipers operate in intermittent mode.
WINDSHIELD WASHERS
Note: Do not operate the wipers on a dry
windshield. This may scratch the glass,
damage the wiper blades or cause the wiper
motor to burn out. Always use the
windshield washers before wiping a dry
windshield.
Note: Do not operate the washers when
the washer reservoir is empty. This may
cause the washer pump to overheat. •
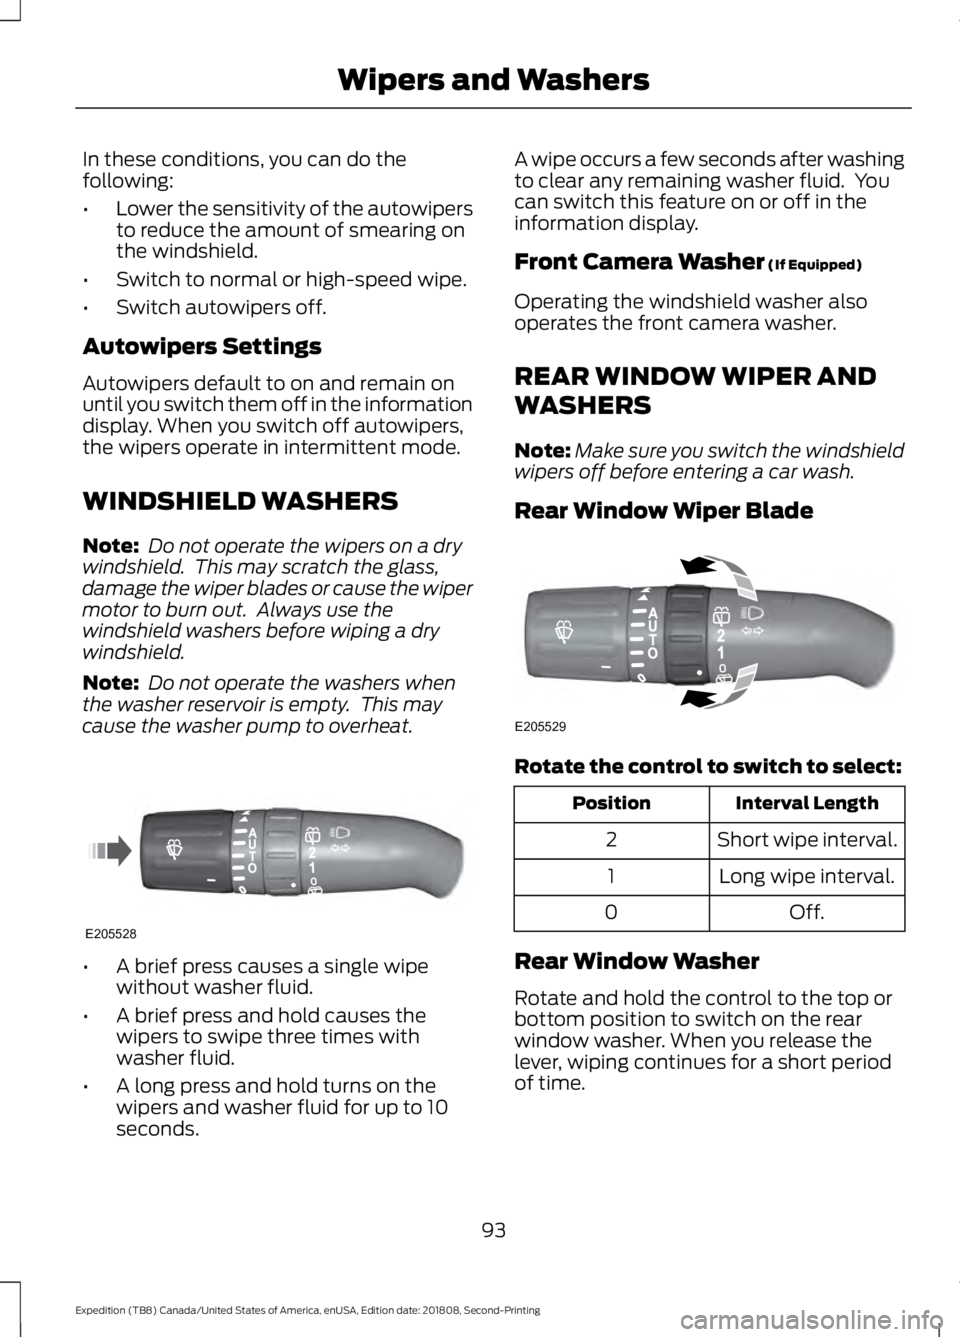
A brief press causes a single wipe
without washer fluid.
• A brief press and hold causes the
wipers to swipe three times with
washer fluid.
• A long press and hold turns on the
wipers and washer fluid for up to 10
seconds. A wipe occurs a few seconds after washing
to clear any remaining washer fluid. You
can switch this feature on or off in the
information display.
Front Camera Washer (If Equipped)
Operating the windshield washer also
operates the front camera washer.
REAR WINDOW WIPER AND
WASHERS
Note: Make sure you switch the windshield
wipers off before entering a car wash.
Rear Window Wiper Blade Rotate the control to switch to select:
Interval Length
Position
Short wipe interval.
2
Long wipe interval.
1
Off.
0
Rear Window Washer
Rotate and hold the control to the top or
bottom position to switch on the rear
window washer. When you release the
lever, wiping continues for a short period
of time.
93
Expedition (TB8) Canada/United States of America, enUSA, Edition date: 201808, Second-Printing Wipers and WashersE205528 E205529
Page 102 of 583
Press to switch the right-hand
individual dome lamp on and off.
Interior Lamp Function Press to switch the interior lamp
function on and off.
When the interior lamp function is off and
you open a door, the courtesy and door
lamps stay off.
When the interior lamp function is on and
you open a door, the courtesy and door
lamps turn on.
Note: The indicator lamp lights amber
when the door function is off.
Individual Map Lamps
Press a map lens to switch individual map
lamps on and off independently.
Rear Interior Lamps
The rear interior lamps may be above the
rear seat or above the rear windows. Press to switch the lamps on or
off.
AMBIENT LIGHTING (IF EQUIPPED)
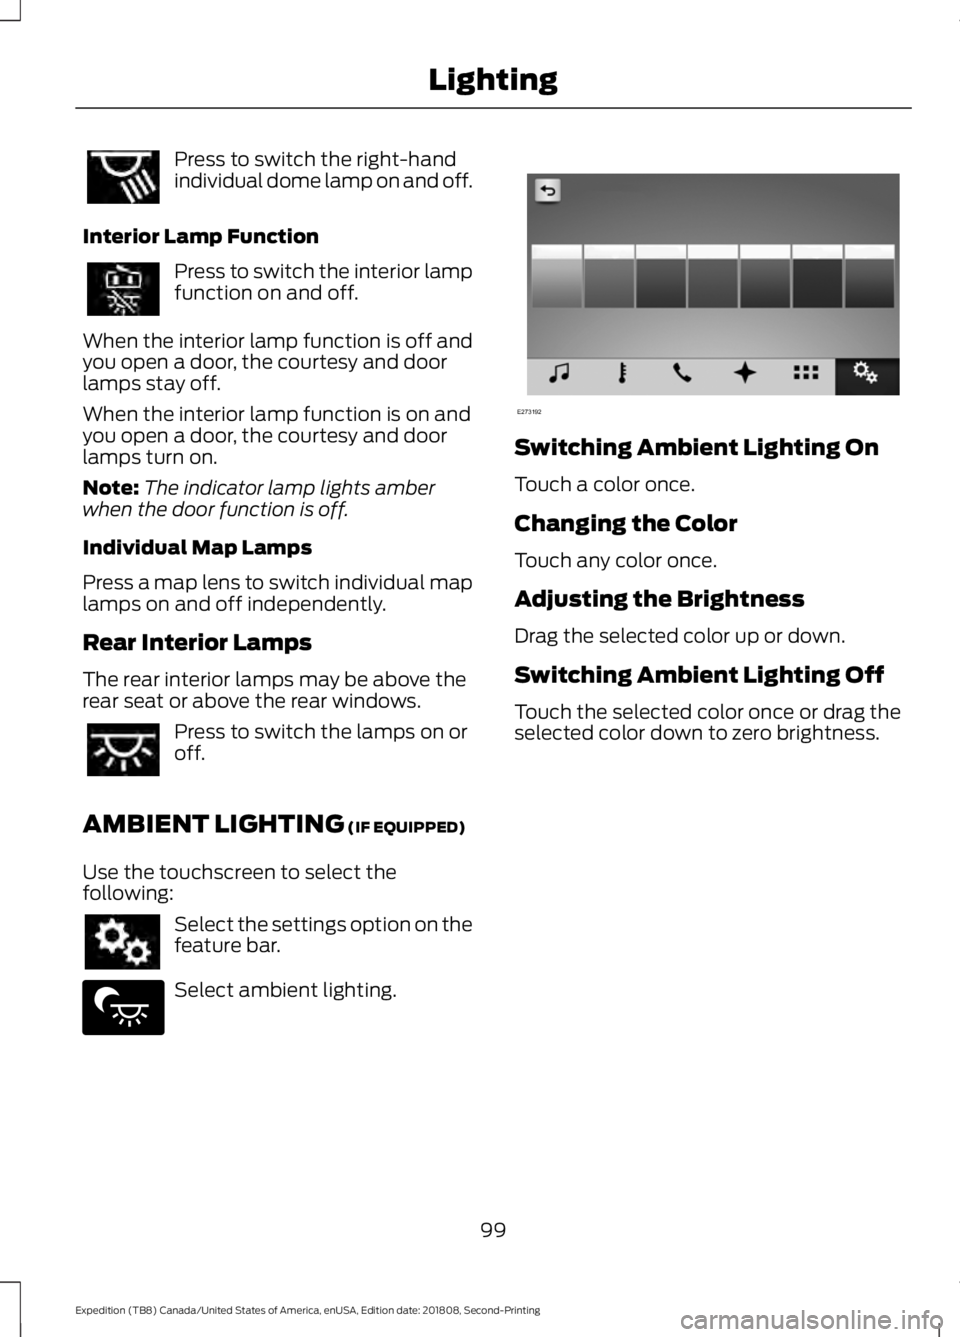
Use the touchscreen to select the
following: Select the settings option on the
feature bar.
Select ambient lighting. Switching Ambient Lighting On
Touch a color once.
Changing the Color
Touch any color once.
Adjusting the Brightness
Drag the selected color up or down.
Switching Ambient Lighting Off
Touch the selected color once or drag the
selected color down to zero brightness.
99
Expedition (TB8) Canada/United States of America, enUSA, Edition date: 201808, Second-Printing Lighting E279027 E273192
Page 103 of 583
POWER WINDOWS
WARNING: Do not leave children
unattended in your vehicle and do not
let them play with the power windows.
Failure to follow this instruction could
result in personal injury. WARNING:
When closing the
power windows, verify they are free of
obstruction and make sure that children
and pets are not in the proximity of the
window openings. Note:
You may hear a pulsing noise when
just one of the windows is open. Lower the
opposite window slightly to reduce this
noise.
Press the control to open the window.
Lift the control to close the window.
One-Touch Down
Press the control to open the window.
Press again or lift it to stop the window.
One-Touch Up
Lift the control fully and release it. Press
again or lift it to stop the window.
Bounce-Back
The window stops and reverses some
distance if it detects an obstacle when
closing. Overriding the Bounce-Back Feature WARNING:
If you override
bounce-back, the window does not
reverse if it detects an obstacle. Take
care when closing the windows to avoid
personal injury or damage to your
vehicle.
Pull up the window switch and hold within
a few seconds of the window reaching the
bounce-back position. The window travels
up with no bounce-back protection. The
window stops if you release the switch
before the window fully closes.
Window Lock Press the control to lock or
unlock the rear window controls.
It illuminates when you lock the
rear window controls.
Accessory
The window switches remain operational
for several minutes when you switch the
ignition off or until you open either front
door.
GLOBAL OPENING
(IF EQUIPPED)
You can use the remote control to open
the windows and vent the moonroof with
the ignition off.
Note: You can enable or disable this feature
in the information display, or see an
authorized dealer.
Note: To operate this feature, accessory
delay must not be active.
100
Expedition (TB8) Canada/United States of America, enUSA, Edition date: 201808, Second-Printing Windows and Mirrors
Page 104 of 583

Remote Control Front Windows
You can open the windows for a short time
after you unlock your vehicle with the
remote control. After you unlock your
vehicle, press and hold the remote control
unlock button to open the windows.
Release the button once movement starts.
Press the lock or unlock button to stop
movement.
Moonroof (If Equipped)
You can vent the moonroof after you
unlock your vehicle with the remote
control. After you unlock your vehicle, press
and hold the remote control unlock button
to vent the moonroof. Release the button
once movement starts. Press the lock or
unlock button to stop movement.
EXTERIOR MIRRORS
Power Exterior Mirrors WARNING:
Do not adjust the
mirrors when your vehicle is moving. This
could result in the loss of control of your
vehicle, serious personal injury or death.
Note: Do not use an ice scraper on the
mirror glass or housing. Left-hand mirror.
A
Right-hand mirror.
B
Adjustment control.
C
Window lockout.
D
Power-folding mirror control.
E
To adjust a mirror:
1. Select the mirror you want to adjust. The control lights.
2. Adjust the position of the mirror.
3. Press the mirror control again.
Fold-Away Exterior Mirrors
Push the mirror toward the door window
glass. Make sure that you fully engage the
mirror in its support when returning it to its
original position.
Auto-Folding Mirrors
(If Equipped)
The exterior mirrors automatically fold in
toward the glass after you place the
transmission into park (P), switch off the
vehicle, open and close the driver-side door
and lock the vehicle. The exterior mirrors
automatically unfold and return to their
driving position after you unlock the vehicle
and open and close the driver-side door.
You can switch this feature on and off
through the information display.
See
General Information (page 113).
101
Expedition (TB8) Canada/United States of America, enUSA, Edition date: 201808, Second-Printing Windows and MirrorsE176219
Page 105 of 583
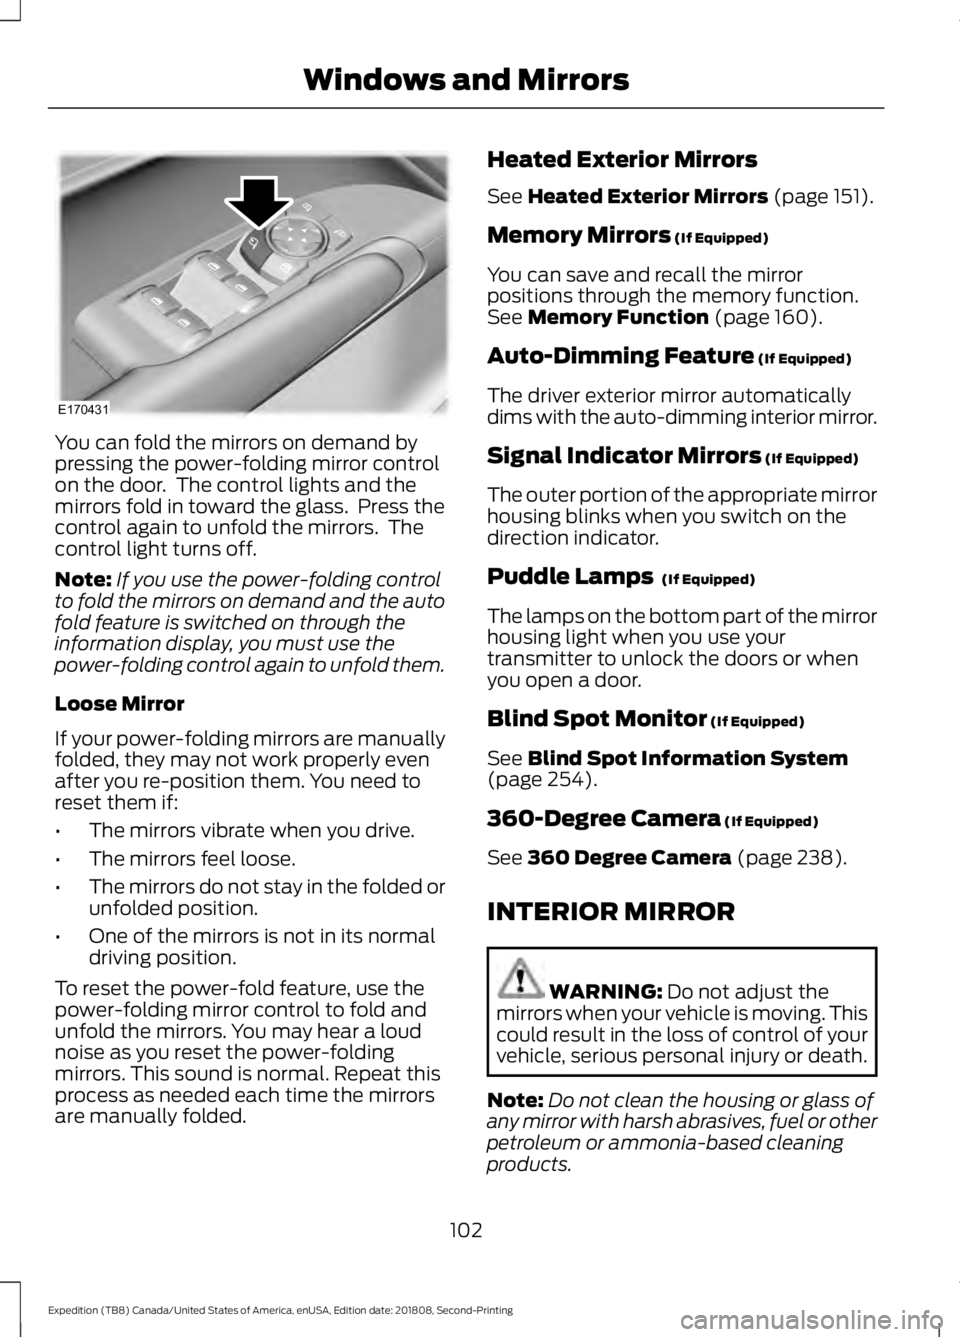
You can fold the mirrors on demand by
pressing the power-folding mirror control
on the door. The control lights and the
mirrors fold in toward the glass. Press the
control again to unfold the mirrors. The
control light turns off.
Note:
If you use the power-folding control
to fold the mirrors on demand and the auto
fold feature is switched on through the
information display, you must use the
power-folding control again to unfold them.
Loose Mirror
If your power-folding mirrors are manually
folded, they may not work properly even
after you re-position them. You need to
reset them if:
• The mirrors vibrate when you drive.
• The mirrors feel loose.
• The mirrors do not stay in the folded or
unfolded position.
• One of the mirrors is not in its normal
driving position.
To reset the power-fold feature, use the
power-folding mirror control to fold and
unfold the mirrors. You may hear a loud
noise as you reset the power-folding
mirrors. This sound is normal. Repeat this
process as needed each time the mirrors
are manually folded. Heated Exterior Mirrors
See Heated Exterior Mirrors (page 151).
Memory Mirrors
(If Equipped)
You can save and recall the mirror
positions through the memory function.
See
Memory Function (page 160).
Auto-Dimming Feature
(If Equipped)
The driver exterior mirror automatically
dims with the auto-dimming interior mirror.
Signal Indicator Mirrors
(If Equipped)
The outer portion of the appropriate mirror
housing blinks when you switch on the
direction indicator.
Puddle Lamps
(If Equipped)
The lamps on the bottom part of the mirror
housing light when you use your
transmitter to unlock the doors or when
you open a door.
Blind Spot Monitor
(If Equipped)
See
Blind Spot Information System
(page 254).
360-Degree Camera
(If Equipped)
See
360 Degree Camera (page 238).
INTERIOR MIRROR WARNING:
Do not adjust the
mirrors when your vehicle is moving. This
could result in the loss of control of your
vehicle, serious personal injury or death.
Note: Do not clean the housing or glass of
any mirror with harsh abrasives, fuel or other
petroleum or ammonia-based cleaning
products.
102
Expedition (TB8) Canada/United States of America, enUSA, Edition date: 201808, Second-Printing Windows and MirrorsE170431