2019 FORD EXPEDITION clock
[x] Cancel search: clockPage 350 of 583
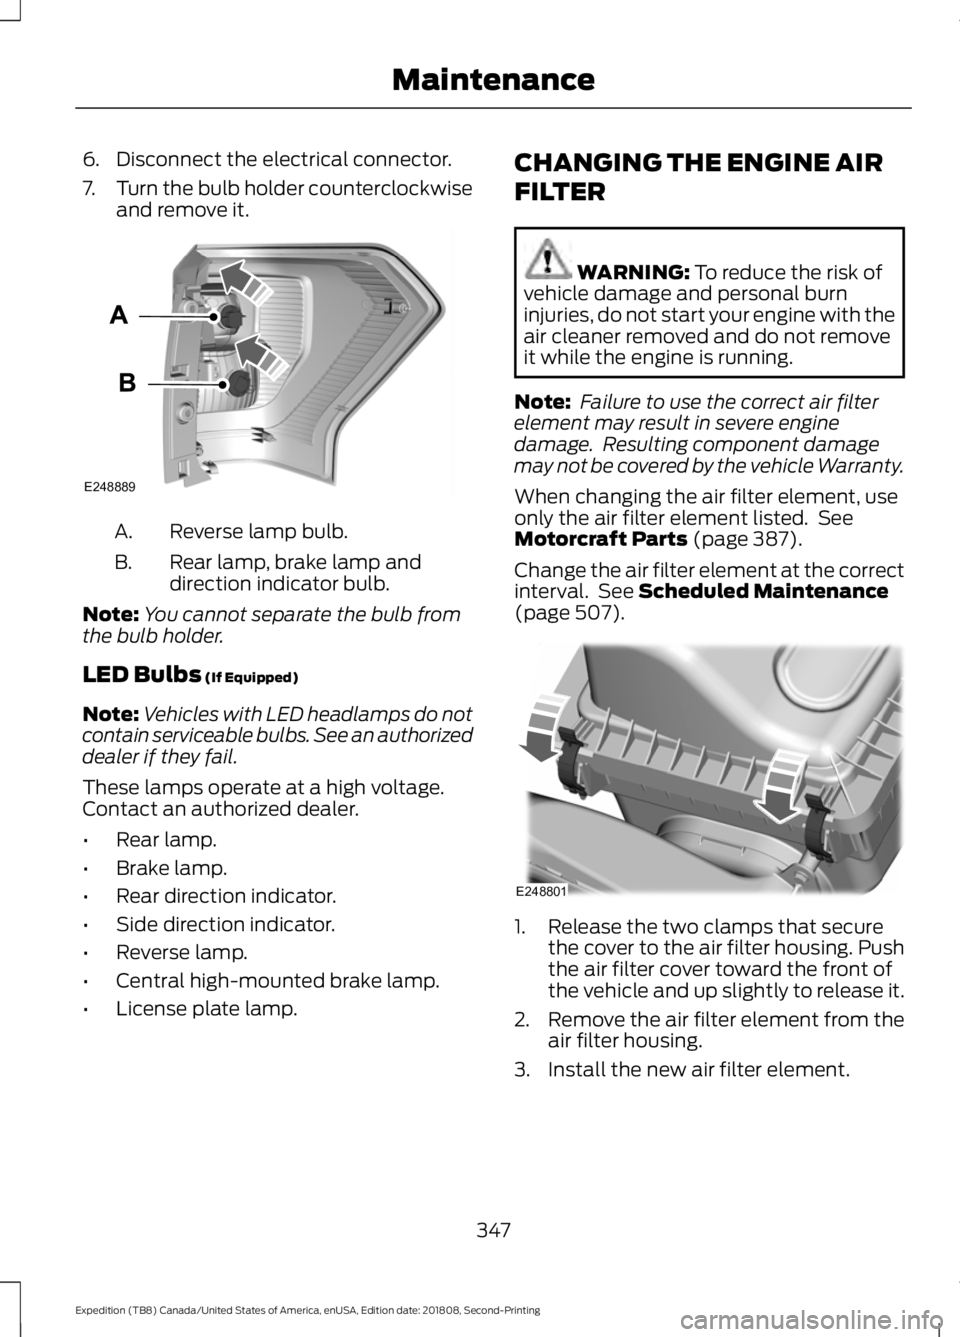
6. Disconnect the electrical connector.
7.
Turn the bulb holder counterclockwise
and remove it. Reverse lamp bulb.
A.
Rear lamp, brake lamp and
direction indicator bulb.
B.
Note: You cannot separate the bulb from
the bulb holder.
LED Bulbs (If Equipped)
Note: Vehicles with LED headlamps do not
contain serviceable bulbs. See an authorized
dealer if they fail.
These lamps operate at a high voltage.
Contact an authorized dealer.
• Rear lamp.
• Brake lamp.
• Rear direction indicator.
• Side direction indicator.
• Reverse lamp.
• Central high-mounted brake lamp.
• License plate lamp. CHANGING THE ENGINE AIR
FILTER WARNING:
To reduce the risk of
vehicle damage and personal burn
injuries, do not start your engine with the
air cleaner removed and do not remove
it while the engine is running.
Note: Failure to use the correct air filter
element may result in severe engine
damage. Resulting component damage
may not be covered by the vehicle Warranty.
When changing the air filter element, use
only the air filter element listed. See
Motorcraft Parts
(page 387).
Change the air filter element at the correct
interval. See
Scheduled Maintenance
(page 507). 1. Release the two clamps that secure
the cover to the air filter housing. Push
the air filter cover toward the front of
the vehicle and up slightly to release it.
2. Remove the air filter element from the
air filter housing.
3. Install the new air filter element.
347
Expedition (TB8) Canada/United States of America, enUSA, Edition date: 201808, Second-Printing MaintenanceE248889 E248801
Page 382 of 583

•
To reduce the chances of interference
from another vehicle, perform the
system reset procedure at least 3 ft
(1 m) away from another Ford Motor
Company vehicle undergoing the
system reset procedure at the same
time.
• Do not wait more than two minutes
between resetting each tire sensor or
the system can time-out and you have
to repeat the entire procedure on all
four wheels.
• A double horn sounds indicating the
need to repeat the procedure.
Performing the System Reset Procedure
Read the entire procedure before
attempting.
1. Drive the vehicle above
20 mph
(32 km/h) for at least two minutes,
then park in a safe location where you
can easily get to all four tires and have
access to an air pump.
2. Place the ignition in the off position and
keep the key in the ignition.
3. Cycle the ignition to the on position with the engine off.
4. Turn the hazard flashers on then off three times. You must accomplish this
within 10 seconds. If you successfully
enter the reset mode, the horn sounds
once, the system indicator flashes and
a message shows in the information
display. If this does not occur, please
try again starting at step 2. If after
repeated attempts to enter the reset
mode, the horn does not sound, the
system indicator does not flash and no
message shows in the information
display, seek service from your
authorized dealer. 5. Train the tire pressure monitoring
system sensors in the tires using the
following system reset sequence
starting with the left front tire in the
following clockwise order: Left front -
driver side front tire, Right front -
passenger side front tire, Right rear -
passenger side rear tire, Left rear -
driver side rear tire.
6. Remove the valve cap from the valve stem on the left front tire. Decrease the
air pressure until the horn sounds.
Note: The single horn tone confirms that
the sensor identification code has been
learned by the module for this position. If a
double horn is heard, the reset procedure
was unsuccessful, and you must repeat it.
7. Remove the valve cap from the valve stem on the right front tire. Decrease
the air pressure until the horn sounds.
8. Remove the valve cap from the valve stem on the right rear tire. Decrease the
air pressure until the horn sounds.
9. Remove the valve cap from the valve stem on the left rear tire. Decrease the
air pressure until the horn sounds.
Training is complete after the horn
sounds for the last tire trained, driver
side rear tire, the system indicator
stops flashing, and a message shows
in the information display.
10. Turn the ignition off. If two short horn
beeps are heard, the reset procedure
was unsuccessful and you must
repeat it. If after repeating the
procedure and two short beeps are
heard when the ignition is turned to
off, seek assistance from your
authorized dealer.
379
Expedition (TB8) Canada/United States of America, enUSA, Edition date: 201808, Second-Printing Wheels and Tires
Page 385 of 583

WARNING: To help prevent your
vehicle from moving when changing a
wheel, shift the transmission into park
(P), set the parking brake and use an
appropriate block or wheel chock to
secure the wheel diagonally opposite to
the wheel being changed. For example,
when changing the front left wheel,
place an appropriate block or wheel
chock on the right rear wheel. WARNING:
Do not attempt to
change a tire on the side of the vehicle
close to moving traffic. Pull far enough
off the road to avoid the danger of being
hit when operating the jack or changing
the wheel. WARNING:
Always use the jack
provided as original equipment with your
vehicle. If using a jack other than the one
provided, make sure the jack capacity is
adequate for the vehicle weight,
including any vehicle cargo or
modifications. If you are unsure if the jack
capacity is adequate, contact the
authorized dealer. WARNING:
Switch off the running
boards before jacking or placing any
object under your vehicle. Never place
your hand between the extended running
board and your vehicle. A moving running
board may cause injury. WARNING:
Only use the spare
wheel carrier to stow the wheel provided
with your vehicle. Other wheel sizes
could cause the spare wheel carrier to
fail if it does not fit securely or is too
heavy. 1. Park the vehicle on firm, level ground
and activate the hazard flashers.
2. Apply the parking brake, place the transmission in park (P) and switch the
ignition off.
3. Block the wheels diagonally opposite the flat tire, for example, if the left front
tire is flat, block the right rear wheel.
Removing the Jack and Tools
Note: Pay close attention to the orientation
of the jack and tool kit bag, because it needs
to be reinstalled after changing the tire.
1. Open the liftgate and lift the load floor
behind the third row seat. If your
vehicle has an access panel, you need
to then unlatch and remove this panel.
2. Remove the wing nut by turning it counterclockwise.
3. Remove the jack and tool kit bag from the bracket, loosen the straps and
remove the tool bag from the jack.
382
Expedition (TB8) Canada/United States of America, enUSA, Edition date: 201808, Second-Printing Wheels and TiresE175447
Page 386 of 583
Removing the Spare Tire
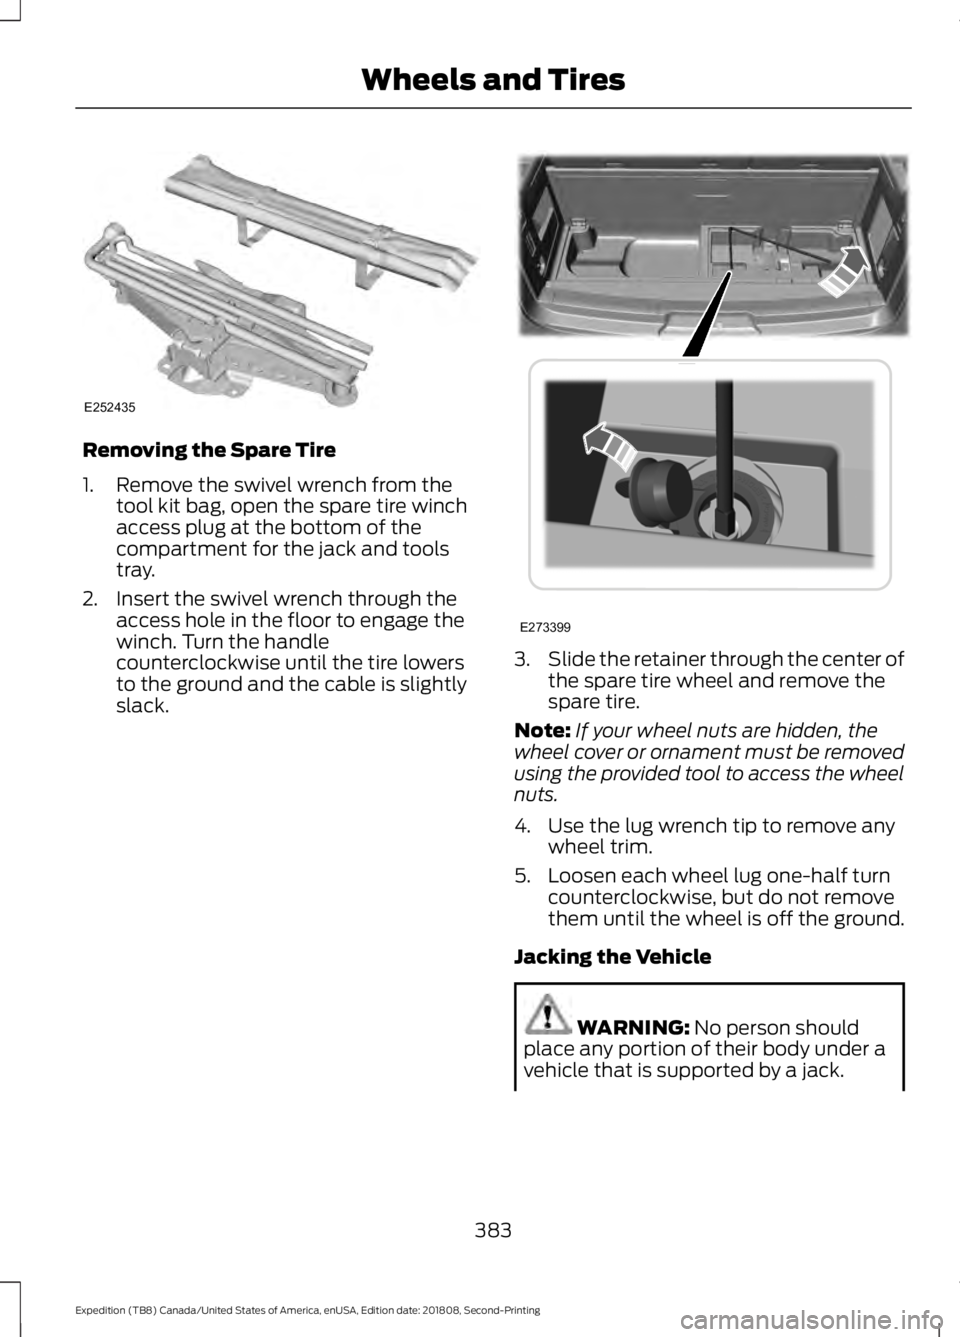
1. Remove the swivel wrench from the
tool kit bag, open the spare tire winch
access plug at the bottom of the
compartment for the jack and tools
tray.
2. Insert the swivel wrench through the access hole in the floor to engage the
winch. Turn the handle
counterclockwise until the tire lowers
to the ground and the cable is slightly
slack. 3.
Slide the retainer through the center of
the spare tire wheel and remove the
spare tire.
Note: If your wheel nuts are hidden, the
wheel cover or ornament must be removed
using the provided tool to access the wheel
nuts.
4. Use the lug wrench tip to remove any wheel trim.
5. Loosen each wheel lug one-half turn counterclockwise, but do not remove
them until the wheel is off the ground.
Jacking the Vehicle WARNING: No person should
place any portion of their body under a
vehicle that is supported by a jack.
383
Expedition (TB8) Canada/United States of America, enUSA, Edition date: 201808, Second-Printing Wheels and TiresE252435 E273399
Page 387 of 583
WARNING: Do not get under a
vehicle that is only supported by a
vehicle jack. WARNING:
Check that the vehicle
jack is not damaged or deformed and
the thread is lubricated and clean. WARNING: The jack supplied with
this vehicle is only intended for changing
wheels. Do not use the vehicle jack other
than when you are changing a wheel in
an emergency. WARNING:
The jack should be
used on level firm ground wherever
possible. WARNING:
Never place anything
between the vehicle jack and the ground. WARNING:
Never place anything
between the vehicle jack and your
vehicle. WARNING:
It is recommended
that the wheels of the vehicle be
chocked, and that no person should
remain in a vehicle that is being jacked. WARNING:
Failure to follow these
guidelines could result in an increased
risk of loss of vehicle control, injury or
death.
Note: The jack does not require
maintenance or additional lubrication over
the service life of your vehicle.
Note: Jack at the specified locations to
avoid damaging your vehicle.
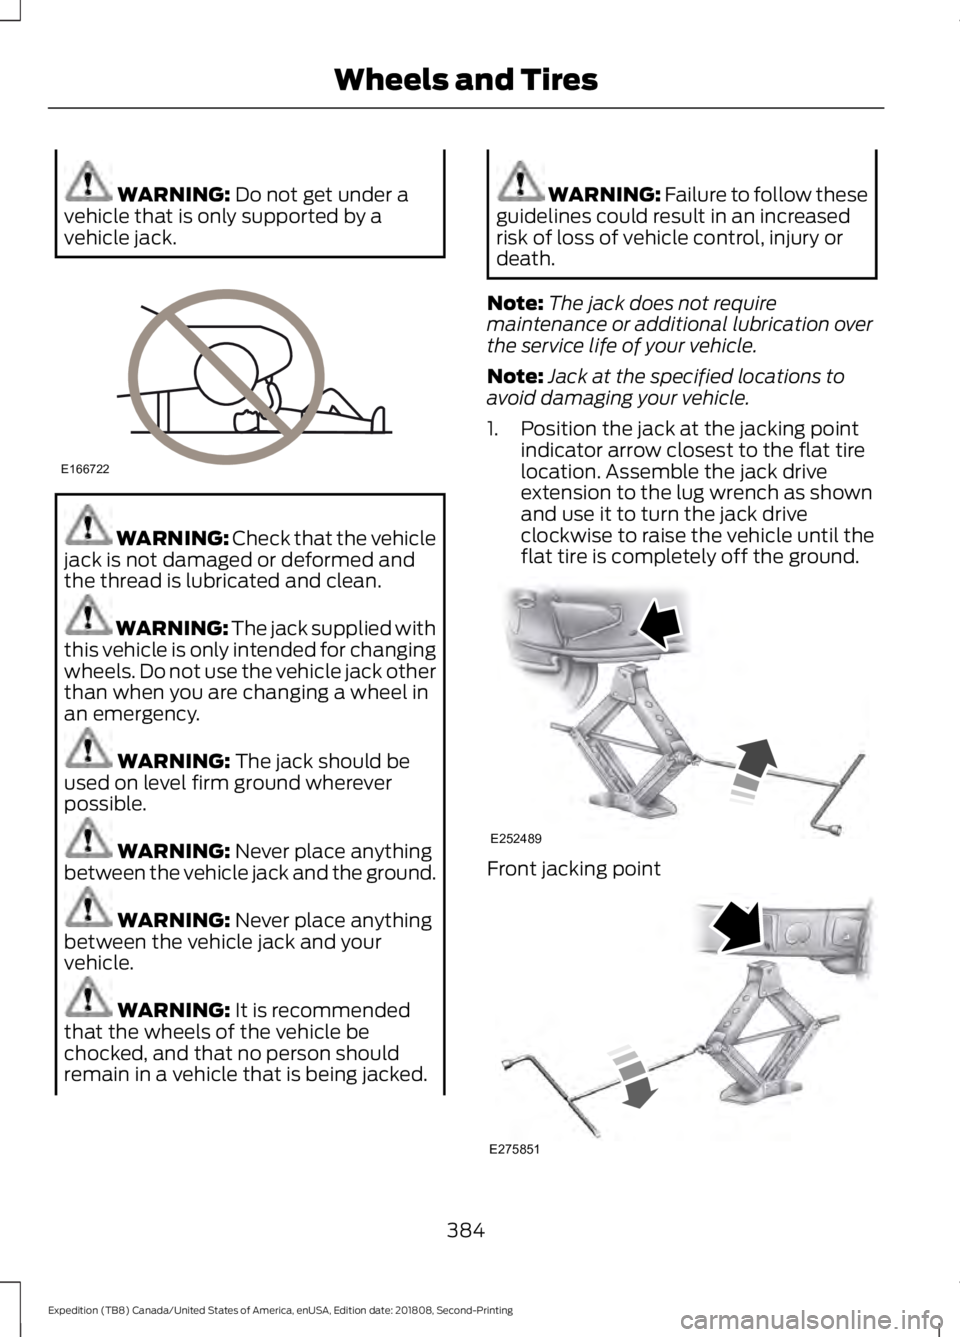
1. Position the jack at the jacking point indicator arrow closest to the flat tire
location. Assemble the jack drive
extension to the lug wrench as shown
and use it to turn the jack drive
clockwise to raise the vehicle until the
flat tire is completely off the ground. Front jacking point
384
Expedition (TB8) Canada/United States of America, enUSA, Edition date: 201808, Second-Printing Wheels and TiresE166722 E252489 E275851
Page 388 of 583
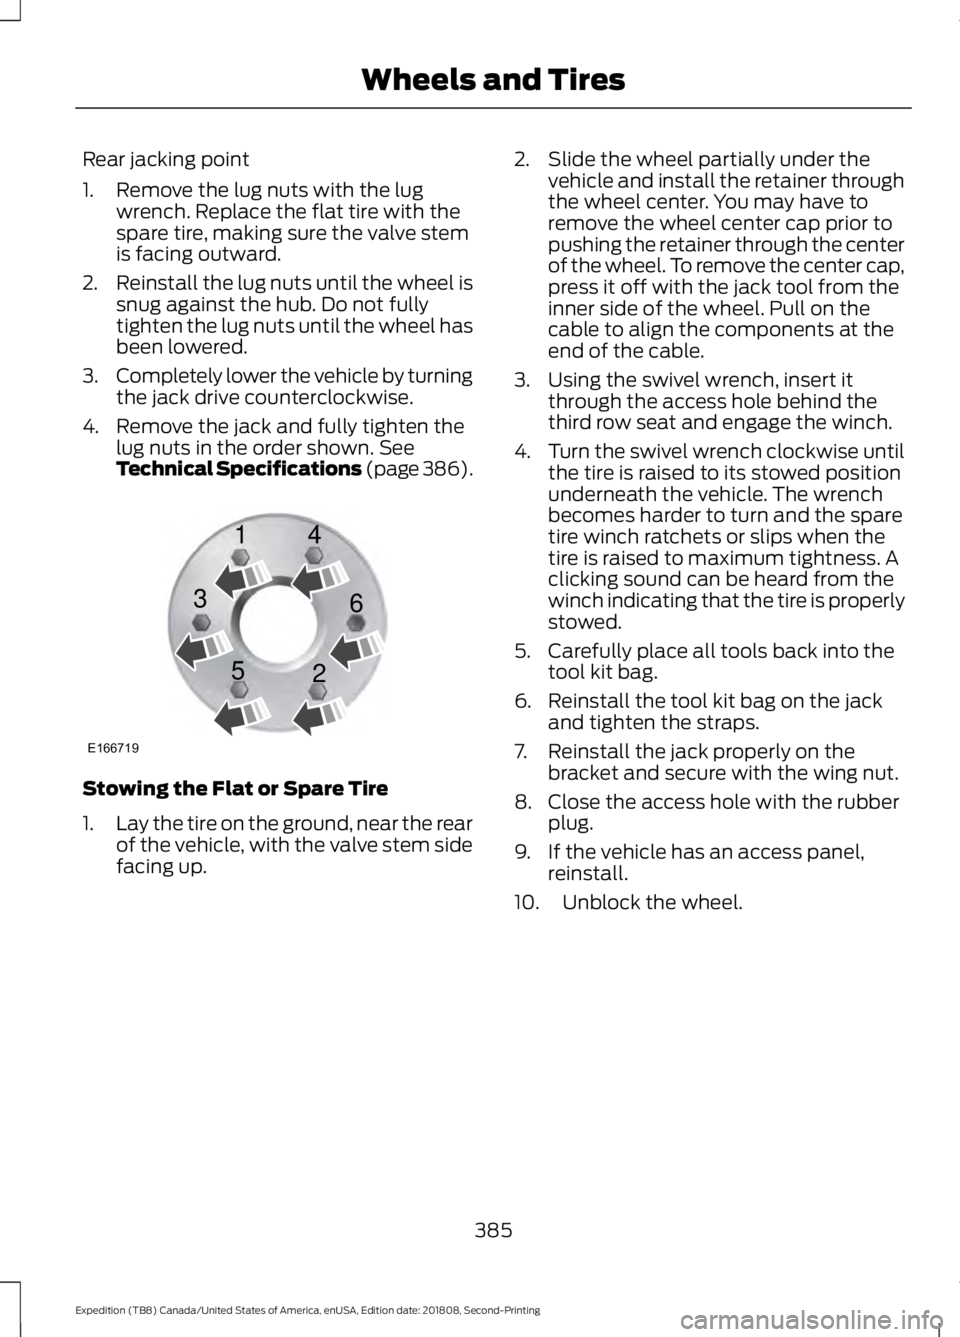
Rear jacking point
1. Remove the lug nuts with the lug
wrench. Replace the flat tire with the
spare tire, making sure the valve stem
is facing outward.
2. Reinstall the lug nuts until the wheel is
snug against the hub. Do not fully
tighten the lug nuts until the wheel has
been lowered.
3. Completely lower the vehicle by turning
the jack drive counterclockwise.
4. Remove the jack and fully tighten the lug nuts in the order shown. See
Technical Specifications (page 386). Stowing the Flat or Spare Tire
1.
Lay the tire on the ground, near the rear
of the vehicle, with the valve stem side
facing up. 2. Slide the wheel partially under the
vehicle and install the retainer through
the wheel center. You may have to
remove the wheel center cap prior to
pushing the retainer through the center
of the wheel. To remove the center cap,
press it off with the jack tool from the
inner side of the wheel. Pull on the
cable to align the components at the
end of the cable.
3. Using the swivel wrench, insert it through the access hole behind the
third row seat and engage the winch.
4. Turn the swivel wrench clockwise until
the tire is raised to its stowed position
underneath the vehicle. The wrench
becomes harder to turn and the spare
tire winch ratchets or slips when the
tire is raised to maximum tightness. A
clicking sound can be heard from the
winch indicating that the tire is properly
stowed.
5. Carefully place all tools back into the tool kit bag.
6. Reinstall the tool kit bag on the jack and tighten the straps.
7. Reinstall the jack properly on the bracket and secure with the wing nut.
8. Close the access hole with the rubber plug.
9. If the vehicle has an access panel, reinstall.
10. Unblock the wheel.
385
Expedition (TB8) Canada/United States of America, enUSA, Edition date: 201808, Second-Printing Wheels and TiresE166719
1
3
5 4
6
2
Page 403 of 583
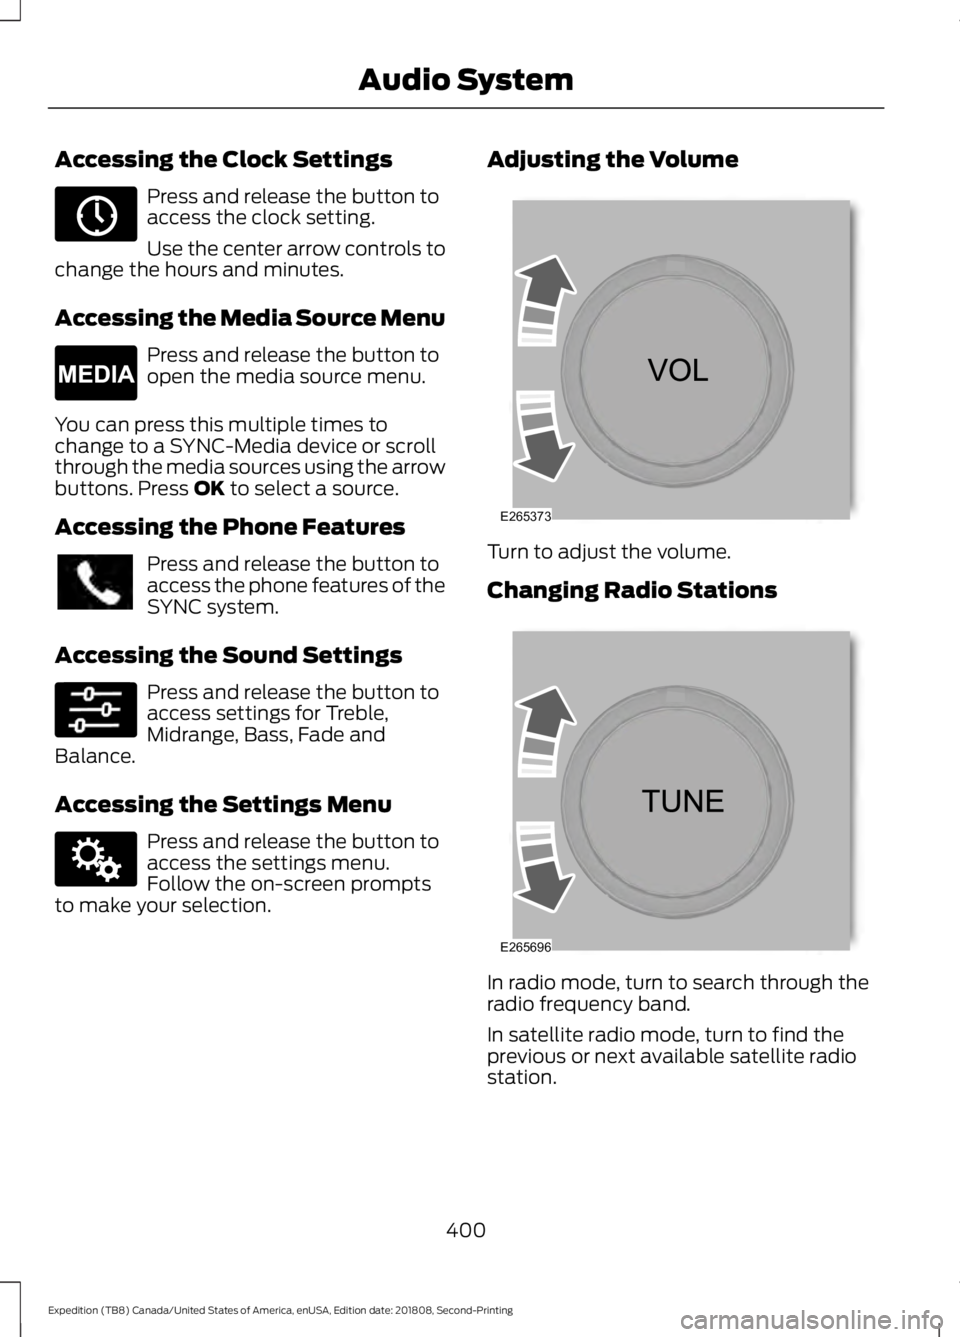
Accessing the Clock Settings
Press and release the button to
access the clock setting.
Use the center arrow controls to
change the hours and minutes.
Accessing the Media Source Menu Press and release the button to
open the media source menu.
You can press this multiple times to
change to a SYNC-Media device or scroll
through the media sources using the arrow
buttons. Press OK to select a source.
Accessing the Phone Features Press and release the button to
access the phone features of the
SYNC system.
Accessing the Sound Settings Press and release the button to
access settings for Treble,
Midrange, Bass, Fade and
Balance.
Accessing the Settings Menu Press and release the button to
access the settings menu.
Follow the on-screen prompts
to make your selection. Adjusting the Volume
Turn to adjust the volume.
Changing Radio Stations
In radio mode, turn to search through the
radio frequency band.
In satellite radio mode, turn to find the
previous or next available satellite radio
station.
400
Expedition (TB8) Canada/United States of America, enUSA, Edition date: 201808, Second-Printing Audio SystemE265036 E265035 E142607 E265373 E265696
Page 430 of 583
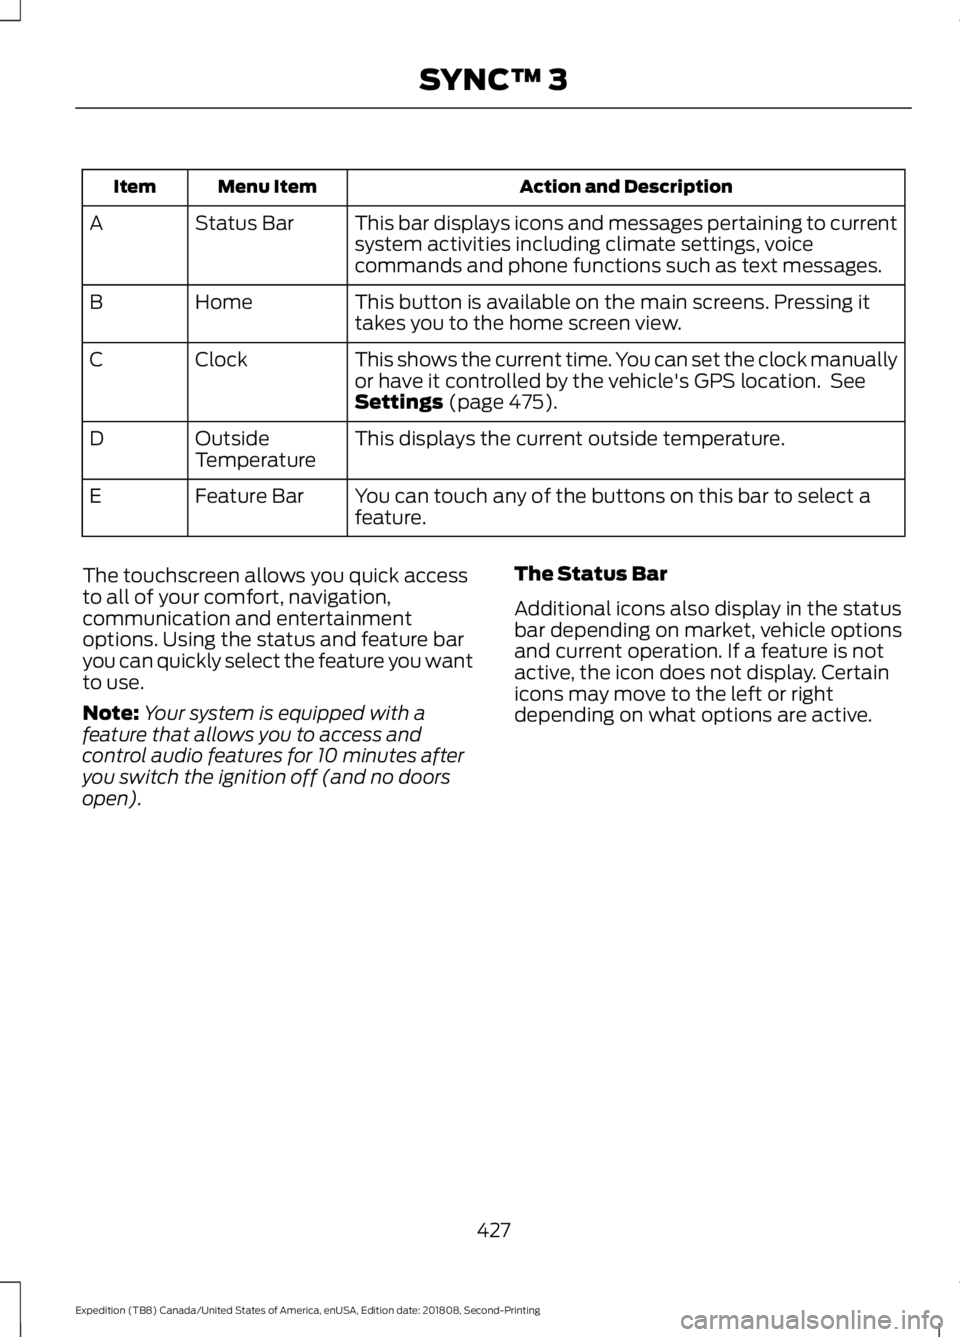
Action and Description
Menu Item
Item
This bar displays icons and messages pertaining to current
system activities including climate settings, voice
commands and phone functions such as text messages.
Status Bar
A
This button is available on the main screens. Pressing it
takes you to the home screen view.
Home
B
This shows the current time. You can set the clock manually
or have it controlled by the vehicle's GPS location. See
Settings (page 475).
Clock
C
This displays the current outside temperature.
Outside
Temperature
D
You can touch any of the buttons on this bar to select a
feature.
Feature Bar
E
The touchscreen allows you quick access
to all of your comfort, navigation,
communication and entertainment
options. Using the status and feature bar
you can quickly select the feature you want
to use.
Note: Your system is equipped with a
feature that allows you to access and
control audio features for 10 minutes after
you switch the ignition off (and no doors
open). The Status Bar
Additional icons also display in the status
bar depending on market, vehicle options
and current operation. If a feature is not
active, the icon does not display. Certain
icons may move to the left or right
depending on what options are active.
427
Expedition (TB8) Canada/United States of America, enUSA, Edition date: 201808, Second-Printing SYNC™ 3