2019 FORD E-450 warning
[x] Cancel search: warningPage 60 of 329

Tow Haul Indicator
Illuminates when the driver
activates the tow/haul feature.
If the light flashes steadily, have
an authorized dealer check the system
immediately, damage to the transmission
could occur.
AUDIBLE WARNINGS AND
INDICATORS
Fail-Safe Cooling Warning Chime
Sounds when the coolant gauge pointer
has moved to hot. There are three stages
of chimes:
• Stage 1 is a single chime when the
engine temperature begins to overheat.
• Stage 2 is multiple chimes and engine
power becomes limited in order to help
cool the engine.
• Stage 3 is multiple chimes and the
engine will shut down.
Headlamps On Warning Chime
Sounds when you remove the key from the
ignition and open the driver's door and you
have left the headlamps or parking lamps
on.
Key in Ignition Warning Chime
Sounds when you open the driver's door
and you have left the key in the ignition.
Parking Brake On Warning Chime
Sounds when you have left the parking
brake on and drive your vehicle. If the
warning chime remains on after you have
released the parking brake, have the
system checked by your authorized dealer
immediately. Shift to Park Warning Chime
Sounds when the ignition is in the off or
accessory position and your vehicle is not
in park, or when you open the driver's door
and your vehicle is not in park.
57
E-Series (TE4) Canada/United States of America, enUSA, Edition date: 201804, Second-Printing Instrument ClusterE161509
Page 61 of 329

GENERAL INFORMATION
WARNING: Driving while
distracted can result in loss of vehicle
control, crash and injury. We strongly
recommend that you use extreme
caution when using any device that may
take your focus off the road. Your
primary responsibility is the safe
operation of your vehicle. We
recommend against the use of any
hand-held device while driving and
encourage the use of voice-operated
systems when possible. Make sure you
are aware of all applicable local laws
that may affect the use of electronic
devices while driving.
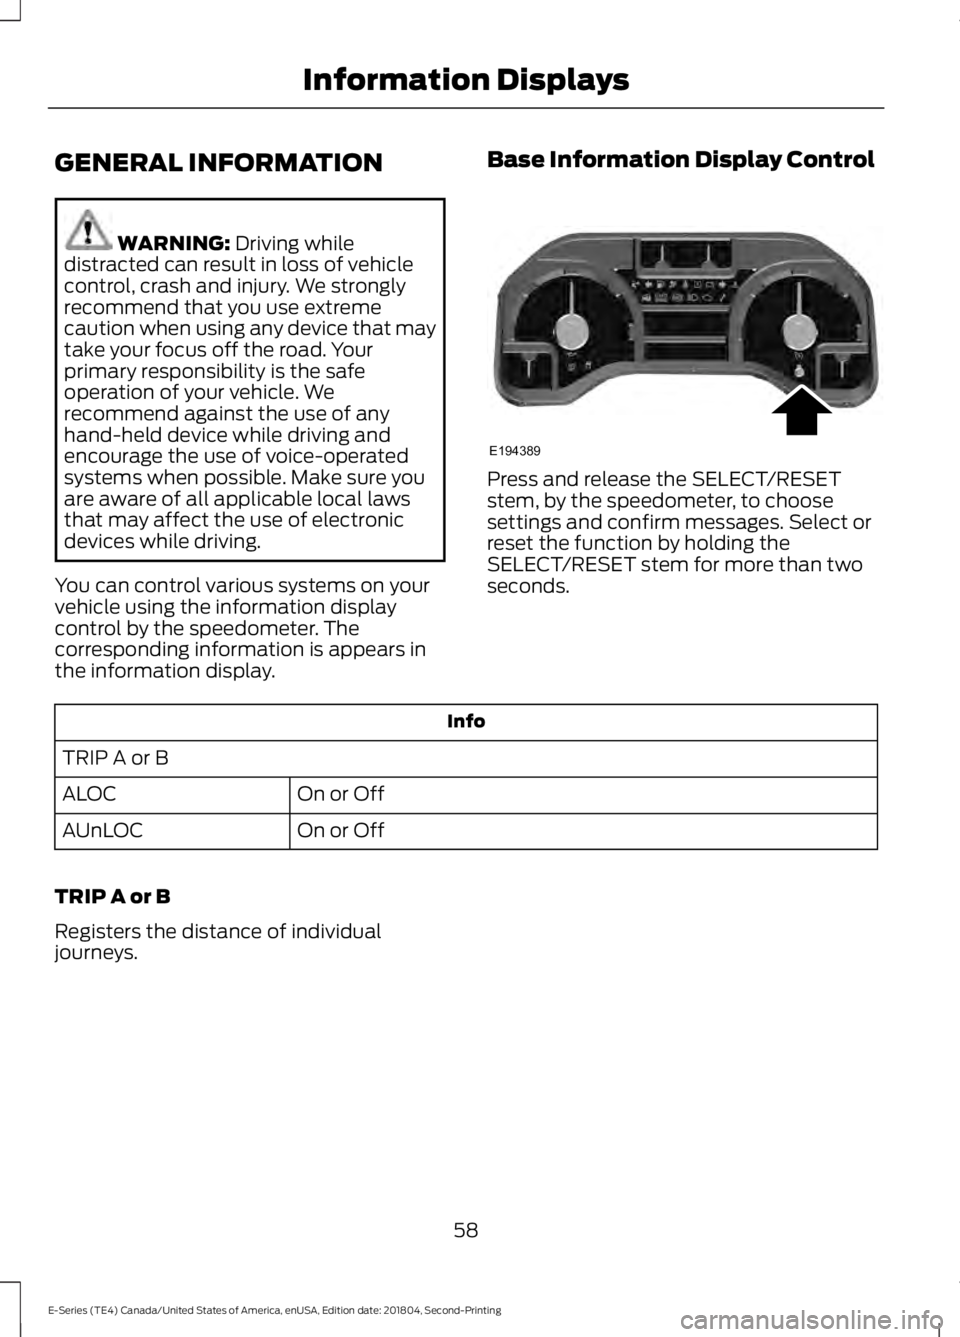
You can control various systems on your
vehicle using the information display
control by the speedometer. The
corresponding information is appears in
the information display. Base Information Display Control Press and release the SELECT/RESET
stem, by the speedometer, to choose
settings and confirm messages. Select or
reset the function by holding the
SELECT/RESET stem for more than two
seconds.
Info
TRIP A or B On or Off
ALOC
On or Off
AUnLOC
TRIP A or B
Registers the distance of individual
journeys.
58
E-Series (TE4) Canada/United States of America, enUSA, Edition date: 201804, Second-Printing Information DisplaysE194389
Page 66 of 329

LANGUAGE = ENGLISH / SPANISH /
FRENCH
Allows you to choose which language
appears in the information display.
Waiting four seconds or pressing the
SELECT/RESET stem cycles the
information display through each of the
language choices.
Press the SELECT/RESET stem to set the
language choice when the language you
want appears.
HOLD RESET FOR SYSTEM CHECK
The information display begins to cycle
through the vehicle systems and provides
a status of the item if needed. Some
systems show a message only if a
condition is present.
INFORMATION MESSAGES
Note:
Depending on the vehicle options
equipped with your vehicle, not all of the
messages will display or be available.
Certain messages may be abbreviated or
shortened depending upon which cluster
type you have.
Press the SELECT/RESET stem to
acknowledge and remove some messages
from the information display. Other
messages will be removed automatically
after a short time.
Certain messages need to be confirmed
before you can access the menus.
Brake System Action
Message
Indicates the brake fluid level is low, have the brakesystem inspected immediately.
BRAKE FLUID LEVEL LOW
Displays when the brake system needs servicing. If thewarning stays on or continues to come on, contact your authorized dealer as soon as possible.
CHECK BRAKE SYSTEM
Displays when the parking brake is set and the vehicleis in motion.
PARK BRAKE ENGAGED
Fuel Action
Message
Displays as an early reminder of a low fuel condition.
XXX MILES TO E FUEL LEVEL
LOW
63
E-Series (TE4) Canada/United States of America, enUSA, Edition date: 201804, Second-Printing Information Displays
Page 67 of 329

Maintenance
Action
Message
Displays when the engine oil life remaining is between5% and 0%.
ENGINE OIL CHANGE SOON
Displays when the oil life left reaches 0%.
OIL CHANGE REQUIRED
Displays after you have the oil changed.
OIL LIFE OK
Tire Action
Message
Displays when one or more tires on your vehicle havelow tire pressure.
LOW TIRE PRESSURE
Displays when the tire pressure monitoring system
malfunctions. If the warning stays on or continues to come on, contact your authorized dealer.
TIRE PRESSURE MONITOR
FAULT
Displays when a tire pressure sensor malfunctions, oryour spare tire is in use. For more information on how the system operates under these conditions, refer to
the Tire Pressure Monitoring System in the Wheels and
Tires chapter for more information. If the warning stays on or continues to come on, contact your authorized dealer as soon as possible.
TIRE PRESSURE SENSOR
FAULT
Traction Control Action
Message
Displays when the traction control system detects a
condition that requires service. Contact your authorized dealer as soon as possible.
Traction Control
64
E-Series (TE4) Canada/United States of America, enUSA, Edition date: 201804, Second-Printing Information Displays
Page 72 of 329

SITTING IN THE CORRECT
POSITION
WARNING: Sitting improperly, out
of position or with the seatback reclined
too far can take weight off the seat
cushion and affect the decision of the
passenger sensing system, resulting in
serious injury or death in the event of a
crash. Always sit upright against your
seat back, with your feet on the floor. WARNING:
Do not recline the
seatback too far as this can cause the
occupant to slide under the seatbelt,
resulting in serious injury in the event of
a collision. WARNING:
Do not place objects
higher than the top of the seat backrest.
Failure to follow this instruction could
result in personal injury or death in the
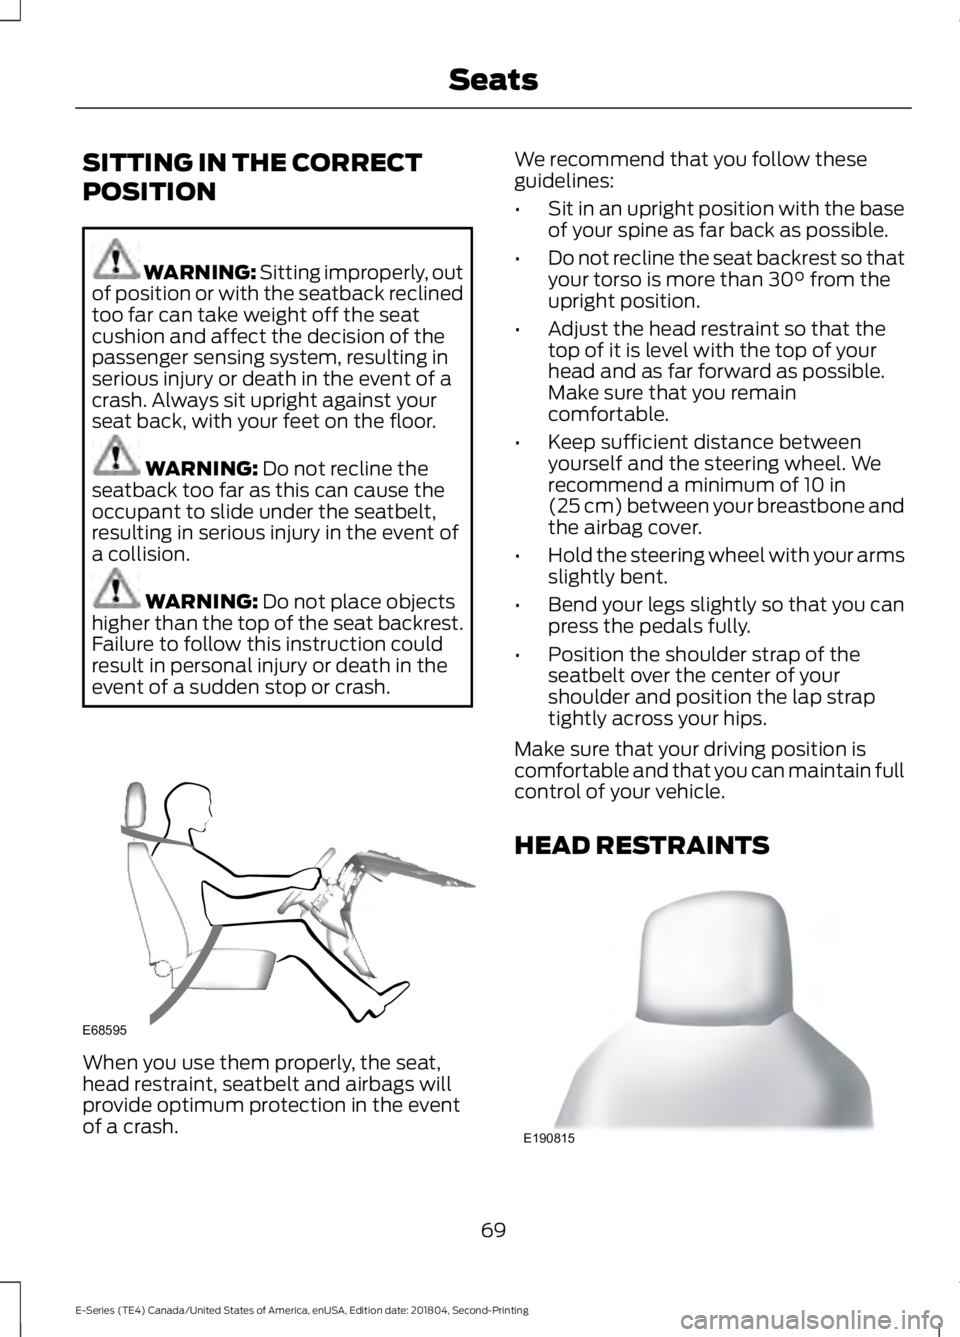
event of a sudden stop or crash. When you use them properly, the seat,
head restraint, seatbelt and airbags will
provide optimum protection in the event
of a crash. We recommend that you follow these
guidelines:
•
Sit in an upright position with the base
of your spine as far back as possible.
• Do not recline the seat backrest so that
your torso is more than
30° from the
upright position.
• Adjust the head restraint so that the
top of it is level with the top of your
head and as far forward as possible.
Make sure that you remain
comfortable.
• Keep sufficient distance between
yourself and the steering wheel. We
recommend a minimum of
10 in
(25 cm) between your breastbone and
the airbag cover.
• Hold the steering wheel with your arms
slightly bent.
• Bend your legs slightly so that you can
press the pedals fully.
• Position the shoulder strap of the
seatbelt over the center of your
shoulder and position the lap strap
tightly across your hips.
Make sure that your driving position is
comfortable and that you can maintain full
control of your vehicle.
HEAD RESTRAINTS 69
E-Series (TE4) Canada/United States of America, enUSA, Edition date: 201804, Second-Printing SeatsE68595 E190815
Page 73 of 329

The front row outboard non-adjustable
head restraints consist of a trimmed foam
covering over the upper structure of the
seatback. Properly adjust the seatback to
an upright driving or riding position, so that
the head restraint is positioned as close as
possible to the back of your head.
MANUAL SEATS (IF EQUIPPED)
WARNING:
Make sure the seat
fully locks into place by rocking it
backward and forward. Not securing the
seat into the locked position can be
dangerous in a crash and could cause
serious personal injury or death.
Moving the Seat Backward and
Forward Recline Adjustment
(If Equipped)
WARNING:
Do not place cargo or
any objects behind the seat backrest
before returning it to the original position.
Pull on the seat backrest to make sure
that it has fully latched after returning
the seat backrest to its original position.
An unlatched seat may become
dangerous if you stop suddenly or have
a crash. Manual Lumbar
(If Equipped)
The lumbar control is on the inboard side
of the driver seat. Turn the control to adjust
your support.
70
E-Series (TE4) Canada/United States of America, enUSA, Edition date: 201804, Second-Printing SeatsE190816 E190817 E166702
Page 74 of 329

POWER SEATS (IF EQUIPPED)
WARNING:
Do not adjust the
driver seat or seatback while your vehicle
is moving. Adjusting your seatback while
the vehicle is in motion may cause loss
of control of the vehicle.
The control is located on the outboard side
of the seat cushion. •
Press A to raise or lower the front
portion of the seat cushion.
• Press B to move the seat forward,
backward, up or down.
• Press C to raise or lower the rear
portion of the seat cushion.
Recline Adjustment
(If Equipped) 71
E-Series (TE4) Canada/United States of America, enUSA, Edition date: 201804, Second-Printing SeatsE190818 E190819
Page 75 of 329

12 Volt DC Power Point
WARNING: Do not plug optional
electrical accessories into the cigar
lighter socket. Incorrect use of the cigar
lighter can cause damage not covered
by the vehicle warranty, and can result
in fire or serious injury.
Note: When you switch the ignition on, you
can use the socket to power 12 volt
appliances with a maximum current rating
of 15 amps.
If the power supply does not work after you
switch the ignition off, switch the ignition
on.
Note: Do not hang any accessory from the
accessory plug.
Note: Do not use the power point over the
vehicle capacity of 12 volt DC 180 watts or
a fuse may blow.
Note: Always keep the power point caps
closed when not in use.
Do not insert objects other than an
accessory plug into the power point. This
damages the power point and may blow
the fuse.
Run the vehicle for full capacity use of the
power point.
To prevent the battery from running out of
charge:
• Do not use the power point longer than
necessary when the vehicle is not
running.
• Do not leave devices plugged in
overnight or when you park your vehicle
for extended periods. Locations
Power points may be in the following
locations:
•
On the instrument panel.
• Inside the glove box.
• Behind the driver's seat, upper trim
panel.
110 Volt AC Power Point
(If Equipped) WARNING: Do not keep electrical
devices plugged in the power point
whenever the device is not in use. Do not
use any extension cord with the 110 volt
AC power point, since it will defeat the
safety protection design. Doing so may
cause the power point to overload due
to powering multiple devices that can
reach beyond the 150 watt load limit and
could result in fire or serious injury.
Note: The power point turns off when you
switch the ignition off, or when the battery
voltage drops below 11 volts.
You can use the power point for electric
devices that require up to 150 watts. It is
on the rear of the center console. To gain access to the outlet contacts,
press the plug against the outlet and rotate
clockwise.
72
E-Series (TE4) Canada/United States of America, enUSA, Edition date: 201804, Second-Printing Auxiliary Power PointsE194174