2019 DODGE GRAND CARAVAN hood release
[x] Cancel search: hood releasePage 24 of 490

Remote Start Abort Messages
The following messages will display in the instrument
cluster display if the vehicle fails to remote start or exits
remote start prematurely:
•Remote Start Aborted — Door Ajar
• Remote Start Aborted — Hood Ajar
• Remote Start Aborted — Fuel Low
• Remote Start Aborted — L/Gate Ajar
• Remote Start Disabled — Start Vehicle To Reset
The instrument cluster display message stays active until
the ignition is turned to the ON/RUN position.
To Enter Remote Start Mode
Push and release the Remote Start button on the key fob
twice within five seconds. The vehicle doors will lock, the
turn signals will flash twice, and the horn will chirp twice.
Then the engine will start, and the vehicle will remain in
the Remote Start mode for a 15-minute cycle. NOTE:
•
If an engine fault is present or fuel level is low, the
vehicle will start and then shut down in 10 seconds.
• The park lamps will turn on and remain on during
Remote Start mode.
• For security, power window operation is disabled when
the vehicle is in the Remote Start mode.
• The engine can be started two consecutive times (two
15-minute cycles) with the key fob. However, the igni-
tion must be placed in the ON/RUN position before you
can repeat the start sequence for a third cycle.
To Exit Remote Start Mode Without Driving The
Vehicle
Push and release the Remote Start button one time or allow
the remote start cycle to complete the entire 15-minute
cycle.
NOTE: To avoid unintentional shutdowns, the system will
disable the one time push of the Remote Start button for
two seconds after receiving a valid Remote Start request.
22 GETTING TO KNOW YOUR VEHICLE
Page 94 of 490
Wind Buffeting
Wind buffeting can be described as the perception of
pressure on the ears or a helicopter-type sound in the ears.
Your vehicle may exhibit wind buffeting with the windows
down, or the sunroof (if equipped) in certain open or
partially open positions. This is a normal occurrence and
can be minimized. If the rear windows are open and
buffeting occurs, open the front and rear windows together
to minimize the buffeting. If the buffeting occurs with the
sunroof open, adjust the sunroof opening to minimize the
buffeting.HOOD
Opening The Hood
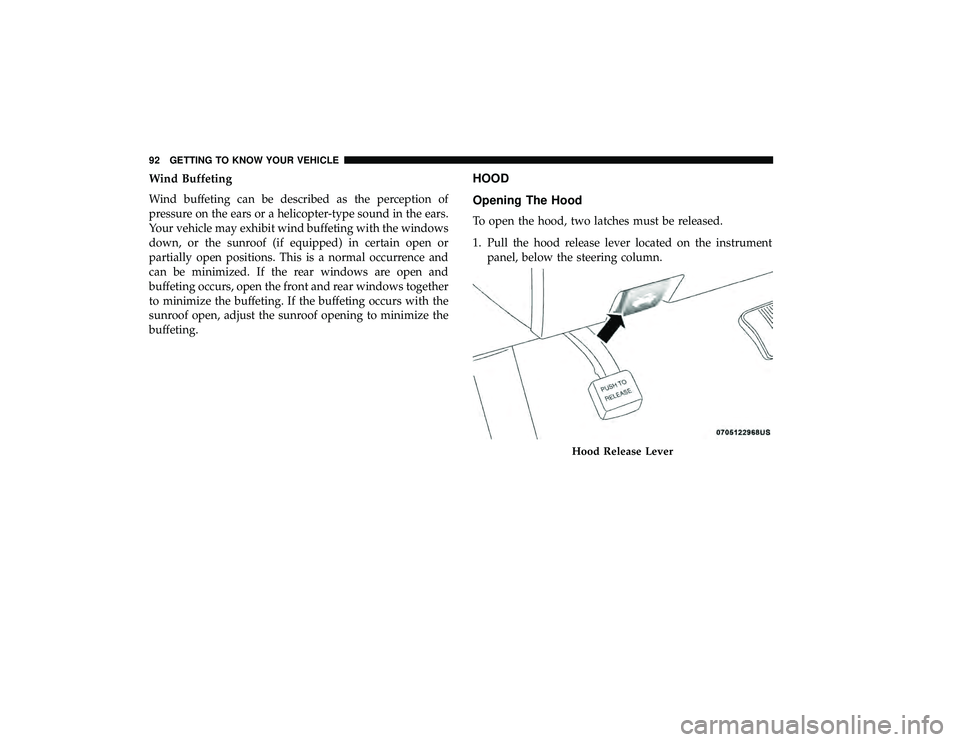
To open the hood, two latches must be released.
1. Pull the hood release lever located on the instrumentpanel, below the steering column.
Hood Release Lever
92 GETTING TO KNOW YOUR VEHICLE
Page 96 of 490
CAUTION!
To prevent possible damage, do not slam the hood to
close it. Lower hood to approximately 12 inches (30 cm)
and drop the hood to close. Make sure hood is fully
closed for both latches. Never drive vehicle unless
hood is fully closed, with both latches engaged.
LIFTGATE
Opening
To Unlock/Enter The Liftgate
The liftgate may be released in several ways:
•Overhead console liftgate button
• Key fob
• Outside handle
Push the liftgate button on the key fob twice within five
seconds to release the liftgate.
Closing
To Close The Liftgate
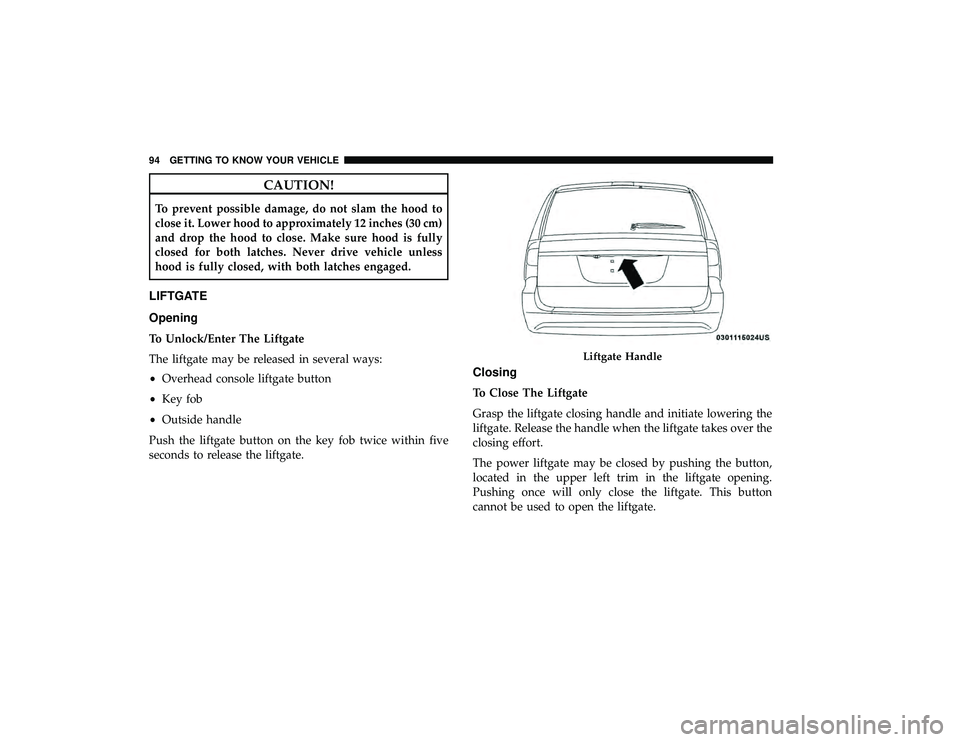
Grasp the liftgate closing handle and initiate lowering the
liftgate. Release the handle when the liftgate takes over the
closing effort.
The power liftgate may be closed by pushing the button,
located in the upper left trim in the liftgate opening.
Pushing once will only close the liftgate. This button
cannot be used to open the liftgate.
Liftgate Handle
94 GETTING TO KNOW YOUR VEHICLE
Page 330 of 490

WARNING!
You or others can be badly burned by hot engine
coolant (antifreeze) or steam from your radiator. If you
see or hear steam coming from under the hood, do not
open the hood until the radiator has had time to cool.
Never try to open a cooling system pressure cap when
the radiator or coolant bottle is hot.
GEAR SELECTOR OVERRIDE
If a malfunction occurs and the gear selector cannot be
moved out of the PARK position, you can use the following
procedure to temporarily move the gear selector:
1. Turn the engine OFF.
2. Firmly apply the parking brake.
3. Using a small screwdriver or similar tool, remove thegear selector override access cover (located near the top
right of the gear selector in the instrument panel). 4. Press and maintain firm pressure on the brake pedal.
5. Insert the screwdriver or similar tool into the access
hole, and push and hold the override release lever
forward.
6. Move the gear selector to the NEUTRAL position.
7. The vehicle may then be started in NEUTRAL.
8. Reinstall the gear selector override access cover.
Gear Selector Override Access Cover
328 IN CASE OF EMERGENCY
Page 350 of 490
clean to remove dust and grit; after lubricating excess oil
and grease should be removed. Particular attention should
also be given to hood latching components to ensure
proper function. When performing other underhood ser-
vices, the hood latch, release mechanism and safety catch
should be cleaned and lubricated.
The external lock cylinders should be lubricated twice a
year, preferably in the Fall and Spring. Apply a small
amount of a high quality lubricant, such as Mopar Lock
Cylinder Lubricant directly into the lock cylinder.
Windshield Wiper Blades
Clean the rubber edges of the wiper blades and the
windshield periodically with a sponge or soft cloth and a
mild nonabrasive cleaner. This will remove accumulations
of salt or road film.
Operation of the wipers on dry glass for long periods may
cause deterioration of the wiper blades. Always use washer
fluid when using the wipers to remove salt or dirt from a
dry windshield.
Avoid using the wiper blades to remove frost or ice from
the windshield. Keep the blade rubber out of contact with
petroleum products such as engine oil, gasoline, etc.NOTE:
Life expectancy of wiper blades varies depending
on geographical area and frequency of use. Poor perfor-
mance of blades may be present with chattering, marks,
water lines or wet spots. If any of these conditions are
present, clean the wiper blades or replace as necessary.
Exhaust System
The best protection against carbon monoxide entry into the
vehicle body is a properly maintained engine exhaust
system.
If you notice a change in the sound of the exhaust system;
or if the exhaust fumes can be detected inside the vehicle;
or when the underside or rear of the vehicle is damaged;
have an authorized technician inspect the complete ex-
haust system and adjacent body areas for broken, dam-
aged, deteriorated, or mispositioned parts. Open seams or
loose connections could permit exhaust fumes to seep into
the passenger compartment. In addition, have the exhaust
system inspected each time the vehicle is raised for lubri-
cation or oil change. Replace as required.
348 SERVICING AND MAINTENANCE
Page 480 of 490
Head Restraints............................49
Heated Mirrors ......................... .56, 60
Heater, Engine Block ....................... .242
High Beam/Low Beam Select (Dimmer) Switch ......62
Hill Start Assist ........................... .160
Hitches Trailer Towing .......................... .273
HomeLink (Garage Door Opener) ................98
Hood Prop ................................92
Hood Release ..............................92
Hook, Coat ...............................112
Ignition ..................................20
Switch .................................20
Inside Rearview Mirror .......................57
Instrument Cluster ......................... .130
Descriptions ........................ .131, 152
Display .............................. .133
Display Controls ........................ .133
Menu Items ........................... .135
Instrument Panel Lens Cleaning ................384
Integrated Power Module (Fuses) ...............292
Interior And Instrument Lights ..................64
Interior Appearance Care .................... .383
Interior Lights ..............................64 Intermittent Wipers (Delay Wipers)
...............67
Introduction ................................4
Inverter Power ................................119
iPod/USB/MP3 Control ..................... .406
Bluetooth Streaming Audio ..............410, 461
Jack Location ............................ .298
Jack Operation ........................ .297, 357
Jump Starting ............................ .324
Key Fob Arm The Alarm ..........................25
Disarm The Alarm ........................25
Programming Additional Key Fobs ..........20, 24
Key Fob Battery Service (Remote Keyless Entry) .....18
Key Fob Programming (Remote Keyless Entry) ......20
Keys ....................................17
Replacement .............................24
Lane Change And Turn Signals .................61
Lane Change Assist ...................... .61, 64
Lap/Shoulder
Belts ........................ .182
Latches ................................. .237
Hood ..................................92
478 INDEX
Page 484 of 490
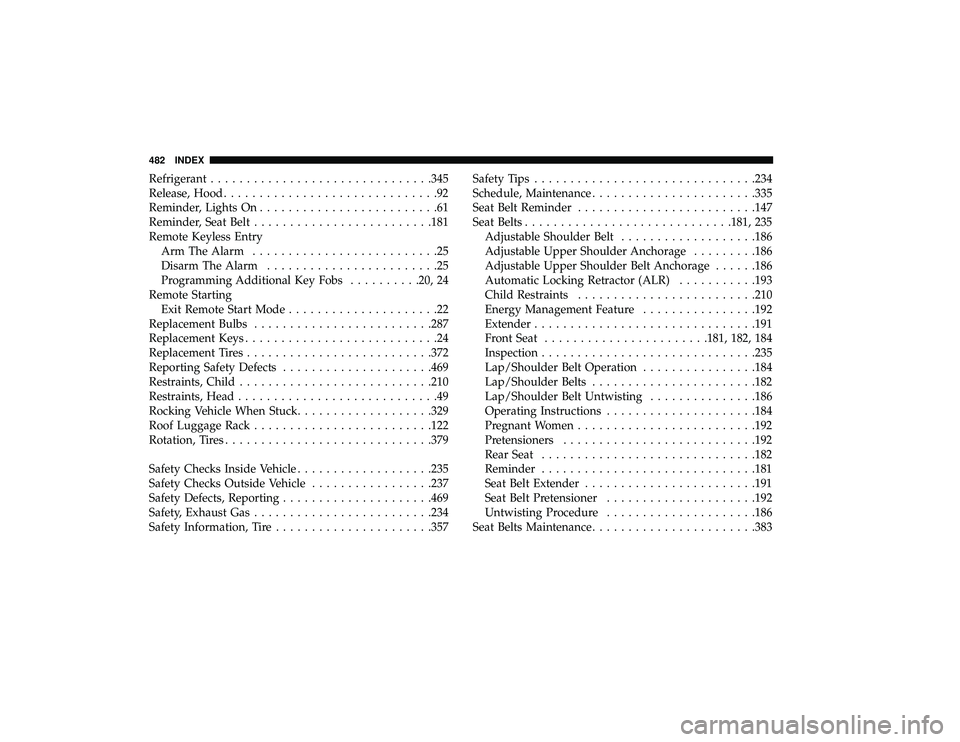
Refrigerant.............................. .345
Release, Hood ..............................92
Reminder, Lights On .........................61
Reminder, Seat Belt ........................ .181
Remote Keyless Entry Arm The Alarm ..........................25
Disarm The Alarm ........................25
Programming Additional Key Fobs ..........20, 24
Remote Starting Exit Remote Start Mode .....................22
Replacement Bulbs ........................ .287
Replacement Keys ...........................24
Replacement Tires ......................... .372
Reporting Safety Defects .................... .469
Restraints, Child .......................... .210
Restraints, Head ............................49
Rocking Vehicle When Stuck ...................329
Roof Luggage Rack ........................ .122
Rotation, Tires ............................ .379
Safety Checks Inside Vehicle ...................235
Safety Checks Outside Vehicle .................237
Safety Defects, Reporting .................... .469
Safety, Exhaust Gas ........................ .234
Safety Information, Tire ..................... .357Safety Tips
.............................. .234
Schedule, Maintenance ...................... .335
Seat Belt Reminder ........................ .147
Seat Belts ............................ .181, 235
Adjustable Shoulder Belt ...................186
Adjustable Upper Shoulder Anchorage .........186
Adjustable Upper Shoulder Belt Anchorage ......186
Automatic Locking Retractor (ALR) ...........193
Child Restraints ........................ .210
Energy Management Feature ................192
Extender .............................. .191
Front Seat ...................... .181, 182, 184
Inspection ............................. .235
Lap/Shoulder Belt Operation ................184
Lap/Shoulder
Belts ...................... .182
Lap/Shoulder Belt Untwisting ...............186
Operating Instructions .................... .184
Pregnant Women ........................ .192
Pretensioners .......................... .192
Rear Seat ............................. .182
Reminder ............................. .181
Seat Belt Extender ....................... .191
Seat Belt Pretensioner .................... .192
Untwisting Procedure .................... .186
Seat Belts Maintenance ...................... .383
482 INDEX