Page 19 of 490

KEYS
Key Fobs
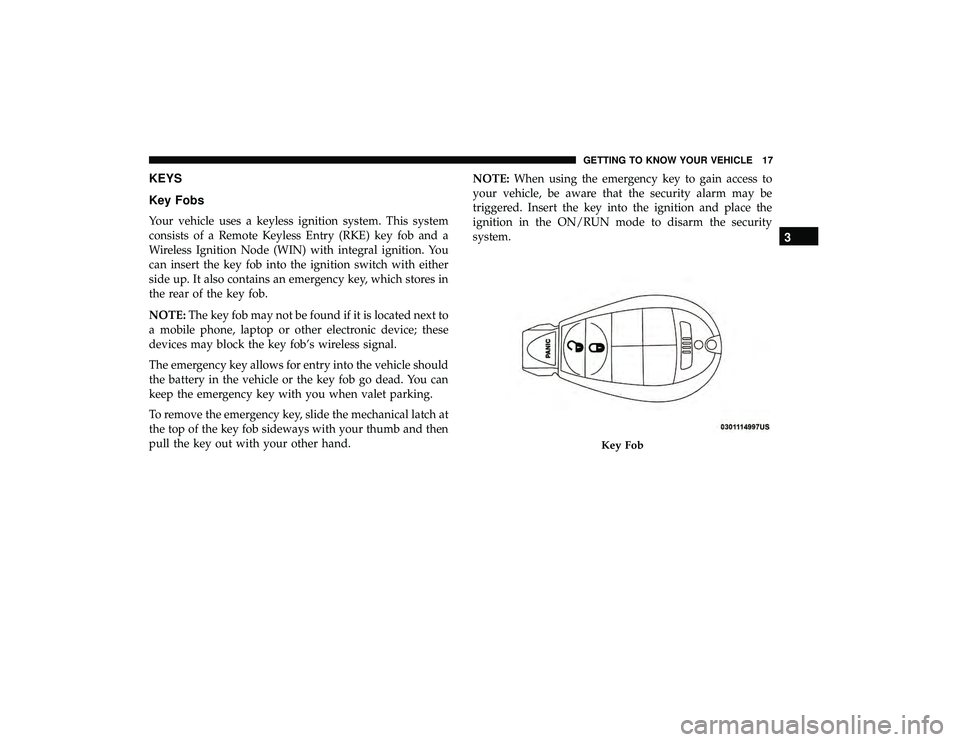
Your vehicle uses a keyless ignition system. This system
consists of a Remote Keyless Entry (RKE) key fob and a
Wireless Ignition Node (WIN) with integral ignition. You
can insert the key fob into the ignition switch with either
side up. It also contains an emergency key, which stores in
the rear of the key fob.
NOTE:The key fob may not be found if it is located next to
a mobile phone, laptop or other electronic device; these
devices may block the key fob’s wireless signal.
The emergency key allows for entry into the vehicle should
the battery in the vehicle or the key fob go dead. You can
keep the emergency key with you when valet parking.
To remove the emergency key, slide the mechanical latch at
the top of the key fob sideways with your thumb and then
pull the key out with your other hand. NOTE:
When using the emergency key to gain access to
your vehicle, be aware that the security alarm may be
triggered. Insert the key into the ignition and place the
ignition in the ON/RUN mode to disarm the security
system.
Key Fob
3
GETTING TO KNOW YOUR VEHICLE 17
Page 20 of 490

To Unlock The Doors And Liftgate
Push and release the unlock button on the key fob once to
unlock the doors. Push and release the unlock button a
second time within 5 seconds to unlock the liftgate. The
turn signal lights will flash to acknowledge the unlock
signal.
To Lock The Doors And Liftgate
Push and release the lock button on the key fob once to lock
the doors. The turn signal lights will flash to acknowledge
the lock signal.
Replacing The Battery In The Key Fob With Remote
Control
The replacement battery is one CR2032 battery.
NOTE:
•Perchlorate Material — special handling may apply. See
www.dtsc.ca.gov/hazardouswaste/perchlorate
• Do not replace coin battery unless the cluster display
indicates a message “Key Fob Low Battery”
• Do not touch the battery terminals that are on the back
housing or the printed circuit board.
1. Remove the emergency key by sliding the mechanical latch on the back of the key fob sideways with your
thumb and then pull the key out with your other hand.
Emergency Key Removal
18 GETTING TO KNOW YOUR VEHICLE
Page 21 of 490
2. Gently pry the two halves of the key fob apart. Makesure not to damage the seal during removal. 3. Remove the battery by turning the back cover over
(battery facing downward) and tapping it lightly on a
solid surface such as a table or similar, then replace the
battery. When replacing the battery, match the + sign on
the battery to the + sign on the inside of the battery clip,
located on the back cover. Avoid touching the new
battery with your fingers. Skin oils may cause battery
deterioration. If you touch a battery, clean it with
rubbing alcohol.
4. To assemble the key fob case, line up the two case halves, and snap them together.
Emergency WIN Key RemovalSeparating WIN Key Fob Case
3
GETTING TO KNOW YOUR VEHICLE 19
Page 23 of 490
REMOTE START — IF EQUIPPED
How To Use Remote Start
All of the following conditions must be met before the
engine will remote start:
•Gear selector in PARK
• Doors closed •
Hood closed
• Liftgate closed
• HAZARD switch off
• BRAKE switch inactive (brake pedal not pushed)
• Battery at an acceptable charge level
• System not disabled from previous remote start event
• Vehicle security alarm not active
• Ignition in OFF position
WARNING!
•Do not start or run an engine in a closed garage or
confined area. Exhaust gas contains Carbon Monox-
ide (CO) which is odorless and colorless. Carbon
Monoxide is poisonous and can cause serious injury
or death when inhaled.
• Keep key fobs away from children. Operation of the
Remote Start System, windows, door locks or other
controls could cause serious injury or death.
Wireless Ignition Switch
1 — OFF
2 — ACC (Accessory)
3 — ON/RUN
4 — START
3
GETTING TO KNOW YOUR VEHICLE 21
Page 28 of 490

NOTE:
•The driver’s door key cylinder and the liftgate button on
the key fob cannot arm or disarm the vehicle security
alarm.
• The vehicle security alarm remains armed during power
liftgate entry. Pushing the liftgate button will not disarm
the vehicle security alarm. If someone enters the vehicle
through the liftgate and opens any door, the alarm will
sound.
• When the vehicle security alarm is armed, the interior
power door lock switches will not unlock the doors.
The vehicle security alarm is designed to protect your
vehicle. However, you can create conditions where the
system will give you a false alarm. If one of the previously
described arming sequences has occurred, the vehicle
security alarm will arm regardless of whether you are in
the vehicle or not. If you remain in the vehicle and open a
door, the alarm will sound. If this occurs, disarm the
vehicle security alarm. If the vehicle security alarm is armed and the battery
becomes disconnected, the vehicle security alarm will
remain armed when the battery is reconnected; the exterior
lights will flash, and the horn will sound. If this occurs,
disarm the vehicle security alarm.
Tamper Alert
If something has triggered the vehicle security alarm in
your absence, the horn will sound three times and the
exterior lights will blink three times when you disarm the
vehicle security alarm. Check the vehicle for tampering.
26 GETTING TO KNOW YOUR VEHICLE
Page 66 of 490

Turn Signal Warning
If the vehicle electronics sense that the vehicle has traveled
at over 18 mph (29 km/h) for about 1 mile (1.6 km) with the
turn signals on, a chime will sound to alert the driver.
Lane Change Assist
Tap the lever up or down once, without moving beyond
the detent, and the turn signal (right or left) will flash three
times then automatically turn off.
Battery Protection
This feature provides battery protection to avoid wearing
down the battery if the headlights or parking lights are left
on for extended periods of time when the ignition is in the
OFF position. After eight minutes of the ignition being in
the OFF position and the headlight switch in any position
other than OFF or AUTO, the lights will turn off automati-
cally until the next cycle of the ignition or headlight switch.
The battery protection feature will be disabled if the
ignition is placed in any position other than OFF during the
eight minute delay.
INTERIOR LIGHTS
Courtesy/Interior Lighting
At the forward end of the overhead console are two
courtesy lights (standard dome light has two buttons).
These interior lights are turned on when a door or the
liftgate is opened, the remote keyless entry key fob is
activated, or when the dimmer control is moved to the
extreme top.
The interior lights will automatically turn off in approxi-
mately 10 minutes for the first activation and 90 seconds
every activation thereafter until the engine is started, if one
of the following occur:
•A door, sliding door or the liftgate is left open.
• Any overhead reading light is left on.
NOTE: The ignition must be cycled to the OFF position for
this feature to operate.
The courtesy lights also function as reading lights. Push in
on each lens to turn these lights on while inside the vehicle.
Push a second time to turn each light off. You may adjust
the direction of these lights by pushing the outside ring,
which is identified with four directional arrows (LED
lamps only).
64 GETTING TO KNOW YOUR VEHICLE
Page 119 of 490
There is an additional 12 Volt power outlet located on the
left rear trim panel immediately behind the second row left
passenger seat.The outlet in the rear quarter panel near the liftgate and the
upper outlet in the instrument panel are both controlled by
the ignition switch. Each of these outlets can support 160
Watts (13 Amps). Do not exceed 160 Watts (13 Amps) for
each of these outlets.
The power outlets include tethered caps, labeled with a key
or battery symbol indicating the power source. The power
outlet, located on the lower instrument panel, is powered
directly from the battery. Items plugged into this power
outlet may discharge the battery and/or prevent the engine
from starting.
Center Stack Power OutletsRear Panel Power Outlet
3
GETTING TO KNOW YOUR VEHICLE 117
Page 210 of 490

NOTE:After an accident, remember to cycle the ignition
to the STOP (OFF/LOCK) position and remove the key
from the ignition switch to avoid draining the battery.
Carefully check the vehicle for fuel leaks in the engine
compartment and on the ground near the engine compart-
ment and fuel tank before resetting the system and starting
the engine. If there are no fuel leaks or damage to the
vehicle electrical devices (e.g. headlights) after an accident,
reset the system by following the procedure described
below. If you have any doubt, contact an authorized dealer.
Enhanced Accident Response System Reset
Procedure
In order to reset the Enhanced Accident Response System
functions after an event, the ignition switch must be
changed from ignition START or ON/RUN to ignition OFF.
Carefully check the vehicle for fuel leaks in the engine
compartment and on the ground near the engine compart-
ment and fuel tank before resetting the system and starting
the engine.
Maintaining Your Air Bag System
WARNING!
• Modifications to any part of the air bag system could
cause it to fail when you need it. You could be
injured if the air bag system is not there to protect
you. Do not modify the components or wiring, in-
cluding adding any kind of badges or stickers to the
steering wheel hub trim cover or the upper passenger
side of the instrument panel. Do not modify the front
bumper, vehicle body structure, or add aftermarket
side steps or running boards.
• It is dangerous to try to repair any part of the air bag
system yourself. Be sure to tell anyone who works on
your vehicle that it has an air bag system.
(Continued)
208 SAFETY