Page 63 of 560

WARNING!
Do not adjust the steering column while driving.
Adjusting the steering column while driving or driv-
ing with the steering column unlocked, could cause the
driver to lose control of the vehicle. Failure to follow
this warning may result in serious injury or death.
Heated Steering Wheel — If Equipped
The steering wheel contains a heating element that helps
warm your hands in cold weather. The heated steering
wheel has only one temperature setting. Once the heated
steering wheel has been turned on, it will stay on for an
average of 80 minutes before automatically shutting off.
This time will vary based on environmental temperatures.
The heated steering wheel can shut off early or may not
turn on when the steering wheel is already warm.
The heated steering wheel control button is located within
the Uconnect system. You can gain access to the control
button through the climate screen or the controls screen.
•Press the heated steering wheel button
once to turn
the heating element on.
• Press the heated steering wheel buttona second time
to turn the heating element off.
NOTE: The engine must be running for the heated steering
wheel to operate.
Vehicles Equipped With Remote Start
On models that are equipped with remote start, the heated
steering wheel can be programmed to come on during a
remote start through the Uconnect system. Refer to
“Uconnect Settings” in “Multimedia” for further information.
WARNING!
• Persons who are unable to feel pain to the skin
because of advanced age, chronic illness, diabetes,
spinal cord injury, medication, alcohol use, exhaus-
tion, or other physical conditions must exercise care
when using the steering wheel heater. It may cause
burns even at low temperatures, especially if used
for long periods.
• Do not place anything on the steering wheel that
insulates against heat, such as a blanket or steering
wheel covers of any type and material. This may
cause the steering wheel heater to overheat.
3
GETTING TO KNOW YOUR VEHICLE 61
Page 69 of 560

Multifunction Lever
The multifunction lever controls the operation of the turn
signals, headlight beam selection and passing lights. The
multifunction lever is located on the left side of the steering
column.
Daytime Running Lights (DRL) — If Equipped
The Daytime Running Lights will turn on when the engine
is started and will remain on unless the headlamps are
turned to the on position, the parking brake is applied, or
the engine is shut OFF.
NOTE:
If allowed by law in the country in which the vehicle
was purchased, the Daytime Running Lights can be turned
on and off using the Uconnect System, refer to “Uconnect
Settings” in “Multimedia” for further information.
High/Low Beam Switch
Push the multifunction lever away from you to switch the
headlights to high beam. Pull the multifunction lever
toward you to switch the headlights back to low beam.
Automatic High Beam — If Equipped
The Automatic High Beam Headlamp Control system
provides increased forward lighting at night by automat-
ing high beam control through the use of a digital camera
mounted on the inside rearview mirror. This camera de-
tects vehicle specific light and automatically switches from
high beams to low beams until the approaching vehicle is
out of view.
Multifunction Lever
3
GETTING TO KNOW YOUR VEHICLE 67
Page 77 of 560
Dome Light Position
Rotate the dimmer control completely upward to the second
detent to turn on the interior lights. The interior lights will
remain on when the dimmer control is in this position.
Interior Light Defeat (Off)
Rotate the instrument panel dimmer control to the extreme
bottom (O) off position. The interior lights will remain off
when the doors are open.
Parade Mode (Daytime Brightness Feature)
Rotate the instrument panel dimmer control upward to the
first detent. This feature brightens all text displays such as
the odometer, instrument cluster display, and radio when
the position lights or headlights are on.
WINDSHIELD WIPERS AND WASHERS
The multifunction lever operates the windshield wipers
and washer when the ignition is placed in the ON/RUN or
ACC position. The multifunction lever is located on the left
side of the steering column.
Windshield Wiper/Washer Control
3
GETTING TO KNOW YOUR VEHICLE 75
Page 78 of 560

Wiper Operation
Rotate the end of the multifunction lever to the first detent,
past the intermittent settings for low-speed wiper opera-
tion, or to the second detent past the intermittent settings
for high-speed wiper operation.
CAUTION!
•Turn the windshield wipers off when driving
through an automatic car wash. Damage to the wind-
shield wipers may result if the wiper control is left in
any position other than off.
• In cold weather, always turn off the wiper switch and
allow the wipers to return to the park position before
turning off the engine. If the wiper switch is left on
and the wipers freeze to the windshield, damage to
the wiper motor may occur when the vehicle is
restarted.
• Always remove any buildup of snow that prevents
the windshield wiper blades from returning to the
off position. If the windshield wiper control is
turned off and the blades cannot return to the off
position, damage to the wiper motor may occur.
Intermittent Wiper System
Use the intermittent wiper when weather conditions make
a single wiping cycle with a variable pause between cycles
desirable. Rotate the end of the multifunction lever to the
first detent position, and then turn the end of the lever to
select the desired delay interval. There are four delay
settings, which allow you to regulate the wipe interval
from a minimum of one cycle every second to a maximum
of approximately 36 seconds between cycles. The delay
intervals will double in duration when the vehicle speed is
10 mph (16 km/h) or less.
Windshield Washers
To use the washer, push the multifunction lever inward
(toward the steering column) and hold it for as long as
washer spray is desired.
If you activate the washer while the windshield wiper
control is in the delay range, the wipers will operate for
two wipe cycles after releasing the lever and then resume
the intermittent interval previously selected.
76 GETTING TO KNOW YOUR VEHICLE
Page 103 of 560

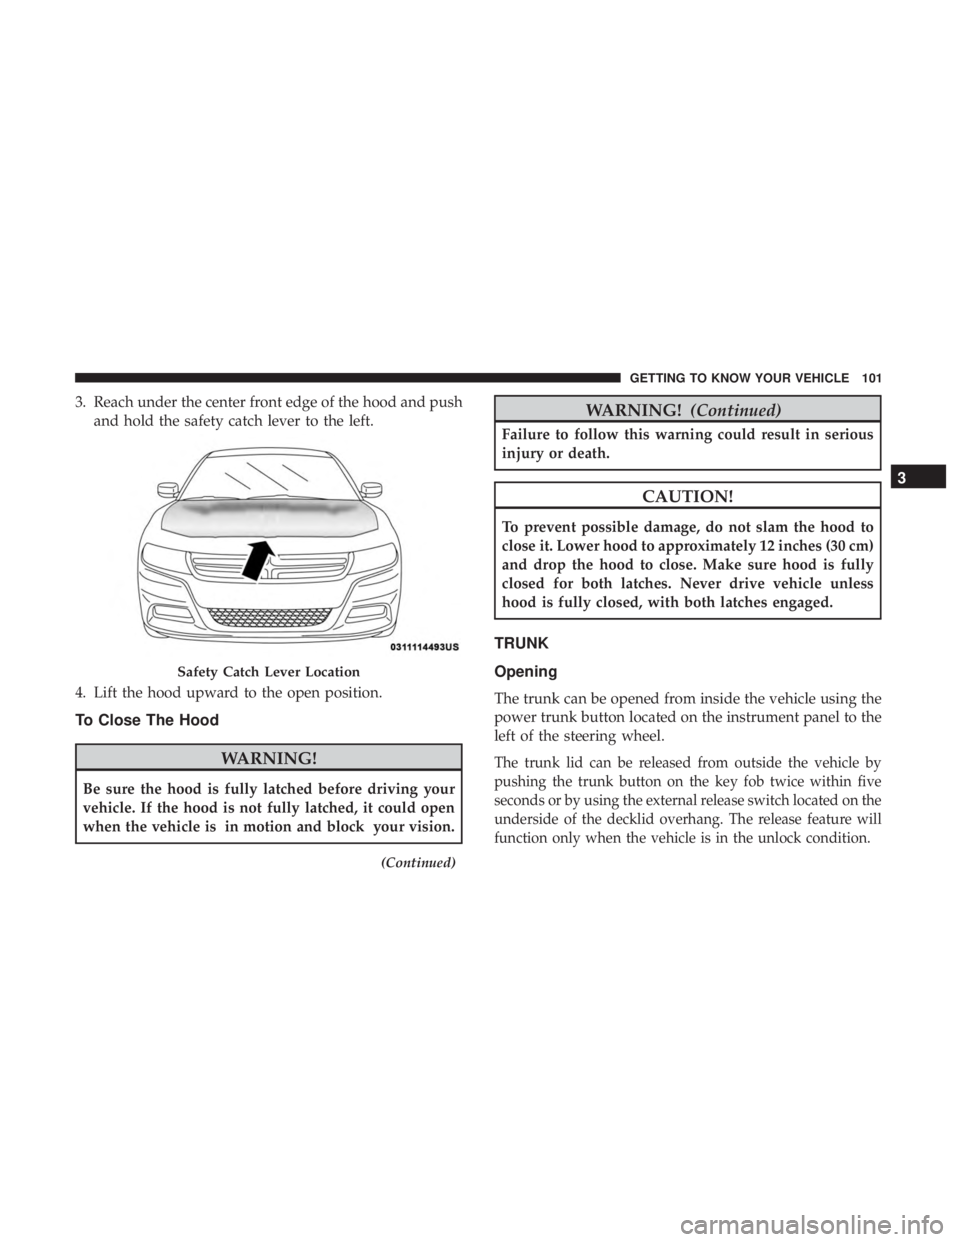
3. Reach under the center front edge of the hood and pushand hold the safety catch lever to the left.
4. Lift the hood upward to the open position.
To Close The Hood
WARNING!
Be sure the hood is fully latched before driving your
vehicle. If the hood is not fully latched, it could open
when the vehicle is in motion and block your vision.
(Continued)
WARNING! (Continued)
Failure to follow this warning could result in serious
injury or death.
CAUTION!
To prevent possible damage, do not slam the hood to
close it. Lower hood to approximately 12 inches (30 cm)
and drop the hood to close. Make sure hood is fully
closed for both latches. Never drive vehicle unless
hood is fully closed, with both latches engaged.
TRUNK
Opening
The trunk can be opened from inside the vehicle using the
power trunk button located on the instrument panel to the
left of the steering wheel.
The trunk lid can be released from outside the vehicle by
pushing the trunk button on the key fob twice within five
seconds or by using the external release switch located on the
underside of the decklid overhang. The release feature will
function only when the vehicle is in the unlock condition.
Safety Catch Lever Location
3
GETTING TO KNOW YOUR VEHICLE 101
Page 104 of 560

With the ignition in the ON/RUN position, the trunk open
symbol will display in the instrument cluster indicating
that the trunk is open. The odometer display will reappear
once the trunk is closed.
With the ignition in the OFF position, the trunk open
symbol will display until the trunk is closed.
NOTE:Refer to “Keyless Enter-N-Go — Passive Entry” in
”Doors” in “Getting To Know Your Vehicle” for further
information on trunk operation with the Passive Entry
feature.
Opening From Inside The Vehicle
Interior Power Trunk Release
The trunk can be opened from inside the
vehicle using the power trunk release
button located on the instrument panel
to the left of the steering wheel.
NOTE:The transmission must be in
PARK before the button will operate.
Opening From Outside The Vehicle
To Unlock/Open The Trunk
The trunk may be unlocked/opened using either of the
following methods:
• Key Fob Trunk Release Button
• Passive Entry Button
Key Fob Trunk Release Button Push the power trunk button on the key fob
twice within five seconds to release the trunk.
Passive Entry Button
Push the trunk passive entry button which is located on the
back of the trunk lid. With a valid Passive Entry key fob
within 5 ft (1.5 m) of the trunk, push the passive entry
button to open the trunk.
Power Trunk Release
102 GETTING TO KNOW YOUR VEHICLE
Page 128 of 560

NOTE:The hard telltales will illuminate for a bulb check
when the ignition is first cycled.
INSTRUMENT CLUSTER DISPLAY
Your vehicle will be equipped with an instrument cluster
display, which offers useful information to the driver. With
the ignition in the STOP/OFF mode, opening/closing of a
door will activate the display for viewing, and display the
total miles, or kilometers, in the odometer. Your instrument
cluster display is designed to display important informa-
tion about your vehicle’s systems and features. Using a
driver interactive display located on the instrument panel,
your instrument cluster display can show you how sys-
tems are working and give you warnings when they are
not. The steering wheel mounted controls allow you to
scroll through the main menus and submenus. You can
access the specific information you want and make selec-
tions and adjustments.
Location And Controls
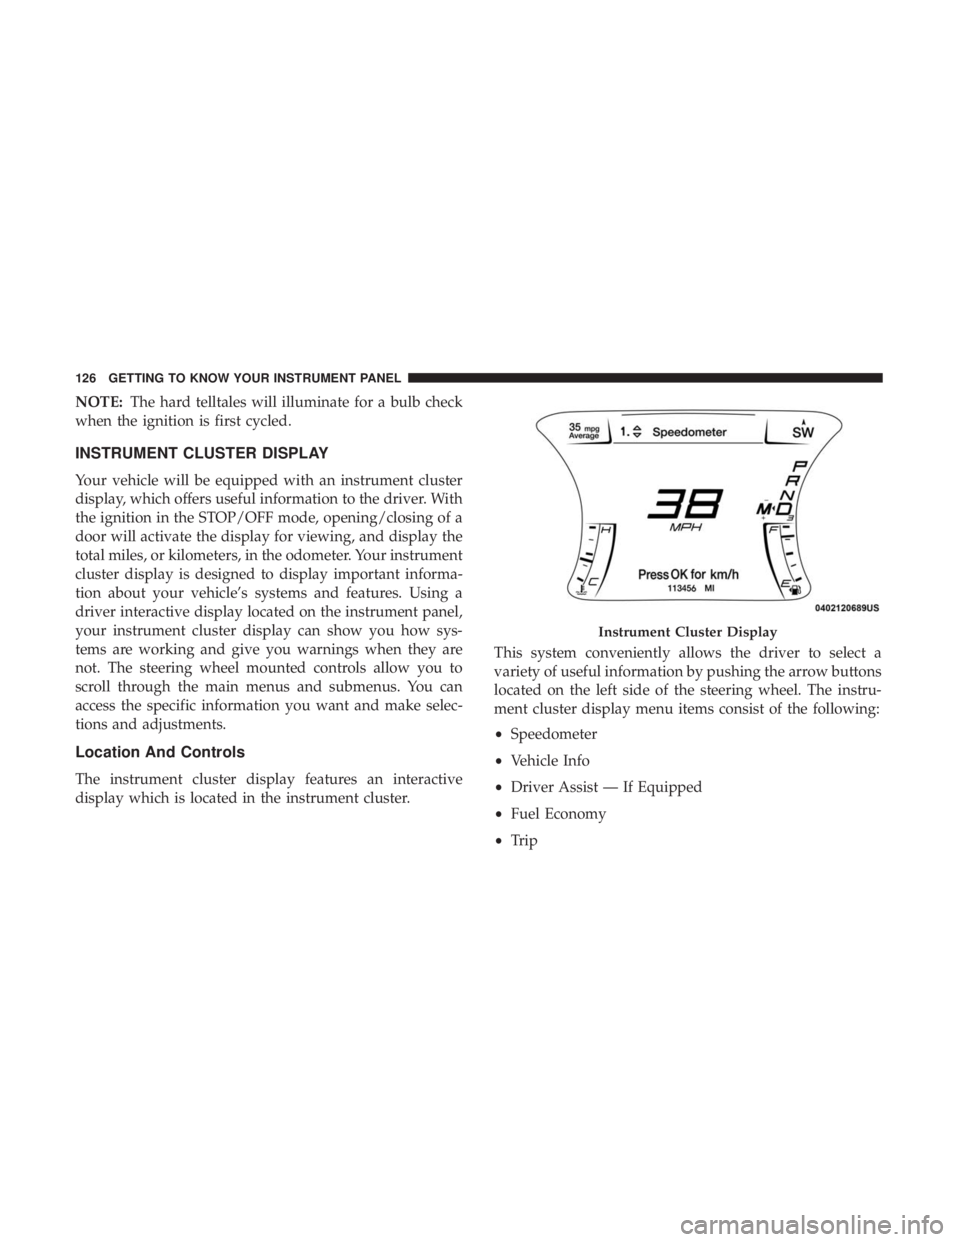
The instrument cluster display features an interactive
display which is located in the instrument cluster. This system conveniently allows the driver to select a
variety of useful information by pushing the arrow buttons
located on the left side of the steering wheel. The instru-
ment cluster display menu items consist of the following:
•
Speedometer
• Vehicle Info
• Driver Assist — If Equipped
• Fuel Economy
• Trip
Instrument Cluster Display
126 GETTING TO KNOW YOUR INSTRUMENT PANEL
Page 129 of 560
•Audio
• Messages
• Screen Setup
The system allows the driver to select information by
pushing the following buttons mounted on the steering
wheel: Up And Down Arrow Buttons:
Using the
upordown arrows allows you to cycle through
the Main Menu Items.
Changes the Main Screen area and Menu Title area.
Left And Right Arrow Buttons:
Using the leftorright arrow button allows you to cycle
through the submenu items of the Main menu item.
NOTE:
• Holding the up/downorleft/right arrow button will
loop the user through the currently selected menu or
options presented on the screen.
• Main menu and submenus wrap for continuous scroll-
ing.
• Upon returning to a main menu, the last submenu
screen viewed within that main menu will be displayed.
OK Button:
For Digital Speedometer:
• Pushing the OKbutton changes units (mph or km/h).
Instrument Cluster Display Controls
4
GETTING TO KNOW YOUR INSTRUMENT PANEL 127