Page 67 of 500

Lane Change Assist — If Equipped
Tap the multifunction lever up or down once, without
moving beyond the detent, and the turn signal (right or
left) will flash three times then automatically turn off.
INTERIOR LIGHTS
The interior lights come on when a door is opened.
To protect the battery, the interior lights will turn off
automatically ten minutes after the ignition is moved to the
OFF position. This will occur if the interior lights were
switched on manually or are on because a door is open.
The Battery Protection also includes the glove compart-
ment light and the trunk light. To restore interior light
operation after automatic battery protection is enabled
(lights off), either place the ignition in the ON/RUN
position or cycle the light switch.
Map/Reading Lights
These lights are mounted between the sun visors on the
overhead console. Each light is turned on by pushing the
lens. Push the lens a second time to turn off the light. These
lights also turn on when a door is opened, when the unlock
button on the remote keyless entry key fob is pushed, or
when the dimmer control is turned fully upward, past the
second detent.
Overhead Console
3
GETTING TO KNOW YOUR VEHICLE 65
Page 88 of 500
Trunk Safety
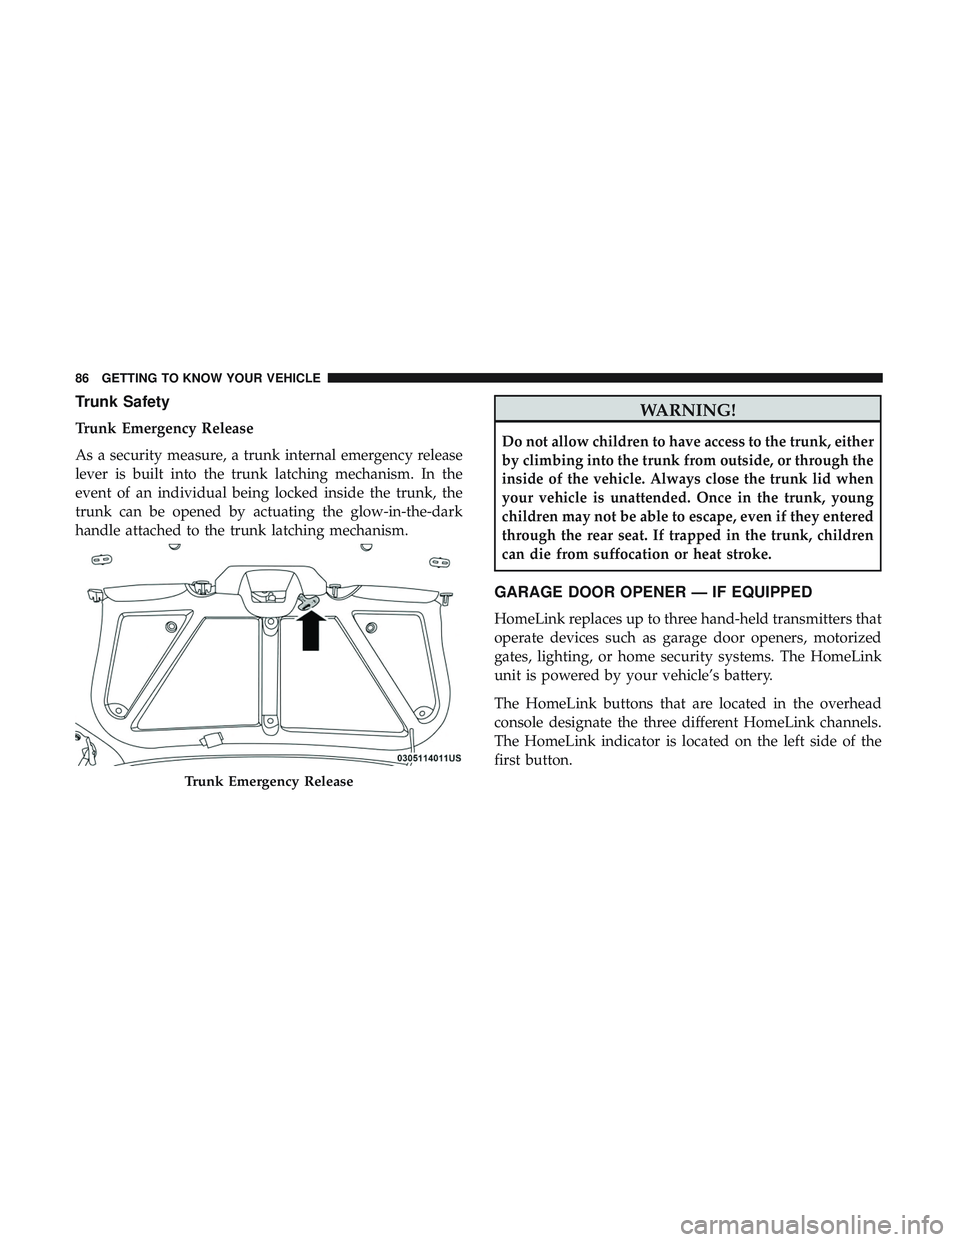
Trunk Emergency Release
As a security measure, a trunk internal emergency release
lever is built into the trunk latching mechanism. In the
event of an individual being locked inside the trunk, the
trunk can be opened by actuating the glow-in-the-dark
handle attached to the trunk latching mechanism.
WARNING!
Do not allow children to have access to the trunk, either
by climbing into the trunk from outside, or through the
inside of the vehicle. Always close the trunk lid when
your vehicle is unattended. Once in the trunk, young
children may not be able to escape, even if they entered
through the rear seat. If trapped in the trunk, children
can die from suffocation or heat stroke.
GARAGE DOOR OPENER — IF EQUIPPED
HomeLink replaces up to three hand-held transmitters that
operate devices such as garage door openers, motorized
gates, lighting, or home security systems. The HomeLink
unit is powered by your vehicle’s battery.
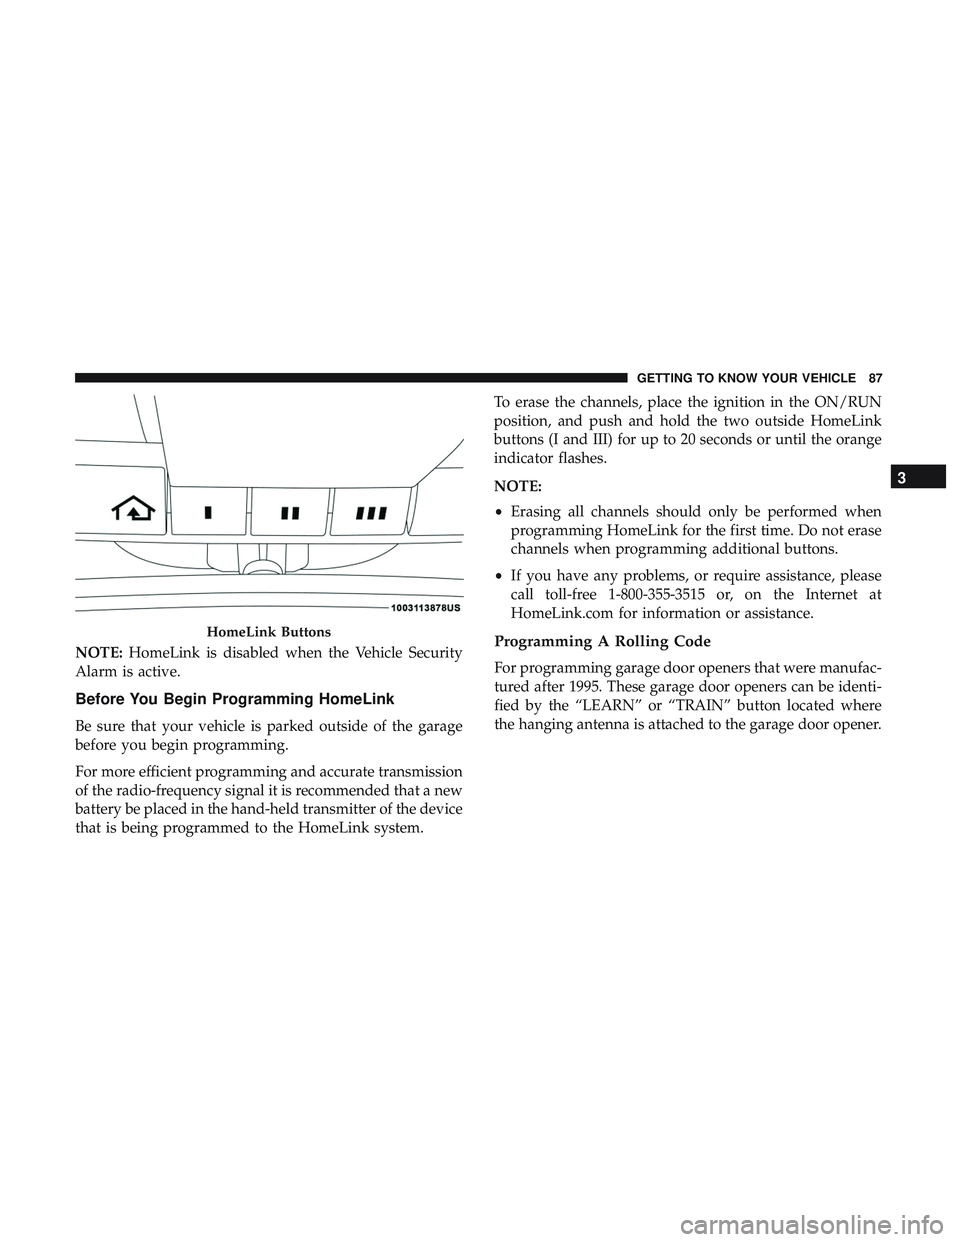
The HomeLink buttons that are located in the overhead
console designate the three different HomeLink channels.
The HomeLink indicator is located on the left side of the
first button.
Trunk Emergency Release
86 GETTING TO KNOW YOUR VEHICLE
Page 89 of 500
NOTE:HomeLink is disabled when the Vehicle Security
Alarm is active.
Before You Begin Programming HomeLink
Be sure that your vehicle is parked outside of the garage
before you begin programming.
For more efficient programming and accurate transmission
of the radio-frequency signal it is recommended that a new
battery be placed in the hand-held transmitter of the device
that is being programmed to the HomeLink system. To erase the channels, place the ignition in the ON/RUN
position, and push and hold the two outside HomeLink
buttons (I and III) for up to 20 seconds or until the orange
indicator flashes.
NOTE:
•
Erasing all channels should only be performed when
programming HomeLink for the first time. Do not erase
channels when programming additional buttons.
• If you have any problems, or require assistance, please
call toll-free 1-800-355-3515 or, on the Internet at
HomeLink.com for information or assistance.
Programming A Rolling Code
For programming garage door openers that were manufac-
tured after 1995. These garage door openers can be identi-
fied by the “LEARN” or “TRAIN” button located where
the hanging antenna is attached to the garage door opener.
HomeLink Buttons
3
GETTING TO KNOW YOUR VEHICLE 87
Page 93 of 500
NOTE:•If the indicator light stays on constantly, programming
is complete and the garage door/device should acti-
vate when the HomeLink button is pressed.
• To program the two remaining HomeLink buttons,
repeat each step for each remaining button. DO NOT
erase the channels.
If you unplugged the garage door opener/device for
programming, plug it back in at this time.
Reprogramming A Single HomeLink Button (Canadian/
Gate Operator)
To reprogram a channel that has been previously trained,
follow these steps:
1. Cycle the ignition to the ON/RUN position.
2. Press and hold the desired HomeLink button until the indicator light begins to flash after 20 seconds. Do not
release the button.
3. Without releasing the button, proceed with “Canadian/ Gate Operator Programming” step 2 and follow all
remaining steps.Using HomeLink
To operate, push and release the programmed HomeLink
button. Activation will now occur for the programmed
device (i.e. garage door opener, gate operator, security
system, entry door lock, home/office lighting, etc.). The
hand-held transmitter of the device may also be used at
any time.
Security
It is advised to erase all channels before you sell or turn in
your vehicle.
To do this, push and hold the two outside buttons for 20
seconds until the orange indicator flashes. Note that all
channels will be erased. Individual channels cannot be
erased.
The HomeLink Universal Transceiver is disabled when the
Vehicle Security Alarm is active.
Troubleshooting Tips
If you are having trouble programming HomeLink, here
are some of the most common solutions:
•Replace the battery in the Garage Door Opener hand-
held transmitter.
3
GETTING TO KNOW YOUR VEHICLE 91
Page 97 of 500
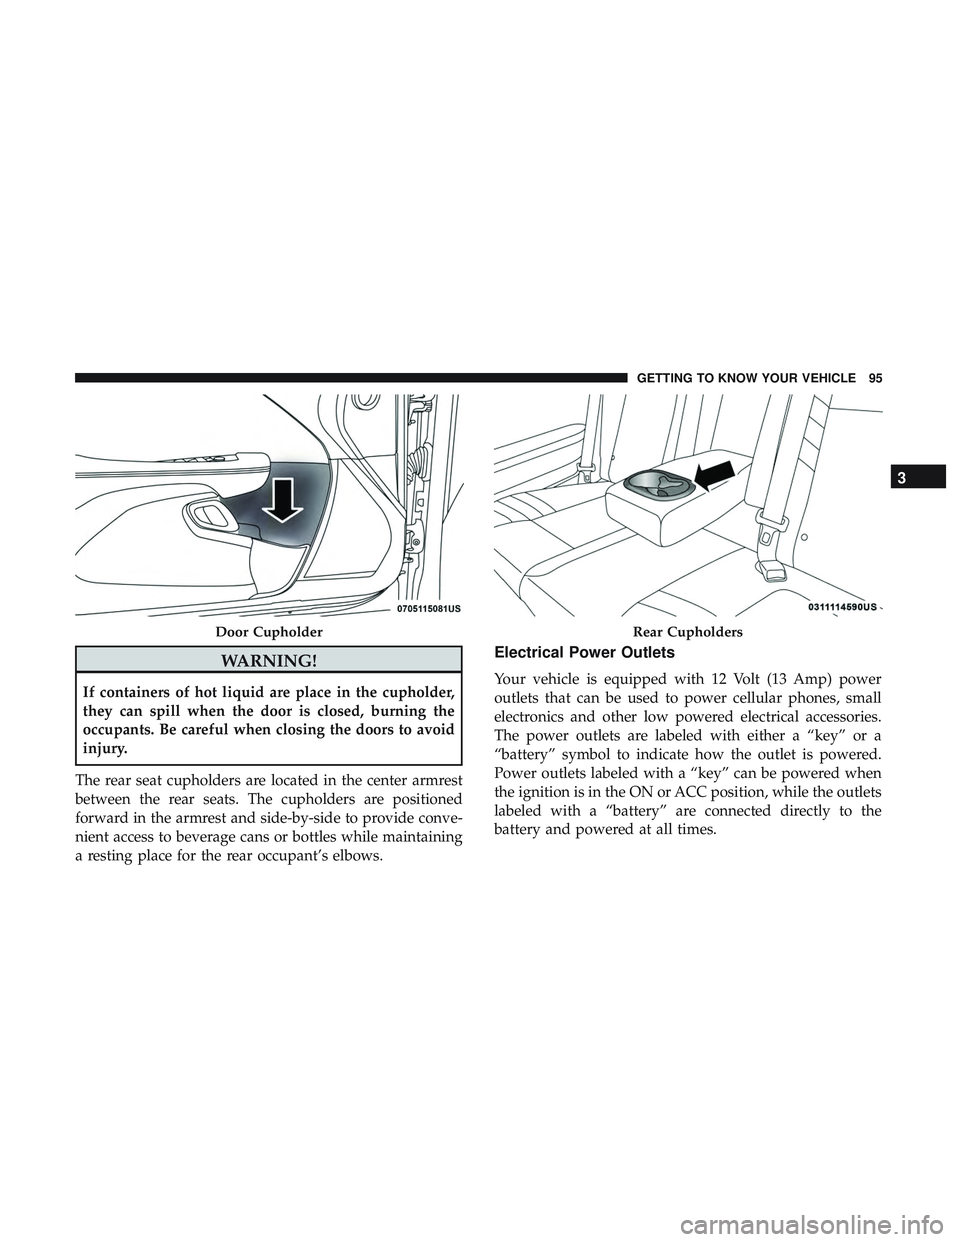
WARNING!
If containers of hot liquid are place in the cupholder,
they can spill when the door is closed, burning the
occupants. Be careful when closing the doors to avoid
injury.
The rear seat cupholders are located in the center armrest
between the rear seats. The cupholders are positioned
forward in the armrest and side-by-side to provide conve-
nient access to beverage cans or bottles while maintaining
a resting place for the rear occupant’s elbows.
Electrical Power Outlets
Your vehicle is equipped with 12 Volt (13 Amp) power
outlets that can be used to power cellular phones, small
electronics and other low powered electrical accessories.
The power outlets are labeled with either a “key” or a
“battery” symbol to indicate how the outlet is powered.
Power outlets labeled with a “key” can be powered when
the ignition is in the ON or ACC position, while the outlets
labeled with a “battery” are connected directly to the
battery and powered at all times.
Door CupholderRear Cupholders
3
GETTING TO KNOW YOUR VEHICLE 95
Page 98 of 500
These power outlets can also operate a conventional cigar
lighter unit.
The front power outlet is located next to the storage area on
the integrated center stack of the instrument panel.
NOTE:
•The front integrated center stack power outlet can be
changed from switched “ignition” to constant “battery”
powered all the time by moving the integrated center
stack fuse #12 in the Rear Power Distribution Center
from fuse location “IGN” to “B+.” Refer to “Fuses” in
“In Case Of Emergency.” In addition to the front center stack power outlet, there is
also a power outlet located in the center console to the left
of the media hub.
NOTE:
All accessories connected to these powered outlets
should be removed or turned off when the vehicle is not in
use to protect the battery against discharge.
Power Outlet — Integrated Center Stack Front
Power Outlet — Center Console
96 GETTING TO KNOW YOUR VEHICLE
Page 100 of 500
CAUTION!
•Many accessories that can be plugged in draw power
from the vehicle’s battery, even when not in use (i.e.,
cellular phones, etc.). Eventually, if plugged in long
enough, the vehicle’s battery will discharge suffi-
ciently to degrade battery life and/or prevent the
engine from starting.
• Accessories that draw higher power (i.e., coolers,
vacuum cleaners, lights, etc.), will degrade the bat-
tery even more quickly. Only use these intermit-
tently and with greater caution.
• After the use of high power draw accessories, or long
periods of the vehicle not being started (with acces-
sories still plugged in), the vehicle must be driven a
sufficient length of time to allow the alternator to
recharge the vehicle’s battery.
• Power outlets are designed for accessory plugs only.
Do not hang any type of accessory or accessory
bracket from the plug. Improper use of the power
outlet can cause damage.
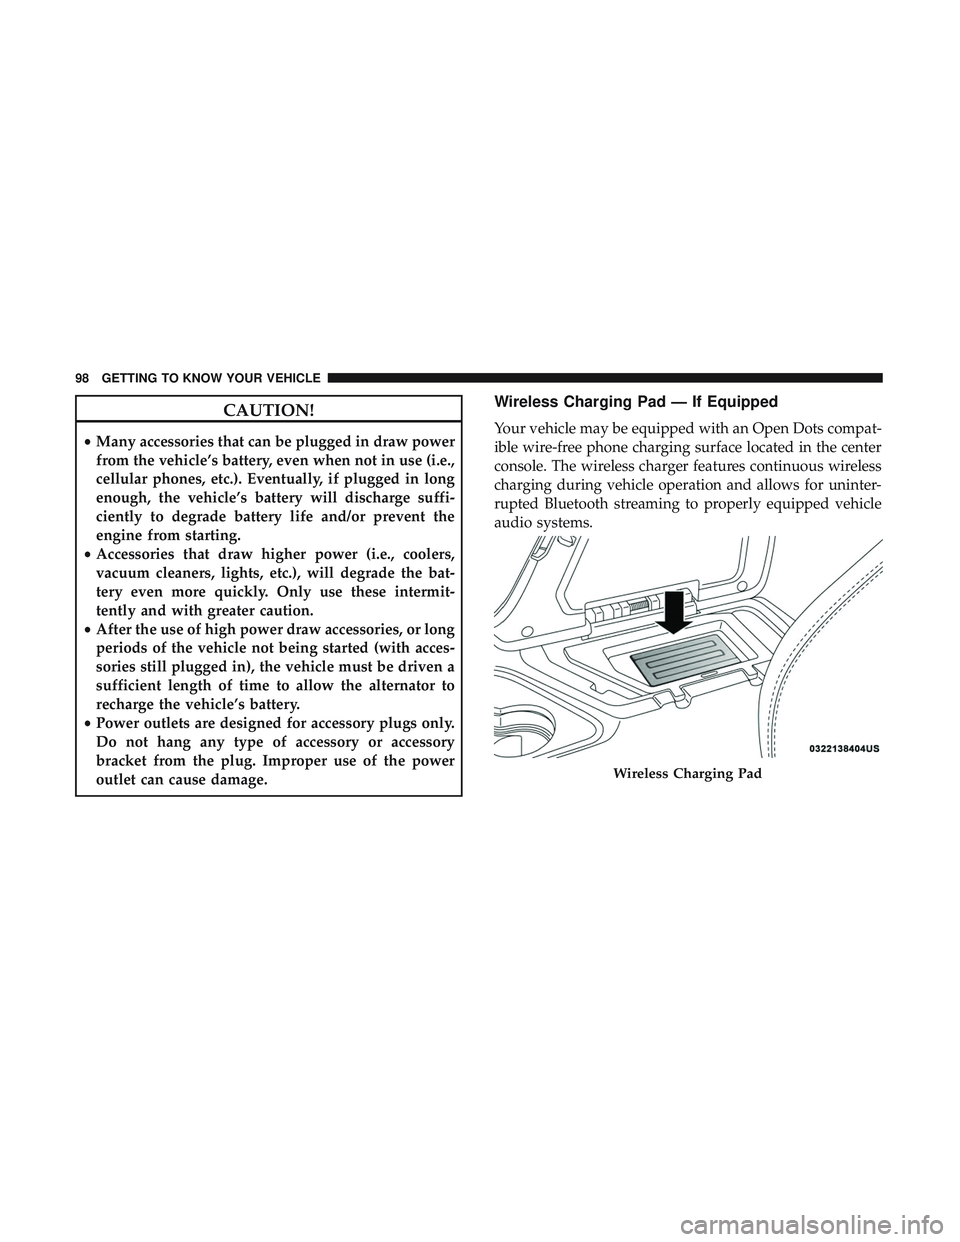
Wireless Charging Pad — If Equipped
Your vehicle may be equipped with an Open Dots compat-
ible wire-free phone charging surface located in the center
console. The wireless charger features continuous wireless
charging during vehicle operation and allows for uninter-
rupted Bluetooth streaming to properly equipped vehicle
audio systems.
Wireless Charging Pad
98 GETTING TO KNOW YOUR VEHICLE
Page 103 of 500
GETTING TO KNOW YOUR INSTRUMENT PANEL
CONTENTS
�INSTRUMENT CLUSTER ..................102
▫ Instrument Cluster Descriptions .............104
� INSTRUMENT CLUSTER DISPLAY ...........105
▫ Location And Controls ...................105
▫ Engine Oil Life Reset ....................107
▫ Performance Shift Indicator (PSI) —
If Equipped .......................... .108
▫ Instrument Cluster Display Selectable Menu
Items ...............................108
▫ Battery Saver On/Battery Saver Mode Message —
Electrical Load Reduction Actions
— If Equipped ........................115 �
WARNING LIGHTS AND MESSAGES .........117
▫ Red Warning Lights .....................117
▫ Yellow Warning Lights ...................122
▫ Yellow Indicator Lights ...................126
▫ Green Indicator Lights ...................126
▫ White Indicator Lights ...................127
▫ Blue Indicator Lights ....................128
� ONBOARD DIAGNOSTIC SYSTEM — OBD II . . .128
▫ Onboard Diagnostic System (OBD II)
Cybersecurity ........................ .129
� EMISSIONS INSPECTION AND MAINTENANCE
PROGRAMS .......................... .1304