2019 CITROEN RELAY reset
[x] Cancel search: resetPage 20 of 232

18
Indicators
Service information
For a few seconds after the ignition is
s witched on, the spanner symbolising ser vice
information comes on: the screen informs you
when the next ser vice is due, in accordance
with the ser vicing schedule indicated in the
manufacturer's service schedule.
Engine oil level
Depending on the engine, the engine oil level
then appears, graduated from 1 (Min.) to
5
( M a x .) .
If no graduation is displayed, the oil level is
too low; it is essential that you top up to avoid
damaging the engine.
For the oil level reading to be accurate, the
vehicle must be parked on level ground, with
the engine off for more than 30
minutes.
This information is determined in relation to the
distance travelled since the previous service. If in doubt, check the level with the
dipstick.
For more information on Checking levels
,
refer to the corresponding section.
Engine oil condition
This warning lamp flashes and,
if your vehicle has this function,
a message is displayed at every
engine start: the system has
detected deterioration of the engine
oil. Have the oil changed as soon as
possible.
This 2nd warning lamp, coupled with the
1st, comes on in the instrument panel
when the oil has not been changed and
the deterioration of the oil has gone
beyond a
new threshold. If this warning
comes on at regular inter vals, have the
oil changed as soon as possible.
For 3.0 litre HDi engines, the engine
s peed is restricted to 3,000 rpm, then
1,500
rpm until the oil is changed. Have
the engine oil changed to avoid any risk of
damage.
After a
few seconds, the display returns to its
usual functions.
Resetting the servicing
information
Refer to the list of checks in the
manufacturer's service schedule which
was given to you on handover of the
vehicle.
Continuous flashing of the indicator is stopped
by a
qualified workshop using a diagnostic tool,
after each service.
If you have ser viced your vehicle personally,
you must reset the ser vice indicator as follows:
F
i
nsert the ignition key into the switch,
F
t
urn it to the MAR position,
F
s
imultaneously press the brake and
accelerator pedals for more than
15
seconds.
Dashboard instruments
Page 30 of 232

28
Setting the date and time
Using the MODE control panelUsing the touch screen audio
system
From the "Time and Date" sub-menu:
F
s elect "Set time and format" to set the
hours, minutes, seconds and choose the
format (24
h, 12 h with am or pm),
F
s
elect "Set date" to set the day, month and
ye a r.
To set the time manually, "Sync Time" must
be Of f.
Trip computer
Information displayed about the current journey
(range, current fuel consumption, average fuel
consumption, etc.).
F
T
o access the trip computer information,
press the TRIP button on the end of the
wiper control stalk.
From the "Lighting" sub-menu, you can:
-
s
elect "Daytime running lamps" to activate
or deactivate their use (On, Off),
-
s
elect "Auto headlamp dipping" to activate
or deactivate its use (On, Off),
-
s
elect "Headlamp sensor" to adjust its
sensitivity (1, 2, 3).
From the "Doors & locking" sub-menu, you can:
-
s
elect "Autoclose" to activate or deactivate
its use (On, Off). F
P
ress the "MODE" button.
F
S
elect the menu "Set time" to set the time
and the format of the clock (24
h or 12
h) or
select the menu "Set date" to set the day,
month and year.
For more information on Vehicle
configuration , refer to the corresponding
section.
Range
This indicates the distance that can still be
travelled with the fuel remaining in the tank on
the basis of the average consumption over the
last few miles (kilometres) travelled.
Distance A
This indicates the distance travelled since the
last trip computer zero reset.
Average fuel consumption A
This is the average fuel consumption since the
last trip computer zero reset.
Dashboard instruments
Page 31 of 232

29
Current fuel consumption A
This is the average fuel consumption during the
last few seconds.
Average speed A
This is the average speed calculated since the
last trip computer zero reset (with the ignition
o n).
Trip duration A
This indicates the total time since the last trip
computer zero reset.
If TRIP B is activated in the MODE menu:
-
D
istance B
-
A
verage fuel consumption B
-
A
verage speed B
-
T
rip duration B
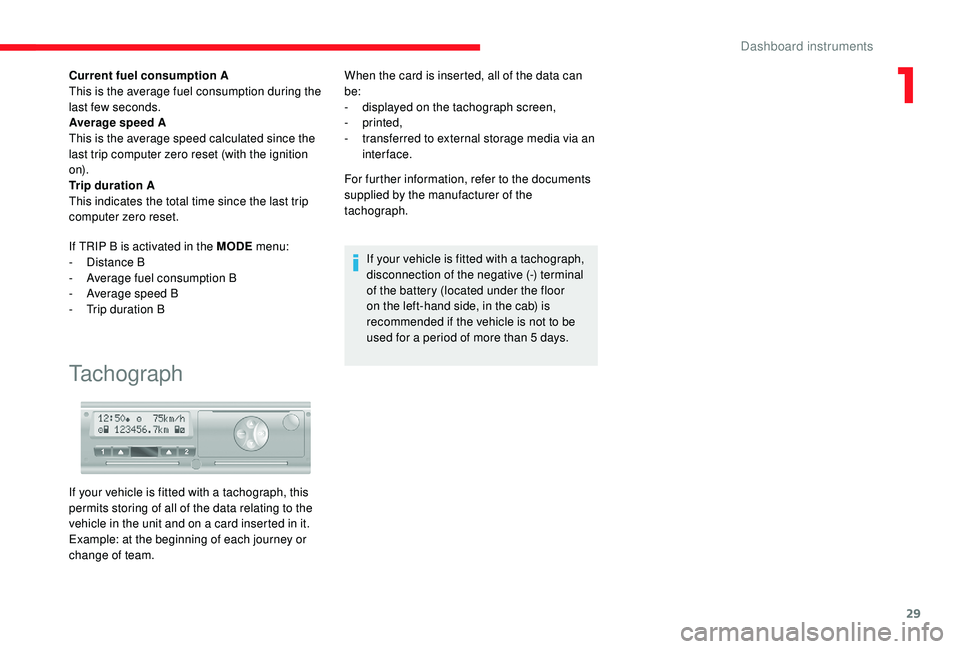
Tachograph
When the card is inserted, all of the data can
be:
-
d
isplayed on the tachograph screen,
-
printed,
-
t
ransferred to external storage media via an
inter face.
For further information, refer to the documents
supplied by the manufacturer of the
tachograph.
If your vehicle is fitted with a
tachograph,
disconnection of the negative (-) terminal
of the battery (located under the floor
on the left-hand side, in the cab) is
recommended if the vehicle is not to be
used for a
period of more than 5 days.
If your vehicle is fitted with a
tachograph, this
permits storing of all of the data relating to the
vehicle in the unit and on a
card inserted in it.
Example: at the beginning of each journey or
change of team.
1
Dashboard instruments
Page 51 of 232

49
By default, pre-selected times are already
stored in the system (1 = 06:00; 2 = 16:00;
3 = 22:00). Any modification cancels and
replaces the previous pre-selected time.
If the battery is disconnected, the default
pre-selected times are restored.
Cancelling the
programming
F Press this button briefly to clear the programmed start
time.
The screen illumination and the pre-selection
number (1, 2
or 3) go off.
Recalling one of the pre-
selected start times
F Press this button as many times as necessary until the
number corresponding to the
required pre-selected start
time (1, 2
or 3) appears.
After ten seconds, the time disappears but
remains stored while the corresponding
number (1, 2
or 3) and the screen remain on.
Setting the period of
operation
The period of operation can be set to between
10 and 60 minutes.
F
P
ress and hold this button. The programmed period of operation is
displayed and the heating or ventilation cycle
indicator flashes.
F
A
djust the period by pressing the "<" or ">"
button.
The setting is confirmed by the period
disappearing from the screen or by pressing
the set button again
In the case of deferred operation, the heating
stops at the end of the programmed period. F
I
n the case of immediate
operation, press this button
again to switch off manually.
The heating cycle indicator and the screen go
of f.
Have the additional heating checked
at least once a
year at the beginning of
winter. Maintenance and repairs should
only be carried out by a
CITROËN dealer
or a
qualified workshop.
Use only genuine replacement parts.
Stopping the heating
If you want to recall another preset time,
press the set button several times within
ten seconds. Within ten seconds, press
the "<" or ">" setting button to select the
required start time.
Setting of the stored time is confirmed by
clearing of the start time, display of the pre-
selection number (1, 2
or 3) and illumination of
the screen.
F
A
t the same time, press the "<" or ">"
button.
The time and the time setting indicator come
on.
F
P
ress and hold the set button again.
F
A
t the same time, press the "<" or ">" button
again.
3
Ease of use and comfort
Page 99 of 232

97
The units for the speed limits (mph or
km/h) depend on the country you are
driving in.
This should be taken into account in order
to obser ve the speed limit.
For the system to operate correctly when
you change country, the units for speed in
the instrument panel must be set to those
for the country you are driving in.
The automatic reading of road signs is
a driving assistance system and does not
always display speed limits correctly.
The speed limit signs present on the road
always take priority over the display by the
system.
The system cannot in any circumstances
replace the need for vigilance on the part
of the driver.
The driver must observe the driving
regulations and must adapt the speed of
the vehicle to suit the weather and traffic.
It is possible for the system to not display
the speed limit if it does not detect a
speed
limit sign within a
preset period.
The system is designed to detect signs
that conform to the Vienna Convention on
road signs. To maintain correct operation of the
system:
-
R
egularly clean the area in front of the
camera.
-
D
o not carry out any repairs in the area
of the windscreen close to the camera
lens.
When replacing headlamp bulbs, you
are strongly recommended to fit genuine
replacement parts.
The use of other bulbs could reduce the
per formance of the system.
Principles Display on the touch screen
then in the instrument
panel
Traffic signs are displayed in two phases:
-
A ll new recognised traffic signs are
displayed on the touch screen in the form of
a
pop-up for 40 seconds.
-
T
hese traffic signs are then displayed in the
instrument panel.
The system can display two traffic signs (speed
limit and no overtaking/end of no overtaking)
in parallel in the two dedicated zones of the
instrument panel.
If an additional traffic sign is detected, such as
one for a
reduced speed limit when the road is
wet, this is displayed in an empty window below
the corresponding sign. Using the camera located at the top of the
windscreen, this system detects and reads
speed limit and no overtaking traffic signs and
signs that indicate the end of these restrictions.
The sign is read by the camera, and then when
the vehicle passes it (at its level), it is displayed
in the instrument panel.
6
Driving
Page 200 of 232

14
Select "Connected " or "Disconnected ",
" Delete device " or "Add device", " Save
Favourites ", "Text messages on ",
" Download " in the list of options offered.
Receiving a call
An incoming call is announced by a ring and
a superimposed display in the screen.
Press this steering wheel mounted
button briefly to accept an incoming
call.
or
Press the " Answer" button displayed in the
screen.
If there are two calls in progress (one in
progress and one on hold), it is possible to
change from one to the other by pressing the
" Switch calls " button or to combine both calls
in a
conference call by pressing the " Co nf e r."
button.
Ending a call
To reject a call, press this button
a t the steering wheel mounted
controls.
or
Press the " Ignore" button displayed in the
screen.
Making a call
Calling a new number
Using the telephone while driving is not
advised. We recommend that you park
safely or make use of the steering wheel
mounted controls.
Press " PHONE ".
Press the keypad button.
Enter the phone number using the keypad then
press the " Call" button to start the call.
Calling a contact
Press "PHONE ".
Press the " Contacts" button or the
" Recent calls " button.
Select the desired contact from the list offered
to start the call.
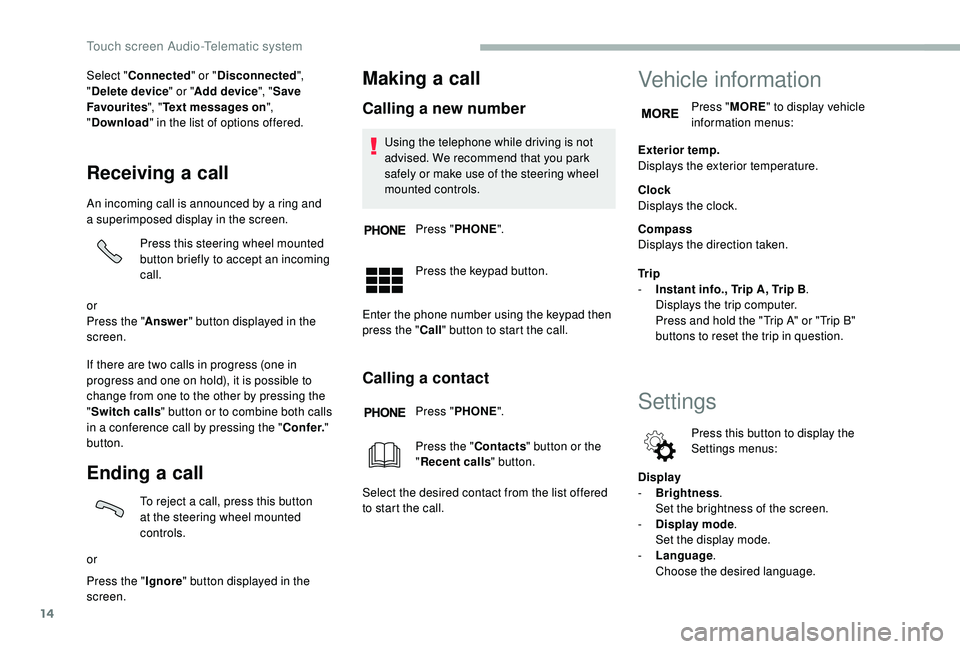
Vehicle information
Press " MORE" to display vehicle
information menus:
Exterior temp.
Displays the exterior temperature.
Clock
Displays the clock.
Compass
Displays the direction taken.
Tr i p
-
I
nstant info., Trip A, Trip B .
Displays the trip computer.
Press and hold the "Trip A" or "Trip B"
buttons to reset the trip in question.
Settings
Press this button to display the
Settings menus:
Display
-
B
rightness .
Set the brightness of the screen.
-
Di
splay mode .
Set the display mode.
-
L
anguage .
Choose the desired language.
Touch screen Audio-Telematic system
Page 216 of 232

6
When the pairing procedure has
finished successfully, a screen page
with "Connection successful"
appears:
Confirm to display the menus.
The telephone menu gives access to
the following functions in particular:
" Calls list ", "Contacts " *,"Digital
keypad ".
Receiving a call
An incoming call is announced by a ring and
a superimposed display in the screen.
Press this button to accept the
incoming call.
Or press this steering wheel
mounted button to reject the call.
Ending a call
To reject a call, press this button
a t the steering wheel mounted
controls.
Making a call
Select "Call log " for access to the
recent calls made.
Select " Contacts " to display your
contacts and use the dial to scroll
through the list.
To dial a
number, use the system's
" Keypad ".
Settings
System settings
Press the " MENU" button.
Select " System settings " then
press to display the list of settings
for activating or deactivating options:
-
"Reset default value "
-
"20
min. delay for switching
off "
-
"Limit initial volume "
-
"Automatic "
Audio
Press the "MENU" button.
Select " Audio" then press to display
the list of settings for activating or
deactivating options:
-
"Tr e b l e "
-
"Mid-range "
-
"Bass "
-
"Balance "
-
"Volume linked to vehicle
speed "
-
"Loudness "
The audio settings are different and
independent for each audio source.
*
I
f your telephone is fully compatible.
Voice commands
Information – Using the
system
Instead of touching the screen, you can
use your voice to issue commands to the
system.
Audio system
Page 226 of 232

186
Jack ...............................................................7, 4Pads, brake ............................................
12 9 -131
Parking brake ........................11, 91-92, 129 -131
Player, USB
................................................6 - 7, 4
Port, USB
...................................................6 - 7, 4
Pre-tensioning seat belts
................................74
Protecting children
..............................75, 77, 79
Radio
......................................................4, 7, 2-3
Radio, digital (Digital Audio Broadcasting – DAB)
......................................5
Range, AdBlue
................................................21
Regeneration of the particle filter
..........12 9 -13 0
Remote control
..........................................30, 89
Replacing bulbs
..................................... 14
3 -14 4
Replacing the air filter
................................... 12
9
Replacing the oil filter
................................... 12
9
Replacing the passenger compartment filter
....12 9
Resetting the service indicator
..................18 -19
Rev counter
.......................................................7
Gauge, fuel
.............................................. 20, 116
Gearbox, manual
.............................. 92, 94, 130
Gear shift indicator ~ Gear efficiency indicator
....................................... 17
Glove box
.................................................. 52-55
Immobiliser, electronic
.................................... 89
Indicator, coolant temperature
........................ 20
Indicator, engine oil level
........................... 18 -19
Indicator lamps, operation
................................ 9
I
ndicators, direction
........................................ 61
Information, vehicle ......................................... 14
Instrument panels
............................................. 7
Instruments and controls
.................................. 4
Intelligent Traction Control
.............................. 71Lane Departure Warning
System (LDWS)
................................... 10 6 -107
Level, engine coolant
...................................... 20
Levels
..................................................... 126 -128
Levels and checks
..............................
..........126
Lighting dimmer
................................................ 8
Low fuel level
.......................................... 2
0, 116
Lumbar
............................................................ 37
Menu
....................................... 22, 4, 6, 9, 12, 14
Menus (audio)
............................................... 4, 6
Mirrors, door .................................................... 42
Hazard warning lamps
.................................... 68
Headlamp flash
............................................... 61
Headlamps, dipped beam
............................... 61
Headlamps, main beam
............................ 16, 61
Head restraints, front
...................................... 37
Heating
............................................................ 43
H
eating, additional
.................................... 46 - 47
Hill Descent Control
................................... 71-72
Hill start assist
................................................. 95
Horn ................................................................. 68Kit, hands-free
.......................................
1
2-13, 5
Oil, engine
.............................................. 126 -128
On-board tools
....................................... 137-142
Opening the bonnet
...................................... 125
Overhead storage
............................... 5
2-54, 56Safety, children
...................................75, 77, 79
Screen, colour
................................................... 4
S
creen menu map
.........................4, 6, 9, 12, 14
Screenwash fluid
...................................126 -128
SCR (Selective Catalytic Reduction)
............132
Seat belts
...................................................7 2 -74
Seat belts, rear
................................................73
Seats, heated
..................................................38
Service indicator
........................................18 -19
Servicing
.................................................... 1
8 -19JP
R
G
I
L
M
H
K
O
S
Alphabetical index