2019 CHEVROLET SILVERADO 1500 LD brakes
[x] Cancel search: brakesPage 313 of 490
Chevrolet Silverado LD 1500 and Silverado 2500/3500 Owner Manual (GMNA-
Localizing-U.S./Canada-12162993) - 2019 - crc - 7/30/18
312 Driving and Operating
Trailer Lamps
Always check all trailer lamps are
working at the beginning of each
trip, and periodically on longer trips.
Turn Signals When Towing a
Trailer
When properly connected, the trailer
turn signals should will illuminate to
indicate the vehicle is turning,
changing lanes, or stopping. When
towing a trailer, the arrows on the
instrument cluster will illuminate
even if the trailer is not properly
connected or the bulbs are
burned out.
Tow/Haul Mode
For instructions on how to enter
Tow/Haul mode, seeTow/Haul
Mode 0261.
Tow/Haul assists when pulling a
heavy trailer or a large or
heavy load.
Tow/Haul Mode is designed to be
most effective when the vehicle and
trailer combined weight is at least
75% of the vehicle's Gross Combined Weight Rating (GCWR).
See
“Weight of the Trailer” under
Trailer Towing 0298.
Tow/Haul Mode is most useful when
towing a heavy trailer or carrying a
large or heavy load:
. through rolling terrain.
. in stop-and-go traffic.
. in busy parking lots.
Operating the vehicle in Tow/Haul
Mode when lightly loaded or not
towing will not cause damage;
however, it is not recommended and
may result in unpleasant engine and
transmission driving characteristics
and reduced fuel economy.Integrated Trailer Brake
Control System
TThe vehicle may have an
Integrated Trailer Brake Control
(ITBC) system for use with electric
trailer brakes or most electric over
hydraulic trailer brake system
This symbol is on the Trailer Brake
Control Panel on vehicles with an
ITBC system. The power output to
the trailer brakes is proportional to
the amount of vehicle braking. This
available power output to the trailer
brakes can be adjusted to a wide
range of trailering situations.
The ITBC system is integrated with
the vehicle’ s brake, anti-lock brake,
and StabiliTrak systems. In trailering
conditions that cause the vehicle’s
anti-lock brake or StabiliTrak
systems to activate, power sent to
the trailer's brakes will be
automatically adjusted to minimize
trailer wheel lock-up. This does not
imply that the trailer has StabiliTrak.
If the vehicle’s brake, anti-lock
brake, or StabiliTrak systems are
not functioning properly, the ITBC
system may not function fully or at
Page 314 of 490
Chevrolet Silverado LD 1500 and Silverado 2500/3500 Owner Manual (GMNA-
Localizing-U.S./Canada-12162993) - 2019 - crc - 7/30/18
Driving and Operating 313
all. Make sure all of these systems
are fully operational to allow the
ITBC system to function properly.
The ITBC system is powered
through the vehicle's electrical
system. Turning the ignition off will
also turn off the ITBC system. The
ITBC system is fully functional only
when the ignition is in ON/RUN.
{Warning
Connecting a trailer that has an
air brake system may result in
reduced or complete loss of trailer
braking, including increased
stopping distance or trailer
instability which could result in
serious injury, death, or property
damage. Only use the ITBC
system with electric or electric
over hydraulic trailer brake
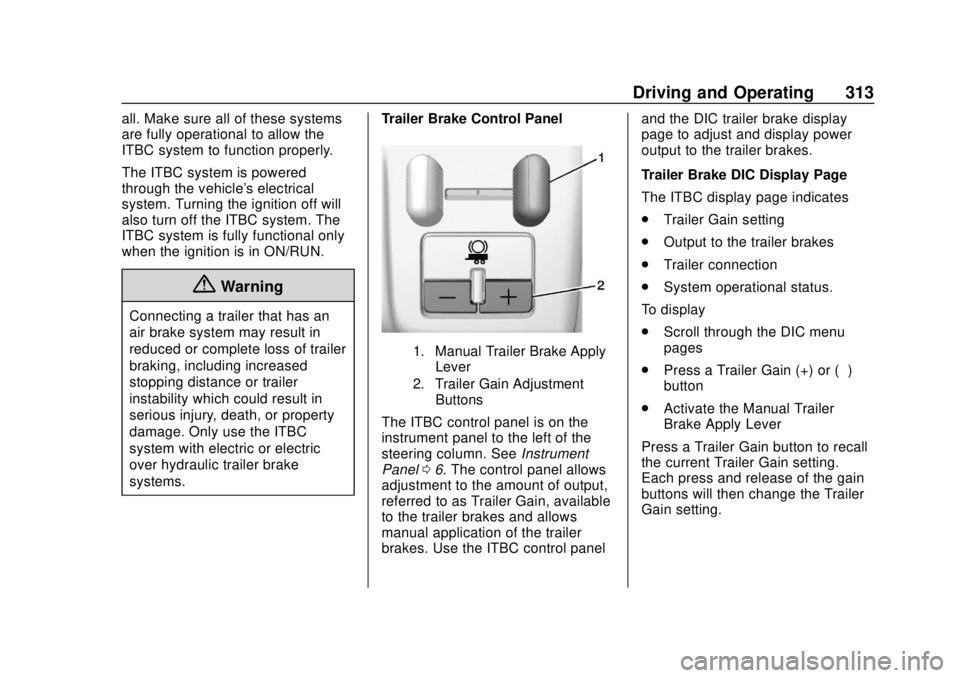
systems.Trailer Brake Control Panel
1. Manual Trailer Brake Apply
Lever
2. Trailer Gain Adjustment Buttons
The ITBC control panel is on the
instrument panel to the left of the
steering column. See Instrument
Panel 06. The control panel allows
adjustment to the amount of output,
referred to as Trailer Gain, available
to the trailer brakes and allows
manual application of the trailer
brakes. Use the ITBC control panel and the DIC trailer brake display
page to adjust and display power
output to the trailer brakes.
Trailer Brake DIC Display Page
The ITBC display page indicates
.
Trailer Gain setting
. Output to the trailer brakes
. Trailer connection
. System operational status.
To display
. Scroll through the DIC menu
pages
. Press a Trailer Gain (+) or (−)
button
. Activate the Manual Trailer
Brake Apply Lever
Press a Trailer Gain button to recall
the current Trailer Gain setting.
Each press and release of the gain
buttons will then change the Trailer
Gain setting.
Page 315 of 490
Chevrolet Silverado LD 1500 and Silverado 2500/3500 Owner Manual (GMNA-
Localizing-U.S./Canada-12162993) - 2019 - crc - 7/30/18
314 Driving and Operating
TRAILER GAIN:
Press the Trailer Gain (+) or (−) to
adjust. Press and hold to
continuously adjust the Trailer Gain.
To turn the output to the trailer off,
adjust the Trailer Gain setting to 0.0.
This setting can be adjusted from
0.0 to 10.0 with a trailer connected
or disconnected.
TRAILER OUTPUT: This displays
anytime a trailer with electric brakes
is connected. Output to the trailer
brakes is based on the amount of
vehicle braking present and relative
to the Trailer Gain setting. Output is
displayed from 0 to 100% for each
gain setting.
The Trailer Output will indicate“- - -
- - -” on the Trailer Brake Display
Page whenever the following occur:
. No trailer is connected.
. A trailer without electric brakes
is connected, no DIC message
will display .
A trailer with electric brakes has
become disconnected, a CHECK
TRAILER WIRING message
displays on the DIC
. There is a fault present in the
wiring to the trailer brakes, a
CHECK TRAILER WIRING
message displays on the DIC
. The ITBC system is not working
due to a fault, a SERVICE
TRAILER BRAKE SYSTEM
message displays in the DIC
Manual Trailer Brake Apply Lever
Slide this lever left to apply the
trailer ’s electric brakes independent
of the vehicle’s brakes. Use this
lever to adjust Trailer Gain to
achieve the proper power output to
the trailer brakes. The trailer's and
the vehicle's brake lamps will come
on when either vehicle brakes or
manual trailer brakes are applied
and properly connected. Trailer Gain Adjustment Procedure
Trailer Gain should be set for a
specific trailering condition and it
must be readjusted anytime vehicle
loading, trailer loading, or road
surface conditions change.
{Warning
Trailer brakes that are
over-gained or under-gained may
not stop the vehicle and the trailer
as intended and can result in a
crash. Always follow the
instructions to set the Trailer Gain
for the proper trailer stopping
performance.
To adjust Trailer Gain for each
towing condition: 1. Drive the vehicle with the trailer attached on a level road
surface representative of the
towing condition and free of
traffic at about 32 - 40 km/h (20
- 25 mph) and fully apply the
Manual Trailer Brake Apply
Lever.
Page 316 of 490
Chevrolet Silverado LD 1500 and Silverado 2500/3500 Owner Manual (GMNA-
Localizing-U.S./Canada-12162993) - 2019 - crc - 7/30/18
Driving and Operating 315
Note
Adjusting Trailer Gain at speeds
lower than 32 to 40 km/h (20 to
25 mph) may result in an incorrect
gain setting.2. Adjust the Trailer Gain, using the Trailer Gain (+) or (−)
adjustment Buttons, to just
below the point of trailer wheel
lock-up, indicated by trailer
wheel squeal or tire smoke
when a trailer wheel locks.
Note
Trailer wheel lock-up may not occur
if towing a heavily loaded trailer.
Adjust the Trailer Gain to the
highest allowable setting for the
towing condition.
3. Readjust Trailer Gain anytime vehicle loading, trailer loading,
or road surface conditions
change or if trailer wheel
lock-up is noticed at any time
while towing. Other ITBC-Related DIC Messages
TRAILER CONNECTED: This
message will briefly display when a
trailer with electric brakes is first
connected to the vehicle. This
message will automatically turn off
in about 10 seconds. This message
can be acknowledged before it
automatically turns off.
CHECK TRAILER WIRING: This
message will display if:
.
The ITBC system first
determines connection to a
trailer with electric brakes and
then the trailer harness becomes
disconnected the vehicle.
If the disconnect occurs while
the vehicle is stationary, this
message will automatically turn
off in about 30 seconds. This
message will also turn off if it is
acknowledged or if the trailer
harness is reconnected.
If the disconnect occurs while
the vehicle is moving, this
message will continue until the
ignition is turned off. This message will also turn off if it is
acknowledged or if the trailer
harness is reconnected.
. There is an electrical fault in the
wiring to the trailer brakes. This
message will continue as long
as there is an electrical fault in
the trailer wiring. This message
will also turn off if it is
acknowledged.
To determine whether the electrical
fault is on the vehicle side or trailer
side of the trailer wiring harness
connection: 1. Disconnect the trailer wiring harness from the vehicle.
2. Turn the ignition off.
3. Wait 10 seconds, then turn the ignition back to RUN.
4. If the CHECK TRAILER WIRING message reappears,
the electrical fault is on the
vehicle side.
Page 317 of 490
Chevrolet Silverado LD 1500 and Silverado 2500/3500 Owner Manual (GMNA-
Localizing-U.S./Canada-12162993) - 2019 - crc - 7/30/18
316 Driving and Operating
If the CHECK TRAILER WIRING
message only reappears when
connecting the trailer wiring harness
to the vehicle, the electrical fault is
on the trailer side.
SERVICE TRAILER BRAKE
SYSTEM: This message will display
when there is a problem with the
ITBC system. If this message
continues over multiple ignition
cycles, have the vehicle serviced.
If either the CHECK TRAILER
WIRING or SERVICE TRAILER
BRAKE SYSTEM message displays
while driving, the ITBC system may
not be fully functional or may not
function at all. When traffic
conditions allow, carefully pull the
vehicle over to the side of the road
and turn the ignition off. Check the
wiring connection to the trailer and
turn the ignition back on. If either of
these messages continues, either
the vehicle or trailer needs service.
A GM dealer may be able to
diagnose and repair problems with
the trailer. However, any diagnosis
and repair of the trailer is not
covered under the vehicle warranty.Contact your trailer dealer for
assistance with trailer repairs and
trailer warranty information.
Trailer Sway
Control (TSC)
Vehicles with StabiliTrak have a
Trailer Sway Control (TSC) feature.
Trailer sway is unintended
side-to-side motion of a trailer while
towing. If the vehicle is towing a
trailer and the TSC detects that
sway is increasing, the vehicle
brakes are selectively applied at
each wheel, to help reduce
excessive trailer sway. If equipped
with the Integrated Trailer Brake
Control (ITBC) system, and the
trailer has an electric brake system,
StabiliTrak may also apply the trailer
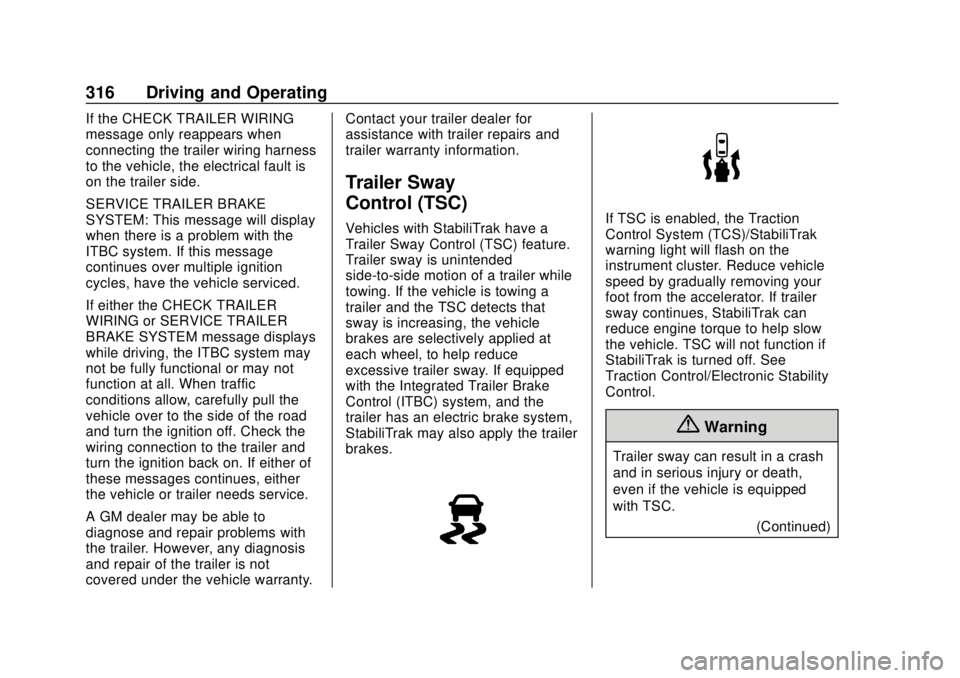
brakes.If TSC is enabled, the Traction
Control System (TCS)/StabiliTrak
warning light will flash on the
instrument cluster. Reduce vehicle
speed by gradually removing your
foot from the accelerator. If trailer
sway continues, StabiliTrak can
reduce engine torque to help slow
the vehicle. TSC will not function if
StabiliTrak is turned off. See
Traction Control/Electronic Stability
Control.
{Warning
Trailer sway can result in a crash
and in serious injury or death,
even if the vehicle is equipped
with TSC.
(Continued)
Page 318 of 490
Chevrolet Silverado LD 1500 and Silverado 2500/3500 Owner Manual (GMNA-
Localizing-U.S./Canada-12162993) - 2019 - crc - 7/30/18
Driving and Operating 317
Warning (Continued)
If the trailer begins to sway,
reduce vehicle speed by
gradually removing your foot from
the accelerator. Then pull over to
check the trailer and vehicle to
help correct possible causes,
including an improperly or
overloaded trailer, unrestrained
cargo, improper trailer hitch
configuration, or improperly
inflated or incorrect vehicle or
trailer tires. SeeTowing
Equipment 0306 for trailer ratings
and hitch setup
recommendations.
Aftermarket Electronic Trailer
Sway Control Devices
Some trailers may come equipped
with an electronic device designed
to reduce or control trailer sway.
Aftermarket equipment
manufacturers also offer similar
devices that connect to the wiring
between the trailer and the vehicle.
These devices may interfere with the vehicle’
s trailer brake systems
or other systems, including
integrated anti-sway systems,
if equipped. Messages related to
trailer connections or trailer brakes
could appear on the DIC. The
effects of these aftermarket devices
on vehicle handling or trailer brake
performance is not known.
{Warning
Use of aftermarket electronic
trailer sway control devices could
result in reduced trailer brake
performance, loss of trailer
brakes, or other malfunctions, and
result in a crash. You or others
could be seriously injured or
killed. Before using one of these
devices:
. Ask the device or trailer
manufacturer if the device
has been thoroughly tested
for compatibility with the
make, model, and year of
(Continued)
Warning (Continued)
your vehicle and any
optional equipment installed
on your vehicle.
. Before driving, check the
trailer brakes are working
properly, if equipped. Drive
the vehicle with the trailer
attached on a level road
surface that is free of traffic
at about 32-40 km/h
(20-25 mph) and fully apply
the manual trailer brake
apply lever. Also, check the
trailer brake lamps and
other lamps are functioning
correctly.
. If the trailer brakes are not
operating properly at any
time, or if a DIC message
indicates problems with the
trailer connections or trailer
brakes, carefully pull the
vehicle over to the side of
the road when traffic
conditions allow.
Page 323 of 490
Chevrolet Silverado LD 1500 and Silverado 2500/3500 Owner Manual (GMNA-
Localizing-U.S./Canada-12162993) - 2019 - crc - 7/30/18
322 Driving and Operating
snow plow is 122 cm (4 ft) in front of
the front axle and the wheelbase is
305 cm (10 ft), then:W = 318 kg (700 lb)
A = 122 cm (4 ft)
W.B. = 305 cm (10 ft)
(W x (A + W.B.)/W.B. =
(318 x (122 + 305))/305 = 445 kg
(980 lb)
This means if the front axle reserve
capacity is more than 445 kg
(980 lb), the snow plow could be
added without exceeding the
front GAWR.
Heavier equipment can be added on
the front of the vehicle if less cargo
or fewer passengers are carried,
or by positioning cargo toward the
rear. This reduces the load on the
front. However, the front GAWR,
rear GAWR, and Gross Vehicle
Weight Rating (GVWR) must never
be exceeded.{Warning
On some vehicles that have
certain front mounted equipment,
such as a snow plow, it may be
possible to load the front axle to
the front Gross Axle Weight
Rating (GAWR) but not have
enough weight on the rear axle to
have proper braking performance.
If the brakes cannot work
properly, the vehice could crash.
Always follow the snow plow
manufacturer or installer's
recommendation for rear ballast
to ensure a proper front and rear
weight distribution ratio.
Maintaining a proper front and
rear weight distribution ratio is
necessary to provide proper
braking performance.
Total vehicle reserve capacity is the
difference between the GVWR and
the weight of the truck with full fuel
and passengers. It is the amount of
weight that can be added to the
vehicle before reaching the GVWR. Reserve capacity numbers are
intended as a guide when selecting
the amount of equipment or cargo
the truck can carry. If unsure of the
vehicle's front, rear, or total weight,
go to a weigh station and weigh the
vehicle. Your dealer can also help
with this.
The total vehicle reserve capacity
for the vehicle is in the lower right
corner of the Certification/Tire label
as shown previously.
See your dealer for additional
advice and information about using
a snow plow on the vehicle. Also,
see
Vehicle Load Limits 0238.
Emergency Roof Lamp
Provisions
Vehicles with the RPO VYU snow
plow prep package also have an
emergency roof lamp provision
package, RPO TRW. Wiring for the
emergency roof lamp is provided
above the overhead console. See
Auxiliary Roof-Mounted Lamp 0176
for switch location.
Page 325 of 490
Chevrolet Silverado LD 1500 and Silverado 2500/3500 Owner Manual (GMNA-
Localizing-U.S./Canada-12162993) - 2019 - crc - 7/30/18
324 Vehicle Care
Vehicle Care
General Information
General Information . . . . . . . . . . 325
California Proposition65 Warning . . . . . . . . . . . . . . . . . 326
California Perchlorate Materials Requirements . . . . . 326
Accessories and Modifications . . . . . . . . . . . . . . . . 326
Vehicle Checks
Doing Your OwnService Work . . . . . . . . . . . . . . . 327
Hood . . . . . . . . . . . . . . . . . . . . . . . . . 327
Engine Compartment Overview . . . . . . . . . . . . . . . . . . . . 329
Engine Oil . . . . . . . . . . . . . . . . . . . . 332
Engine Oil Life System . . . . . . . 334
Automatic Transmission Fluid (6-Speed Transmission) . . . . . 336
Automatic Transmission Fluid (8-Speed Transmission) . . . . . 338
Engine Air Cleaner/Filter . . . . . . 339
Cooling System . . . . . . . . . . . . . . 340
Engine Overheating . . . . . . . . . . 344
Overheated Engine Protection Operating Mode . . . . . . . . . . . . . 345
Engine Fan . . . . . . . . . . . . . . . . . . . 346 Power Steering Fluid (1500
Series) . . . . . . . . . . . . . . . . . . . . . . 346
Power Steering Fluid (2500/ 3500 Series) . . . . . . . . . . . . . . . . 346
Washer Fluid . . . . . . . . . . . . . . . . . 347
Brakes . . . . . . . . . . . . . . . . . . . . . . . 348
Brake Fluid . . . . . . . . . . . . . . . . . . . 349
Battery - North America . . . . . . 350
Four-Wheel Drive . . . . . . . . . . . . . 351
Front Axle . . . . . . . . . . . . . . . . . . . . 351
Rear Axle . . . . . . . . . . . . . . . . . . . . 352
Noise Control System . . . . . . . . 353
Starter Switch Check . . . . . . . . . 355
Automatic Transmission Shift
Lock Control Function
Check . . . . . . . . . . . . . . . . . . . . . . . 355
Ignition Transmission Lock Check . . . . . . . . . . . . . . . . . . . . . . . 355
Park Brake and P (Park) Mechanism Check . . . . . . . . . . 355
Wiper Blade Replacement . . . . 356
Windshield Replacement . . . . . 357
Gas Strut(s) . . . . . . . . . . . . . . . . . . 357
Headlamp Aiming
Headlamp Aiming . . . . . . . . . . . . 358
Bulb Replacement
Bulb Replacement . . . . . . . . . . . . 358
Halogen Bulbs . . . . . . . . . . . . . . . . 358 High Intensity Discharge (HID)
Lighting . . . . . . . . . . . . . . . . . . . . . 359
LED Lighting . . . . . . . . . . . . . . . . . 359
Headlamps, Front Turn Signal, Sidemarker, and Parking
Lamps . . . . . . . . . . . . . . . . . . . . . . 359
Fog Lamps . . . . . . . . . . . . . . . . . . . 360
Taillamps (Chassis Cab Models) . . . . . . . . . . . . . . . . . . . . . 360
Taillamps, Turn Signal, Stoplamps, and Back-Up
Lamps . . . . . . . . . . . . . . . . . . . . . . 360
Center High-Mounted Stoplamp (CHMSL) and
Cargo Lamp . . . . . . . . . . . . . . . . . 362
Electrical System
Electrical System Overload . . . 362
Fuses and Circuit Breakers . . . 363
Engine Compartment FuseBlock . . . . . . . . . . . . . . . . . . . . . . . . 363
Instrument Panel Fuse Block (Right) . . . . . . . . . . . . . . . . . . . . . . 367
Instrument Panel Fuse Block (Left) . . . . . . . . . . . . . . . . . 368
Wheels and Tires
Tires . . . . . . . . . . . . . . . . . . . . . . . . . . 371
All-Season Tires . . . . . . . . . . . . . . 371
Winter Tires . . . . . . . . . . . . . . . . . . 372
Low-Profile Tires . . . . . . . . . . . . . 372