2019 CHEVROLET SILVERADO 1500 LD power steering
[x] Cancel search: power steeringPage 250 of 490
Chevrolet Silverado LD 1500 and Silverado 2500/3500 Owner Manual (GMNA-
Localizing-U.S./Canada-12162993) - 2019 - crc - 7/30/18
Driving and Operating 249
The switch stays in this position
when the engine is running. The
transmission is also unlocked in this
position.
If the key is left in ON/RUN with the
engine off, the battery could drain
and the vehicle may not start.
3 (START) :This is the position that
starts the engine. When the engine
starts, release the key. The ignition
returns to ON/RUN for driving.
Starting the Engine
If the vehicle has a diesel engine,
see the Duramax diesel
supplement.
Caution
If you add electrical parts or
accessories, you could change
the way the engine operates. Any
resulting damage would not be
covered by the vehicle warranty.
See Add-On Electrical Equipment
0 318.
Caution
If the steering wheel is turned
until it reaches the end of its
travel, and is held in that position
while starting the vehicle, damage
may occur to the power steering
system and there may be loss of
power steering assist.
Place the transmission in the
proper gear.
Automatic Transmission
Move the shift lever to P (Park) or
N (Neutral). To restart the engine
when the vehicle is already moving,
use N (Neutral) only.
Caution
Do not try to shift to P (Park) if the
vehicle is moving. If you do, you
could damage the transmission.
Shift to P (Park) only when the
vehicle is stopped.
Starting Procedure
1. With your foot off the accelerator pedal, turn the
ignition key to START. When
the engine starts, let go of the
key. The idle speed will go
down as the engine gets warm.
Do not race the engine
immediately after starting it.
Operate the engine and
transmission gently to allow the
oil to warm up and lubricate all
moving parts.
When the low fuel warning light
is on and the FUEL LEVEL
LOW message is displayed in
the Driver Information Center
(DIC), hold the ignition switch
in the START position to
continue engine cranking.
Caution
Cranking the engine for long
periods of time, by returning the
ignition to the START position
immediately after cranking has
(Continued)
Page 263 of 490
Chevrolet Silverado LD 1500 and Silverado 2500/3500 Owner Manual (GMNA-
Localizing-U.S./Canada-12162993) - 2019 - crc - 7/30/18
262 Driving and Operating
If equipped, on vehicles with a
gasoline engine, to disable or
enable Tow/Haul Grade Braking
within the current ignition key cycle,
press and hold the Tow/Haul button
for five seconds. When the button is
released, the requested mode
change is made. A DIC message is
displayed.
On vehicles with a diesel engine,
Tow/Haul Mode Grade Braking can
be enabled or disabled by pressing
the Tow/Haul Mode button. Use the
exhaust brake and Tow/Haul Mode
for maximum grade braking.
SeeTowing Equipment 0306.
For other forms of grade braking,
see Automatic Transmission 0256
and Cruise Control 0276.Drive Systems
Four-Wheel Drive
If equipped, four-wheel drive
engages the front axle for extra
traction.
Read the appropriate section for
transfer case operation before
using.
Caution
Do not drive on clean, dry
pavement in 4
mand 4n(if
equipped) for an extended period
of time. These conditions may
cause premature wear on the
vehicle’s powertrain.
Driving on clean, dry pavement in
4
mor 4nmay:
. Cause a vibration to be felt in
the steering system.
. Cause tires to wear faster.
. Make the transfer case harder to
shift, and cause it to run noisier.
{Warning
If equipped with four-wheel drive,
the vehicle will be free to roll if the
transfer case is in N (Neutral),
even when the shift lever is in
P (Park). You or someone else
could be seriously injured. Be
sure the transfer case is in a drive
gear —2
m, 4m, or 4n—or set the
parking brake before placing the
transfer case in N (Neutral). See
Shifting Into Park 0253.
Caution
Extended high-speed operation in
4
nmay damage or shorten the
life of the drivetrain.
Engagement noise and bump when
shifting between 4
nand 4mor from
N (Neutral), with the engine running,
is normal.
Page 268 of 490
Chevrolet Silverado LD 1500 and Silverado 2500/3500 Owner Manual (GMNA-
Localizing-U.S./Canada-12162993) - 2019 - crc - 7/30/18
Driving and Operating 267
Shifting Out of N (Neutral)
To shift:1. Set the parking brake and apply the brake pedal.
2. Turn the ignition on with the engine off.
3. Shift the transmission to N (Neutral).
4. Turn the transfer case knob to 2
m.
After the transfer case has
shifted out of N (Neutral), the
N (Neutral) light will go out.
5. Release the parking brake.
Caution
Shifting the transmission into gear
before the requested mode
indicator light has stopped
flashing could damage the
transfer case.
6. Start the engine and shift the transmission to the
desired gear.
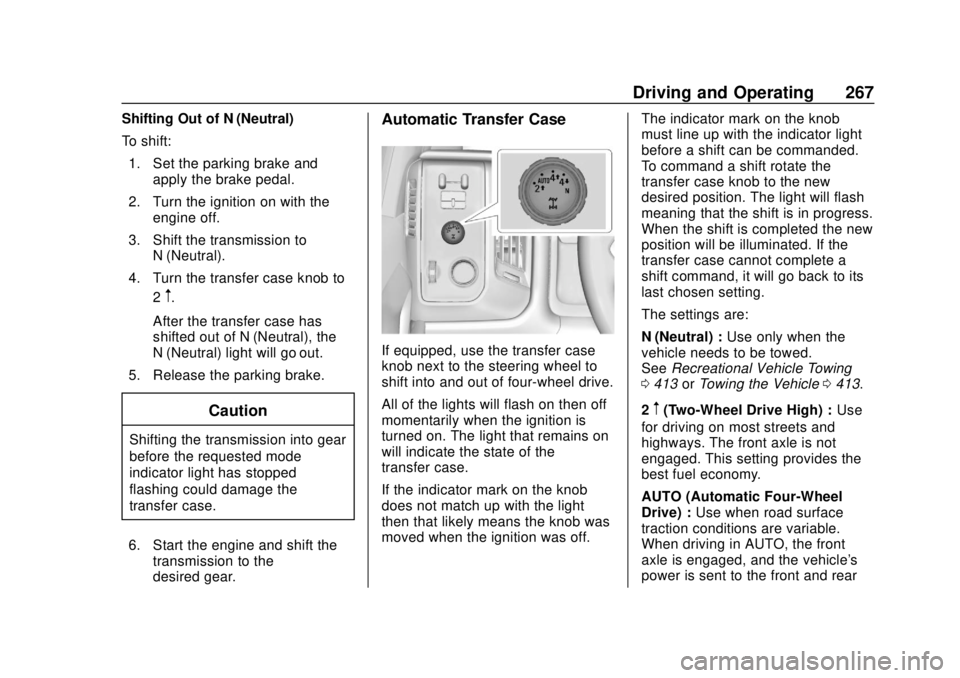
Automatic Transfer Case
If equipped, use the transfer case
knob next to the steering wheel to
shift into and out of four-wheel drive.
All of the lights will flash on then off
momentarily when the ignition is
turned on. The light that remains on
will indicate the state of the
transfer case.
If the indicator mark on the knob
does not match up with the light
then that likely means the knob was
moved when the ignition was off. The indicator mark on the knob
must line up with the indicator light
before a shift can be commanded.
To command a shift rotate the
transfer case knob to the new
desired position. The light will flash
meaning that the shift is in progress.
When the shift is completed the new
position will be illuminated. If the
transfer case cannot complete a
shift command, it will go back to its
last chosen setting.
The settings are:
N (Neutral) :
Use only when the
vehicle needs to be towed.
See Recreational Vehicle Towing
0 413 orTowing the Vehicle 0413.
2
m(Two-Wheel Drive High) : Use
for driving on most streets and
highways. The front axle is not
engaged. This setting provides the
best fuel economy.
AUTO (Automatic Four-Wheel
Drive) : Use when road surface
traction conditions are variable.
When driving in AUTO, the front
axle is engaged, and the vehicle's
power is sent to the front and rear
Page 273 of 490
Chevrolet Silverado LD 1500 and Silverado 2500/3500 Owner Manual (GMNA-
Localizing-U.S./Canada-12162993) - 2019 - crc - 7/30/18
272 Driving and Operating
A chime sounds and the warning
light flashes when the parking brake
is applied and the vehicle is moving
at least 8 km/h (5 mph).
To release the parking brake, hold
the regular brake pedal down. Then
pull the bottom edge of the lever
with the parking brake symbol,
located to the right of the steering
column.
If the ignition is on when the parking
brake is released, the brake system
warning light goes off.
Caution
Driving with the parking brake on
can overheat the brake system
and cause premature wear or
damage to brake system parts.
Make sure that the parking brake
is fully released and the brake
warning light is off before driving.
If you are towing a trailer and are
parking on any hill see Driving
Characteristics and Towing Tips
0 294.
Brake Assist
The Brake Assist feature is
designed to assist the driver in
stopping or decreasing vehicle
speed in emergency driving
conditions. This feature uses the
stability system hydraulic brake
control module to supplement the
power brake system under
conditions where the driver has
quickly and forcefully applied the
brake pedal in an attempt to quickly
stop or slow down the vehicle. The
stability system hydraulic brake
control module increases brake
pressure at each corner of the
vehicle until the ABS activates.
Minor brake pedal pulsation or
pedal movement during this time is
normal and the driver should
continue to apply the brake pedal as
the driving situation dictates The
Brake Assist feature will
automatically disengage when the
brake pedal is released or brake
pedal pressure is quickly
decreased.
Hill Start Assist (HSA)
This vehicle has a Hill Start Assist
(HSA) feature, which may be useful
when the vehicle is stopped on a
grade. This feature is designed to
prevent the vehicle from rolling,
either forward or rearward, during
vehicle drive off. After you
completely stop and hold the vehicle
in a complete standstill on a grade,
HSA will automatically activate.
During the transition period between
when you release the brake pedal
and start to accelerate to drive off
on a grade, HSA holds the braking
pressure for a maximum of
two seconds to ensure that there is
no rolling. The brakes will
automatically release when the
accelerator pedal is applied within
the two-second window. If the
vehicle is equipped with the
Integrated Trailer Brake Control
(ITBC) system, HSA may also apply
the trailer brakes. It will not activate
if the vehicle is in a drive gear and
facing downhill or if the vehicle is
facing uphill and in R (Reverse).
Page 314 of 490
Chevrolet Silverado LD 1500 and Silverado 2500/3500 Owner Manual (GMNA-
Localizing-U.S./Canada-12162993) - 2019 - crc - 7/30/18
Driving and Operating 313
all. Make sure all of these systems
are fully operational to allow the
ITBC system to function properly.
The ITBC system is powered
through the vehicle's electrical
system. Turning the ignition off will
also turn off the ITBC system. The
ITBC system is fully functional only
when the ignition is in ON/RUN.
{Warning
Connecting a trailer that has an
air brake system may result in
reduced or complete loss of trailer
braking, including increased
stopping distance or trailer
instability which could result in
serious injury, death, or property
damage. Only use the ITBC
system with electric or electric
over hydraulic trailer brake
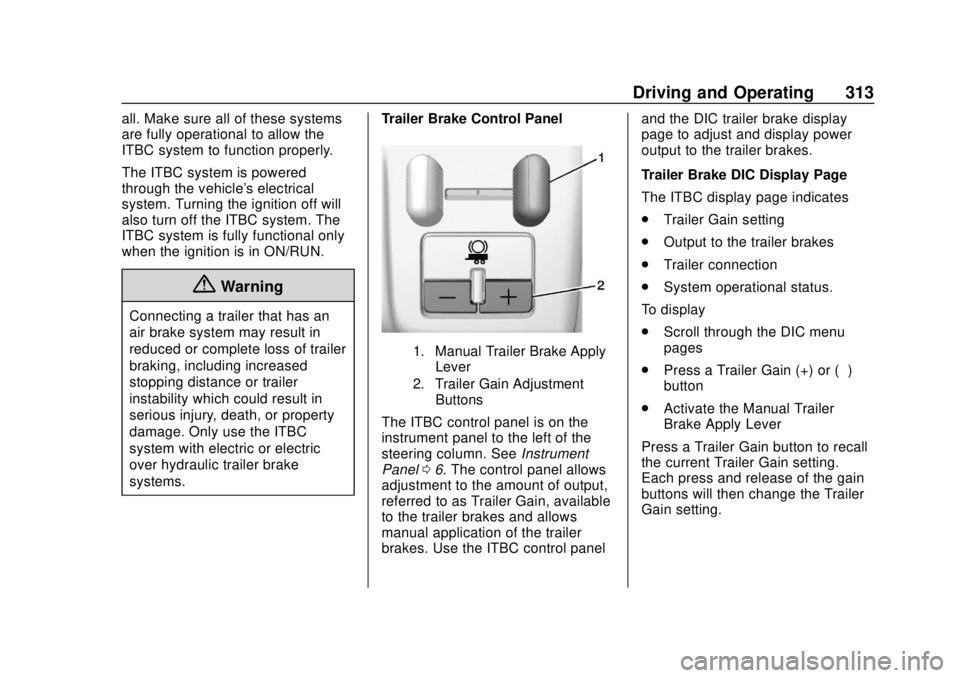
systems.Trailer Brake Control Panel
1. Manual Trailer Brake Apply
Lever
2. Trailer Gain Adjustment Buttons
The ITBC control panel is on the
instrument panel to the left of the
steering column. See Instrument
Panel 06. The control panel allows
adjustment to the amount of output,
referred to as Trailer Gain, available
to the trailer brakes and allows
manual application of the trailer
brakes. Use the ITBC control panel and the DIC trailer brake display
page to adjust and display power
output to the trailer brakes.
Trailer Brake DIC Display Page
The ITBC display page indicates
.
Trailer Gain setting
. Output to the trailer brakes
. Trailer connection
. System operational status.
To display
. Scroll through the DIC menu
pages
. Press a Trailer Gain (+) or (−)
button
. Activate the Manual Trailer
Brake Apply Lever
Press a Trailer Gain button to recall
the current Trailer Gain setting.
Each press and release of the gain
buttons will then change the Trailer
Gain setting.
Page 325 of 490
Chevrolet Silverado LD 1500 and Silverado 2500/3500 Owner Manual (GMNA-
Localizing-U.S./Canada-12162993) - 2019 - crc - 7/30/18
324 Vehicle Care
Vehicle Care
General Information
General Information . . . . . . . . . . 325
California Proposition65 Warning . . . . . . . . . . . . . . . . . 326
California Perchlorate Materials Requirements . . . . . 326
Accessories and Modifications . . . . . . . . . . . . . . . . 326
Vehicle Checks
Doing Your OwnService Work . . . . . . . . . . . . . . . 327
Hood . . . . . . . . . . . . . . . . . . . . . . . . . 327
Engine Compartment Overview . . . . . . . . . . . . . . . . . . . . 329
Engine Oil . . . . . . . . . . . . . . . . . . . . 332
Engine Oil Life System . . . . . . . 334
Automatic Transmission Fluid (6-Speed Transmission) . . . . . 336
Automatic Transmission Fluid (8-Speed Transmission) . . . . . 338
Engine Air Cleaner/Filter . . . . . . 339
Cooling System . . . . . . . . . . . . . . 340
Engine Overheating . . . . . . . . . . 344
Overheated Engine Protection Operating Mode . . . . . . . . . . . . . 345
Engine Fan . . . . . . . . . . . . . . . . . . . 346 Power Steering Fluid (1500
Series) . . . . . . . . . . . . . . . . . . . . . . 346
Power Steering Fluid (2500/ 3500 Series) . . . . . . . . . . . . . . . . 346
Washer Fluid . . . . . . . . . . . . . . . . . 347
Brakes . . . . . . . . . . . . . . . . . . . . . . . 348
Brake Fluid . . . . . . . . . . . . . . . . . . . 349
Battery - North America . . . . . . 350
Four-Wheel Drive . . . . . . . . . . . . . 351
Front Axle . . . . . . . . . . . . . . . . . . . . 351
Rear Axle . . . . . . . . . . . . . . . . . . . . 352
Noise Control System . . . . . . . . 353
Starter Switch Check . . . . . . . . . 355
Automatic Transmission Shift
Lock Control Function
Check . . . . . . . . . . . . . . . . . . . . . . . 355
Ignition Transmission Lock Check . . . . . . . . . . . . . . . . . . . . . . . 355
Park Brake and P (Park) Mechanism Check . . . . . . . . . . 355
Wiper Blade Replacement . . . . 356
Windshield Replacement . . . . . 357
Gas Strut(s) . . . . . . . . . . . . . . . . . . 357
Headlamp Aiming
Headlamp Aiming . . . . . . . . . . . . 358
Bulb Replacement
Bulb Replacement . . . . . . . . . . . . 358
Halogen Bulbs . . . . . . . . . . . . . . . . 358 High Intensity Discharge (HID)
Lighting . . . . . . . . . . . . . . . . . . . . . 359
LED Lighting . . . . . . . . . . . . . . . . . 359
Headlamps, Front Turn Signal, Sidemarker, and Parking
Lamps . . . . . . . . . . . . . . . . . . . . . . 359
Fog Lamps . . . . . . . . . . . . . . . . . . . 360
Taillamps (Chassis Cab Models) . . . . . . . . . . . . . . . . . . . . . 360
Taillamps, Turn Signal, Stoplamps, and Back-Up
Lamps . . . . . . . . . . . . . . . . . . . . . . 360
Center High-Mounted Stoplamp (CHMSL) and
Cargo Lamp . . . . . . . . . . . . . . . . . 362
Electrical System
Electrical System Overload . . . 362
Fuses and Circuit Breakers . . . 363
Engine Compartment FuseBlock . . . . . . . . . . . . . . . . . . . . . . . . 363
Instrument Panel Fuse Block (Right) . . . . . . . . . . . . . . . . . . . . . . 367
Instrument Panel Fuse Block (Left) . . . . . . . . . . . . . . . . . 368
Wheels and Tires
Tires . . . . . . . . . . . . . . . . . . . . . . . . . . 371
All-Season Tires . . . . . . . . . . . . . . 371
Winter Tires . . . . . . . . . . . . . . . . . . 372
Low-Profile Tires . . . . . . . . . . . . . 372
Page 333 of 490
Chevrolet Silverado LD 1500 and Silverado 2500/3500 Owner Manual (GMNA-
Localizing-U.S./Canada-12162993) - 2019 - crc - 7/30/18
332 Vehicle Care
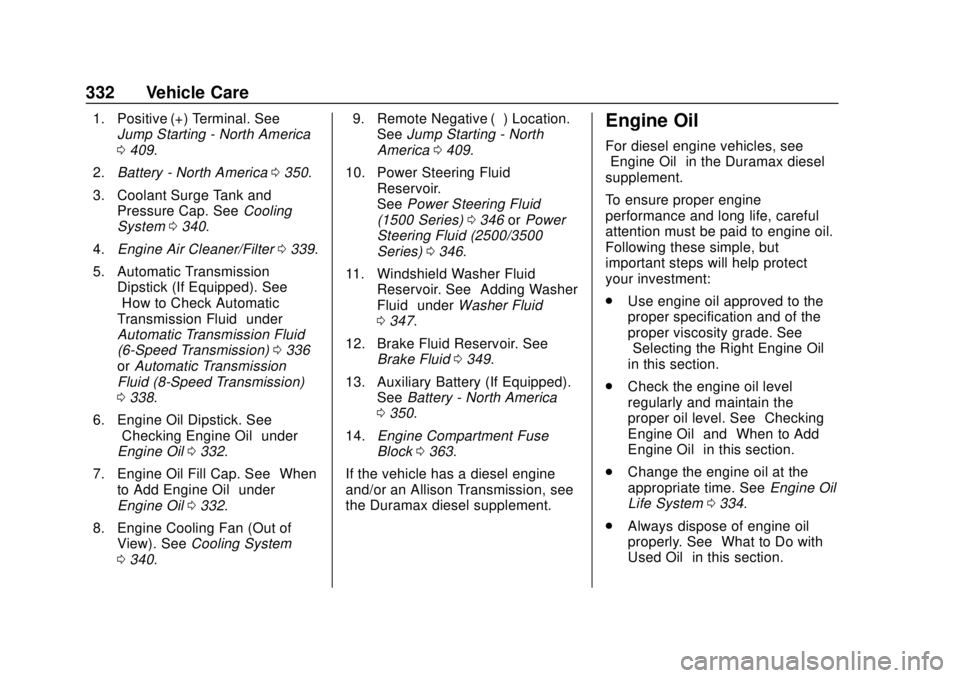
1. Positive (+) Terminal. SeeJump Starting - North America
0409.
2. Battery - North America 0350.
3. Coolant Surge Tank and Pressure Cap. See Cooling
System 0340.
4. Engine Air Cleaner/Filter 0339.
5. Automatic Transmission Dipstick (If Equipped). See
“How to Check Automatic
Transmission Fluid” under
Automatic Transmission Fluid
(6-Speed Transmission) 0336
or Automatic Transmission
Fluid (8-Speed Transmission)
0 338.
6. Engine Oil Dipstick. See “Checking Engine Oil” under
Engine Oil 0332.
7. Engine Oil Fill Cap. See “When
to Add Engine Oil” under
Engine Oil 0332.
8. Engine Cooling Fan (Out of View). See Cooling System
0 340. 9. Remote Negative (–) Location.
See Jump Starting - North
America 0409.
10. Power Steering Fluid Reservoir.
SeePower Steering Fluid
(1500 Series) 0346 orPower
Steering Fluid (2500/3500
Series) 0346.
11. Windshield Washer Fluid Reservoir. See “Adding Washer
Fluid” under Washer Fluid
0 347.
12. Brake Fluid Reservoir. See Brake Fluid 0349.
13. Auxiliary Battery (If Equipped). SeeBattery - North America
0 350.
14. Engine Compartment Fuse
Block 0363.
If the vehicle has a diesel engine
and/or an Allison Transmission, see
the Duramax diesel supplement.Engine Oil
For diesel engine vehicles, see
“Engine Oil” in the Duramax diesel
supplement.
To ensure proper engine
performance and long life, careful
attention must be paid to engine oil.
Following these simple, but
important steps will help protect
your investment:
. Use engine oil approved to the
proper specification and of the
proper viscosity grade. See
“Selecting the Right Engine Oil”
in this section.
. Check the engine oil level
regularly and maintain the
proper oil level. See “Checking
Engine Oil” and“When to Add
Engine Oil” in this section.
. Change the engine oil at the
appropriate time. See Engine Oil
Life System 0334.
. Always dispose of engine oil
properly. See “What to Do with
Used Oil” in this section.
Page 347 of 490
Chevrolet Silverado LD 1500 and Silverado 2500/3500 Owner Manual (GMNA-
Localizing-U.S./Canada-12162993) - 2019 - crc - 7/30/18
346 Vehicle Care
Caution (Continued)
attempting any repair. Repair the
cause of coolant loss, change the
oil, and reset the oil life system.
SeeEngine Oil 0332.
Engine Fan
If the vehicle has a clutched engine
cooling fan, when the clutch is
engaged, the fan spins faster to
provide more air to cool the engine.
In most everyday driving conditions,
the fan is spinning slower and the
clutch is not fully engaged. This
improves fuel economy and reduces
fan noise. Under heavy vehicle
loading, trailer towing, and/or high
outside temperatures, the fan speed
increases as the clutch more fully
engages, so an increase in fan
noise may be heard. This is normal
and should not be mistaken as the
transmission slipping or making
extra shifts. It is merely the cooling
system functioning properly. The fan will slow down when additional
cooling is not required and the
clutch disengages.
This fan noise may also be heard
when starting the engine. It will go
away as the fan clutch partially
disengages.
If the vehicle has electric cooling
fan(s), the fans may be heard
spinning at low speed during most
everyday driving. The fans may turn
off if no cooling is required. Under
heavy vehicle loading, trailer towing,
high outside temperatures,
or operation of the air conditioning
system, the fans may change to
high speed and an increase in fan
noise may be heard. This is normal
and indicates that the cooling
system is functioning properly. The
fans will change to low speed when
additional cooling is no longer
required.
The electric engine cooling fans
may run after the engine has been
turned. off. This is normal and no
service is required.
Power Steering Fluid
(1500 Series)
The vehicle has electric power
steering and does not use power
steering fluid.
Power Steering Fluid
(2500/3500 Series)
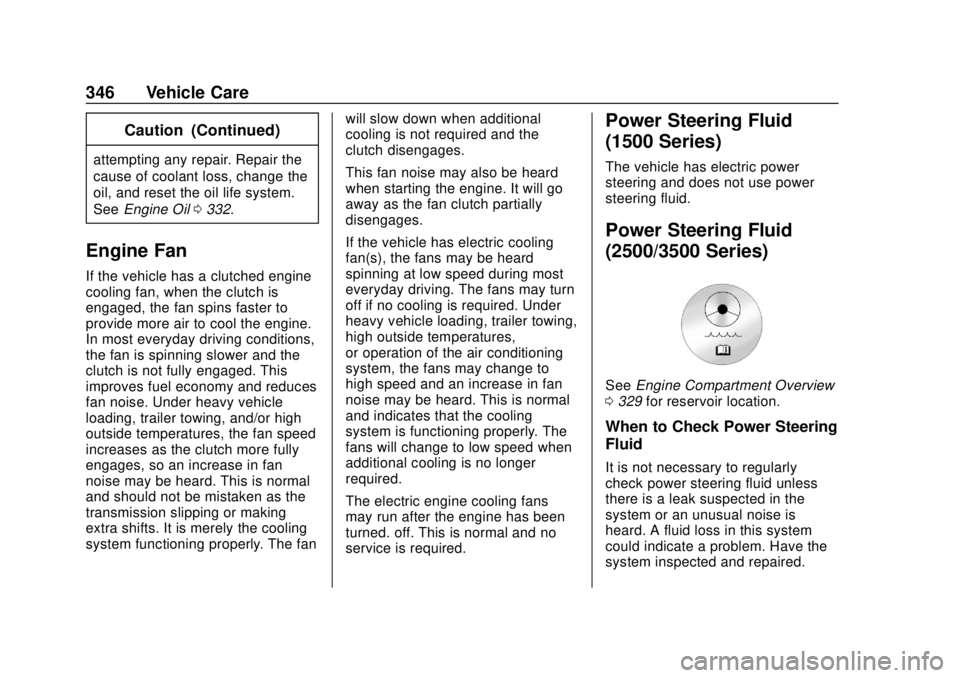
See
Engine Compartment Overview
0 329 for reservoir location.
When to Check Power Steering
Fluid
It is not necessary to regularly
check power steering fluid unless
there is a leak suspected in the
system or an unusual noise is
heard. A fluid loss in this system
could indicate a problem. Have the
system inspected and repaired.