2019 CHEVROLET BOLT EV door lock
[x] Cancel search: door lockPage 215 of 371
Chevrolet BOLT EV Owner Manual (GMNA-Localizing-U.S./Canada/Mexico-
12163003) - 2019 - crc - 5/18/18
214 Driving and Operating
One-Pedal Driving
With One-Pedal Driving, the
accelerator pedal can be used to
control the deceleration of the
vehicle down to a complete stop.
Completely lifting off the accelerator
pedal will result in aggressive
deceleration. Slowly lifting off the
accelerator pedal will allow the
deceleration of the vehicle to be
adjusted as desired.
To use One-Pedal Driving, place the
vehicle in L (Low). Press the
accelerator pedal to the desired
speed. The deceleration provided by
One-Pedal Driving provides full
regenerative braking and helps
increase energy efficiency. The
brake lamps may come on when the
accelerator pedal is released or
during substantial deceleration from
regenerative braking.While operating in One-Pedal
Driving, the electric parking brake
may apply in some circumstances.
This can occur when:
.
Driving on slopes.
. The driver ’s door is open.
. The vehicle has remained
stationary for 5 minutes.
. There is a problem with the
propulsion system.
To drive again, depress the
accelerator pedal, and the electric
parking brake will automatically
disengage.
One-Pedal Driving may shift the car
into P (Park) if the vehicle is pushed
once it has been stopped or if a
problem with the propulsion system
develops.Brakes
Antilock Brake
System (ABS)
This vehicle has an Antilock Brake
System (ABS), an advanced
electronic braking system that helps
prevent a braking skid.
When propulsion is active and the
vehicle begins to drive away, ABS
checks itself. A momentary motor or
clicking noise might be heard while
this test is going on, and it might
even be noticed that the brake
pedal moves a little. This is normal.
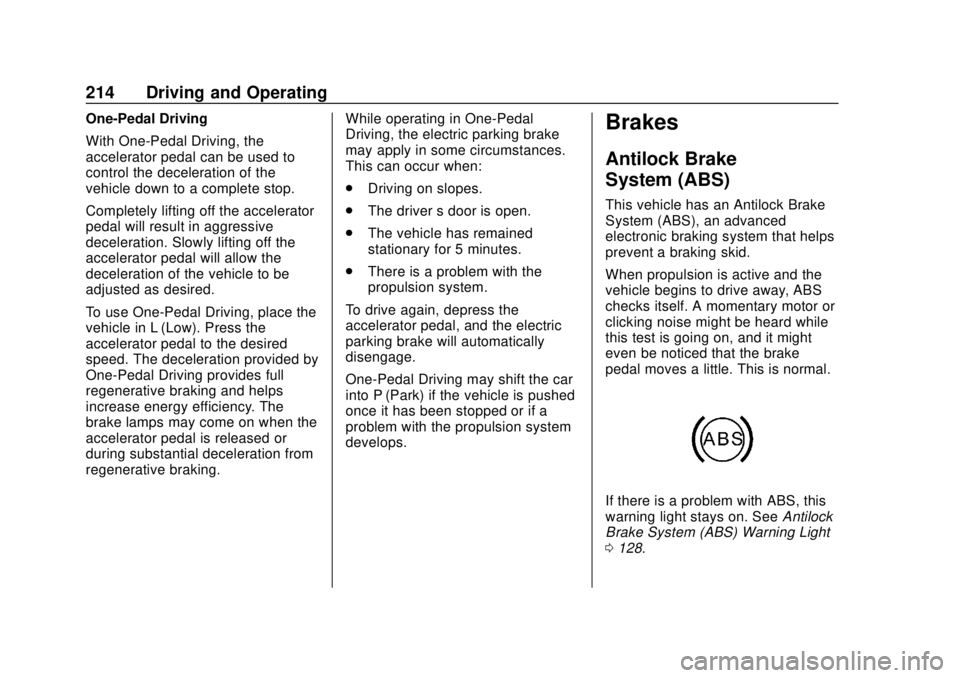
If there is a problem with ABS, this
warning light stays on. See Antilock
Brake System (ABS) Warning Light
0 128.
Page 240 of 371
Chevrolet BOLT EV Owner Manual (GMNA-Localizing-U.S./Canada/Mexico-
12163003) - 2019 - crc - 5/18/18
Driving and Operating 239
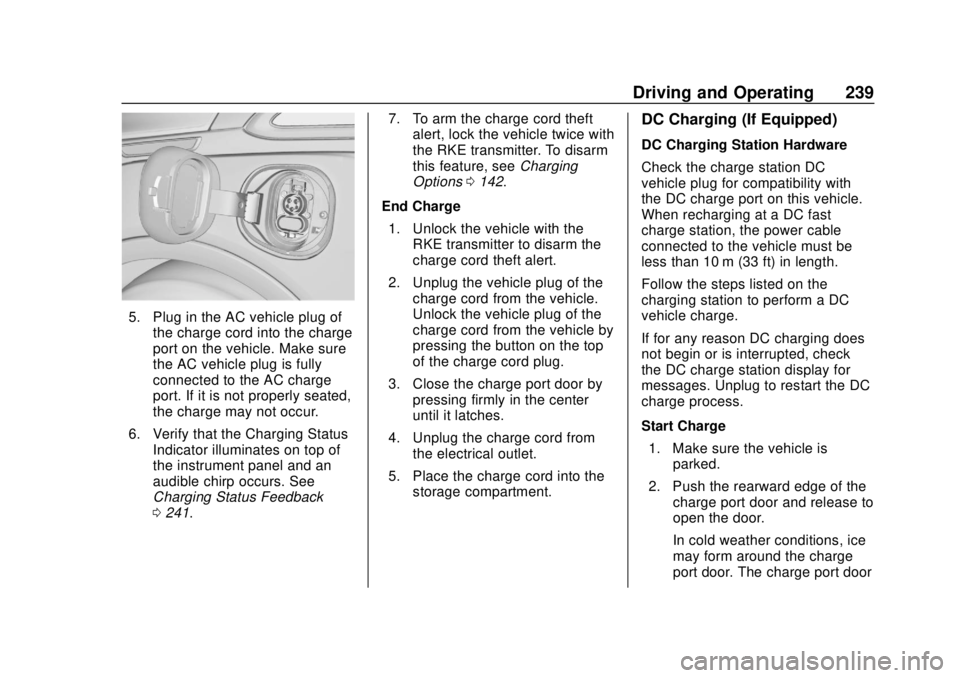
5. Plug in the AC vehicle plug ofthe charge cord into the charge
port on the vehicle. Make sure
the AC vehicle plug is fully
connected to the AC charge
port. If it is not properly seated,
the charge may not occur.
6. Verify that the Charging Status Indicator illuminates on top of
the instrument panel and an
audible chirp occurs. See
Charging Status Feedback
0241. 7. To arm the charge cord theft
alert, lock the vehicle twice with
the RKE transmitter. To disarm
this feature, see Charging
Options 0142.
End Charge 1. Unlock the vehicle with the RKE transmitter to disarm the
charge cord theft alert.
2. Unplug the vehicle plug of the charge cord from the vehicle.
Unlock the vehicle plug of the
charge cord from the vehicle by
pressing the button on the top
of the charge cord plug.
3. Close the charge port door by pressing firmly in the center
until it latches.
4. Unplug the charge cord from the electrical outlet.
5. Place the charge cord into the storage compartment.
DC Charging (If Equipped)
DC Charging Station Hardware
Check the charge station DC
vehicle plug for compatibility with
the DC charge port on this vehicle.
When recharging at a DC fast
charge station, the power cable
connected to the vehicle must be
less than 10 m (33 ft) in length.
Follow the steps listed on the
charging station to perform a DC
vehicle charge.
If for any reason DC charging does
not begin or is interrupted, check
the DC charge station display for
messages. Unplug to restart the DC
charge process.
Start Charge
1. Make sure the vehicle is parked.
2. Push the rearward edge of the charge port door and release to
open the door.
In cold weather conditions, ice
may form around the charge
port door. The charge port door
Page 241 of 371

Chevrolet BOLT EV Owner Manual (GMNA-Localizing-U.S./Canada/Mexico-
12163003) - 2019 - crc - 5/18/18
240 Driving and Operating
may not open on the first
attempt. Remove ice from the
area and repeat attempting to
open the charge port door.
3. Unlatch the DC charging dustcover and lower it fully.
4. Plug in the DC vehicle plug into the DC charge port on the
vehicle. Make sure that the DC
vehicle plug is fully connected
to the DC charge port. If it is
not properly seated then the
charge may not occur. Proper
plug connection can be
checked by information on
the DIC. 5. Follow the steps listed on the
charging station to start
charging. The Electric Parking
Brake will automatically apply
once the charge process has
been started.
6. Once charging, the DC vehicle plug will be locked to the DC
charge port and cannot be
disconnected while charging is
active.
7. Verify that the Charging Status Indicator illuminates on top of
the instrument panel and an
audible chirp occurs. See
Charging Status Feedback
0241.
Caution
Do not attempt to disconnect the
DC vehicle plug while charging is
active. This action may damage
vehicle or charging station
hardware. Stop Charge
Controls on the charging station can
be used to stop the charge process
at any time.
To stop the charge when inside the
vehicle, you may use the stop
charging button on the Charging
screen. See
Programmable
Charging 0132.
There is also an available mobile
app with several charging functions.
See KeyPass 045.
Stop Charge —Automatic
When the vehicle no longer needs
to use power from the charging
station, it will stop charging and the
DC vehicle plug will be unlocked
from the DC charge port.
Energy can still be consumed from
the charging station when the
vehicle’s displays and indicators
show that the battery is fully
charged. This is to ensure the
battery is in optimal temperature
operating range to maximize vehicle
range. See Programmable Charging
0 132.
Page 242 of 371
Chevrolet BOLT EV Owner Manual (GMNA-Localizing-U.S./Canada/Mexico-
12163003) - 2019 - crc - 5/18/18
Driving and Operating 241
End Charge1. Wait until the charging process has been fully stopped, the
vehicle plug is unlocked, and
the Charging Status Indicator is
solid green or off.
If the vehicle plug does not
unlock from the vehicle charge
port after a charge, contact
Roadside Assistance for
assistance. See Roadside
Assistance Program 0337.
2. Unplug the DC vehicle plug from the DC charge port on the
vehicle and close the dust
cover.
3. Close the charge port door by pressing firmly in the center
until it latches.
4. The Electric Parking Brake should be manually
disengaged before driving the
vehicle.
5. To start another DC charge, remove the DC vehicle plug
and reconnect.Delayed Charging
Override
To temporarily override a delayed
charge event, unplug the charge
cord from the charge port and then
plug it back in within five seconds.
A single audible chirp will sound
and charging will begin immediately.
To cancel a temporary override,
unplug the charge cord, wait for
10 seconds, and then plug the
charge cord back in. A double
audible chirp will sound and
charging will be delayed.
See Programmable Charging 0132
for advanced charge scheduling
options.
Charging Status
Feedback
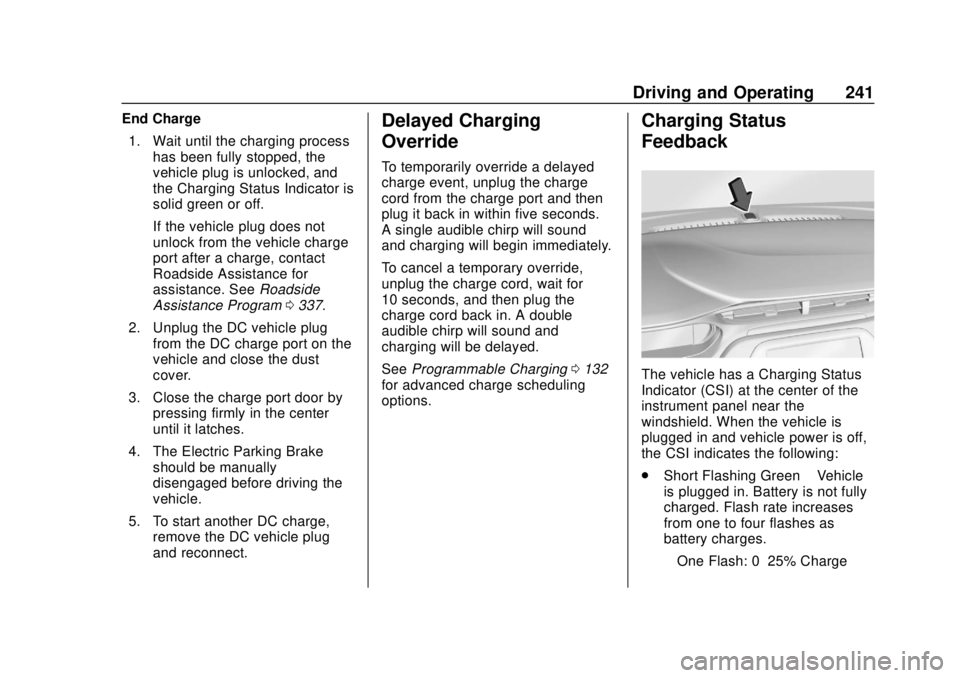
The vehicle has a Charging Status
Indicator (CSI) at the center of the
instrument panel near the
windshield. When the vehicle is
plugged in and vehicle power is off,
the CSI indicates the following:
. Short Flashing Green –Vehicle
is plugged in. Battery is not fully
charged. Flash rate increases
from one to four flashes as
battery charges.
‐ One Flash: 0–25% Charge
Page 278 of 371

Chevrolet BOLT EV Owner Manual (GMNA-Localizing-U.S./Canada/Mexico-
12163003) - 2019 - crc - 5/18/18
Vehicle Care 277
Instrument Panel Fuse
BlockThe instrument panel fuse block is
on the left side of the instrument
panel. To access the fuses, open
the fuse panel door by pulling out.
To reinstall the door, insert the top
tab first, then push the door back
into its original location.Fuses Usage
F01 Video processing
module
F02 Indicator light solar
sensor
F03 Side blind zone alert
F04 Passive entry, passive
start
F05 CGM
F06 Body control module 4
F07 Body control module 3
F08 Body control module 2
F09 Body control module 1
F10 Trailer interface
module 1
F11 Amplifier
F12 Body control module 8 Fuses Usage
F13 Data link connector 1
F14 Automatic parking
assist
F15 -
F16 Single power inverter
module 1
F17 Body control module 6
F18 Body control module 5
F19 –
F20 –
F21 –
F22 –
F23 USB
F24 Wireless charging
module
F25 Reflected LED alert
display
F26 Heated steering wheel
F27 CGM 2
F28 Instrument cluster 2
Page 303 of 371
Chevrolet BOLT EV Owner Manual (GMNA-Localizing-U.S./Canada/Mexico-
12163003) - 2019 - crc - 5/18/18
302 Vehicle Care
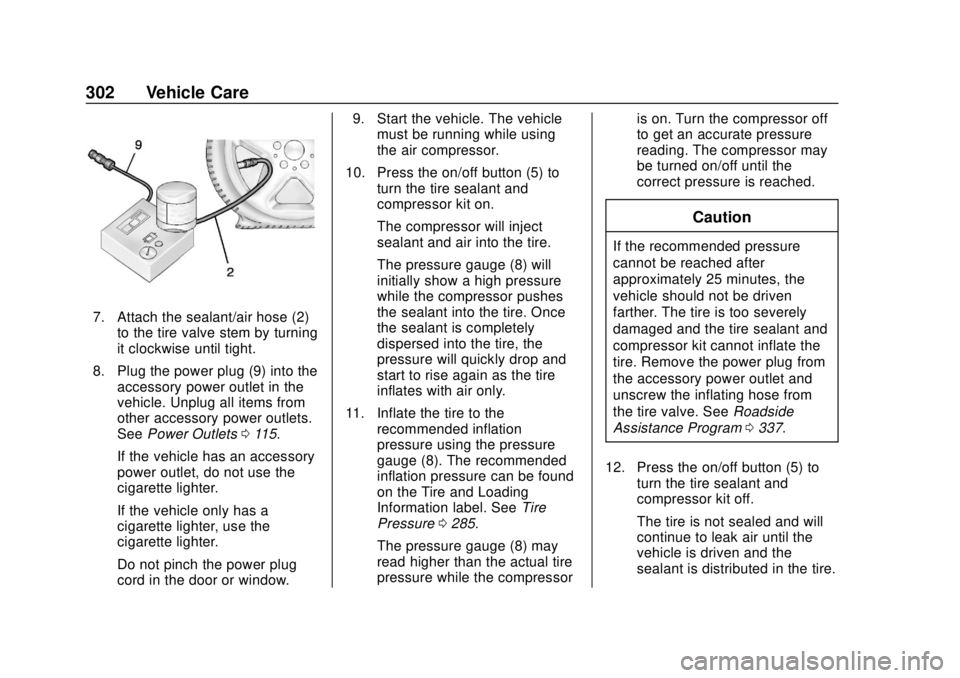
7. Attach the sealant/air hose (2)to the tire valve stem by turning
it clockwise until tight.
8. Plug the power plug (9) into the accessory power outlet in the
vehicle. Unplug all items from
other accessory power outlets.
See Power Outlets 0115.
If the vehicle has an accessory
power outlet, do not use the
cigarette lighter.
If the vehicle only has a
cigarette lighter, use the
cigarette lighter.
Do not pinch the power plug
cord in the door or window. 9. Start the vehicle. The vehicle
must be running while using
the air compressor.
10. Press the on/off button (5) to turn the tire sealant and
compressor kit on.
The compressor will inject
sealant and air into the tire.
The pressure gauge (8) will
initially show a high pressure
while the compressor pushes
the sealant into the tire. Once
the sealant is completely
dispersed into the tire, the
pressure will quickly drop and
start to rise again as the tire
inflates with air only.
11. Inflate the tire to the recommended inflation
pressure using the pressure
gauge (8). The recommended
inflation pressure can be found
on the Tire and Loading
Information label. See Tire
Pressure 0285.
The pressure gauge (8) may
read higher than the actual tire
pressure while the compressor is on. Turn the compressor off
to get an accurate pressure
reading. The compressor may
be turned on/off until the
correct pressure is reached.
Caution
If the recommended pressure
cannot be reached after
approximately 25 minutes, the
vehicle should not be driven
farther. The tire is too severely
damaged and the tire sealant and
compressor kit cannot inflate the
tire. Remove the power plug from
the accessory power outlet and
unscrew the inflating hose from
the tire valve. See
Roadside
Assistance Program 0337.
12. Press the on/off button (5) to turn the tire sealant and
compressor kit off.
The tire is not sealed and will
continue to leak air until the
vehicle is driven and the
sealant is distributed in the tire.
Page 306 of 371
Chevrolet BOLT EV Owner Manual (GMNA-Localizing-U.S./Canada/Mexico-
12163003) - 2019 - crc - 5/18/18
Vehicle Care 305
If the vehicle only has a
cigarette lighter, use the
cigarette lighter.
Do not pinch the power plug
cord in the door or window.
7. Start the vehicle. The vehicle must be running while using
the air compressor.
8. Press the on/off button (5) to turn the tire sealant and
compressor kit on.
The compressor will inflate the
tire with air only.
9. Inflate the tire to the recommended inflation
pressure using the pressure
gauge (8). The recommended
inflation pressure can be found
on the Tire and Loading
Information label. See Tire
Pressure 0285.
The pressure gauge (8) may
read higher than the actual tire
pressure while the compressor
is on. Turn the compressor off
to get an accurate pressure reading. The compressor may
be turned on/off until the
correct pressure is reached.
Caution
If the recommended pressure
cannot be reached after
approximately 25 minutes, the
vehicle should not be driven
farther. The tire is too severely
damaged and the tire sealant and
compressor kit cannot inflate the
tire. Remove the power plug from
the accessory power outlet and
unscrew the inflating hose from
the tire valve. See
Roadside
Assistance Program 0337.
10. Press the on/off button (5) to turn the tire sealant and
compressor kit off.
Be careful while handling the
compressor as it could be
warm after usage.
11. Unplug the power plug (9) from the accessory power outlet in
the vehicle. 12. Turn the air only hose (10)
counterclockwise to remove it
from the tire valve stem.
13. Replace the tire valve stem cap.
14. Return the air only hose (10) and power plug (9) back to
their original storage location.
15. Return the equipment to its original storage location in the
vehicle.
The tire sealant and compressor kit
has accessory adapters located in a
compartment on the bottom of its
housing that can be used to inflate
air mattresses, balls, etc.
Storing the Tire Sealant
and Compressor Kit
To access the tire sealant and
compressor kit: 1. Open the liftgate. See Liftgate
0 47.
2. Remove the load floor.
Page 318 of 371

Chevrolet BOLT EV Owner Manual (GMNA-Localizing-U.S./Canada/Mexico-
12163003) - 2019 - crc - 5/18/18
Vehicle Care 317
Caution (Continued)
on roads that have been sprayed
with magnesium chloride or
calcium chloride. These are used
on roads for conditions such as
dust and ice. Always wash the
chrome with soap and water after
exposure.
Caution
To avoid surface damage on
wheels and wheel trim, do not
use strong soaps, chemicals,
abrasive polishes, cleaners,
or brushes. Use only GM
approved cleaners. Do not drive
the vehicle through an automatic
car wash that uses silicone
carbide tire/wheel cleaning
brushes. Damage could occur
and the repairs would not be
covered by the vehicle warranty.
Brake System
Visually inspect brake lines and
hoses for proper hook-up, binding,
leaks, cracks, chafing, etc. Inspect
disc brake pads for wear and rotors
for surface condition. Inspect drum
brake linings/shoes for wear or
cracks. Inspect all other brake parts.
Steering, Suspension, and
Chassis Components
Visually inspect steering,
suspension, and chassis
components for damaged, loose,
or missing parts or signs of wear at
least once a year.
Inspect power steering for proper
attachment, connections, binding,
leaks, cracks, chafing, etc.
Visually check constant velocity joint
boots and axle seals for leaks.
Body Component Lubrication
Lubricate all key lock cylinders,
hood hinges, liftgate hinges, steel
charge port door, and power assist
step hinges, unless the components
are plastic. Applying silicone greaseon weatherstrips with a clean cloth
will make them last longer, seal
better, and not stick or squeak.
Underbody Maintenance
At least twice a year, spring and fall,
use plain water to flush any
corrosive materials from the
underbody. Take care to thoroughly
clean any areas where mud and
other debris can collect.
Sheet Metal Damage
If the vehicle is damaged and
requires sheet metal repair or
replacement, make sure the body
repair shop applies anti-corrosion
material to parts repaired or
replaced to restore corrosion
protection.
Original manufacturer replacement
parts will provide the corrosion
protection while maintaining the
vehicle warranty.
Finish Damage
Quickly repair minor chips and
scratches with touch-up materials
available from your dealer to avoid