2019 BUICK REGAL SPORTBACK warning
[x] Cancel search: warningPage 106 of 391
Buick Regal Owner Manual (GMNA-Localizing-U.S./Canada-12163021) -
2019 - CRC - 11/14/18
Seats and Restraints 105
Securing Child Restraints
(With the Seat Belt in the
Front Seat)
This vehicle has airbags. A rear
seat is a safer place to secure a
forward-facing child restraint. See
Where to Put the Restraint096.
In addition, the vehicle has a
passenger sensing system which is
designed to turn off the front
outboard passenger frontal airbag
and knee airbag under certain
conditions. See Passenger Sensing
System 084 and Passenger Airbag
Status Indicator 0134 for more
information, including important
safety information.
Never put a rear-facing child seat in
the front. This is because the risk to
the rear-facing child is so great if the
airbag deploys.
{Warning
A child in a rear-facing child
restraint can be seriously injured
or killed if the front outboard
passenger frontal airbag inflates.
This is because the back of the
rear-facing child restraint would
be very close to the inflating
airbag. A child in a forward-facing
child restraint can be seriously
injured or killed if the front
outboard passenger frontal airbag
inflates and the passenger seat is
in a forward position.
Even if the passenger sensing
system has turned off the front
outboard passenger airbag(s), no
system is fail-safe. No one can
guarantee that an airbag will not
deploy under some unusual
circumstance, even though the
airbag(s) are off.
Secure rear-facing child restraints
in a rear seat, even if the
airbag(s) are off. If you secure a
(Continued)
Warning (Continued)
forward-facing child restraint in
the front outboard passenger
seat, always move the seat as far
back as it will go. It is better to
secure the child restraint in a
rear seat.
SeePassenger Sensing System
0 84 for additional information.
If the child restraint uses a top
tether, see Lower Anchors and
Tethers for Children (LATCH
System) 097 for top tether anchor
locations.
Do not secure a child seat in a
position without a top tether anchor
if a national or local law requires
that the top tether be anchored, or if
the instructions that come with the
child restraint say that the top tether
must be anchored.
In Canada, the law requires that
forward-facing child restraints have
a top tether, and that the tether be
attached.
Page 109 of 391
Buick Regal Owner Manual (GMNA-Localizing-U.S./Canada-12163021) -
2019 - CRC - 11/14/18
108 Seats and Restraints
{Warning
After the hood has lifted, the hood
hinge and latch area may be hot.
Do not touch the pedestrian
protection system components.
The pedestrian protection system is
designed to lift the hood only once.
The pedestrian protection system
may not activate under the following
conditions:
. The pedestrian impact is outside
the range of the sensors located
on the front bumper.
. The sensors on the front bumper
are damaged.
. The path of the lifting hood is
blocked by snow or ice. Clear
any ice or snow from the hood
before driving.
. Winter fronts, grille covers,
or other aftermarket equipment
is attached to the bumper. .
Vehicle speed at impact is less
than 25 km/h (15 mph) or greater
than 50 km/h (31 mph).
. The vehicle impacts a small
object.
For other frontal impacts or vehicle
speeds, the airbags may also
deploy. See Airbag System 078.
After the pedestrian protection
system has deployed, the hood will
remain in the raised position and the
driver ’s view may be reduced by the
raised hood.
{Warning
Do not drive the vehicle when the
hood is raised.
Operating the vehicle with the
hood raised can obstruct your
view and may cause a collision
resulting in damage to the
vehicle, damage to other property,
personal injury, or even death.
Caution
After the pedestrian protection
system has deployed, see your
dealer for service. The hood
assembly including hinges, latch,
and actuators must be replaced.
If towing service is not available, the
hood may be repositioned
temporarily. See “Temporary Hood
Repair” following.
The SERVICE PEDESTRIAN
PROTECTION SYSTEM message
will appear when there is a problem
with the pedestrian protection
system. See your dealer for service
immediately.
During a frontal impact involving a
pedestrian, the vehicle may record
information about the condition of
the vehicle and how it was
operated. See Vehicle Data
Recording and Privacy 0364.
Page 110 of 391
Buick Regal Owner Manual (GMNA-Localizing-U.S./Canada-12163021) -
2019 - CRC - 11/14/18
Seats and Restraints 109
Temporary Hood Repair
If the rear of the hood is raised, the
hood may be repositioned
temporarily if a towing service is not
available.
{Warning
Before beginning the procedure,
read all the instructions. Failure to
read and follow the instructions
could injure you or others, and
damage the vehicle.
{Warning
After the hood has lifted, the hood
hinge and latch area may be hot.
Do not touch the pedestrian
protection system components.
Allow the engine to cool before
attempting any repair.
{Warning
You or others could be injured
when the hood is lowered or
latched.
Be sure to keep fingers and other
body parts away from the edge of
the hood and fenders.
1. Place both hands on top of the right corner of the hood near
the windshield and push the
hood down quickly.
If the hood does not latch, push
down again with slightly more
force until the hood is latched
securely.
2. Repeat the previous step to latch the left side of the hood.
3. Pull up on the rear corners of the hood to make sure the
hood is latched securely and
will not lift.
{Warning
Do not drive the vehicle if the
hood is not securely latched at
both rear corners and the front
latch.
Operating your vehicle without the
hood securely latched can lead to
a collision resulting in damage to
your vehicle, damage to other
property, personal injury, or even
death.
4. Drive directly to a dealer for service. If you cannot go in for
service immediately, have the
vehicle towed.
Some noise will occur when
the vehicle is driven while the
hood is temporarily
repositioned.
If you do not have the system
repaired, the pedestrian protection
system will not be operable in the
event of another crash or frontal
impact involving a pedestrian. See
your dealer for service immediately.
Page 111 of 391
Buick Regal Owner Manual (GMNA-Localizing-U.S./Canada-12163021) -
2019 - CRC - 11/14/18
110 Seats and Restraints
{Warning
Safety procedures must always
be observed when disposing of
the vehicle or vehicle parts.
Disposal should only be
performed by an authorized
service center, to help protect the
environment and your health.
Page 112 of 391
Buick Regal Owner Manual (GMNA-Localizing-U.S./Canada-12163021) -
2019 - CRC - 11/14/18
Storage 111
Storage
Storage Compartments
Storage Compartments . . . . . . . 111
Glove Box . . . . . . . . . . . . . . . . . . . . 111
Cupholders . . . . . . . . . . . . . . . . . . . 111
Front Storage . . . . . . . . . . . . . . . . . 112
Sunglasses Storage . . . . . . . . . . 112
Armrest Storage . . . . . . . . . . . . . . 112
Additional Storage Features
Cargo Cover . . . . . . . . . . . . . . . . . . 113
Cargo Tie-Downs (Wagon) . . . . 114
Convenience Net . . . . . . . . . . . . . 114
Roof Rack System
Roof Rack System . . . . . . . . . . . . 115
Storage
Compartments
{Warning
Do not store heavy or sharp
objects in storage compartments.
In a crash, these objects may
cause the cover to open and
could result in injury.
Glove Box
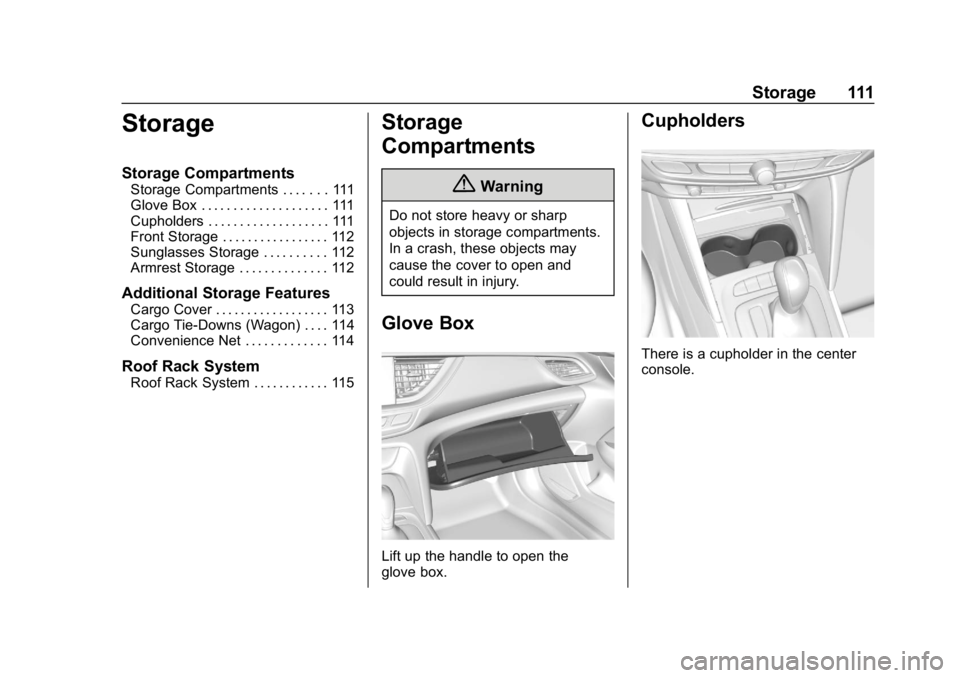
Lift up the handle to open the
glove box.
Cupholders
There is a cupholder in the center
console.
Page 114 of 391
Buick Regal Owner Manual (GMNA-Localizing-U.S./Canada-12163021) -
2019 - CRC - 11/14/18
Storage 113
Additional Storage
Features
Cargo Cover
{Warning
An unsecured cargo cover could
strike people in a sudden stop or
turn, or in a crash. Store the
cargo cover securely or remove it
from the vehicle.
{Warning
Do not place objects on the cargo
cover. Sudden stops or turns can
cause objects to be thrown in the
vehicle. You or others could be
injured.
If equipped with a cargo cover, use
it to cover items in the rear of the
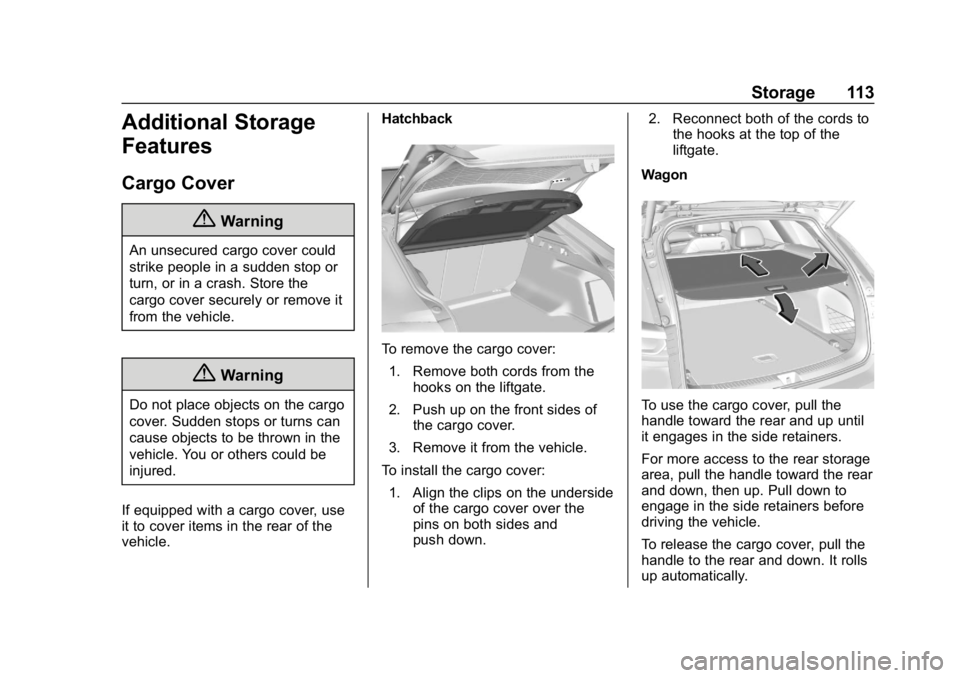
vehicle. Hatchback
To remove the cargo cover:
1. Remove both cords from the hooks on the liftgate.
2. Push up on the front sides of the cargo cover.
3. Remove it from the vehicle.
To install the cargo cover: 1. Align the clips on the underside of the cargo cover over the
pins on both sides and
push down. 2. Reconnect both of the cords to
the hooks at the top of the
liftgate.
Wagon
To use the cargo cover, pull the
handle toward the rear and up until
it engages in the side retainers.
For more access to the rear storage
area, pull the handle toward the rear
and down, then up. Pull down to
engage in the side retainers before
driving the vehicle.
To release the cargo cover, pull the
handle to the rear and down. It rolls
up automatically.
Page 116 of 391
Buick Regal Owner Manual (GMNA-Localizing-U.S./Canada-12163021) -
2019 - CRC - 11/14/18
Storage 115
Roof Rack System
(Wagon)
{Warning
If something is carried on top of
the vehicle that is longer or wider
than the roof rack—like paneling,
plywood, or a mattress —the
wind can catch it while the vehicle
is being driven. The item being
carried could be violently torn off,
and this could cause a collision
and damage the vehicle. Never
carry something longer or wider
than the roof rack on top of the
vehicle unless using a GM
certified accessory carrier.
For vehicles with a roof rack, the
rack can be used to load items. For
roof racks that do not have
crossrails included, GM Certified
crossrails can be purchased as an
accessory. See your dealer for
additional information.
Caution
Loading cargo on the roof rack
that weighs more than 75 kg
(165 lb) or hangs over the rear or
sides of the vehicle may damage
the vehicle. Load cargo so that it
rests evenly between the
crossrails, making sure to fasten
cargo securely.
To prevent damage or loss of cargo
when driving, check to make sure
crossrails and cargo are securely
fastened. Loading cargo on the roof
rack will make the vehicle’ s center
of gravity higher. Avoid high speeds,
sudden starts, sharp turns, sudden
braking, or abrupt maneuvers;
otherwise it may result in loss of
control. If driving for a long distance,
on rough roads, or at high speeds,
occasionally stop the vehicle to
make sure the cargo remains in
its place. Do not exceed the
maximum vehicle capacity when
loading the vehicle.
See Vehicle Load Limits 0186.
Page 117 of 391
Buick Regal Owner Manual (GMNA-Localizing-U.S./Canada-12163021) -
2019 - CRC - 11/14/18
116 Instruments and Controls
Instruments and
Controls
Controls
Steering Wheel Adjustment . . . 117
Steering Wheel Controls . . . . . . 117
Heated Steering Wheel . . . . . . . 117
Horn . . . . . . . . . . . . . . . . . . . . . . . . . . 117
Windshield Wiper/Washer . . . . 117
Rear Window Wiper/Washer . . . . . . . . . . . . . . . . . . . . . . 118
Compass . . . . . . . . . . . . . . . . . . . . . 119
Clock . . . . . . . . . . . . . . . . . . . . . . . . . 119
Power Outlets . . . . . . . . . . . . . . . . 119
Wireless Charging . . . . . . . . . . . . 120
Warning Lights, Gauges, and
Indicators
Warning Lights, Gauges, and Indicators . . . . . . . . . . . . . . . . . . . 123
Instrument Cluster . . . . . . . . . . . . 124
Speedometer . . . . . . . . . . . . . . . . . 130
Odometer . . . . . . . . . . . . . . . . . . . . . 130
Tachometer . . . . . . . . . . . . . . . . . . . 130
Fuel Gauge . . . . . . . . . . . . . . . . . . . 130
Engine Oil Temperature Gauge
(Uplevel) . . . . . . . . . . . . . . . . . . . . 131 Engine Coolant Temperature
Gauge . . . . . . . . . . . . . . . . . . . . . . 132
Voltmeter Gauge (Uplevel) . . . 132
Seat Belt Reminders . . . . . . . . . 133
Airbag Readiness Light . . . . . . . 134
Passenger Airbag Status Indicator . . . . . . . . . . . . . . . . . . . . 134
Charging System Light . . . . . . . 135
Malfunction Indicator Lamp (Check Engine Light) . . . . . . . . 135
Brake System Warning Light . . . . . . . . . . . . . . . . . . . . . . . . 137
Electric Parking Brake Light . . . . . . . . . . . . . . . . . . . . . . . . 138
Service Electric Parking Brake Light . . . . . . . . . . . . . . . . . . . . . . . . 138
Antilock Brake System (ABS) Warning Light . . . . . . . . . . . . . . . 138
Lane Keep Assist (LKA) Light . . . . . . . . . . . . . . . . . . . . . . . . 139
Vehicle Ahead Indicator . . . . . . 139
Traction Off Light . . . . . . . . . . . . . 139
StabiliTrak OFF Light . . . . . . . . . 140
Traction Control System (TCS)/ StabiliTrak Light . . . . . . . . . . . . . 140
Engine Coolant Temperature Warning Light . . . . . . . . . . . . . . . 140
Tire Pressure Light . . . . . . . . . . . 141
Engine Oil Pressure Light . . . . 141
Low Fuel Warning Light . . . . . . 142 Security Light . . . . . . . . . . . . . . . . . 142
High-Beam On Light . . . . . . . . . . 142
Adaptive Forward Lighting
(AFL) Light . . . . . . . . . . . . . . . . . . 142
Front Fog Lamp Light . . . . . . . . . 143
Lamps On Reminder . . . . . . . . . 143
Cruise Control Light . . . . . . . . . . 143
Door Ajar Light . . . . . . . . . . . . . . . 143
Information Displays
Driver Information
Center (DIC) . . . . . . . . . . . . . . . . 144
Head-Up Display (HUD) . . . . . . 149
Vehicle Messages
Vehicle Messages . . . . . . . . . . . . 152
Engine Power Messages . . . . . 152
Vehicle Speed Messages . . . . . 153
Vehicle Personalization
Vehicle Personalization . . . . . . . 153
Universal Remote System
Universal Remote System . . . . 158
Universal Remote System Programming . . . . . . . . . . . . . . . 158
Universal Remote System Operation . . . . . . . . . . . . . . . . . . . 161