2019 AUDI TT ROADSTER brake
[x] Cancel search: brakePage 250 of 304

Wheels
while it is in use. It should be re-
placed with a regular tire as soon
as possible.
Applies to: vehicles with all wheel
drive: All four wheels must be
equipped with tires that are the
same brand and have the same
construction and tread pattern so
that the drive system is not dam-
aged by different wheel speeds.
For this reason, in case of emer-
gency, only use a spare tire* that
is the same circumference as the
regular tires.
Z\, WARNING
—Only use tire/rim combina-
tions and suitable wheel bolts
that have been approved by
Audi. Otherwise, damage to
the vehicle and an accident
could result.
—For technical reasons, it is not
possible to use tires from oth-
er vehicles. In some cases, you
cannot even use tires from the
same vehicle model.
—Make sure that the tires you
select have enough clearance
to the vehicle. Replacement
tires should not be chosen
simply based on the nominal
size, because tires with a dif-
248
ferent construction can differ
greatly even if they are the
same size. If there is not
enough clearance, the tires or
the vehicle can be damaged
and this can reduce driving
safety and increase the risk of
an accident.
—Only use tires that are more
than six years old when abso-
lutely necessary and drive
carefully when doing so.
—Do not use run-flat tires on
your vehicle. Using them when
not permitted can lead to ve-
hicle damage or accidents.
—If you install wheel covers on
the vehicle, make sure they al-
low enough air circulation to
cool the brake system. If they
do not, this could increase the
risk of an accident.
Tire wear and damage
B4H-0415
aa
Fig. 182 Tire profile: treadwear indica-
tor
Page 255 of 304

8S8012721BA
Wheels
total weight of whatever is being
carried in the vehicle is limited.
The more passengers in the vehi-
cle or passengers who are heavier
than the standard weights as-
sumed mean that less weight can
be carried as luggage.
The Gross Vehicle Weight Rating
and the Gross Axle Weight Rating
are listed on the safety compli-
ance sticker label located on the
driver’s side B-pillar.
Z\ WARNING
Overloading a vehicle can cause
loss of vehicle control, a crash
or other accident, serious per-
sonal injury, and even death.
—Carrying more weight than
your vehicle was designed to
carry will prevent the vehicle
from handling properly and in-
crease the risk of the loss of
vehicle control.
—The brakes on a vehicle that
has been overloaded may not
be able to stop the vehicle
within a safe distance.
—Tires on a vehicle that has
been overloaded can fail sud-
denly, including a blowout and
sudden deflation, causing loss
of control and a crash.
—Always make sure that the to-
tal load being transported
does not make the vehicle
heavier than the vehicle’s
Gross Vehicle Weight Rating.
Determining correct load
Talks
Use the example below to calcu-
late the total weight of the pas-
sengers and luggage or other
things that you plan to transport
so that you can make sure that
your vehicle will not be overload-
ed.
Steps for Determining Correct
Load Limit
1. Locate the statement “THE
COMBINED WEIGHT OF OCCU-
PANTS AND CARGO SHOULD
NEVER EXCEED XXX KG OR XXX
LBS” on your vehicle’s placard
(tire inflation pressure label)
=> page 250, fig. 183.
2. Determine the combined
weight of the driver and pas-
sengers that will be riding in
your vehicle.
3. Subtract the combined weight
of the driver and passengers
from “XXX” kilograms or “XXX” >
253
Page 265 of 304

8S8012721BA
Care and cleaning
—To reduce the risk of cuts, protect yourself
from sharp metal components when wash-
ing the underbody or the inside of the wheel
housings.
— After washing the vehicle, the braking effect
may be delayed due to moisture on the
brake rotors or ice in the winter. This in-
creases the risk of an accident. The brakes
must be dried with a few careful brake appli-
cations.
@) Note
— If you wash the vehicle in an automatic car
wash, you must retract the extendable rear
spoiler* if necessary, and fold the exterior
mirrors in to reduce the risk of damage.
Power folding exterior mirrors* must only
be folded in and out using the power folding
function.
—To reduce the risk of paint damage, do not
wash the vehicle in direct sunlight.
—To reduce the risk of damage, do not wash —To
reduce the risk of damage, do not wash
the power top with a pressure washer.
—To reduce the risk of damage to the surface,
do not use insect removing sponges, kitchen
sponges, or similar items.
— When washing matte finish painted vehicle
components:
— To reduce the risk of damage to the sur-
face, do not use polishing agents or hard
wax.
— Never use protective wax. It can destroy
the matte finish effect.
— Do not place any stickers or magnetic
signs on vehicle components painted with
matte finish paint. The paint could be
damaged when the stickers or magnets
are removed.
@) For the sake of the environment
Only wash the vehicle in facilities specially de-
signed for that purpose. This will reduce the
risk of dirty water contaminated with oil from
decorative decals* with a pressure washer.
Cleaning and care information
When cleaning and caring for individual vehicle
components, refer to the following tables. The
information contained there is simply recommen-
dations. For questions or for components that
Exterior cleaning
entering the sewer system.
are not listed, consult an authorized Audi dealer
or authorized Audi Service Facility. Also follow
the information found in > A.
Component Situation Solution
Windshield wiper | Deposits Soft cloth with glass cleaner, > page 43
blades
Headlights/ Deposits Soft sponge with a mild soap solution®
Tail lights
Sensors/ Deposits Sensors: soft cloth with solvent-free cleaning solution
Camera lenses Camera lenses: soft cloth with alcohol-free cleaning solu-
tion
Snow/ice Hand brush/solvent-free de-icing spray
Wheels Road salt Water
Brake dust Acid-free special cleaning solution
Exhaust tail pipes | Road salt Water, cleaning solution suitable for stainless steel, if nec-
essary
263
Page 270 of 304

Emergency assistance
Emergency assistance
General information
> Park the vehicle as far as possible from moving
traffic in the event of a breakdown. In the event
of a flat tire, park the vehicle ona level surface.
If you are ona steep hill, be especially careful.
> Set the parking brake.
> Switch the emergency flashers on.
> Have the passengers exit the vehicle. They
should move to a safe place, for example be-
hind a guard rail.
Z\ WARNING
Follow the steps given above. This is for your
protection and the for the safety of others on
the road.
Equipment
Vehicle tool kit/tire mobility kit/
compressor
Fig. 185 Luggage compartment: cargo floor closed
The vehicle tool kit, tire mobility kit and compres-
sor are stored in the luggage compartment under
the cargo floor cover.
> Push on the plastic handle and lift up the cargo
floor.
> Open the cargo floor.
Completely retract the vehicle jack arm before
storing the vehicle jack”.
@ Tips
The vehicle jack* does not require any mainte-
nance.
268
Tire mobility kit
Applies to: vehicles with tire mobility kit
> Read and follow the important safety precau-
tions > page 268, General information.
>» Set the parking brake.
> Select the "P" selector lever position.
> Check if a repair with the tire mobility kit is pos-
sible > page 268.
ORT Maimeri add
Applies to: vehicles with tire mobility kit
B8K-1475
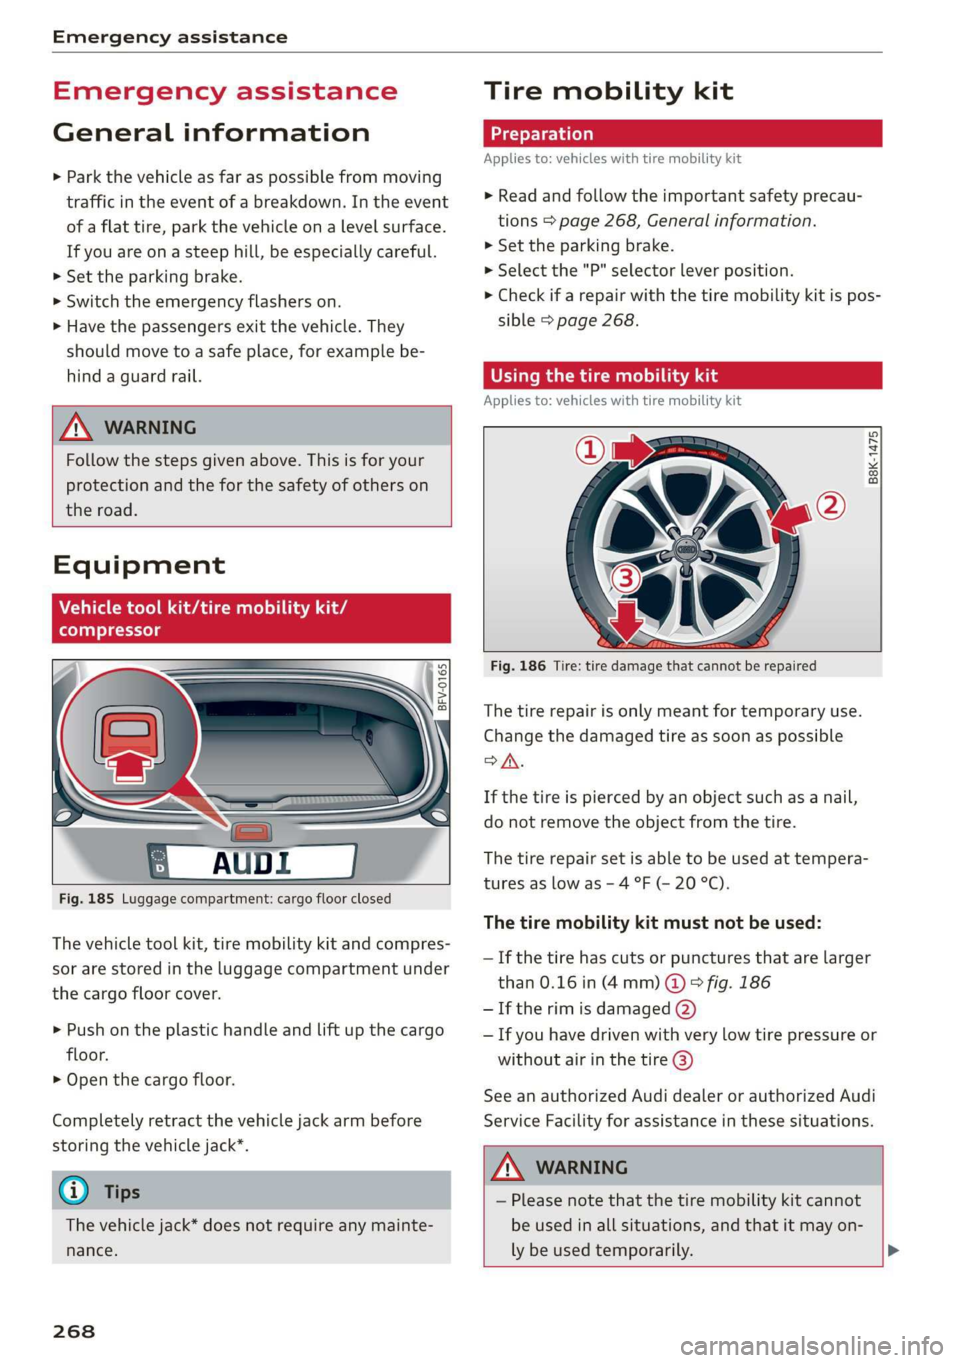
Fig. 186 Tire: tire damage that cannot be repaired
The tire repair is only meant for temporary use.
Change the damaged tire as soon as possible
SA.
If the tire is pierced by an object such as a nail,
do not remove the object from the tire.
The tire repair set is able to be used at tempera-
tures as low as - 4 °F (- 20 °C).
The tire mobility kit must not be used:
— If the tire has cuts or punctures that are larger
than 0.16 in (4mm) @ ° fig. 186
— If the rim is damaged (2)
— If you have driven with very low tire pressure or
without air in the tire @)
See an authorized Audi dealer or authorized Audi
Service Facility for assistance in these situations.
A WARNING
— Please note that the tire mobility kit cannot
be used in all situations, and that it may on-
ly be used temporarily. >
Page 272 of 304

Emergency assistance
— Ifa tire pressure of 29 psi (200 kPA) cannot
reached after inflating for 6 minutes, then
the tire is too severely damaged. Do not con-
tinue driving.
— If the tire cannot be repaired with the tire
sealant, see an authorized Audi dealer or au-
thorized Audi Service Facility for assistance.
@) Tips
Do not operate the compressor for more than
six minutes continuously, or it can overheat.
Once the compressor has cooled, you can con-
tinue to use it.
fey CLL)
Applies to: vehicles with tire mobility kit
> Affix the sticker that says "max. 50 mph (max.
80 km/h)" that is provided with the tire mobili-
ty kit within the driver's field of vision.
> Stop the vehicle after driving for about 10 mi-
nutes and check the tire pressure.
> If the tire pressure is lower than 19 psi (130
kPA), then the tire is too severely damaged. Do
not continue driving.
ZA WARNING
Pay attention to the following after repairing
the tire:
— Do not drive faster than 50 mph (80 km/h).
— Avoid hard acceleration or braking and driv-
ing fast around curves.
— The vehicle may become more difficult to
control.
— If the tire is too severely damaged, see an
authorized Audi dealer or authorized Audi
Service Facility for assistance.
@ For the sake of the environment
You can give the used tire sealant bottle to an
authorized Audi dealer or authorized Audi
Service Facility for disposal.
@ Tips
Remember to obtain a new bottle of sealant
from an authorized Audi dealer or authorized
Audi Service Facility after repairing a tire.
270
Replacing wheels
You must complete the preparation before
changing a tire.
> Read and follow the important safety precau-
tions > page 268, General information.
> Set the parking brake.
> Select the "P" selector lever position.
> Lay out the vehicle tool kit > page 268 and the
spare tire > page 274.
ZA WARNING
When using the vehicle jack* on a road with a
steep hill or when offroad, you must take ex-
tra precautions to prevent the vehicle from
rolling. Use suitable objects to block the front
and back of the wheel that is diagonal from
the wheel with the flat tire.
Removing the cover
B4L-1521
Fig. 189 Wheel: wheel hub cover
V6
Es
al
Fig. 190 Wheel: wheel bolts with caps
B4L-1337
@
Wheel hub covers*
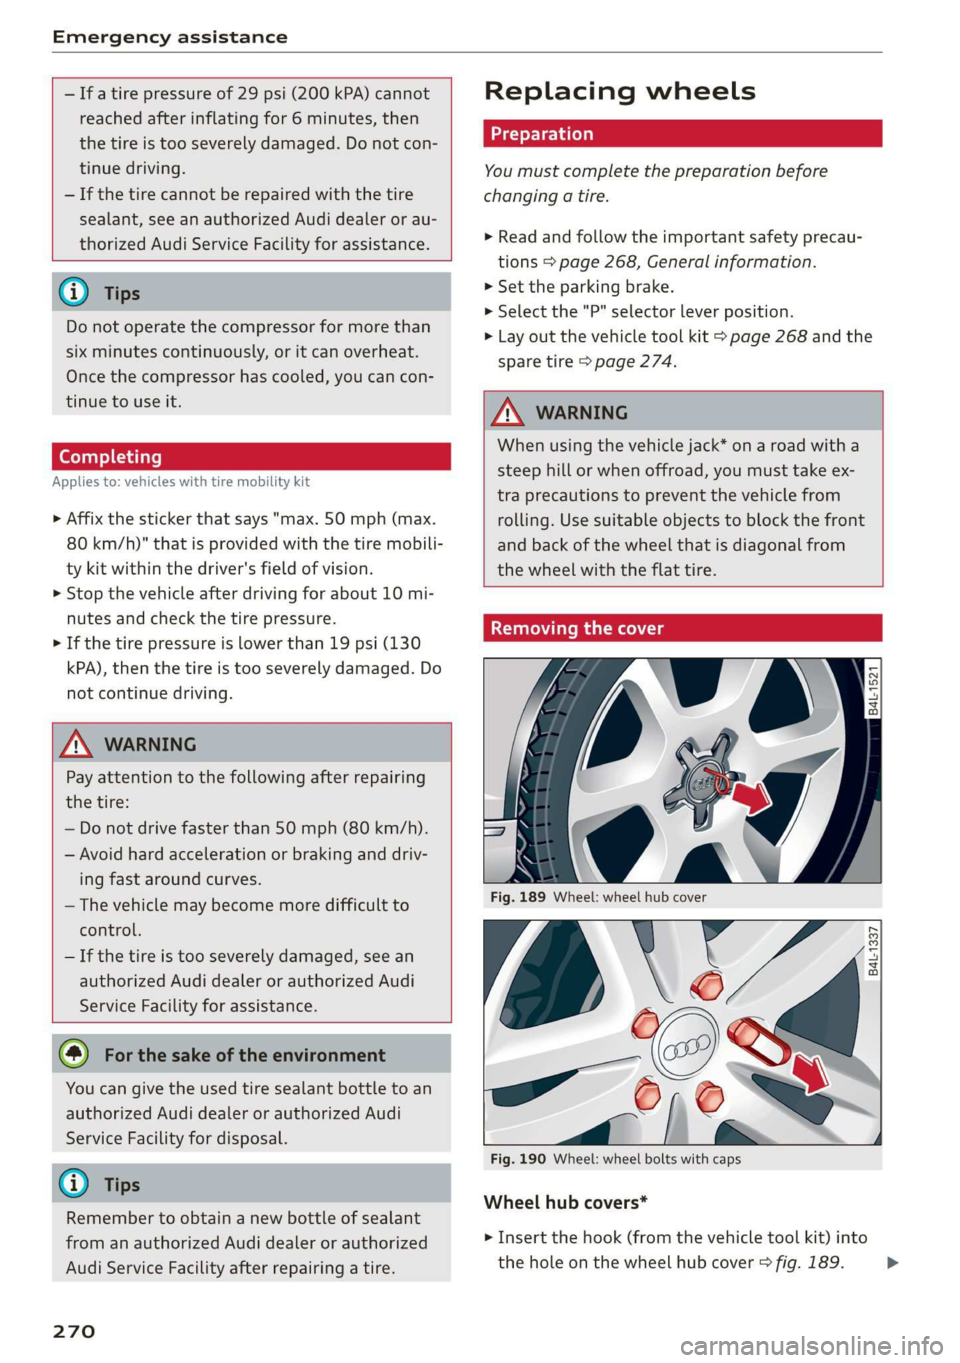
> Insert the hook (from the vehicle tool kit) into
the hole on the wheel hub cover > fig. 189. >
Page 275 of 304

8S58012721BA
Emergency assistance
Removing and mounting a wheel
@ Rg Tt
“ 0 oO
B8K-1477
Fig. 196 Wheel: alignment pin in the top hole
Removing a wheel
> Remove the top wheel bolt completely using
the hex socket in the screwdriver handle from
the vehicle tool kit > fig. 195 and place it ona
clean surface.
> Then install the alignment pin from the vehicle
tool kit in the empty wheel bolt hole by hand
> fig. 196.
> Remove the rest of the wheel bolts.
>» Remove the wheel >). The alignment pin re-
mains in the hole while doing this.
Installing a wheel
Read the directions on > page 273 when instal-
ling unidirectional tires.
> Slide the wheel on over the alignment pin >@.
> Install the wheel bolts and tighten them gently
using the hex socket.
> Remove the alignment pin and tighten the re-
maining wheel bolt.
> Carefully lower the vehicle using the vehicle
jack*.
> Tighten the wheel bolts in a diagonal pattern
using the wheel wrench.
The wheel bolts must be clean and loosen and
tighten easily. Check the contact surfaces for the
wheel and hub. Contaminants on these surfaces
must be removed before installing the wheel.
ZA\ WARNING
— Read and follow the important information
and notes under > page 247.
— Never use the hex socket in the screwdriver
handle to tighten the wheel bolts. Using the
hex socket will not achieve the required
tightening torque, which increases the risk
of an accident.
() Note
When removing or installing the wheel, the
rim could hit the brake rotor and damage the
rotor. Work carefully and have a second per-
son help you.
Unidirectional tires
A unidirectional tire profile is identified by arrows
on the tire sidewall that point in the running di-
rection. You must always maintain the specified
running direction. This is necessary to ensure the
tire's optimum performance in regard to adhe-
sion, running noise, and friction, and to reduce
the risk of hydroplaning.
To benefit fully from the advantages of the uni-
directional tire design, you should replace faulty
tires as soon as possible and restore the correct
running direction on all of the tires.
> Reinstall the caps on the wheel bolts if necessa-
ry.
> Store the vehicle tool kit in its designated
place.
> If the removed wheel does not fit in the spare
wheel well, store it securely in the luggage
compartment > page 50.
> Check the tire pressure on the installed wheel
as soon as possible.
> Check the tire pressure and store it in the Info-
tainment system. >
273
Page 276 of 304

Emergency assistance
> The wheel bolt tightening specification must be
90 ft lbs (120 Nm). Have it checked as soon as
possible with a torque wrench. Drive carefully
until then.
> Have the faulty wheel replaced as quickly as
possible.
Spare tire
General information
Applies to: vehicles with space-saving spare tire (compact
spare tire)
—maa
BFV-0166
The spare tire is intended for short-term use only.
Have the damaged tire checked and replaced if
necessary by an authorized Audi dealer or author-
ized Audi Service Facility as soon as possible.
There are some restrictions on the use of the
compact spare tire. The compact spare tire has
been designed specifically for your type of vehi-
cle. Do not replace it with the spare tire from an-
other type of vehicle.
Removing the spare tire
> Turn the handle > fig. 197 @ counter-clock-
wise.
>» Remove the spare tire.
Removing the vehicle jack
> Lift up the cover on the right side of the lug-
gage compartment and remove the vehicle
jack.
Snow chains
For technical reasons, the use of snow chains on
the
compact spare tire is not permitted.
If you have to drive with snow chains and a front
tire fails, mount the spare tire in place of a rear
274
tire. Install the snow chains on the rear tire that
you removed, and install that in place of the
front tire that failed.
Z\ WARNING
— After installing a spare tire, the tire pressure
must be checked as soon as possible.
— Do not drive faster than SO mph (80 km/h)
with a compact spare tire. Driving faster
than that increases the risk of an accident.
— To reduce the risk of an accident, avoid hard
acceleration or braking and driving fast
around curves with the compact spare tire.
— To reduce the risk of an accident, never drive
with more than one compact spare tire.
— Normal summer or winter tires must not be
mounted on the compact spare wheel rim.
Towing
General information
You should only perform the steps that follow if
you have the necessary tools and technical ex-
pertise.
Towing requires a certain amount of practice. Au-
di recommends contacting a towing company to
have the vehicle transported.
You should only have your vehicle towed by an-
other vehicle when disabled in exceptional cir-
cumstances. Inexperienced drivers should not
tow.
Notes on towing
When the engine is stopped, the transmission
will not be sufficiently lubricated if traveling at
high speeds and long distances:
— The maximum permitted towing speed is 30
mph (50 km/h).
— The maximum permitted towing distance is 30
miles (50 km).
Additional information on towing with a tow
truck
The vehicle may only be towed with the front axle
raised. Do not wrap any chains or cables around
the brake lines.
Page 277 of 304

8S8012721BA
Emergency assistance
If the vehicle should be towed with the axle
raised, then the ignition must be switched off to
reduce the risk of damage to the drivetrain.
Tow bar and towing cable
The vehicle can be towed with a tow bar or tow-
ing cable. Both drivers should be familiar with
the special considerations when towing, especial-
ly when using a towing cable.
Always make sure the traction force does not ex-
ceed the permitted level and there are no shock
loading conditions. There is always the risk of the
coupling becoming overloaded when driving off-
road.
For the most safety and security, drive with a tow
bar. You should use a towing cable only if a tow
bar is not available. Use a towing cable made of
synthetic elastic cable similar elastic material.
ZA\ WARNING
— Towing highly increases the risk of an acci-
dent, for example from colliding with the
towing vehicle.
— To reduce the risk of an accident, do not al-
low anyone to remain inside the vehicle
when it is being transported by a tow truck
or a special transporter.
@) Note
— If normal towing is not possible, for exam-
ple if the transmission is faulty or if the
towing distance is greater than 30 miles
(50 km), then transport the vehicle on a
special carrier.
— If the vehicle is towed by a tow truck at the
axle that is not permitted, this can cause se-
vere damage to the transmission.
— The vehicle must not be tow started for
technical reasons.
@) Tips
—If there is a power failure, the selector lever
will not move out of the "P" position. The
parking lock must be released using the
D_ Requirement: the vehicle battery must have a sufficient
charge level.
emergency release before towing the vehi-
cle > page 68.
— Follow the local legal regulations for tow-
ing.
Read and follow the important information under
=> page 274.
Preparations
> Only secure the towing cable or tow bar at the
designated towing loops > page 276,
=> page 276.
> Make sure the towing cable is not twisted. Oth-
erwise it could disconnect from the towing loop
while towing.
» Switch the emergency flashers on in both vehi-
cles > page 40. However, do not do this if it
prohibited by law.
Towing vehicle (front)
> Only start to drive when the towing cable is
taut.
> Be especially careful when accelerating.
> Avoid sudden braking or driving maneuvers.
Vehicle being towed (rear)
» Make sure the ignition is switched on so that
the steering wheel is not locked and so that you
can use the turn signals, the horn, and the
windshield wipers if needed > A\.
> The brake booster only works when the engine
is running. Power steering only works when the
ignition is switched on and the vehicle is roll-
ing )). If the brake booster and power steering
are not functioning, you must press the brake
pedal much harder and use more force to steer.
> Release the parking brake > page 59.
> Select the "N" selector lever position.
> Make sure the towing cable is always taut.
275
>